
There’s just something magical about Italian desserts, isn’t there? They carry such a rich history and they always feel like a special occasion item, even when you’re just having one after a Tuesday night dinner. I know they look fussy, but trust me, making authentic, bakery-quality treats at home is totally achievable. I’ve spent years in my kitchen, turning complicated techniques into streamlined methods perfect for our busy lives, and what I really wanted to share today is my absolute favorite: the definitive cannoli recipe.
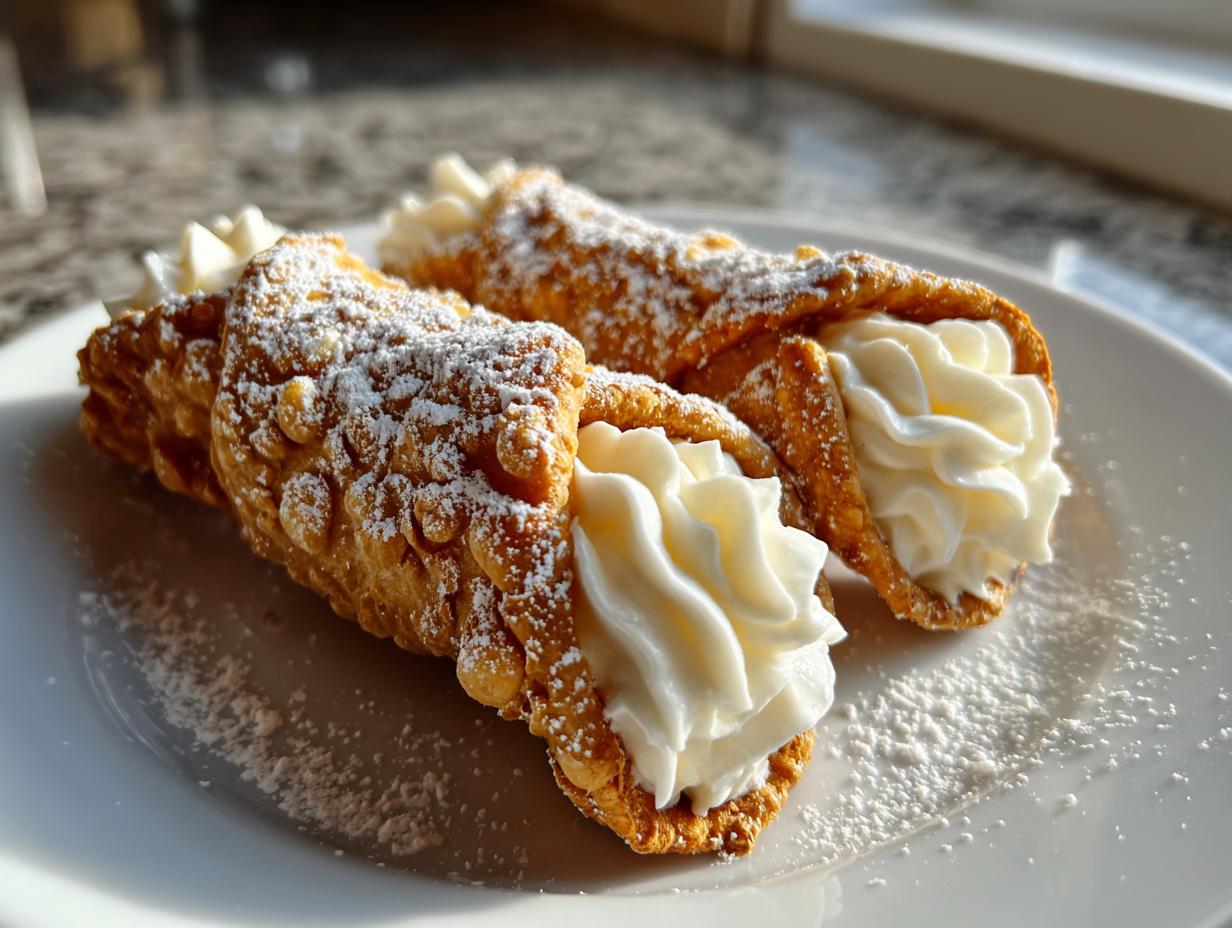
Forget the stuff that comes in a plastic tube! We are going all the way—we’ll tackle those wonderfully crisp, bubbly fried shells, paired with the smoothest, sweetest ricotta cream filling you’ve ever tasted. As Michael Carter here, I promise this guide strips away the pressure. If you love making impressive sweets, check out my other delicious dessert recipes! You don’t need to be a pastry chef to master this truly Traditional Sicilian Pastry right in your own kitchen. Grab your flour, and let’s compose some sweet harmony!
- Why This is the Best Homemade Cannoli Recipe
- Essential Ingredients for Your Cannoli Recipe
- Step-by-Step Instructions for the Perfect Cannoli Recipe
- Tips for the Best Cannoli Recipe Success
- Variations on This Cannoli Recipe
- Serving Suggestions for Your Traditional Sicilian Pastry
- Storing Leftovers of Your Cannoli Recipe
- Frequently Asked Questions About This Cannoli Recipe
- Estimated Nutritional Information for This Cannoli Recipe
- Share Your Homemade Cannoli Creations
Why This is the Best Homemade Cannoli Recipe
I know why you’re cautious about making homemade cannoli. Frying dough sounds messy, and getting that perfect crunch seems like a professional-only trick. But I’m telling you, making this Traditional Sicilian Pastry at home is totally within your reach! We’ve simplified the process without sacrificing that essential bakery quality. It comes down to nailing two things, and once you get those down, you’ll be rolling these out for every party.
- We are getting those shells perfectly crisp—crispy enough to shatter just a little when you bite into them.
- The filling is unbelievably smooth, creamy, and wonderfully sweet, not grainy or watery!
Skip those average recipes; this one hits the mark every single time. You can check out general Italian Dessert Recipe guides, but this method is the one that finally worked for me.
Achieving Truly Crispy Cannoli Shells
Crispiness starts long before the oil gets hot. Seriously, you have to chill that dough for at least an hour. That resting time allows the gluten to relax, which is key! But the real magic happens when you drop the formed shells into oil that’s sitting right at 375°F. If it’s too cold, the dough soaks up oil, and you get floppy pastry. If it’s too hot, it burns outside before cooking through. Pay attention to that temperature, and you’ll get those beautiful bubbly blisters that scream “authentic!”
The Secret to Creamy Ricotta Filling
If you want truly Creamy Ricotta Filling—the kind that feels luxurious and not sandy—you must drain your ricotta. And when I say drain, I mean drain it overnight in a sieve, covered with a paper towel, sitting in the fridge. Water is the enemy of a good cannoli filling! Once it’s good and dry, whipping it with the right amount of powdered sugar, vanilla, and that comforting hint of cinnamon turns it into the perfect sweet cloud ready to pipe into those crunchy shells. Don’t skip the draining, or you’ll end up with soup!
Essential Ingredients for Your Cannoli Recipe
Okay, let’s talk about what actually goes into these beauties. Because we are aiming for that Authentic Italian Sweets flavor, ingredient quality really does matter, especially with something this simple. There’s no hiding behind complicated sauces here; these flavors need to shine solo. I always make sure to have everything measured out before I even think about kneading dough or draining dairy. It just keeps the process moving smoothly.
When you look at the list, you’ll notice we aren’t using anything crazy. It’s all about technique applying these simple things correctly. Just make sure you check out my guide on easy-moist-banana-bread if you need tips on keeping ingredients cold when necessary—that same rule applies here for the butter!
For the Crispy Cannoli Shells Dough
For the dough, you need standard pantry staples, but pay close attention to that butter. It has to be cold! Seriously cold, cut into little cubes. That cold fat is what creates those delicate layers when it hits the hot oil. You’ll need about 1 1/2 cups of all-purpose flour, mixed up with 1/4 cup of regular granulated sugar and just a tiny pinch (1/4 teaspoon) of salt. Then we bring in the wet flavor agents: one large egg, one tablespoon of bright white wine vinegar—don’t skip that, it helps with texture!—and about 1/4 cup of dry white wine. If you don’t want to use wine, water works, but the wine adds a tiny edge that I love. Remember that cold, cubed butter!
For the Creamy Ricotta Filling
Now for the star of the show—the cream! Obviously, you need 15 ounces of whole milk ricotta cheese, but remember what I said: it absolutely must be drained overnight. That’s the number one rule for success! For sweetness, we use 1/2 cup of powdered sugar, plus extra for dusting later. For that classic Italian comfort flavor, I use 1 teaspoon of vanilla extract and about 1/4 teaspoon of ground cinnamon. And if you’re feeling extra? That’s where your optional 1/4 cup of those tiny mini chocolate chips come in. They make for a perfect Chocolate Chip Cannoli!
Step-by-Step Instructions for the Perfect Cannoli Recipe
Alright, now that we have our ingredients ready, it’s time to get our hands dirty. Making these from scratch is so rewarding, and while it feels long, the steps themselves are straightforward—it’s just about respecting the time needed for chilling and frying. I’ve mapped out the whole process for you so you can see exactly how we turn flour and ricotta into that incredible experience that basically screams Best Cannoli Recipe. If you’ve ever felt intimidated by frying dough, stick close to me; we’re making this easy! Don’t forget to check out my linked guide on churros recipe if you want more practice with frying dough recipes.
Mixing and Chilling the Fried Pastry Dough
First things first: the dough. In a big bowl, start by whisking together your dry stuff—the flour, granulated sugar, and salt. Then, we cut in that cold, cubed butter. I like using my fingers for this part because I can really feel when it gets that coarse crumb texture, but a pastry blender works wonders too. Once it looks like meal, whisk your wet ingredients—the egg, vinegar, and wine—in a separate little dish.
Pour that wet mix right into the dry. You’ll mix it just until it starts holding together—we’re looking for a shaggy mess at this point. Now, the most important instruction for this step: handle it gently! Lightly knead it on your counter for just about one minute until it smoothes out. Seriously, do not overwork the dough; we want those flaky, bubbly layers, not tough bread! Wrap that ball up tight in plastic wrap and stick it in the fridge for at least one hour. Minimum! This chilling time is non-negotiable for great texture.
Forming and Frying the Crispy Cannoli Shells
Once your dough is nice and cold, take it out and slice it into four sections. Keep the pieces you aren’t working with wrapped up so they don’t dry out. Lightly flour your surface, and get that dough rolled out super thin. I mean thin—almost transparent! If you can hold the dough up and the light shines through easily, you’ve nailed it. Use your 3-inch cutter to make your circles.
Time to shape! Lightly grease your metal cannoli tubes—this is super important, or they’ll get stuck forever! Wrap each dough circle around a tube, making sure they overlap just a little bit. Brush that overlap seam with a touch of water or an egg wash to seal it shut securely. Now for the frying fun! Heat up about two inches of oil in a heavy pot until it hits exactly 375°F (190°C). Carefully drop in two or three shells at a time. Use tongs to gently keep them submerged and straight in the oil. They cook fast—like 1 to 2 minutes per side—until they are golden brown and looking all bubbly. They should smell amazing!
As soon as they’re golden, use your tongs to take them out and lay them immediately on paper towels. While they are still warm—and this is crucial—gently slide the metal tube right out. Give them time to cool completely before filling. If you try to fill them warm, the shell will soften too much!
Making the Vanilla Cinnamon Filling and Assembly
While those shells cool down (or while the dough was chilling earlier—timing is everything!), you can make your Vanilla Cinnamon Filling. Take that ricotta cheese that you hopefully drained overnight—it should be thick now! Whip it up with your powdered sugar, vanilla extract, and cinnamon until it’s totally smooth. If you are adding those mini chocolate chips, fold them in gently right at the end.
Cover this perfect cream and chill it for at least 30 minutes because cold filling pipes much better. Now, for the grand finale! You must fill these shells only right before you plan to serve them. If you fill them hours ahead, that moisture from the ricotta is going to sneak into your beautiful, crispy Fried Pastry Dough and make them soggy. Get your piping bag ready (or just use a small spoon!) and fill those gorgeous golden tubes until they are plump. Dust the ends with extra powdered sugar for that professional bakery look, and get them on the platter fast!
Tips for the Best Cannoli Recipe Success
You’ve done the tricky parts—you made the dough and fried those beautiful shells! That’s huge! But when you are working on an authentic recipe like this, even the little details can make the difference between a great cannoli and an absolutely unforgettable one. This last bit of advice is about making sure your hard work stays perfect until the moment someone takes that first bite. We are aiming for textural harmony here, remember? If you love getting into the nitty-gritty of baking, you might enjoy my recipe for crème brûlée donuts next!
Ricotta Drainage: The Non-Negotiable Step
I’ve mentioned it before, but I need to spend a minute really hammering this home: draining the ricotta is not optional if you want a thick, gorgeous Ricotta Cream Dessert. If you skip this, you will end up with a thin, sad, watery filling that leaks right out of the shell—and worse, it ruins the crispness of the shell faster! You need to take those 15 ounces of whole milk ricotta and put them in a fine-mesh sieve. I highly recommend lining that sieve with a few layers of cheesecloth, though a thick paper towel works in a pinch. Prop that setup over a bowl, cover it lightly, and let it sit in the fridge for a minimum of four hours, but overnight is truly the sweet spot. You’ll be shocked how much liquid comes out. This is how you guarantee that rich, pipeable texture.
Preventing Soggy Shells: Timing is Everything
I preach this every time: Fill fresh, eat fresh! The biggest enemy of a perfect cannoli recipe is time between filling and serving. Once that moist ricotta hits the dry shell, the clock starts ticking on structural integrity. Seriously, if you’re having a party, have your shells cooled completely and stored airtight (maybe even wrapped in a single layer of paper towels inside the container) for up to two days. Make the filling the day before. But do not, under any circumstances, pipe the cream in until the guests are sitting down! If you absolutely must fill them ahead of time, pipe them no more than an hour before, dust them, and pray. But trust me, five minutes before serving is the magic window. This is the key to that satisfying crunch!
Variations on This Cannoli Recipe
While I champion the classic, rich flavor profile of this cannoli recipe, sometimes you just want to play around a little bit, right? That’s the beauty of making things yourself! You get to customize! This is where you can turn a classic dessert into something instantly personalized. Maybe you need an Easy Italian Treat for a casual weeknight, or maybe you just want to try something new for a party. I’ve got a couple of simple ideas that don’t compromise the integrity of the filling too much.
Flavor Twists for Your Ricotta Filling
The filling is begging for a little zest! Trust me on this one: adding the zest of one whole lemon or one small orange into the ricotta mixture along with your vanilla creates such a bright, beautiful springtime flavor that really cuts through the richness of the fried shell. If you aren’t a huge cinnamon fan, you can easily swap that out for a pinch of ground nutmeg instead. It gives the filling a warmer, deeper background note. It’s delicious, and you can find inspiration for other fruity flavors over in my cranberry orange punch recipe if you get ambitious!
Shell Alternatives for an Easy Cannoli Tutorial
Look, I adore making everything from scratch, but I also understand life happens, and sometimes you need a miracle dessert fast! If you are in a pinch and can’t spend the time rolling and frying the dough—which is a whole process in itself—it is perfectly okay to buy pre-made, empty shells. I know, I know, they aren’t quite as bubbly, but filling them with my homemade ricotta cream will still taste a million times better than a pre-filled grocery store option. This is your secret weapon for turning out Dessert for Parties on a tight schedule or serving up impressive Weeknight Desserts with minimal fuss. You can definitely find great store-bought shells linked from sites like Homemade Cannoli guides if you need that shortcut for your Easy Cannoli Tutorial.
Serving Suggestions for Your Traditional Sicilian Pastry
So, you’ve mastered the shell and the filling—congratulations! Now comes the fun part: making them look as spectacular as they taste. When you serve these beauties, they instantly become the star of the show. This is truly a recipe made for Desserts to Impress Guests because frankly, no one expects this level of care from a home kitchen!

Presentation is everything with a Traditional Sicilian Pastry. The easiest way to make them look stunning is to finish the ends right before you put them on the platter, just like the bakeries do. If you didn’t put chocolate chips inside the filling, try dipping the exposed cream ends into finely chopped pistachios or maybe some candied orange peel. The green and red contrast against that stark white cream is gorgeous! For more inspiration on classic sweets, take a look at other recipes like the one found here.
For a classic Italian finish, skip the sugar coating and dust the tops lightly with unsweetened cocoa powder—it adds a lovely little bitterness that balances the sweet ricotta perfectly. If you’re serving these as part of a larger spread, consider pairing them with something strong! A shot of espresso balances the sweetness beautifully. I often make an iced version of coffee crème brûlée on the side when I make these for parties, which you can find the recipe for over on my New Orleans Iced Coffee Crème Brûlée guide. Or, for something really traditional, serve them alongside a tiny glass of sweet Marsala wine. Enjoy watching everyone reach for these—they’re always the first to go at holiday gatherings!
Storing Leftovers of Your Cannoli Recipe
Now, I want to talk about the leftovers, because honestly, if you’re making an authentic cannoli recipe, there’s a near-zero chance you’ll have any! But just in case you manage to save a few, we need to treat the shells and the filling like two completely separate entities. If you fill them ahead of time, I’m going to be really disappointed in you! Remember, we fight hard for that crispness we worked so hard to achieve, right?
The biggest mistake anyone makes is storing them pre-filled. The moisture from that gorgeous Creamy Ricotta Filling is going to migrate right into the shell overnight, turning that delicate, bubbly crunch into a sad, damp chewiness. We just can’t have that compromise happening to our beautiful shells! It’s like putting crispy potato chips in a hot tub—it’s just wrong.
For shells that you’ve fried and cooled completely, keep them stored in a truly airtight container at room temperature. If you’re worried about them getting humid, you can line the container with a single paper towel to absorb any ambient moisture. They will happily stay crisp for two, maybe three days this way. You can even try making a batch of homemade applesauce to clear out some space in your fridge, because you’ll need that space for what comes next!
The ricotta filling is a dairy product, so it needs to stay chilled. Place your wonderfully smooth, sweet filling into an airtight container and keep it in the refrigerator. It’s best used within about three days, though honestly, if you drained it well, it lasts longer. The rule remains the same: when you are ready to eat, bring the shells out, grab the filling, and assemble them right then and there. A cannoli is a dessert designed to be eaten the moment it’s finished. If they are already filled and you find them slightly less snappy the next day, there’s really no ‘refreshing’ them—they are just leftover filling waiting for a new shell!
Frequently Asked Questions About This Cannoli Recipe
It happens all the time! You follow a complex recipe like mastering this cannoli recipe, and suddenly you have questions that aren’t covered in the main instructions. That’s totally normal, and honestly, it shows me you’re invested in making these the absolute best they can be for your family or guests. I’ve gathered the questions I get asked most often when people try this Traditional Sicilian Pastry for the first time. We want you to have success, so let’s tackle these little sticking points right here!
Can I bake the cannoli shells instead of frying them?
This is the big one! Look, if you are desperate for what some call an Easy Italian Treat, you *can* bake the dough circles on a sheet pan until they look golden. BUT, and this is a massive but, you absolutely will not get the correct—or what I consider the *right*—texture. Frying is what creates those signature, light, bubbly blisters and the structural integrity needed for a truly crisp shell. Baked shells come out dense, hard, and more like a cracker than a flaky pastry. To honor this Classic Italian Baking tradition, I really push you to try frying at least once. It’s faster than you think!
How far in advance can I make the ricotta cream filling?
This is where planning your party strategy comes in handy! Because we insist on draining that ricotta until it’s bone-dry, the filling is relatively stable, but we still want fresh flavors. You can absolutely mix up that beautiful Creamy Ricotta Filling the day before you plan to assemble everything. Just put it in a truly airtight container and keep it snug in the refrigerator. It should keep perfectly for 24 to 36 hours.
However, remember the golden rule: assembly time is just before serving! If you make the filling one day ahead, you are one step closer to getting those perfect, crispy shells ready to be filled right when people arrive. If you’re looking for other simple planning tips, check out my recipes for easy breakfast recipes; timing is key in those too!
Can I make the dough ahead of time?
Yes, you can! I often make the dough the night before I plan to fry the shells. Once you mix that dough, wrap it up tightly—and I mean *tightly*—in plastic wrap. Pop it in the fridge. It needs that minimum one-hour rest to relax the gluten, but it can easily hang out there for up to 24 hours. Keeping it chilled ensures that when you roll it out thin the next day, it stays cooperative and doesn’t keep snapping back at you! Just let it sit on the counter for about 15 minutes to soften slightly before you try rolling it out paper-thin.
What temperature should my frying oil be?
This might be one of the most critical technical details for success in any Fried Pastry Dough. You absolutely need a thermometer for this, folks! The oil needs to hover right around 375°F (190°C). If you go lower than 360°F, the dough starts sucking up oil before it can puff and crisp, leading to soggy, greasy shells. If you go much higher than 385°F, the outside will brown way too fast, and the shell won’t cook evenly inside. Keep that temperature steady while frying in small batches, and you’ll get those perfect, bubbly shells every time!
Estimated Nutritional Information for This Cannoli Recipe
Okay, now for the reality check. We’ve been talking about richness and flavor—and yes, we’re dealing with fried dough and sweet cheese filling here, so this isn’t exactly a kale salad! But just like when I map out my favorite weeknight dinner recipes, I always like to give you a ballpark idea of what you’re eating.
Please remember, this is just an estimate based on the ingredients exactly as listed in the recipe above. If you add extra chocolate, use a different sweetener, or even if your ricotta drains differently, these numbers might shift a little. But this gives us a good baseline for enjoying these wonderful Italian treats!
Here is the estimated nutritional breakdown per one single cannoli:
- Serving Size: 1 cannoli
- Calories: 350
- Sugar: 25g
- Sodium: 80mg
- Total Fat: 18g
- Saturated Fat: 10g
- Carbohydrates: 40g
- Protein: 10g
See? Totally worth it for that crunch and creaminess! If you’re counting macros, you can see that the fat and sugar content are definitely geared toward an indulgence, which is exactly what this Traditional Sicilian Pastry should be. Enjoy every single bite!
Share Your Homemade Cannoli Creations
That’s it! You’ve done the hard work, you’ve conquered the fryer, and now you have these show-stopping, authentic treats sitting on your counter. I genuinely hope you feel a sense of accomplishment because making this cannoli recipe from scratch is something to be proud of!
Now, the best part about cooking is sharing—it’s the harmony we create when people gather around a table. So, please, when you try these out, don’t be shy! I want to see your results! If you loved the crispy shells or if the ricotta filling came out perfectly smooth, please come back here and drop a star rating so other home cooks know this recipe is a winner. It really helps me know which of my simple techniques are hitting the mark for everyone.
If anything felt tricky—maybe sealing those shells, or perhaps you had a specific question about draining the cheese—leave a comment below! I read every single one, and honestly, I love troubleshooting with you all. Nothing makes me happier than realizing Delish Symphony helped someone find their rhythm in the kitchen. If you’re looking for other quick wins, check out my guide on simple snack recipes for easy entertaining ideas!
Go on now, share your success, ask your questions, and know that you just created a truly special piece of Classic Italian Baking!
PrintClassic Homemade Cannoli Recipe with Crispy Shells and Creamy Ricotta Filling

Make authentic Italian cannoli from scratch. This recipe gives you crispy fried shells and a sweet, smooth ricotta cream filling, perfect for impressing guests.
- Prep Time: 45 min
- Cook Time: 20 min
- Total Time: 1 hour 5 min
- Yield: 12 servings 1x
- Category: Dessert
- Method: Frying
- Cuisine: Italian
- Diet: Vegetarian
Ingredients
- 1 1/2 cups all-purpose flour
- 1/4 cup granulated sugar
- 1/4 teaspoon salt
- 1 large egg
- 1 tablespoon white wine vinegar
- 1/4 cup dry white wine (or water)
- 1/4 cup unsalted butter, cold and cubed
- Vegetable oil, for frying
- 15 ounces whole milk ricotta cheese, drained overnight
- 1/2 cup powdered sugar, plus more for dusting
- 1 teaspoon vanilla extract
- 1/4 teaspoon ground cinnamon
- 1/4 cup mini chocolate chips (optional)
- Powdered sugar, for dusting
Instructions
- Prepare the Dough: In a large bowl, whisk together the flour, granulated sugar, and salt. Cut in the cold butter using a pastry blender or your fingers until the mixture resembles coarse crumbs.
- Mix Wet Ingredients: In a separate small bowl, whisk the egg, white wine vinegar, and white wine. Pour this mixture into the dry ingredients and mix until a shaggy dough forms. Knead briefly, about 1 minute, until smooth. Do not overwork the dough.
- Chill the Dough: Wrap the dough tightly in plastic wrap and let it rest in the refrigerator for at least 1 hour.
- Roll and Cut Shells: Divide the chilled dough into four pieces. Working with one piece at a time (keep the others refrigerated), roll the dough out very thinly on a lightly floured surface until almost transparent. Use a 3-inch round cutter to cut circles.
- Shape the Shells: Lightly grease cannoli tubes. Wrap each dough circle around a tube, overlapping the edges slightly. Brush the overlapping seam with a little water or egg white to seal it firmly.
- Fry the Shells: Heat 2 inches of vegetable oil in a deep, heavy-bottomed pot to 375°F (190°C). Carefully place 2 or 3 shells into the hot oil, using tongs to keep them submerged and straight. Fry for 1 to 2 minutes per side until golden brown and bubbly.
- Drain Shells: Remove the shells with tongs and immediately place them on a paper towel-lined tray to drain excess oil. While still warm, carefully slide the shells off the tubes. Let them cool completely.
- Prepare the Filling: Place the well-drained ricotta cheese in a bowl. Add the powdered sugar, vanilla extract, and cinnamon. Beat with an electric mixer until the mixture is smooth and creamy. If using, gently fold in the mini chocolate chips.
- Chill the Filling: Cover the ricotta filling and chill for at least 30 minutes to firm up slightly.
- Fill the Cannoli: Just before serving, use a piping bag or a small spoon to fill the cooled shells with the ricotta cream. Dust the ends with extra powdered sugar or dip them in mini chocolate chips. Serve immediately to maintain crispness.
Notes
- Drain the ricotta cheese for at least 4 hours, or preferably overnight in the refrigerator using a fine-mesh sieve lined with cheesecloth. This step prevents a watery filling.
- To keep shells crispy, fill them only right before you plan to serve them.
- If you do not have cannoli tubes, you can use heavy-duty aluminum foil shaped into tight cylinders.
Nutrition
- Serving Size: 1 cannoli
- Calories: 350
- Sugar: 25
- Sodium: 80
- Fat: 18
- Saturated Fat: 10
- Unsaturated Fat: 8
- Trans Fat: 0.5
- Carbohydrates: 40
- Fiber: 1
- Protein: 10
- Cholesterol: 55