
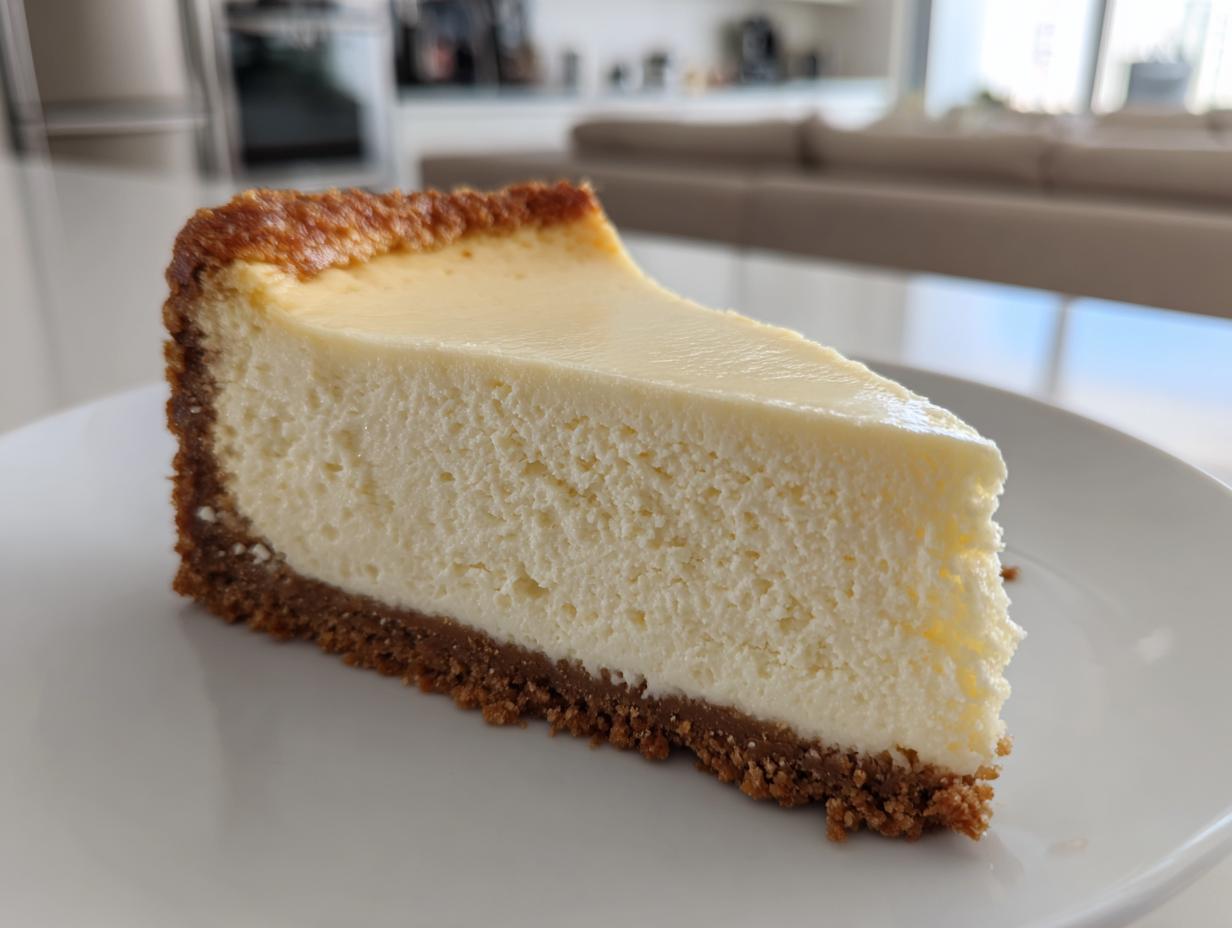
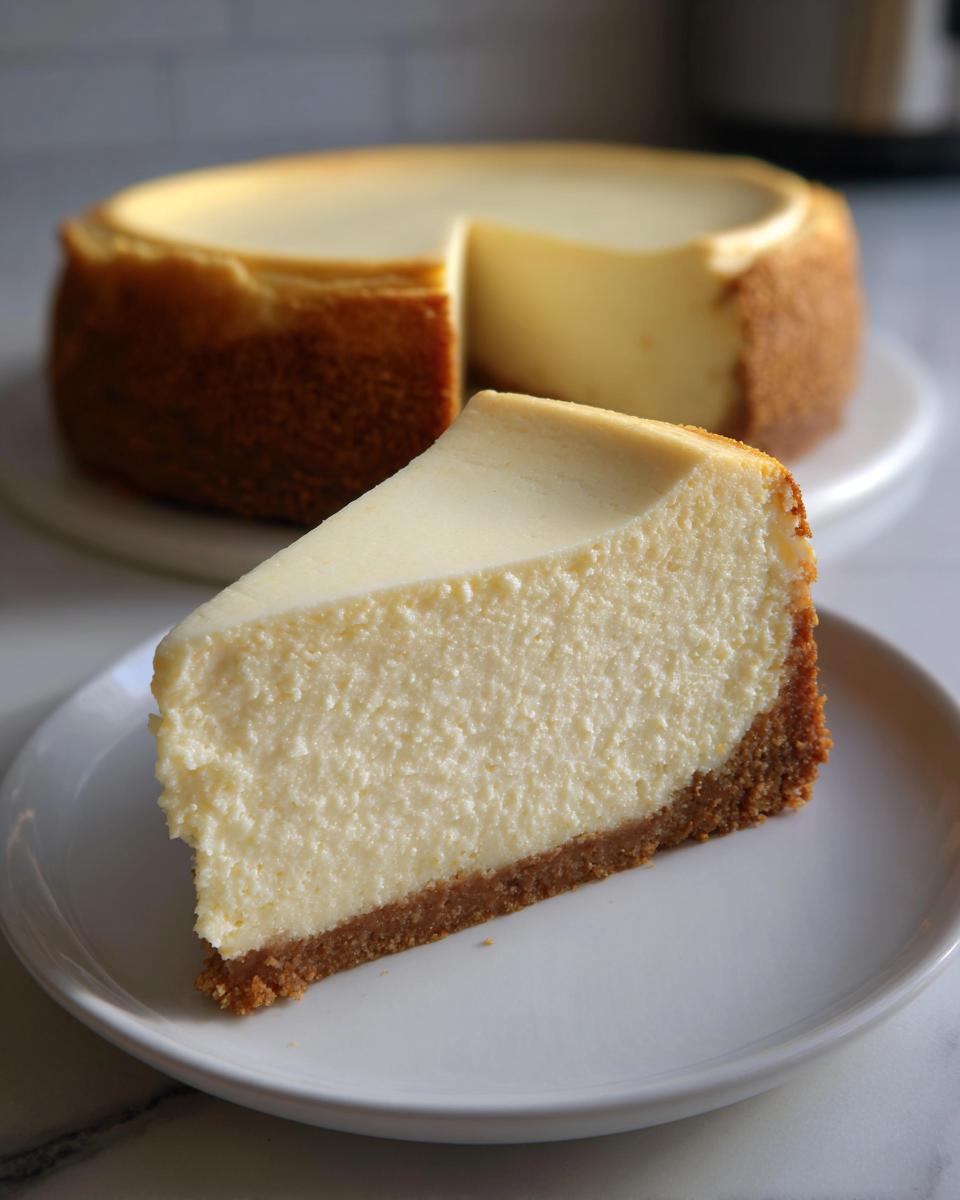
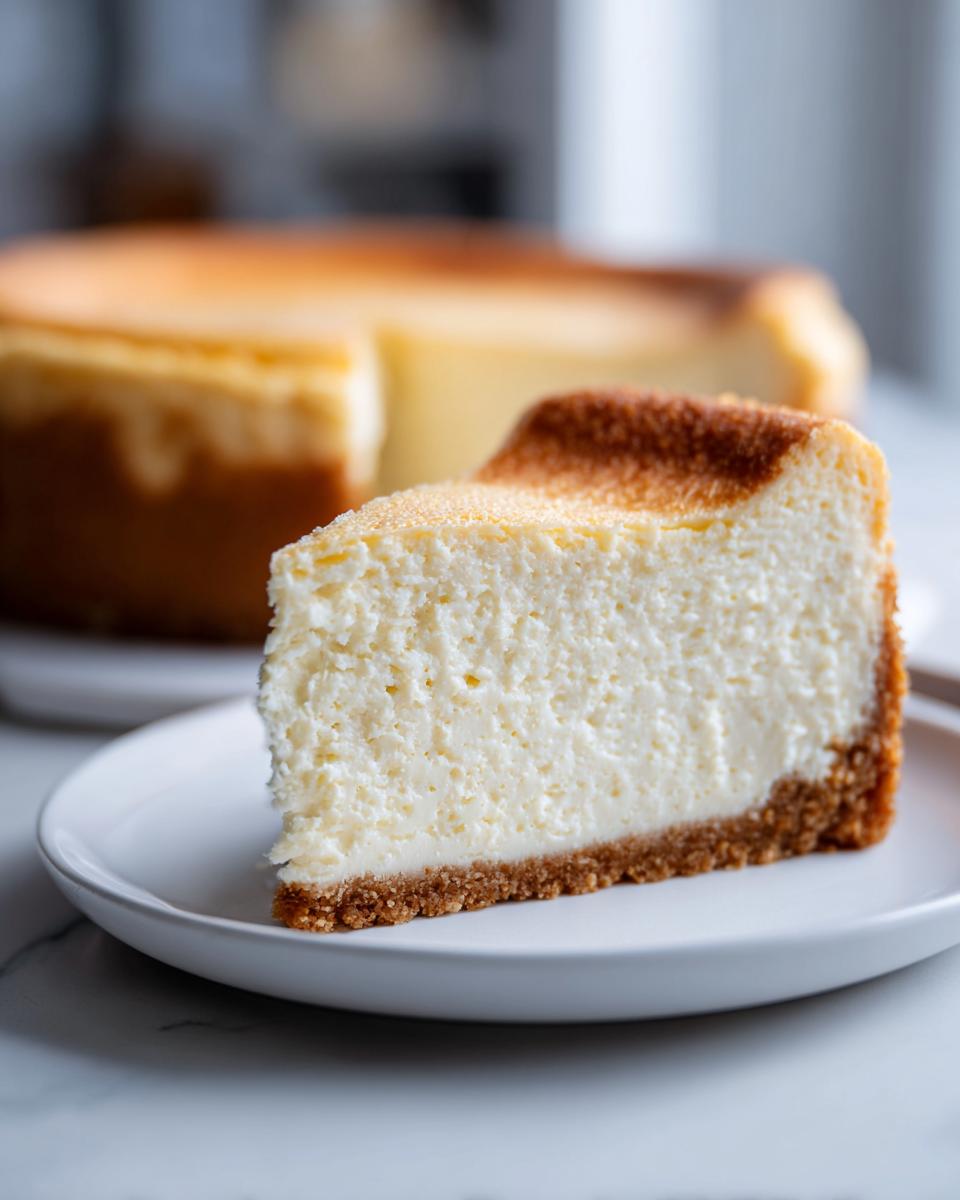
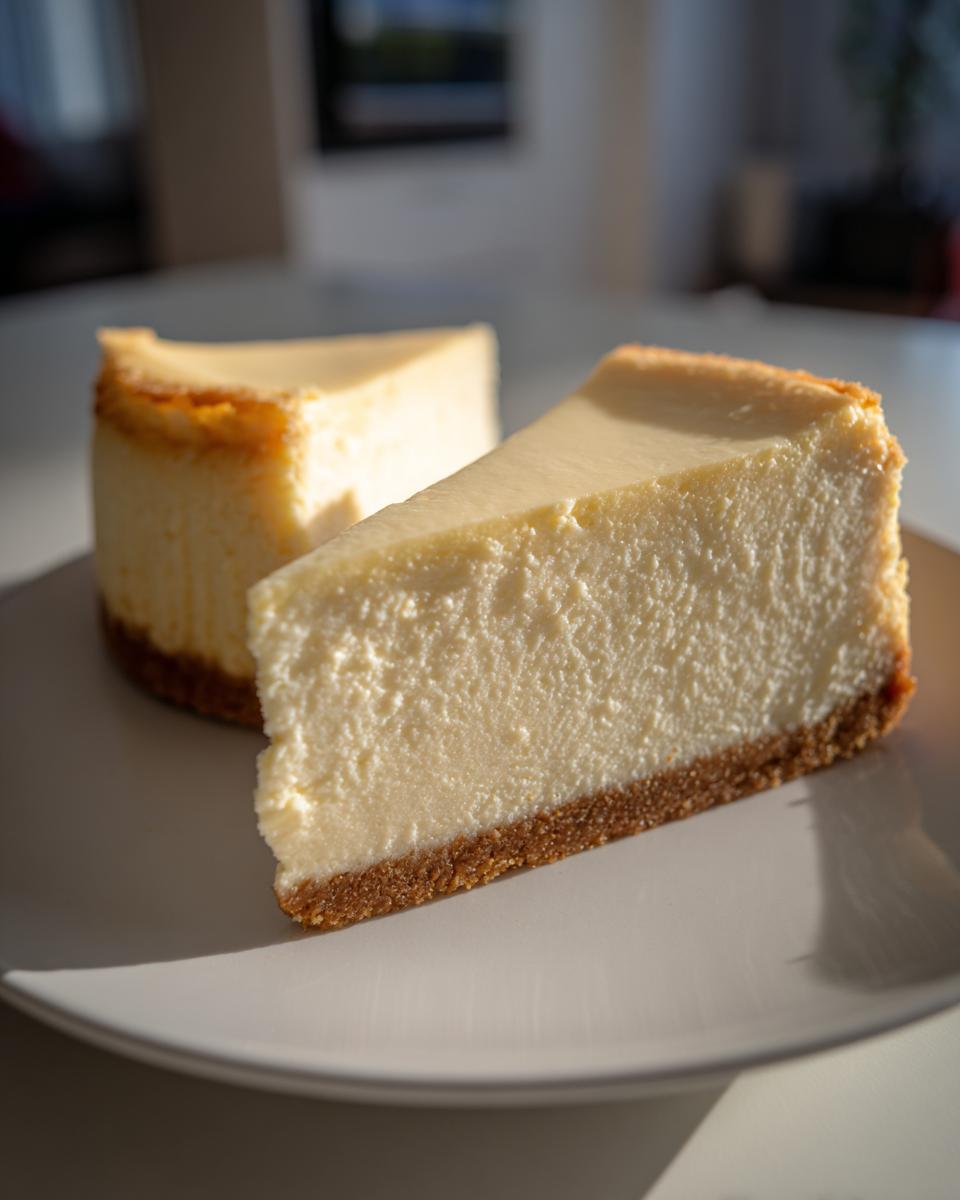
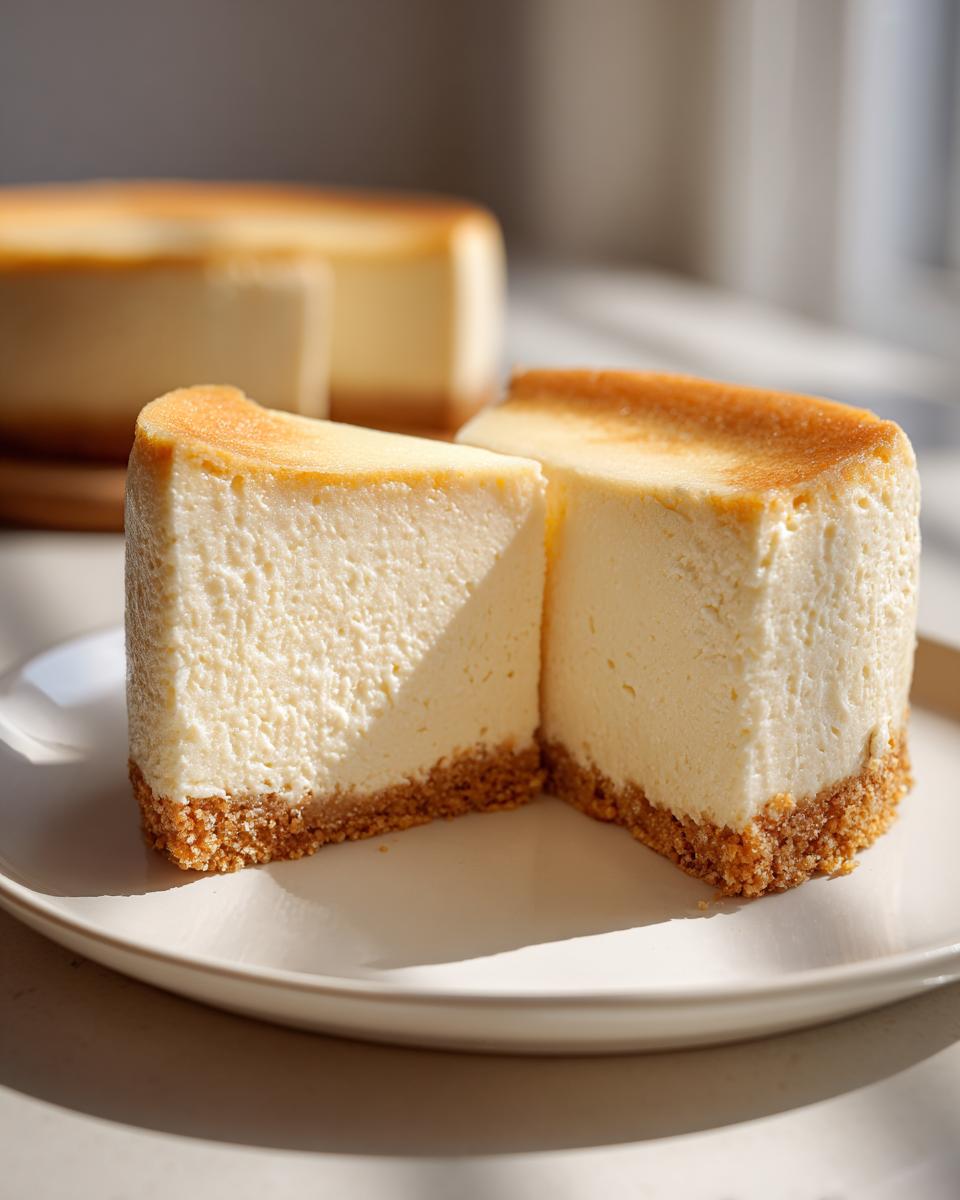
If you’re looking for that truly show-stopping, incredibly decadent dessert that whispers luxury but tastes like pure comfort, stop right here. We’ve finally perfected the white chocolate cheesecake you’ve been dreaming about. I know! Cheesecake can be intimidating—all those warnings about water baths and cracking—but trust me, that’s where I step in. Here at Delish Symphony, my entire goal is to take those gourmet experiences, like getting a perfect, restaurant-quality cheesecake, and make them totally foolproof right here in your own kitchen. This, my friends, stands out as the truly best white chocolate cheesecake recipe because it delivers that impossibly rich, creamy texture everyone craves, and we’re skipping that fussy water bath entirely. It’s elegant, easy, and absolutely unforgettable. You’ll want to save this one among your favorite delicious dessert recipes!
- Why This Is the Best White Chocolate Cheesecake Recipe
- Gathering Ingredients for Your Creamy White Chocolate Cheesecake
- How to Prepare the Ultimate White Chocolate Dessert
- Tips for Restaurant Quality Cheesecake at Home
- Serving Suggestions for Your Elegant Cheesecake Desserts
- Storage and Making Ahead for Your White Chocolate Cheesecake
- Frequently Asked Questions About Baked White Chocolate Cheesecake
- Estimated Nutritional Information for White Chocolate Cheesecake
- Share Your Symphony: Rate This Recipe
Why This Is the Best White Chocolate Cheesecake Recipe
What makes this recipe truly the ultimate? It’s simplicity meeting elegance. I spent ages perfecting the ratio of cream cheese to melted white chocolate so you get that glorious, creamy white chocolate cheesecake texture without any grainy bits. We’ve engineered this to be a no fail cheesecake recipe, which is why I know you’ll love it. My whole philosophy here at Delish Symphony is to build confidence in the home cook. You see everything I use and every step I take, just like when I’m baking for friends or family. Check out my story sometime to see how dedicated I am to making cooking accessible! Learn more about our kitchen philosophy here.
Achieving a Smooth Cheesecake Filling Without a Water Bath
The biggest fear with baked cheesecake is cracking, right? Well, we defeat that terror through two simple, non-fussy steps. First, every single dairy product—the cream cheese, the sour cream, the eggs—must be at true room temperature. This lets them blend into one seamless unit. Second, the cooling process is gentle; we turn the oven off and let it sit inside for a full hour. This gradual temperature change is the secret sauce that locks in that beautiful, smooth cheesecake filling and prevents surface tension cracks. Easy peasy!
Gathering Ingredients for Your Creamy White Chocolate Cheesecake
Alright, let’s talk supplies. Making a truly decadent dessert starts here, with the right building blocks. Don’t even think about using cold cream cheese; that’s how you get lumps! For the best results, everything we use—especially the cream cheese, eggs, and sour cream—needs about an hour on the counter to come up to room temperature. Remember, we want that perfect, smooth texture, and warm ingredients blend so much better. This combination creates the ultimate white chocolate cream cheese dessert!
For the Buttery Graham Cracker Crust Recipe
- 1 1/2 cups graham cracker crumbs
- 1/4 cup granulated sugar (for crust)
- 6 tablespoons unsalted butter, melted
For the Decadent White Chocolate Cheesecake Filling
- 3 (8 ounce) packages cream cheese, softened
- 1 1/2 cups white chocolate chips, melted and slightly cooled
- 1 cup granulated sugar (for filling)
- 1 teaspoon vanilla extract
- 1/4 teaspoon salt
- 3 large eggs, room temperature
- 1/2 cup sour cream, room temperature
How to Prepare the Ultimate White Chocolate Dessert
Now we get to the fun part—actually assembling this beauty! Since we want this to feel like a completely stress-free process, I’ve broken it down into three clear stages. Follow these mixing and cooling rules closely, and you’ll have that restaurant quality cheesecake at home without needing any fancy equipment. We’re aiming for rich, velvety goodness here, so remember what I said about room temperature ingredients! This method is exactly how to make white chocolate cheesecake that holds its shape beautifully. For quick weeknight inspiration after this show-stopping dessert, check out some of my easy weeknight dinner recipes.
Step 1: Building and Pre-Baking the Crust
First things first: grab a 9-inch springform pan and wrap the entire bottom and up the sides tightly with heavy-duty aluminum foil. I usually do two or three layers—this is our insurance policy against any leaks! Mix your crust ingredients, press that buttery mixture down firmly into the base, and pop it into your preheated 325°F (160°C) oven for just 10 minutes. Once that’s done, pull it out and let it cool completely before you even think about pouring in the filling.
Step 2: Mixing the Smooth Cheesecake Filling
This is where we banish lumps forever! In a large bowl, start by beating that softened cream cheese *until it is completely, totally smooth*. Scrape the sides down often. Then, mix in your granulated sugar, vanilla, and salt. Next, slowly pour in your slightly cooled, melted white chocolate and mix until it’s just blended in. Stir in the sour cream for extra richness. The most important part comes last: add your eggs one at a time. Mix only until you see the yellow disappear. Seriously, stop when it’s just barely combined! Overmixing at this stage is what causes air pockets and cracks.
Step 3: Baking and Gradual Cooling for a Perfect White Chocolate Cheesecake
Pour that gorgeous batter right over your cooled crust. Give the pan a little gentle tap on the counter to scare out any big bubbles. Bake it for about 55 to 65 minutes. You know it’s close when the edges look solid but the very center two inches still has a tiny wobble when you give the pan a nudge. That’s the sign! Once it looks right, turn the oven off completely. Prop that door open an inch, and let the cheesecake hang out inside the cooling oven for a full hour. This slow cool-down is what guarantees you have that perfect smooth cheesecake filling.
Tips for Restaurant Quality Cheesecake at Home
You want that signature silky texture you only find in high-end bakeries? It comes down to handling your ingredients with a little respect. My secret weapon, which I always emphasize, is temperature! If your cream cheese, eggs, and sour cream are actually room temperature—not even slightly cold potatoes—they emulsify perfectly, giving you that consistent, creamy white chocolate cheesecake. Also, pay attention to that melted white chocolate. It needs to be melted completely smooth, but it must cool down just a touch before you stream it into the batter.
If it’s too hot when you add it, you risk scrambling the eggs, and nobody wants that! When you’re done baking, remember that crucial slow cooling process inside the turned-off oven. It really does prevent the dreaded crack. If you want more ideas for easy morning meals, swing by and check out my easy breakfast recipes!
Serving Suggestions for Your Elegant Cheesecake Desserts
This white chocolate cheesecake is absolutely stunning naked, but if you want to take it over the top for a party, toppings are the way to go. Since the cheesecake itself is so rich and sweet, you want pairings that offer a little contrast. A simple homemade fruit topping works wonders! Think about a quick simmered sauce for a gorgeous white chocolate raspberry cheesecake effect, or even use tart fruits like cherries or cranberries to cut through the sweetness.
For the holidays, I love making a beautiful swirl when the cheesecake is almost done—maybe a quick mix of cranberry sauce stirred right into the top layer before baking. That makes for an incredible white chocolate cranberry cheesecake presentation! Or, keep it super simple: a dusting of powdered sugar and some shaved white chocolate looks incredibly elegant. Speaking of pairings, if you need something savory to balance all that sweetness, check out my ideas for roasted sweet potato rounds pairings!
Storage and Making Ahead for Your White Chocolate Cheesecake
Good news! This creamy white chocolate cheesecake actually tastes better the next day, which is perfect for busy schedules or holiday prep. You absolutely must let it chill completely—I insist on a minimum of 6 hours, but honestly, overnight is where the magic solidifies. Once it’s totally cold, cover the whole pan loosely with plastic wrap before you stash it away. It keeps beautifully in the fridge for about 4 days. If you’re planning ahead, you can bake it two days out from serving, which means less panic on the big day! For more make-ahead sweet favorites, check out my recipe for easy pumpkin bars recipe.
Frequently Asked Questions About Baked White Chocolate Cheesecake
It’s totally normal to have questions when tackling a phenomenal dessert like this! I’ve gathered up the ones I hear most often. If you’ve been worried about making a white chocolate cheesecake before, these quick tips should give you the confidence to get started.
Can I make a No Bake White Chocolate Cheesecake instead?
That’s a great question. This recipe is specifically designed to be a rich, dense, baked white chocolate cheesecake that relies on eggs and slow cooling for that signature texture. If you need something faster that skips the oven entirely, you’ll want to search for a specific no bake white chocolate cheesecake recipe. They use gelatin or whipped cream to set up, which gives a lighter feel than this decadent version!
What kind of white chocolate works best for this recipe?
This is critical for achieving that incredible flavor profile! To get the smoothest, most luxurious texture—what I call creamy white chocolate cheesecake greatness—skip those waxy white baking wafers or compound coating chocolate. I really recommend using a good quality white chocolate baking bar (like Ghirardelli or Lindt) or high-quality white chocolate chips. That extra cocoa butter translates directly into a richer, silkier final product.
Estimated Nutritional Information for White Chocolate Cheesecake
I always include nutritional estimates because knowledge is power in the kitchen, even when we’re talking pure indulgence! Keep in mind these numbers are just ballpark figures based on standard ingredient brands. They can shift a little depending on what you use, especially the brand of white chocolate chips. This is a wonderfully rich treat, so portion control is key for keeping things balanced.
- Serving Size: 1 slice
- Calories: 450
- Fat: 30g
- Carbohydrates: 40g
- Protein: 8g
- Sugar: 35g
Share Your Symphony: Rate This Recipe
You’ve made it! You’ve conquered the cooling process and pulled that stunning, crack-free, white chocolate cheesecake from the pan. Now comes my favorite part: hearing about your success! I truly put my heart into developing these recipes to ensure they work perfectly in your kitchen, and seeing your results keeps my passion burning.
Did you try it plain? Did you swirl in some raspberry? I want all the details! Please take a moment to leave a star rating right below—it’s so helpful for other bakers wondering if this is the recipe for them. And if you snapped a photo of your beautifully creamy creation, share it with me! You can always send photos or questions over anytime through the contact page.
Happy baking, truly. I’m already excited to see what wonderful symphony you composed!
PrintCreamy Baked White Chocolate Cheesecake (No Water Bath)
Make a restaurant-quality, smooth white chocolate cheesecake at home. This recipe delivers a rich, decadent texture without the need for a water bath, making it an easy yet elegant dessert.
- Prep Time: 25 min
- Cook Time: 65 min
- Total Time: 7 hours 30 min
- Yield: 12 servings 1x
- Category: Dessert
- Method: Baking
- Cuisine: American
- Diet: Vegetarian
Ingredients
- 1 1/2 cups graham cracker crumbs
- 1/4 cup granulated sugar (for crust)
- 6 tablespoons unsalted butter, melted
- 3 (8 ounce) packages cream cheese, softened
- 1 1/2 cups white chocolate chips, melted and slightly cooled
- 1 cup granulated sugar (for filling)
- 1 teaspoon vanilla extract
- 1/4 teaspoon salt
- 3 large eggs, room temperature
- 1/2 cup sour cream, room temperature
Instructions
- Preheat your oven to 325°F (160°C). Wrap the outside bottom of a 9-inch springform pan tightly with heavy-duty aluminum foil.
- Prepare the crust: Mix graham cracker crumbs, 1/4 cup sugar, and melted butter until combined. Press the mixture firmly into the bottom of the prepared springform pan. Bake for 10 minutes. Remove from the oven and let it cool while you prepare the filling.
- Melt the white chocolate chips slowly in a microwave or double boiler until smooth. Set aside to cool slightly; do not let it set up hard.
- Prepare the filling: In a large bowl, beat the softened cream cheese with an electric mixer until completely smooth. Scrape down the sides of the bowl.
- Beat in 1 cup sugar, vanilla extract, and salt until just combined. Do not overmix.
- Beat in the slightly cooled melted white chocolate until fully incorporated.
- Beat in the sour cream until smooth.
- Add the eggs one at a time, mixing only until each egg is incorporated. Stop mixing as soon as the last egg disappears into the batter. Overmixing develops air, which causes cracks.
- Pour the filling over the cooled crust. Gently tap the pan on the counter a few times to release any large air bubbles.
- Bake for 55 to 65 minutes. The edges should look set, but the center 2 inches should still have a slight wobble when gently nudged.
- Turn off the oven, prop the door open slightly (about 1 inch), and let the cheesecake cool inside the oven for 1 hour. This gradual cooling helps prevent cracking.
- Remove the cheesecake from the oven and let it cool completely on a wire rack.
- Once cool, cover the pan loosely with plastic wrap and chill in the refrigerator for at least 6 hours, or preferably overnight, before serving.
Notes
- For a smooth, creamy texture, ensure your cream cheese, eggs, and sour cream are at true room temperature before starting.
- If you wish to top this with berries, wait until the cheesecake is fully chilled before adding any topping.
- To easily remove the foil after chilling, tear it away carefully from the sides of the pan.
Nutrition
- Serving Size: 1 slice
- Calories: 450
- Sugar: 35g
- Sodium: 250mg
- Fat: 30g
- Saturated Fat: 18g
- Unsaturated Fat: 12g
- Trans Fat: 0.5g
- Carbohydrates: 40g
- Fiber: 1g
- Protein: 8g
- Cholesterol: 110mg