
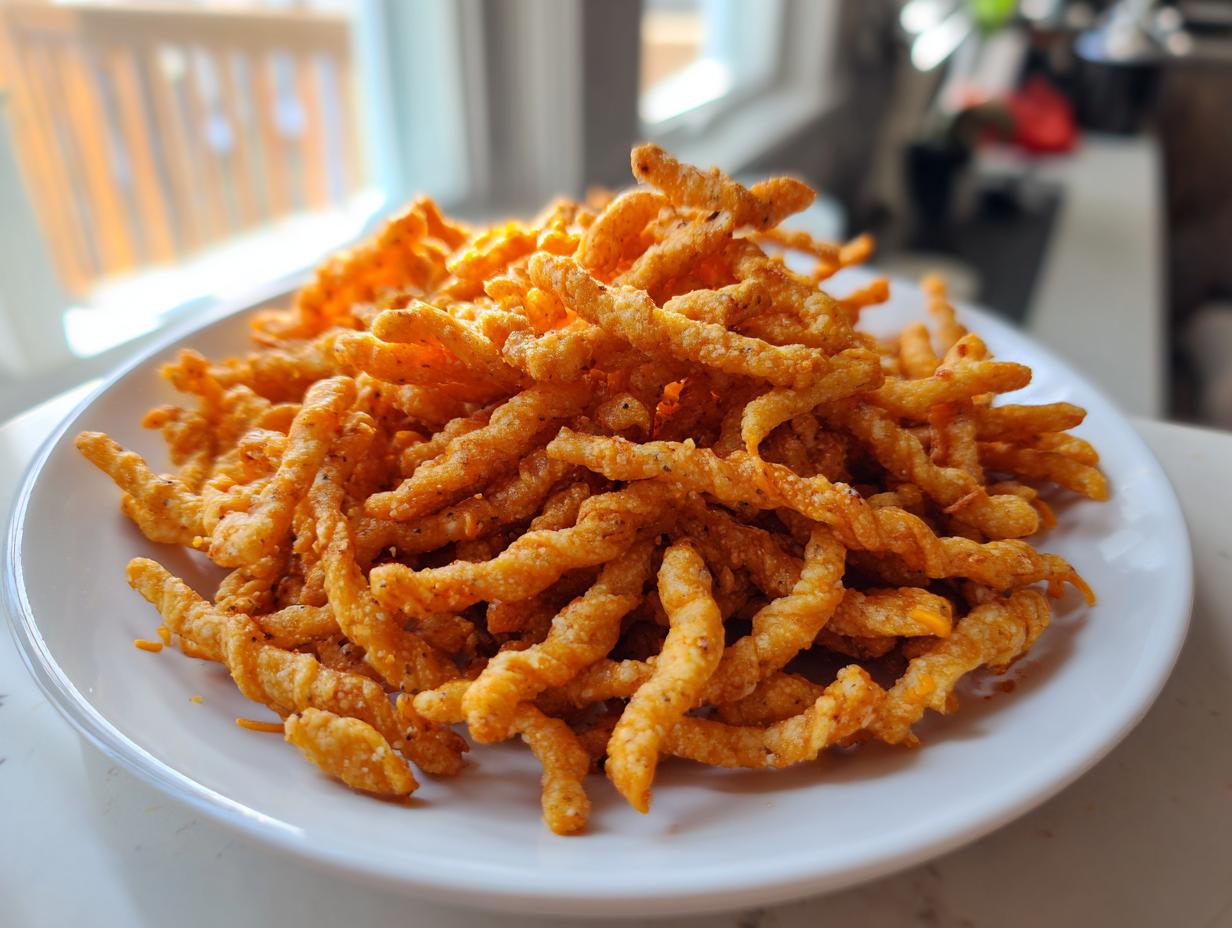
Let’s be honest, sometimes you just crave something savory that snaps when you bite it, right? Forget those bland chips sitting on the shelf! I’m here to tell you about the absolute pinnacle of savory baked snacks: these Classic Crispy Southern cheese straws. We use plenty of sharp cheddar here, which gives them that irresistible bite you just can’t replicate with store-bought crackers. I spent weeks testing the flour-to-fat ratio in my kitchen to make sure every batch—every single batch, promise—comes out perfectly crisp. You need these cheese straws for your next get-together because Michael Carter guarantees they are foolproof delicious!
- Why You Will Love These Classic Crispy Cheese Straws
- Ingredients for Perfect Homemade Cheese Straws
- Expert Tips for Making the Best Cheese Straws
- Step-by-Step Instructions for Classic Cheese Straws
- Variations on Traditional Cheese Straws
- Serving Suggestions for Your Cheesy Finger Foods
- Storage and Reheating Instructions for Homemade Cheese Crackers
- Frequently Asked Questions About Making Cheese Straws
- Share Your Experience Making These Cheese Straws
Why You Will Love These Classic Crispy Cheese Straws
Okay, now that I have your attention, let me tell you why these savory appetizers are about to become your new obsession. It’s not just that they involve cheese—though, hello, that helps!—it’s the payoff. You put in minimal effort, and you get maximum crunch. Trust me on this one, these are the cheesy finger foods people actually fight over at parties.
- That Perfect Snap: We’re not messing around with soft, pliable snacks here! These deliver incredible crispiness that makes them so addictive.
- Sharp Flavor Pop: Using only sharp cheddar means you get a big, bold cheesy flavor in every single bite. No wimpy cheese allowed!
- Party Ready in a Flash: With only 20 minutes of actual prep time, these are absolute heroes when you need an impressive appetizer fast.
- Incredibly Buttery Texture: That cold butter melting into the dough creates a texture that’s wonderfully buttery and tender, even while being super crisp.
- Make-Ahead Magic: They hold up beautifully, making them essential for holiday entertaining or game day prep.
- A True Southern Classic: If you want that authentic, comforting taste that screams homemade cheese crackers, this is the recipe you need.
Ingredients for Perfect Homemade Cheese Straws
Getting the right ingredients assembled is the first step in making sure these turn out perfect. Remember, I test these recipes until they’re foolproof, so please follow these notes exactly! The key here is coldness and sharpness. You must grate that cheese yourself, don’t cheat!
- 2 cups all-purpose flour
- 1 teaspoon salt
- 1/2 teaspoon cayenne pepper (you can dial this up if you like some heat!)
- 1/2 teaspoon black pepper
- 1 cup (that’s two full sticks!) unsalted butter, which must be very cold and cut into little pieces.
- 1 1/2 cups sharp cheddar cheese, freshly grated—this makes all the difference.
- About 1/4 cup of ice water. Keep this near while you mix!
That sharp cheddar provides the strong, savory punch we want in our savory cheese appetizers. Mild just won’t cut it here!
Expert Tips for Making the Best Cheese Straws
Listen, I’ve made these cheese straws more times than I can count testing for the perfect texture, and I’ve learned a few things that really take them from good to absolutely unforgettable. My goal when developing this recipe was to eliminate the disappointing, floppy ones—we want real snack satisfaction here!
One thing you really need to pay attention to is chilling time. If you check the notes, I mention you can chill the dough for an hour instead of 30 minutes if you want that flakier texture. It takes a little more patience, but letting the flour fully hydrate around that cold fat makes a difference when you bake them.
Achieving Maximum Crispiness in Your Cheese Straws
The crisp factor all comes down to two moments: the butter and the cooling rack. First, that butter has to be ice cold—practically frozen—when you cut it into the flour. If it melts even a little bit during mixing, you lose those crucial pockets of fat that turn into steam, resulting in a puffier, softer straw instead of a crisp one.
Second, and this is vital, don’t touch them once they come out of the oven! They look a little soft right out of the 400 degrees oven, but they are actively setting up. You have to transfer them immediately to a wire rack. That air circulation underneath is what locks in that wonderful, snap-in-half crispiness. They actually finish cooking on the rack, so just try to keep your hands off for 15 minutes!
Ingredient Spotlight: Why Sharp Cheddar Matters
You could technically use mild cheddar, but why would you ruin this moment? These are meant to be bold, punchy savory cheese appetizers. Mild cheddar loses all its character halfway through the baking process, leaving you with just fat and salt.
Sharp cheddar, though? That cheese has depth! It brings that acidic, tangy background note that balances the flour and the touch of cayenne pepper we add. It’s the flavor backbone of the whole thing. If you want truly gourmet savory pastries, you have to go sharp. And speaking of delicious bakes, if you are looking for another savory showstopper, you have to check out my recipe for cheesy garlic pull-apart bread; it uses a similar concept of high flavor using quality dairy!
Step-by-Step Instructions for Classic Cheese Straws
Alright, let’s get down to business! Making these cheese straws follows a classic pastry method, and if you remember to keep things cold, you’re golden. I’ve broken down the steps below so we can ensure your results are consistently spectacular—think of the perfect crispy cheese snacks every time. Once the dough chills, things move really fast!
Preparing the Dough Base for Flaky Cheese Snacks
This is where we build the flavor foundation, and patience with mixing is key. Remember, we want a crumbly, shaggy dough, not one slick blob. We are aiming for that wonderful texture that makes them feel like gourmet savory pastries!
- Grab a large bowl and whisk together your dry stuff first: the flour, salt, black pepper, and that little kick of cayenne pepper. Get ’em nice and distributed.
- Now, add your very cold, cubed butter. This is where the magic starts. Use a pastry blender—or just your fingertips if you work fast—to cut that butter into the flour until it looks like coarse crumbs, maybe like little peas. Do not overwork this part!
- Stir in that beautiful, sharp cheddar cheese you grated. Make sure it’s mixed evenly throughout those floury butter pieces.
- Time for the water. Add the ice water slowly, just a tablespoon at a time. You stop adding it the second the dough starts clinging together when you squeeze a handful. Seriously, do not overmix! Too much water or too much stirring is how you end up with tough crackers.
- Once it just barely comes together, turn it out onto some plastic wrap. Squish it into a nice flat disk—this helps it chill faster—wrap it tight, and stick it in the fridge for at least 30 minutes. This chilling time is non-negotiable in my book!
Cutting and Twisting Your Cheese Straws
Once the dough is firm from the fridge, it’s shaping time! If you’re planning on making these for a party, this part is where you can rope in a couple of helpers because twisting is fun, but it takes a minute. While you’re working, preheat your oven to 400°F (200°C) and line those baking sheets with parchment paper.
You want these thin if you want them crispy! Dust your counter lightly with flour and roll that dough out until it’s about 1/8-inch thick. Honestly, thinner is better if you hate softness in your cheese straws. Then, use a pizza cutter to slice them into strips that are about 1/2-inch wide and roughly 5 to 6 inches long.
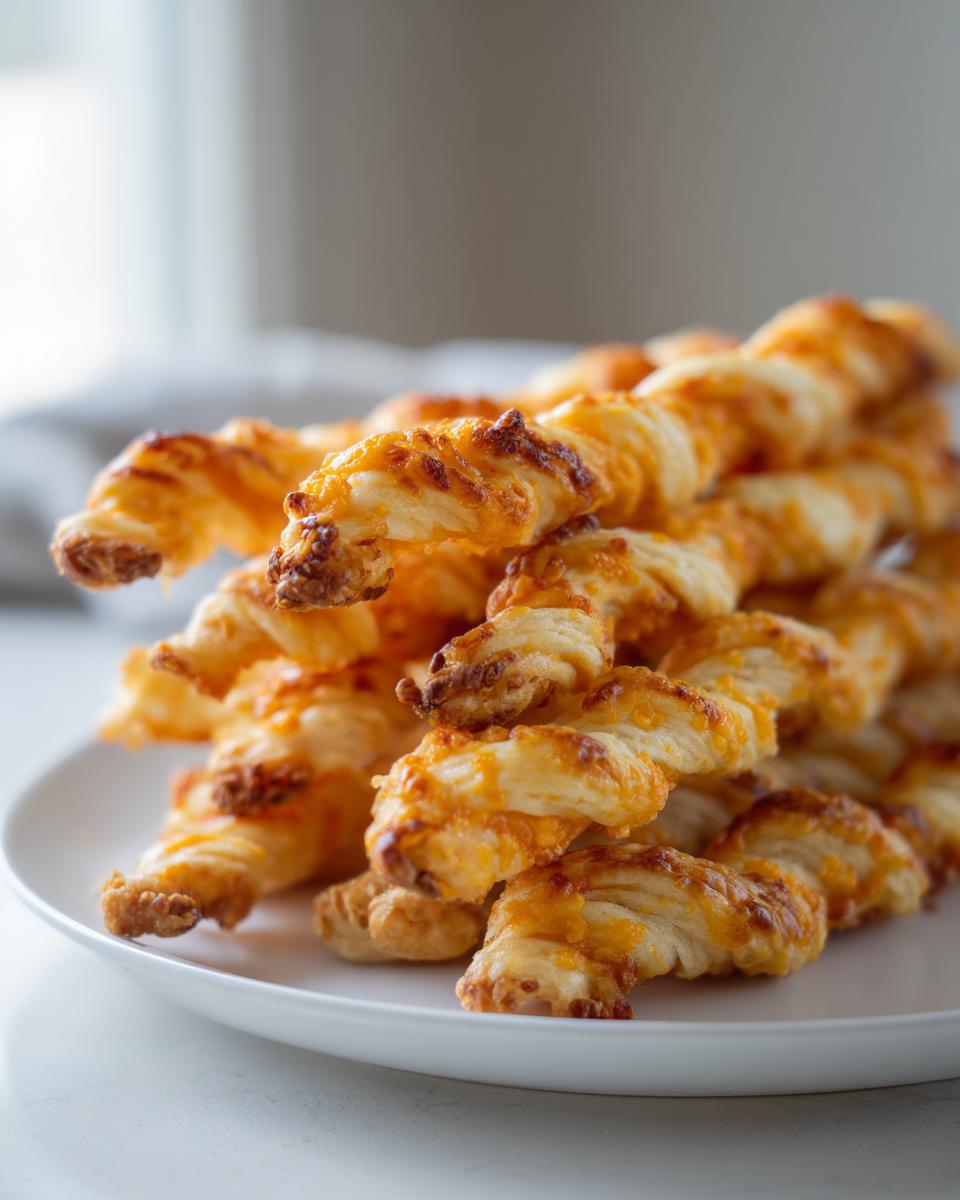
For the iconic shape, just take each strip and twist it a couple of times. Place them carefully on your parchment-lined baking sheets. Don’t crowd them too much; they need a little breathing room to crisp up properly.
Baking and Cooling the Crispy Cheese Snacks
The oven does the hard part now, but the cooling rack handles the final texture job! Bake these for 12 to 15 minutes. Keep an eye on them starting around the 12-minute mark. You are looking for them to be beautifully golden brown all over.
When they come out, they might feel just slightly flexible—don’t panic! Immediately move those hot cheese straws over to a wire rack. This is crucial because if they cool on a solid sheet pan, the bottoms steam and you lose that fantastic crunch. Let them cool completely—at least 15 minutes—and you will be rewarded with truly crispy cheesy finger foods perfect for dipping, maybe in this creamy dill dip I love!
Variations on Traditional Cheese Straws
While these classic cheese straws are my absolute favorite—they capture that pure, sharp cheddar feeling—I never shy away from playing around with the spice rack or the cheese drawer! That’s the beauty of a simple base recipe; it’s ready for your own spin. You can easily turn these into fantastic gourmet savory pastries depending on what you have on hand.
If you’re looking for a bit more sophistication, swapping out the cayenne pepper for different dried ingredients is the fastest way to change the vibe. Rosemary and thyme work beautifully, especially if you’re serving these alongside something rich, like roasted chicken later in the week. You just mix about a teaspoon or two of your chosen herb right in with the dry flour mixture.
For lovers of the real heat, you should absolutely check out some of the traditional spicy recipes out there! If you want to see another fantastic take that really cranks up the cayenne, check out this version from Martie Duncan: Spicy Southern Cheese Straws. That method is amazing for holidays when you want an extra kick.
What about the cheese? Sharp white cheddar is stunning if you want a lighter color, but feel free to mix it up! Try using Gruyère for a nuttier, earthier flavor, or even adding a sharp Parmesan—which really bumps up the salty umami notes. I sometimes substitute about a quarter cup of the cheddar with Parmesan to deepen the flavor profile, which takes these from simple party appetizer recipes to something truly decadent. It’s fun to see how you can transform simple ingredients just by swapping out the main flavor driver. If you’ve made these savory snacks and used Pecans, you might also love my recipe for candied pecans as a sweet counterpart on your appetizer board!
Serving Suggestions for Your Cheesy Finger Foods
Now that you have these wonderfully crispy, buttery bites, the question becomes: what do you serve them with? Honestly, these cheesy finger foods are good enough to eat all by themselves while standing over the warm oven, but they really shine when paired with the right dips and drinks. They are the perfect backdrop for any gathering, especially if you’re hosting friends for game day or need easy holiday entertaining food.
Because they have a strong, sharp flavor profile from the cheddar and that little bit of cayenne, they pair surprisingly well with sweeter things, too! Think about setting up a little grazing board. You can mix these in with some fresh berries or even some candied nuts if you’re feeling fancy.
But let’s talk dips, because the right sauce elevates any appetizer game instantly. Since these are so savory and slightly spicy, I like offering something creamy to cut through the richness and cool the palate. My absolute favorite thing to set out beside these is a good, savory, garlicky dip. You seriously HAVE to try my Cowboy Butter dipping sauce recipe. It’s rich, full of herbs, and totally unexpected when paired with a simple cheese straw.
For drinks, they are fantastic alongside a crisp, cold pale ale or even just a bubbly glass of Prosecco. The carbonation helps cleanse the palate between bites. If you’re serving them to a crowd of kids or folks who don’t drink, just a simple glass of ice-cold milk works wonders—it’s the classic pairing for any sharp cracker!
Storage and Reheating Instructions for Homemade Cheese Crackers
I know you’re making a huge batch, because nobody ever makes just a few of these, right? They are totally addictive! The good news is, these little crispy cheese snacks are super easy to store, and they hold onto their crunch really well, which is a miracle for a dairy-heavy baked good.
The most important rule for keeping your homemade cheese crackers tasting like they just came out of the oven is this: temperature control is your friend during storage. Skip the fridge unless your kitchen is unusually hot or humid. Cold air actually encourages food to go stale faster, and we want maximum crispiness!
Just let them cool completely—and I mean 100% cool—on the wire rack first. If you trap any residual heat inside a container, you are guaranteeing steam, and steam means sogginess. Once they are stone cold, transfer them to an airtight container. Seriously, use one with a good seal.
If you store them correctly at room temperature, you can easily enjoy these savory cheese appetizers for up to a week. I tend to stack a little piece of parchment paper between layers if I’m putting a lot in one tin, just to make sure they don’t rub against each other too hard, but honestly, they rarely last that long in my house.
Now, what if they *do* get a tiny bit soft after a few days? Don’t toss them! They are incredibly easy to revive. Just spread them out on a baking sheet and pop them back into that 400-degree oven for about 3 to 5 minutes. Watch them closely! Pull them out the second they feel firm and crisp again, and they’ll be perfect. It’s like magic—they are good as new!
Frequently Asked Questions About Making Cheese Straws
When you start messing with cheese and pastry, you always end up with a few lingering questions, I totally get it! I’ve baked enough of these Southern Style Baked Goods to know what trips people up. Getting these cheese straws just right means understanding the dough, so I wanted to clear up a few things that pop up most often in my inbox. Don’t worry if your first batch isn’t absolute perfection; we’ll get you there!
Can I use a different cheese besides sharp cheddar in these cheese straws?
Yes, you absolutely can, but you might change the characteristic Southern flavor profile we’re going for! Sharp cheddar is the gold standard here because it holds up to baking and delivers that intense tang we need to balance the butter and cayenne spice. However, if you want to experiment or are out of cheddar, Parmesan is a fantastic substitute. Parmesan adds a really nutty, salty depth, making them taste slightly more gourmet! You could even do a 50/50 mix of sharp cheddar and Gruyère for an amazing, slightly sweeter, nutty flavor that still bakes up beautifully crisp.
How long can I store my crispy cheese snacks?
If you managed to have any leftovers, which is tough because they are seriously addictive crispy cheese snacks, storage is key to keeping that snap! As I mentioned before, keep them away from the fridge. Room temperature, airtight container, that’s the ticket.
If you followed the recipe steps precisely—especially making sure they are completely cool on the wire rack before putting them away—they should stay wonderfully crisp for up to a week. If you are looking for other great ways to use alternative flours in your baking (since we know sometimes you run out of AP!), you should check out my recipe for soft whole wheat bread. But back to the straws: if they soften up after day five, just pop them back in a 400-degree oven for about four minutes. That flash of heat brings the crunch right back!
If you want to see how another great home cook handles their recipe for crispy snacks, House of Nash Eats has a great guide on their site, too, if you want a second opinion: Southern Cheese Straws resource.
Share Your Experience Making These Cheese Straws
Now it’s your turn! I’ve handed over all my best secrets for getting that perfect, buttery snap in these classic cheese straws, and now the kitchen is all yours. Honestly, seeing your results is the best part of sharing these recipes.
Did you test out the rosemary variation, or did you stick firmly to that sharp cheddar tradition? Maybe you found a fantastic dipping sauce that the cheese straws absolutely soared with? Don’t keep that success a secret!
Please leave a five-star rating below if these savory appetizers hit the spot for your holiday entertaining or game day spread. A rating helps other home cooks find reliable, delicious recipes just like this one.
More importantly, snap a photo! Head over to social media and tag me so I can see your beautiful, golden-brown harvest. Hearing how these cheesy finger foods came out for your family—whether they lasted five minutes or five days!—makes all my recipe testing totally worth it. If you loved diving into this savory bake, you should definitely check out my favorite Snickerdoodle Cheesecake for an unbeatable sweet finish to your next party!
I read every comment, so let me know what you think. Happy baking!
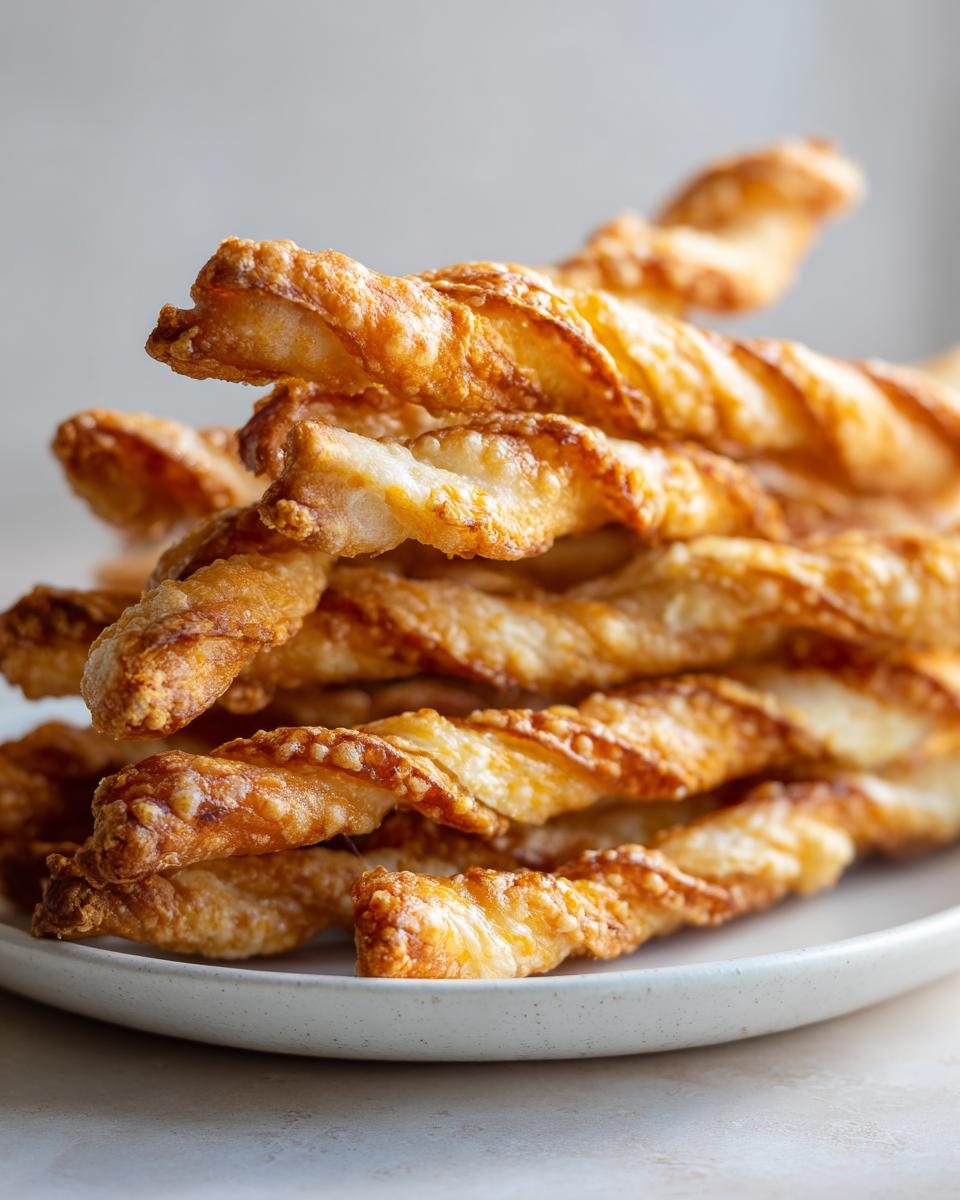
PrintClassic Crispy Southern Cheese Straws

Make these classic, crispy Southern cheese straws using sharp cheddar for a savory, buttery appetizer perfect for any gathering.
- Prep Time: 20 min
- Cook Time: 15 min
- Total Time: 35 min
- Yield: About 4 dozen 1x
- Category: Appetizer
- Method: Baking
- Cuisine: American
- Diet: Vegetarian
Ingredients
- 2 cups all-purpose flour
- 1 teaspoon salt
- 1/2 teaspoon cayenne pepper (adjust to taste)
- 1/2 teaspoon black pepper
- 1 cup (2 sticks) cold unsalted butter, cut into small pieces
- 1 1/2 cups sharp cheddar cheese, grated
- 1/4 cup ice water, approximately
Instructions
- In a large bowl, whisk together the flour, salt, cayenne pepper, and black pepper.
- Cut the cold butter into the flour mixture using a pastry blender or your fingertips until the mixture resembles coarse crumbs.
- Stir in the grated sharp cheddar cheese until evenly distributed.
- Gradually add the ice water, one tablespoon at a time, mixing until the dough just comes together. Do not overmix.
- Form the dough into a flat disk, wrap it in plastic wrap, and chill in the refrigerator for at least 30 minutes.
- Preheat your oven to 400 degrees Fahrenheit (200 degrees Celsius). Line two baking sheets with parchment paper.
- On a lightly floured surface, roll the chilled dough out to about 1/8-inch thickness.
- Use a knife or pizza cutter to cut the dough into strips about 1/2-inch wide and 5 to 6 inches long.
- Twist each strip a few times to form a straw shape, then place them on the prepared baking sheets.
- Bake for 12 to 15 minutes, or until the cheese straws are golden brown and crisp.
- Transfer the straws to a wire rack to cool completely. They will crisp up as they cool.
Notes
- For extra flavor, you can substitute half of the all-purpose flour with whole wheat flour.
- If you prefer a flakier texture, chill the dough for one hour instead of 30 minutes.
- These savory cheese appetizers store well in an airtight container at room temperature for up to one week.
Nutrition
- Serving Size: 4 straws
- Calories: 110
- Sugar: 0.2
- Sodium: 180
- Fat: 8
- Saturated Fat: 5
- Unsaturated Fat: 3
- Trans Fat: 0.3
- Carbohydrates: 6
- Fiber: 0.3
- Protein: 4
- Cholesterol: 25