
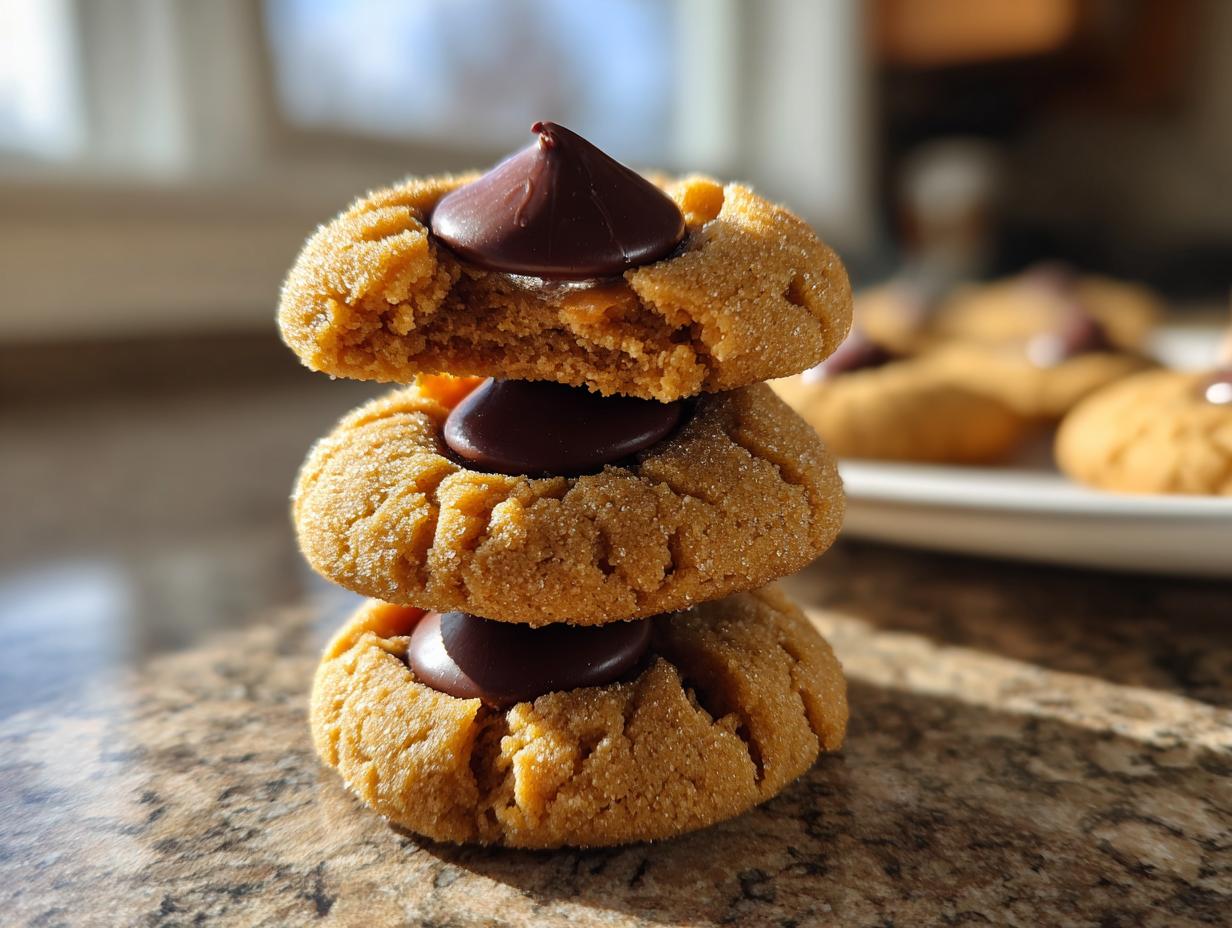
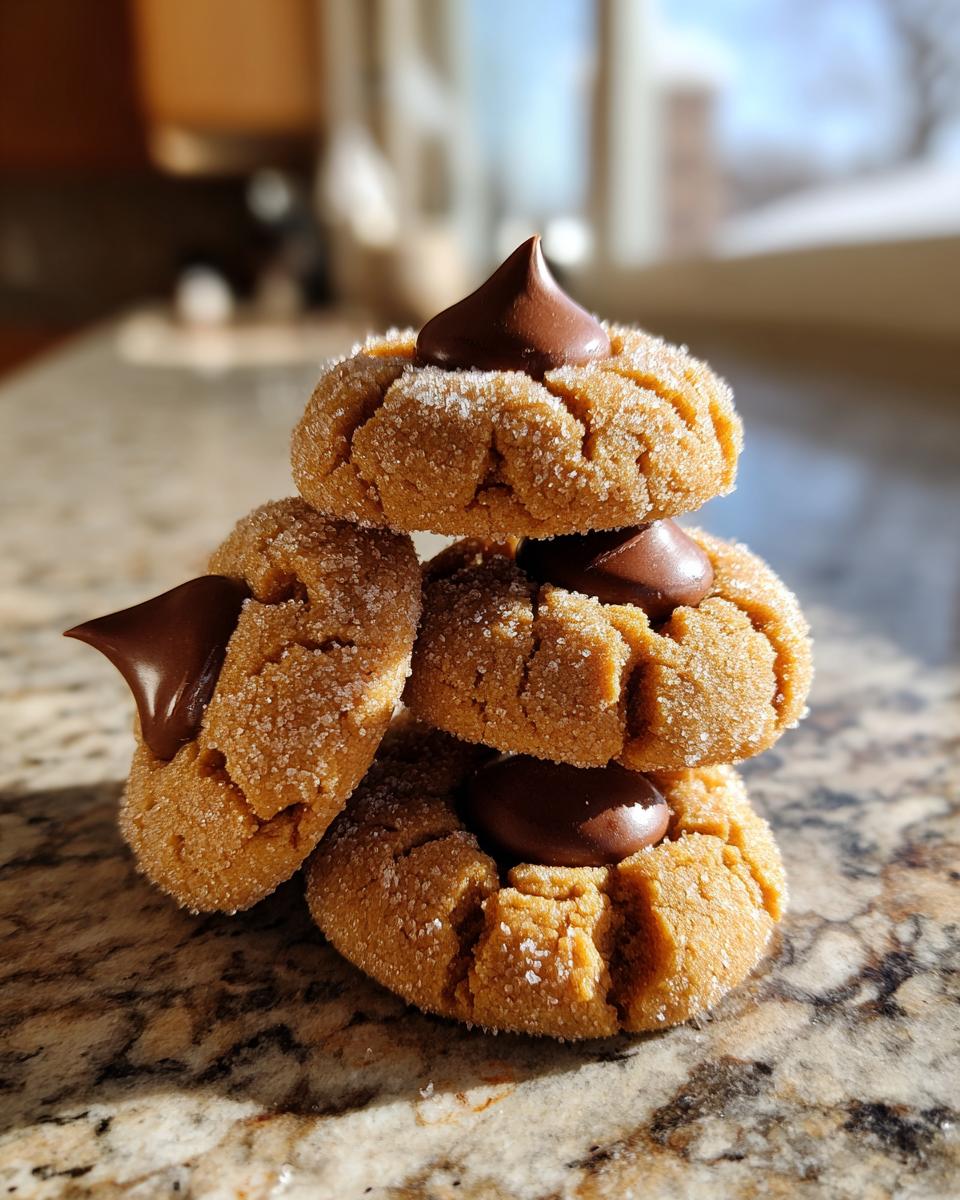
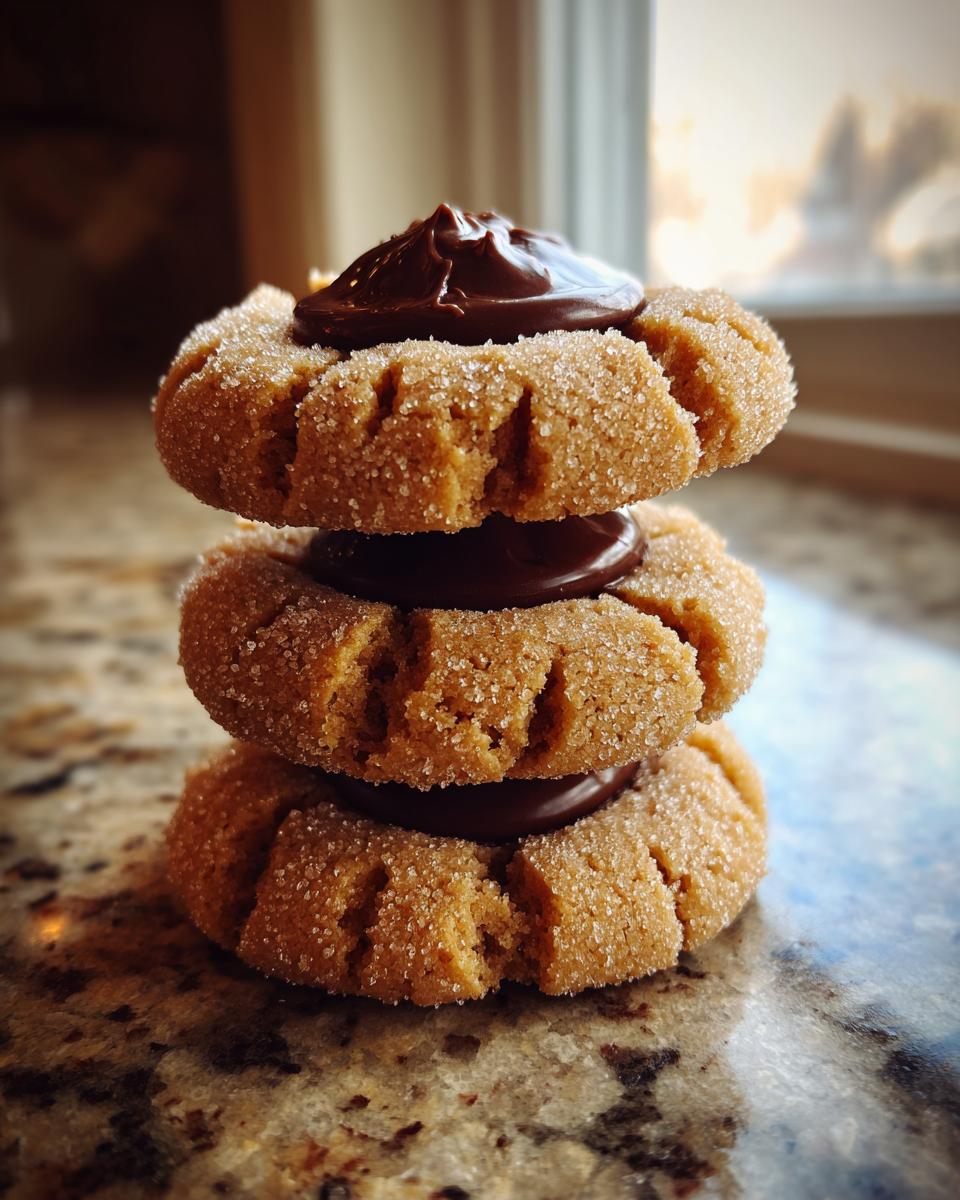
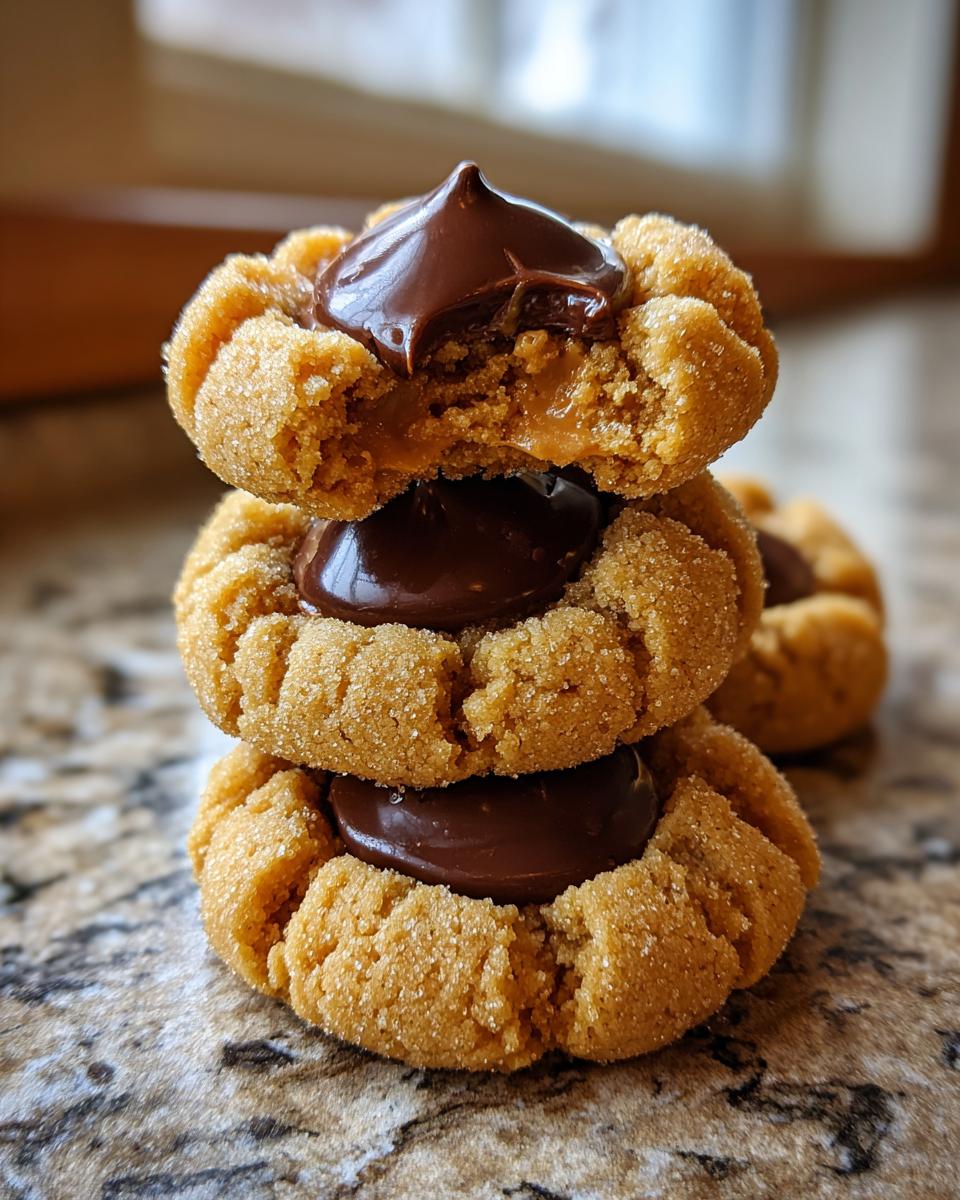
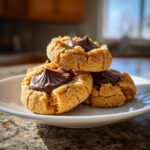
There’s a sweet, cozy smell that instantly transports me back to my childhood kitchen during the holidays, and that aroma is almost always the unmistakable scent of freshly baked peanut butter blossoms. If you’re looking for that perfect, crackled-top, buttery cookie that melts slightly around a famous chocolate kiss on top, you’ve landed in the right spot. I’ve spent years perfecting this recipe here at Delish Symphony because for me, these aren’t just cookies; they are the centerpiece of family gatherings. When I bring a platter of these classic, soft and chewy peanut butter blossoms to any event, they disappear first. It’s the harmony of salty-sweet peanut butter and milk chocolate that just sings together. Trust me, this is the foolproof recipe you’ll want to keep forever.
We’re keeping this recipe classic, focusing on achieving that supremely soft and chewy texture that makes these cookies so beloved. I promise, the process is simple, even if you’re just starting out in the kitchen. If you’re looking for another simple treat, you might also want to check out my guide on making easy 5-ingredient almond joy cookies just to mix things up!
- Why This is the Best peanut butter blossom Recipe (Family Favorite Cookies)
- Ingredients for Classic peanut butter blossom
- How to Prepare Your peanut butter blossom Cookies Step-by-Step
- Tips for Perfect Soft and Chewy peanut butter blossom
- Variations for Your peanut butter blossom Recipe
- Making peanut butter blossom Cookies for Holiday Baking
- Storage and Keeping Your peanut butter blossom Fresh
- Frequently Asked Questions About peanut butter blossom
- Nutritional Estimates for Homemade peanut butter blossom
Why This is the Best peanut butter blossom Recipe (Family Favorite Cookies)
You’re going to love this because it hits every single mark for what a true peanut butter blossom should be. We aren’t messing around with complicated techniques here; this is an easy peanut butter cookies recipe that tastes like nostalgia. The secret to getting that perfect soft and chewy texture lies in the balance of sugars—we use both granulated and brown sugar—plus, never overworking the flour when we mix!
This is truly the best peanut butter blossoms recipe I’ve developed because it holds up year after year, making it a genuine family favorite cookies staple on my holiday baking list. The cookies stay beautifully tender even a couple of days later. For more recipes engineered for that perfect bite, take a look at my guide for making soft and chewy snickerdoodles!
Ingredients for Classic peanut butter blossom
When making these classic peanut butter blossoms, the quality of your ingredients really does make a difference, especially the peanut butter and the chocolate! We need butter that’s softened, not melted—this helps with the creaming step later on. We rely on two kinds of sugar to keep the texture delightfully soft and chewy.
Here is what you’ll need for about three dozen cookies:
- 1 cup unsalted butter, softened
- 3/4 cup creamy peanut butter
- 3/4 cup granulated sugar
- 3/4 cup packed brown sugar
- 2 large eggs
- 1 teaspoon vanilla extract
- 2 1/4 cups all-purpose flour
- 1 teaspoon baking soda
- 1/2 teaspoon salt
- 1/4 cup extra granulated sugar for rolling
- About 72 milk chocolate Hershey’s Kisses, unwrapped
Remember, having everything ready to go makes the actual process so smooth! If you’re also whipping up some appetizers tonight, you might want to check out my notes on making easy creamy dill dip.
How to Prepare Your peanut butter blossom Cookies Step-by-Step
Making these peanut butter blossoms is straightforward—it’s one of the great things about this recipe! We are aiming for that signature crackled top held together by a perfectly soft center, making these some of the easiest peanut butter cookies you’ll ever put together. Don’t worry about complicated steps; just follow the rhythm!
Mixing the peanut butter blossom Dough
First things first, you need a warm oven! Preheat to 375 degrees Fahrenheit and get those baking sheets lined up with parchment paper so nothing sticks. Now, in a big bowl, you’ll start by beating the softened butter, peanut butter, and both sugars until they look creamy and completely combined. Next, we add the eggs one at a time—don’t rush this! Beat them in well, then splash in that vanilla extract.
In a separate bowl, just mix your flour, baking soda, and salt together. Now, add the dry stuff to the wet stuff gradually. And here’s a key Mike tip: stop mixing as soon as you don’t see any more white streaks of flour. Overmixing develops the gluten and kills that soft texture we are hunting for!
Shaping and Baking the peanut butter blossom
Get that extra granulated sugar ready on a shallow plate. Take about 1 inch of dough and roll it into a nice, even ball—like a little marble. You want to roll that ball vigorously in the sugar until it’s completely coated. This sugar coating is what gives us those beautiful little cracks once they bake!
Space them about two inches apart on your baking sheets. They bake fast, only 8 to 10 minutes. I look for them to be puffed up and set, but honestly, pull them out when they look *slightly* pale. They should look a little underdone, but that’s our precision at work to keep these peanut butter kiss cookies super soft!
Adding the Chocolate Kiss to the peanut butter blossom
This is the moment everyone waits for! As soon as those sheets come out of the oven, you need to work fast because the cookies are hot. Immediately press one unwrapped Hershey’s Kiss right into the center of each warm cookie. See how the heat starts to melt the bottom of the chocolate just a tad? That little bit of softened chocolate acts like glue.
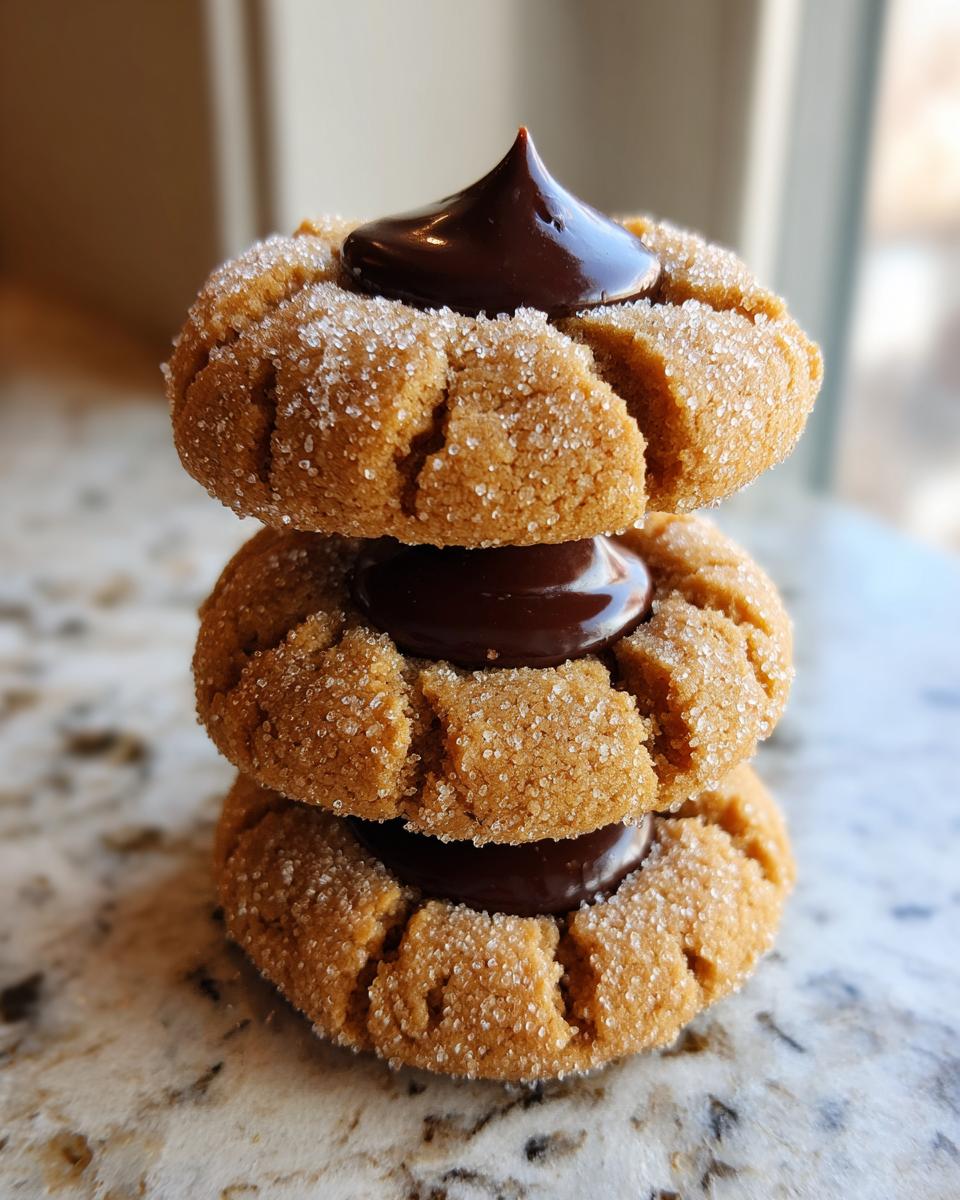
Don’t touch them for about five minutes while they sit on the hot pan. This lets the chocolate firm up just enough before you move them to a wire rack to cool completely. If you try to move them too early, you’ll lose your kiss! If you need some great homemade sauces to go along with these treats, take a peek at my guide on easy homemade salad dressing recipes—you never know when you’ll need a savory counterpoint!
Tips for Perfect Soft and Chewy peanut butter blossom
Achieving that melt-in-your-mouth texture in your peanut butter blossoms is all about precision in those last few steps, even though the dough itself is so simple. The biggest mistake people make when aiming for soft and chewy cookies is leaving them in the oven too long. Remember what I said earlier? Pull them when they look slightly puffed but still look a tiny bit pale in the middle.
If they come out deeply golden brown, they are already overdone, and that wonderful softness will be compromised when they cool down. Trust me on this; the residual heat of the pan finishes the cooking process perfectly once the Kisses are added.
Also, dough temperature matters! If you find your dough is so warm that the balls flatten out immediately when you try to roll them in sugar, just pop the whole bowl into the fridge for about 30 minutes. A slightly chilled dough holds its shape much better during baking. It’s a small pause, but it makes a huge difference in the final appearance. For another guaranteed tender bake, check out my recipe for the best juicy classic meatloaf—balance is key in the kitchen!
Variations for Your peanut butter blossom Recipe
While I absolutely insist that the best peanut butter blossoms recipe is the classic one—butter, two sugars, peanut butter, and that chocolate centerpiece—I know everyone’s kitchen is a little different! We want everyone to enjoy this holiday treat, which is why exploring simple swaps is totally acceptable here. This recipe is very flexible, provided you respect the ratios of fat to flour.
If you need a gluten free peanut butter blossoms option, it’s incredibly easy to manage. Right in the notes, I mentioned swapping out the all-purpose flour for a quality 1-to-1 gluten-free baking blend. Make sure the blend you choose already contains xanthan gum, and honestly, you won’t notice a difference in the cookie’s softness once it’s finished!
What about peanut butter? I always use creamy because it blends smoother, but if you’re feeling adventurous, crunchy peanut butter works fine too! It just gives you little pockets of extra peanut texture inside the cookie. You can also use natural peanut butter, but you might need to add an extra tablespoon of flour since natural varieties tend to be runnier. It’s amazing how versatile this simple cookie is! If you enjoy baking and making things moist, you should definitely check out my secrets for moist lemon zucchini bread next.
Making peanut butter blossom Cookies for Holiday Baking
When December rolls around, you absolutely need these peanut butter blossoms on your baking schedule. They are, hands down, one of the most essential classic Christmas cookies out there. Everyone expects them, and honestly, they make your cookie tray look professional with that little cap of chocolate!
The best news is that these are fantastic for batch baking. You can easily double or triple the recipe for massive cookie production. I always bake the dough balls, let them cool completely (Kisses and all!), and then freeze them flat on a tray before transferring them to a big zip-top bag. They keep beautifully!
This makes them perfect for those busy days leading up to your holiday parties. When you need a last-minute fresh cookie, just pop the frozen dough balls onto a lined sheet and add about two extra minutes to the baking time. If you want another amazing treat for your holiday spread, check out my recipe for easy Christmas cookie bars. They are a crowd-pleaser, too! For even more inspiration on these beautiful holiday baking recipes, take a peek at why others love this tradition here.
Storage and Keeping Your peanut butter blossom Fresh
One of the best things about these peanut butter blossoms, besides how fast they are to make, is how long they actually last! Unlike some delicate pastries, these cookies are built to last, provided you store them right. The goal here is to make sure that classic soft and chewy texture stays intact, and that chocolate Kiss doesn’t melt or get weirdly streaky.
Forget the fridge! That cold air will actually dry out the cookie faster than you can imagine. You must store your finished cookies at room temperature in a truly airtight container. When I package mine up after a big baking session, I let them cool completely—Kiss and all—before sealing the lid tight. If you stack them, put a small piece of parchment paper between the layers so the bottoms of the cookies don’t stick to the chocolate of the cookie above it.
Properly stored, these cookies will stay wonderfully soft and delicious for a solid five to seven days. Sometimes I think they taste even better on day three! If you’re trying to make sure all your baked goods stay moist for a long time, check out my secrets for making moist pumpkin bread—the storage tips overlap perfectly!
Frequently Asked Questions About peanut butter blossom
I know when you’re baking something classic, you always have a few last-minute worries! These questions pop up every time I make a batch of these homemade Hershey Kiss cookies, so let’s clear up any confusion about getting these classic Christmas cookies perfect. Don’t stress; we’re going to make sure your cookies turn out exactly like the picture!
What happens if I overbake the peanut butter blossom?
Oh, this is the most important question for texture! If you happen to overbake your peanut butter blossom dough—meaning they come out looking deeply golden brown instead of just set—you are going to lose that wonderful melt-in-your-mouth quality. An overbaked cookie snaps instead of bending, and it can sometimes crack severely before you even get the chance to press in that chocolate Kiss. Since the Kiss relies on the residual heat to soften the chocolate bottom, if the cookie itself is too firm, the Kiss just sits there awkwardly instead of melting slightly into the crackle. We aim for tender, not crisp!
Is chilling the peanut butter blossom dough necessary?
In short, no! This is a fantastic reason why this is such an easy cookie recipe—we don’t require any chilling time. That means you can whip up these peanut butter chocolate cookies from start to finish in about 30 minutes. However, I always offer an alternative for folks who bake in the summer or whose kitchens get really warm: if your dough feels greasy or the 1-inch balls are spreading too much, put the dough in the fridge for 30 minutes. It’s not mandatory, but it helps manage sticky dough so you can roll those balls perfectly in the sugar. If you’re ever looking for a quick savory dish to balance out all that sweetness, check out my recipe for easy creamy dill dip.
Nutritional Estimates for Homemade peanut butter blossom
Okay, let’s talk numbers for a second. I know when we are baking up huge batches of peanut butter blossoms for the holidays, we aren’t exactly thinking about macros, but it’s good to have a general idea of what’s in your favorite comfort food desserts!
Please remember, this data is just an estimate based on using the exact measurements and standard ingredients listed in the recipe. If you use natural peanut butter or a different type of chocolate Kiss, your numbers might shift a little bit. But for a classic homemade Hershey Kiss cookies serving—which this recipe yields about 3 dozen of—here is the breakdown per cookie:
- Calories: 160
- Fat: 9g
- Saturated Fat: 4g
- Carbohydrates: 18g
- Sugar: 13g
- Protein: 4g
- Cholesterol: 25mg
See? Not bad for the best peanut butter blossom you’ll ever eat! It’s a perfect little package of peanut butter joy. Since we’re talking about quick fuel for busy days, if you’re looking for something easy to make the next morning, you should definitely check out my recipes for easy breakfast recipes!
PrintClassic Soft and Chewy Peanut Butter Blossoms
Make the classic, soft, and chewy peanut butter cookies topped with a milk chocolate Hershey’s Kiss. This simple recipe is a favorite for holiday baking.
- Prep Time: 15 min
- Cook Time: 10 min
- Total Time: 25 min
- Yield: About 3 dozen cookies 1x
- Category: Dessert
- Method: Baking
- Cuisine: American
- Diet: Vegetarian
Ingredients
- 1 cup unsalted butter, softened
- 3/4 cup creamy peanut butter
- 3/4 cup granulated sugar
- 3/4 cup packed brown sugar
- 2 large eggs
- 1 teaspoon vanilla extract
- 2 1/4 cups all-purpose flour
- 1 teaspoon baking soda
- 1/2 teaspoon salt
- 1/4 cup extra granulated sugar for rolling
- About 72 milk chocolate Hershey’s Kisses, unwrapped
Instructions
- Preheat your oven to 375 degrees Fahrenheit. Line baking sheets with parchment paper.
- In a large bowl, beat the softened butter, peanut butter, granulated sugar, and brown sugar with an electric mixer until the mixture is creamy.
- Beat in the eggs one at a time, then mix in the vanilla extract.
- In a separate bowl, whisk together the flour, baking soda, and salt. Gradually add the dry ingredients to the wet ingredients, mixing until just combined. Do not overmix the dough.
- Pour the extra granulated sugar onto a shallow plate.
- Roll the dough into 1-inch balls. Roll each ball in the extra sugar until fully coated.
- Place the sugared dough balls about 2 inches apart on the prepared baking sheets.
- Bake for 8 to 10 minutes. The cookies will look slightly puffed and set, but not deeply browned.
- Remove the baking sheets from the oven. Immediately press one unwrapped Hershey’s Kiss into the center of each warm cookie. The heat from the cookie will soften the chocolate slightly.
- Let the cookies cool on the baking sheet for 5 minutes before transferring them to a wire rack to cool completely. The chocolate will set as the cookies cool.
Notes
- For the softest texture, do not overbake the cookies; they should look slightly underdone when you remove them from the oven for the kiss pressing step.
- If you want a gluten free peanut butter blossoms option, substitute the all-purpose flour with a 1-to-1 gluten-free baking blend.
- You can chill the dough for 30 minutes before rolling if your dough feels too soft to handle easily.
Nutrition
- Serving Size: 1 cookie
- Calories: 160
- Sugar: 13
- Sodium: 75
- Fat: 9
- Saturated Fat: 4
- Unsaturated Fat: 5
- Trans Fat: 0
- Carbohydrates: 18
- Fiber: 1
- Protein: 4
- Cholesterol: 25