
If you’re ever staring down a craving for something deeply decadent but you absolutely cannot, for the life of you, turn on the oven, then I have found your absolute perfect answer. We’re talking about those rich, fudgy, melt-in-your-mouth treats that look fancy but sneakily come together with hardly any effort at all. I’m talking about the ultimate oreo balls recipe.
Here at Delish Symphony, Michael Carter and I built this entire philosophy around making incredible meals using accessible ingredients and practical techniques, and these little chocolate truffles embody that perfectly. They’re famously no-bake, they require only three main ingredients to become the most satisfying bite-sized dessert you’ve ever made, and they disappear instantly at any gathering. Seriously, these simple oreo balls are the definition of a quick win!
If you need a recipe that cuts through the noise and delivers pure, unadulterated chocolate joy with minimal fuss, you’ve landed in the right spot. You can check out more of our easy dessert recipes right here: our collection of delicious dessert recipes.
- Why This Classic 3 Ingredient Oreo Balls Recipe Works (Authoritative Insight)
- Gathering Ingredients for Your Oreo Balls
- Step-by-Step Instructions for Easy Oreo Balls
- Making Holiday Oreo Desserts: Festive Oreo Balls Variations
- Tips for Success When Making Homemade Candy Recipes
- Storage and Keeping Your Oreo Balls Fresh
- Frequently Asked Questions About Easy Oreo Truffles
- Estimated Nutritional Breakdown for Oreo Balls
- Share Your Symphony of Oreo Balls
- Estimated Nutritional Breakdown for Oreo Balls
- Share Your Symphony of Oreo Balls
Why This Classic 3 Ingredient Oreo Balls Recipe Works (Authoritative Insight)
Honestly, I’ve tried every fancy twist under the sun, but when it comes down to it, the classic combination of Oreos and cream cheese is the undisputed gold standard for oreo balls. Why mess with perfection? This recipe hits that sweet spot where you get intense chocolate flavor without needing an oven—perfect for those hectic times when you need a Quick Dessert Recipe that still feels indulgent.
I remember the very first time I made these. I was neck-deep in a huge IT project, working evenings, and desperately needed a party contribution that wouldn’t take up my precious weekend hours. I threw Oreos and cream cheese into a bowl, rolled ’em up, and they were instantly better than the store-bought stuff. It was proof that you don’t need complicated choreography; just the right harmony of simple components.
For more recipes engineered for your busy schedule, check out our approach to weeknight dinners—it’s all about efficiency!
Achieving the Perfect Fudgy Oreo Truffles Texture
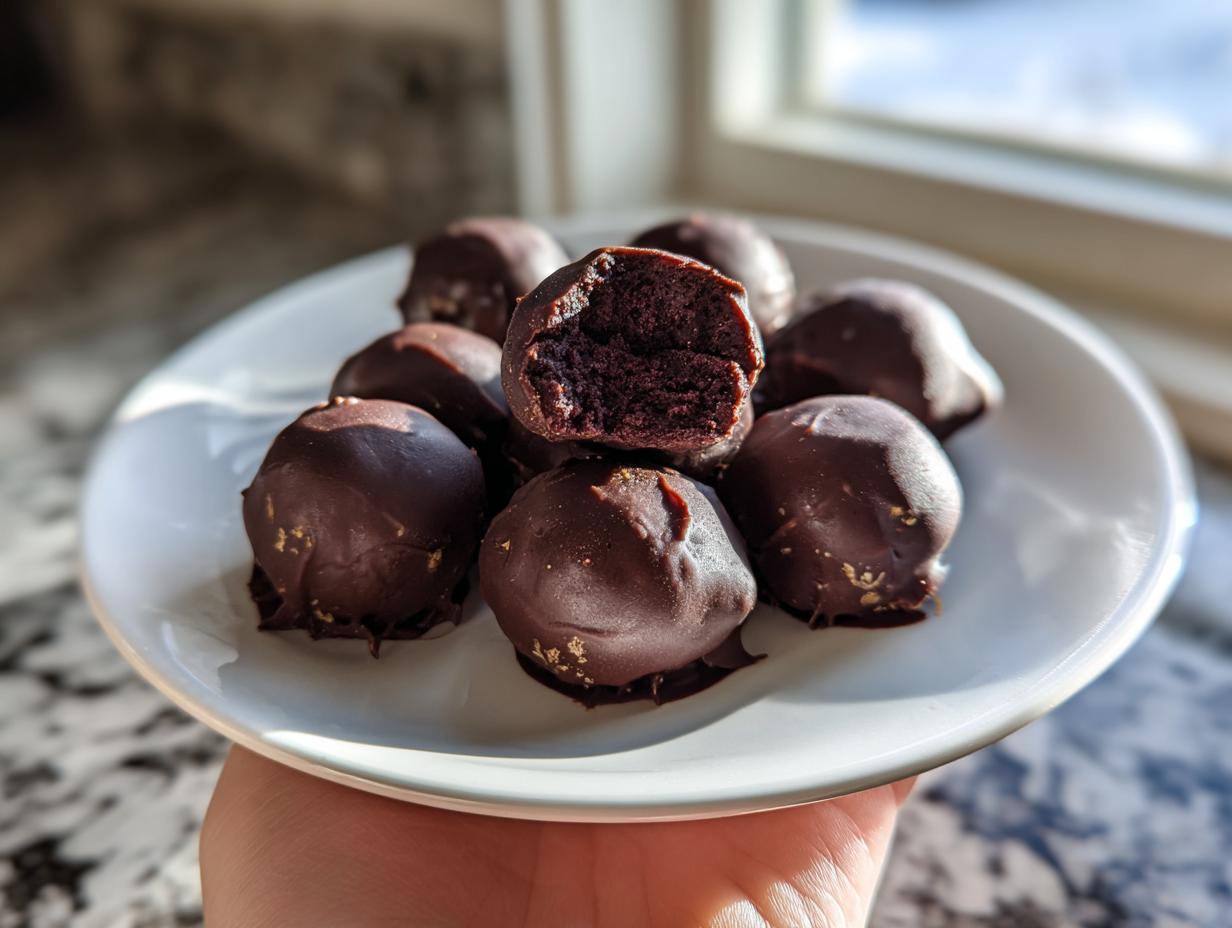
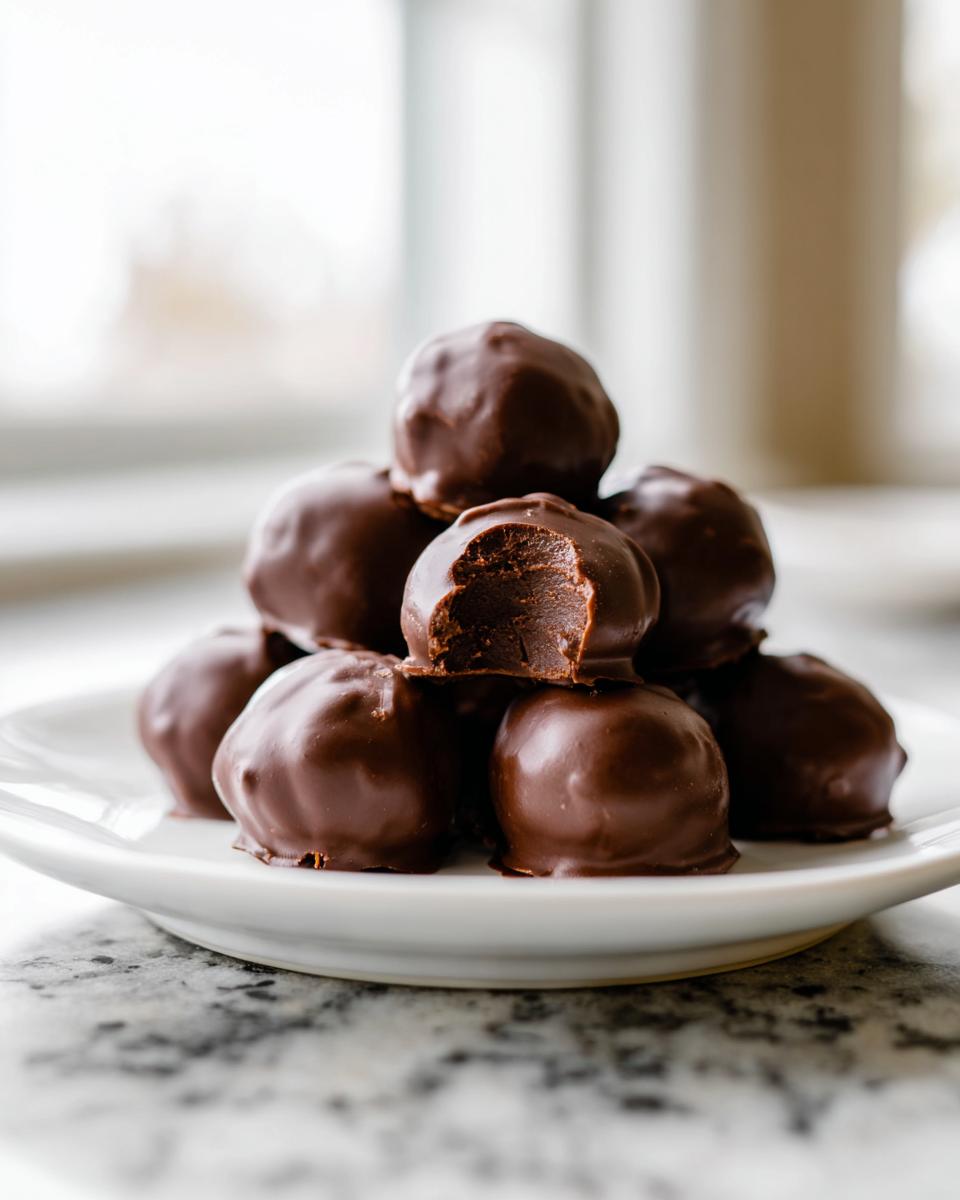
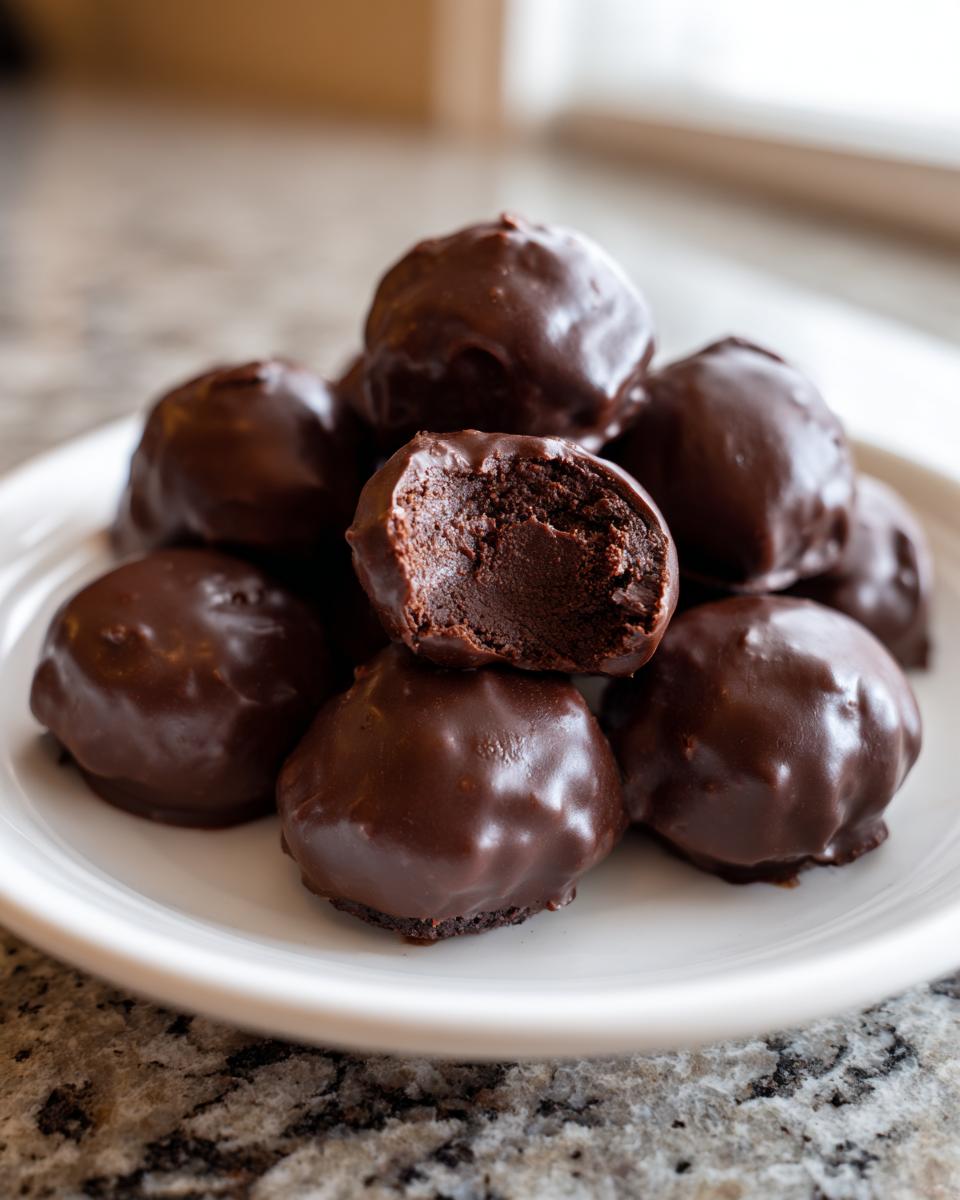
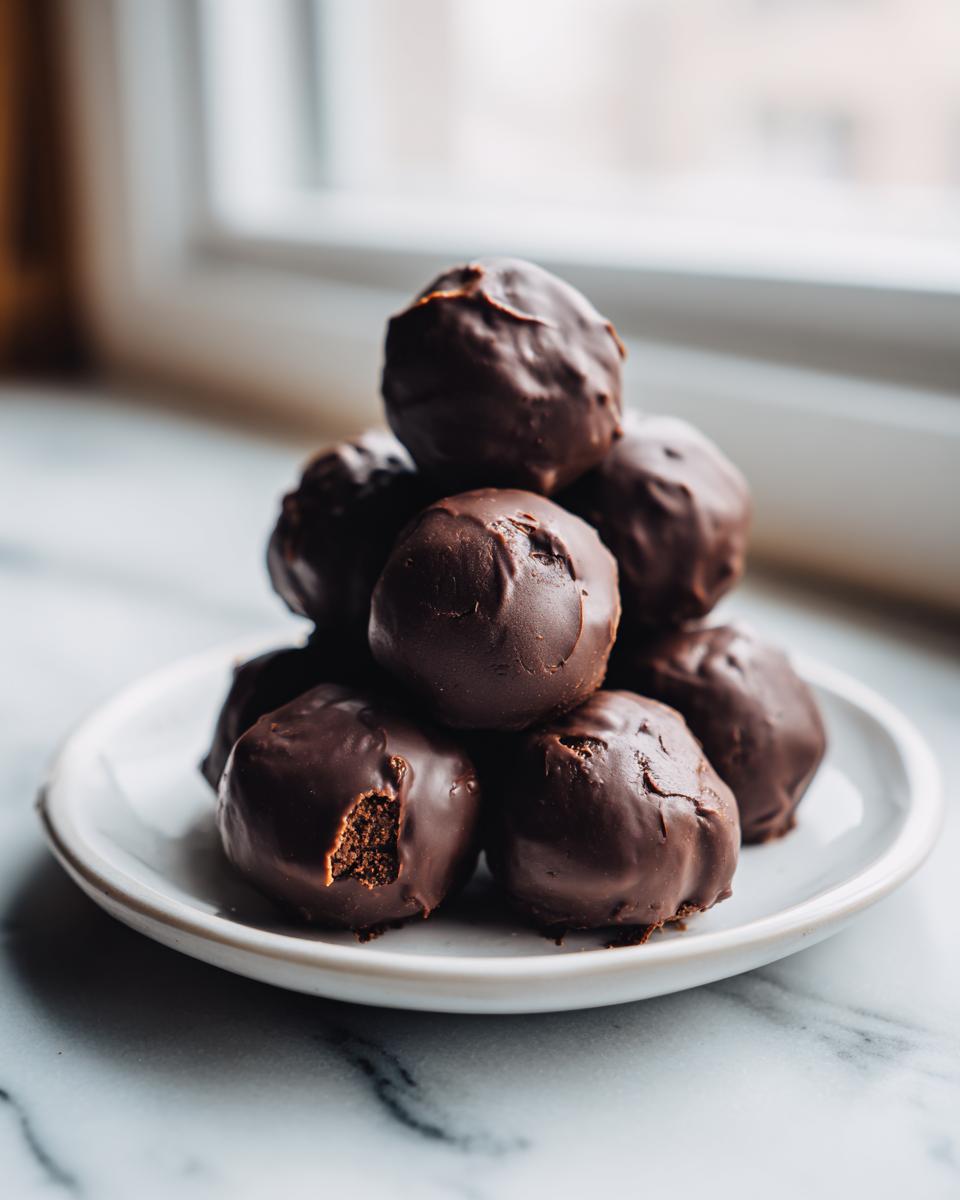
The real magic here isn’t the chocolate coating, it’s the center. That dense, creamy, almost fudgy texture comes entirely from the cream cheese acting as the binder. When the softened cheese mixes with the fine cookie crumbs, it binds them together into a smooth, pliable dough. It’s more stable than a standard cake pop filling because the fat from the cheese hydrates the cookie crumbs beautifully, locking in moisture.
Skipping the chilling step, which I see people do all the time, results in a sticky mess. We want that firm truffle texture that handles dipping well, and that firm structure is what makes these the best oreo balls around!
Gathering Ingredients for Your Oreo Balls
Okay, getting started is the best part because the ingredient list for these OREO BALLS is ridiculously short. It’s why this is called the 3 Ingredient Oreo Balls recipe—it’s almost unbelievable how much flavor comes from so few items! When I say simple, I mean it. You’ll only need to grab three things to nail this, but how you handle them is key to that symphony of flavor we strive for.
Here’s exactly what you need:
- One standard package of Oreo cookies (that’s 14.3 ounces, cream and filling included—don’t even try to sneak out the filling, that’s vital!).
- 8 ounces of cream cheese. Now, listen closely: this needs to be fully softened to room temperature. If it’s cold, your dough will be crumbly, and we want smooth and pliable!
- 16 ounces of semi-sweet chocolate melting wafers or chips.
For more incredibly straightforward recipes that don’t require a scavenger hunt for obscure items, take a peek at our simple snack recipes. We keep things easy!
Ingredient Notes and Essential Substitutions for Oreo Balls
Since we are working with such a tight ingredient list, quality and preparation matter for these oreo balls. First off, the cream cheese: always use the full block, full-fat version. Skip the low-fat stuff! The higher fat content is necessary to properly emulsify with the cookie fats and provide the structure needed for a creamy, non-crumbly center.
If you want to switch things up without changing the fundamental texture, try the peanut butter variation mentioned in the notes! Just swap out half the cream cheese (4 ounces) for 4 ounces of softened peanut butter. It creates these amazing Peanut Butter Oreo Balls that are ridiculously good. Just remember to make sure that peanut butter is also soft!
Regarding the chocolate coating, I slightly prefer melting wafers over standard chocolate chips. Wafers are designed to melt smoothly and set up with a nice, clean snap. If you use chips, you might need to add a tiny bit of vegetable shortening or coconut oil when melting them to prevent them from seizing up and becoming too thick for easy dipping. Keep it smooth, people; we are aiming for those perfectly coated Chocolate Covered Oreo Truffles!
Step-by-Step Instructions for Easy Oreo Balls
Alright, let’s get down to the fun part! This is where the magic happens for our No Bake Oreo Balls Recipe. It’s just a few simple steps, but trust me when I say, don’t rush the chilling part. Chilling is the secret weapon that keeps these treats from turning into a gooey mess when you try to dip them. We are making something that looks beautiful enough for a party, but it takes virtually no oven time!
First, toss your entire package of Oreos—yes, the whole thing, filling and all—into a food processor. Pulse until you have fine, uniform crumbs. If you don’t have a processor, a Ziploc bag and a rolling pin work in a pinch, but it takes more elbow grease! Once crumbly, dump those dark bits into a bowl and bring in the softened cream cheese. Mix it all up. You can use a sturdy spoon, but honestly, nothing beats getting your hands in there to make sure everything is totally combined into one thick, dark dough.
Once it’s mixed, roll them out! Aim for balls about one inch wide. You should get right around 30 pieces. Place them on that parchment-lined baking sheet. Now, the non-negotiable step: into the fridge they go for a minimum of 30 minutes. This firms them up so they hold their shape!
For more quick kitchen wins that save you time, take a look at our easy breakfast recipes—we believe in saving time anywhere we can!
Preparing the Oreo Dough Base for Creamy Oreo Desserts
When you’re crushing those cookies, you really need those fine crumbs. If you have bigger chunks, they won’t absorb the cream cheese properly, and you’ll end up with pockets of dry cookie instead of that smooth, Creamy Oreo Dessert center we adore. Make sure that cream cheese is truly soft—if it fights you when you try to mix it, pop it back in the microwave for about 10 seconds.
When combining the crumbs and cheese, use a wooden spoon at first, but don’t hesitate to switch to your clean hands for the final mix. You need to feel when the dough is homogenous. It shouldn’t stick aggressively to your hands anymore; it should feel cohesive, almost like playdough. Stop mixing as soon as it comes together; overmixing after the cheese is incorporated isn’t helpful here.
Chilling and Coating Your Oreo Balls Perfectly
The chilling step is what separates amateur truffles from professional-looking Chocolate Covered Oreo Truffles. If you skip it, the warm dough will melt your chocolate instantly, making the coating thin and patchy. So, 30 solid minutes in the cold is required.
When your chocolate is melted—and please watch it carefully if using the microwave, stirring every 30 seconds so it doesn’t burn—dip your *cold* balls in quickly. Use a fork to fish them out, tapping the side of the bowl to let the excess chocolate drizzle off. If it drips too long, the coating gets too thick. Right after they come out, if you want a fancy look, dust on your sprinkles or some extra crushed cookie crumbs immediately before the chocolate sets. If you wait even 30 seconds too long, the decoration will just fall right off!
Making Holiday Oreo Desserts: Festive Oreo Balls Variations
While the classic dark chocolate coating is amazing for anytime snacking, these oreo balls truly shine when you dress them up for the holidays. Think about it—they are the perfect addition to any cookie exchange tray or when you need a fun, fast homemade candy recipe that still feels special. People go wild for these, especially when they look festive!
One of my favorite ways to make these into gorgeous Christmas Truffles is by switching up the coating entirely. Instead of semi-sweet, grab those white chocolate wafers. White chocolate takes on color beautifully, which opens up so many fun doors for party dessert ideas.
To get that vibrant Grinch or general holiday look mentioned in the notes—you simply melt the white chocolate. After it’s smooth, you stir in just a drop or two of gel food coloring. Gel works much better than the liquid kind, trust me, or you risk thinning out your chocolate too much. I love making a batch of bright green ones and another batch in red. If you’re making them for a party, you can even dip half the ball in white and the other half in green for a fun color block effect!

While the coating is still wet, that’s your window to adorn them. Crushed cookies look nice, but for holiday flair, you can’t beat festive sprinkles. You can find tons of great ideas for turning these into Christmas Oreo Balls online, but once you have the white chocolate base, the decorating is entirely up to you.
This versatility is why these are such strong party dessert ideas year-round, too. Swap the green for bright pink and blue for a baby shower, or keep them dark for a sophisticated dinner party touch. They are just that good!
Tips for Success When Making Homemade Candy Recipes
Even though these are just oreo balls—simple, right?—there are a few little tricks I rely on in the kitchen to elevate them from ‘good’ to ‘wait, how did you make these so perfect?’ When you’re making Homemade Candy Recipes, little details make a huge difference in texture and presentation. These need to look professional, even if they took you zero baking time.
Here are my top tips for turning out perfect truffles every single time:
- Keep Your Hands Cool While Rolling: Oreos and cream cheese are soft, and the warmth from your hands melts that fats right away, leading to sticky, soft balls that are impossible to dip cleanly. If your hands start getting warm, just pause and run them under cold water for about 15 seconds. Dry them thoroughly, and get back to rolling. This simple shock of cold keeps the dough workable.
- Uniformity is Key for Even Coating: You want your Easy Cookie Balls to look like they came from the same mold, especially if you’re planning on gifts! Use a small cookie scoop—about a teaspoon or a tablespoon size, depending on how big you like them. This method ensures every single ball is the exact same size, meaning they all take the same amount of time to chill and the same amount of chocolate to coat. It takes the guesswork out of the final look.
- The Cookie Crumble Trick: If you want those extra bits of cookie on the outside (which I highly recommend for texture!), don’t toss out all the crumbs after you process them. Before you roll the balls, reserve about a half cup of the finely ground crumbs. After you dip the truffle in the melted chocolate, immediately drop it into that bowl of reserved crumbs and give it a gentle roll. This secures that chocolate coating and adds a wonderful textural contrast.
For more ideas on making crowd-pleasing treats that everyone loves, you should check out my guide to incredible party dips—because every great spread needs a great dip!
If you want to see another expert’s take on perfecting the rolling and chilling process, Sally has some great insights over on her site: Sally’s Oreo Ball Guide.
Storage and Keeping Your Oreo Balls Fresh
So, you’ve made a million of these incredible oreo balls—or at least, enough to actually share—and now you need to know how to keep that creamy, fudgy center perfect? Dealing with Easy Cookie Balls is simple, but they do have a sweet spot for texture. Since these are no bake and relying on the cream cheese for structure, they don’t behave exactly like shelf-stable candies.
My rule? Keep them cold. These truffles absolutely must hang out in the refrigerator. They stay fantastic when stored in an airtight container. You can easily keep them good for up to two weeks this way. If you stack them, make sure you place a small piece of wax paper or parchment paper between the layers. You don’t want them sticking together, especially if the chocolate coating is thick.
Now, can you freeze them? Yes, and this is a lifesaver around the holidays! For freezing, I actually like dipping them *after* they come out of the deep freeze. You can roll the dough balls and freeze them solid on a tray. Once frozen solid, transfer those little icy orbs to a freezer bag. They’ll last for about three months this way.
When you want to serve them, just take out what you need and let them thaw in the fridge for a few hours. Or, if you’re in a real rush, pull them out, let them sit on the counter for 15 minutes while you melt your chocolate, and then dip them straight from semi-frozen. They firm up so beautifully after dipping and chilling when taken from frozen!
Frequently Asked Questions About Easy Oreo Truffles
I know you want to make these Easy Oreo Truffles perfect on the first try, so here are the questions I get asked most often in my comments section when people are putting together their No Bake Oreo Balls Recipe. Let’s clear up any doubts so you can jump right into the mixing!
Can I use different kinds of cookies instead of the original Oreos?
That’s a great question! While the classic Oreo is what gives you that signature fudgy center and deep chocolate flavor, you certainly can experiment. For a different twist, try using chocolate graham crackers or even vanilla sandwich cookies if you prefer a lighter taste. Just remember that the filling is important! If you use cookies without filling, you might need to add an extra tablespoon of cream cheese or a splash of milk just to make sure the mixture comes together properly into a rollable dough.
Do I absolutely have to use cream cheese for these Oreo Balls?
Yes, for this specific recipe, you really do need the cream cheese. It’s the primary binding agent that makes these not just cookie crumbs, but the amazing Creamy Oreo Desserts we are aiming for. If you skip it, your mixture will just be dry crumbs unless you substitute it with something similar in texture and fat content, like softened mascarpone cheese. If someone in your house can’t have dairy, you might need to look for a completely different Homemade Candy Recipe that calls for something like nut butter or date paste as the binder instead.
What happens if I skip the chilling step before I dip them?
Oh, don’t do it! If you skip chilling, you’re asking for trouble, and I’d hate for your beautiful batch of Easy Cookie Balls to turn into soup right when they hit the hot chocolate. The mixture needs that 30 minutes in the fridge to chill and solidify. If it’s too soft when you dip it, the cream cheese center melts into the chocolate, you get uneven coatings, and your fork ends up dragging the whole truffle around the bowl. Chilling is your insurance policy for great-looking treats!
Do these need to stay refrigerated after they are coated?
They are definitely better cold, especially since they contain cream cheese. While the chocolate coating does offer some protection, leaving them out at room temperature all day—say, at an outdoor summer party—can make them get squishy and soft again. Once the chocolate is set, I always recommend storing them in an airtight container in the fridge. They taste crisper and firmer that way. You can definitely find more details on keeping them just right here: my guide to keeping treats moist often covers refrigeration tips!
Are these considered Oreo Cheesecake Balls or Oreo Truffles?
That’s a common point of confusion! Because they rely heavily on cream cheese, many people rightly call them Oreo Cheesecake Balls or Easy Oreo Truffles. Technically, a true truffle is usually a ganache center, but for home bakers, these fit perfectly into the truffle category because they are densely rolled centers coated in chocolate. The cheesecake flavor comes subtly from the cream cheese, making “Oreo Cheesecake Balls” a very accurate nickname!
For a slightly more detailed explanation on how to store these long-term, check out this great resource: Easy No Bake Oreo Balls storage tips.
Estimated Nutritional Breakdown for Oreo Balls
I always like to give you guys a rough idea of what’s in these incredible little treats, though remember, these figures are based strictly on the basic 3-ingredient recipe and serving proportions listed. When everything is divided into about 30 small balls, you get something rich, but surprisingly reasonable for a decadent dessert!
For one standard serving—that’s one little ball—you’re looking at roughly 150 calories, with about 9 grams of total fat, 16 grams of carbohydrates, and 2 grams of protein. They clock in around 15 grams of sugar which is mostly balanced by the fat content, keeping that sweetness in check. These are high-impact treats, so one is usually plenty!
Share Your Symphony of Oreo Balls
That’s it! You now have the knowledge, the technique, and the recipe blueprint to create what I consider one of the greatest, easiest No Bake Chocolate Treats ever invented. I truly hope these oreo balls bring a little bit of that simple, harmonious joy into your kitchen.
When you make this recipe, please, please come back and leave me a rating at the bottom of the page—five stars if you loved them! And if you tried a variation, like the peanut butter swap or the festive sprinkles, tell me all about it in the comments below. Hearing about your successes helps build trust for everyone else looking for reliable, delicious recipes like this one. Need to get in touch directly? You can always reach me here: Contact Delish Symphony. Happy composing!
PrintClassic 3-Ingredient No-Bake Oreo Balls

Make these rich, fudgy Oreo Balls using only three simple ingredients. This no-bake recipe creates perfect chocolate truffles that are ideal for parties or quick holiday desserts.
- Prep Time: 20 min
- Cook Time: 10 min
- Total Time: 65 min
- Yield: 30 servings 1x
- Category: Dessert
- Method: No-Bake
- Cuisine: American
- Diet: Vegetarian
Ingredients
- 1 package (14.3 oz) Oreo cookies
- 8 oz cream cheese, softened
- 16 oz semi-sweet chocolate melting wafers or chips
Instructions
- Place the entire package of Oreo cookies, cream, and filling included, into a food processor. Pulse until you have fine crumbs.
- Transfer the crumbs to a medium bowl. Add the softened cream cheese. Mix with a sturdy spoon or your hands until the mixture is completely combined and forms a thick dough.
- Roll the dough into small balls, about 1 inch in diameter. You should get approximately 30 balls. Place the rolled balls on a baking sheet lined with parchment paper.
- Chill the Oreo balls in the refrigerator for at least 30 minutes. This step is necessary to firm them up before dipping.
- Melt the chocolate according to package directions. You can use a double boiler or microwave in 30-second intervals, stirring well between each interval.
- Dip each chilled Oreo ball into the melted chocolate, ensuring it is fully coated. Use a fork to lift the ball out, allowing excess chocolate to drip back into the bowl.
- Place the coated ball back onto the parchment-lined baking sheet. If you want, immediately sprinkle with crushed Oreos or festive sprinkles while the chocolate is still wet.
- Allow the chocolate coating to set completely at room temperature, or speed up the process by chilling them for another 15 minutes.
Notes
- For a variation, substitute 4 ounces of the cream cheese with 4 ounces of softened peanut butter for Peanut Butter Oreo Balls.
- If you want a festive look, use white chocolate wafers for dipping and add green food coloring before dipping for Christmas Oreo Balls.
- If the dough feels too soft to roll, chill it for an additional 15 minutes before forming the balls.
Nutrition
- Serving Size: 1 ball
- Calories: 150
- Sugar: 15
- Sodium: 75
- Fat: 9
- Saturated Fat: 5
- Unsaturated Fat: 4
- Trans Fat: 0
- Carbohydrates: 16
- Fiber: 0
- Protein: 2
- Cholesterol: 10