
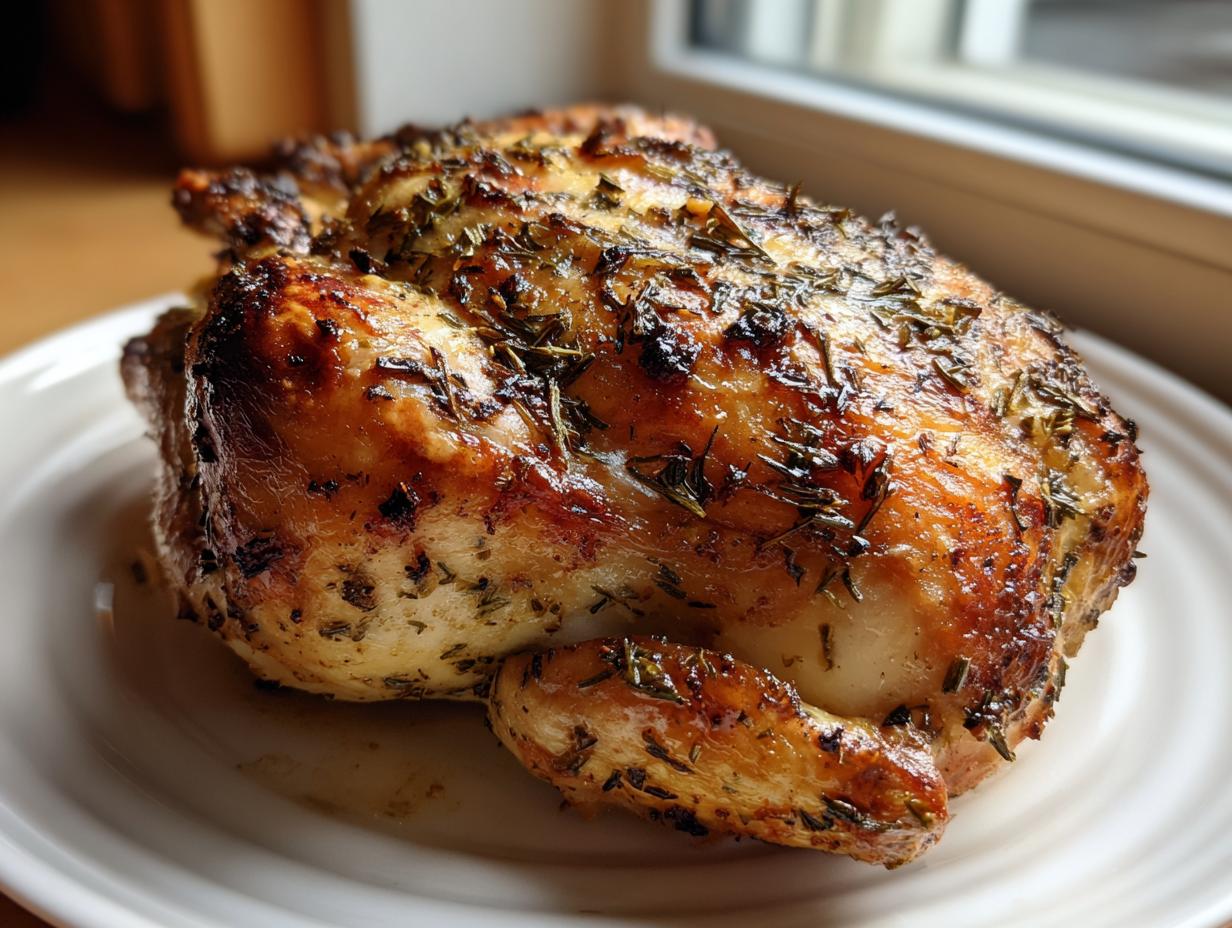
You know that smell, right? That incredible aroma that completely takes over the house when you have a perfect roasted chicken in the oven? It smells like comfort, Sunday afternoon, and maybe a little bit fancy all at once. I get it—cooking a whole bird can look daunting, but trust me, it doesn’t have to be a huge production. I’m Mike, and after years of balancing IT work with my real love for cooking, I developed this method. It’s my absolute no-fuss way for any busy American cook to master the art of the bird. This is The Ultimate Easy Garlic Herb Butter Roasted Chicken; it’s engineered to give you meat that just melts and skin that shatters beautifully every single time. Forget complicated steps; we’re just focusing on harmony here. If you’re looking for dependable weeknight dinner recipes that feel special, this is it.
- Why This Garlic Herb Butter Roasted Chicken is Your New Favorite
- Ingredients for the Ultimate Easy Roasted Chicken Recipe
- The Best Roast Chicken Technique: Step-by-Step Instructions
- Ingredient Notes and Simple Substitutions for Your Roasted Chicken
- Variations: Lemon Garlic Roasted Chicken and More
- Serving Suggestions for Your Simple Whole Chicken Dinner
- Storage and Reheating Instructions for Leftover Roasted Chicken
- Frequently Asked Questions About Oven Roasted Chicken
- Nutritional Estimates for This Comfort Food Chicken Dinner
- Share Your Perfect Roasted Chicken Experience
- Nutritional Estimates for This Comfort Food Chicken Dinner
- Share Your Perfect Roasted Chicken Experience
Why This Garlic Herb Butter Roasted Chicken is Your New Favorite
When I developed this style of roasted chicken, I had three main goals. I wanted it to fit into a busy schedule, yes, but I also wanted the results to look exactly like something you’d see on a magazine cover. This recipe delivers reliability in spades.
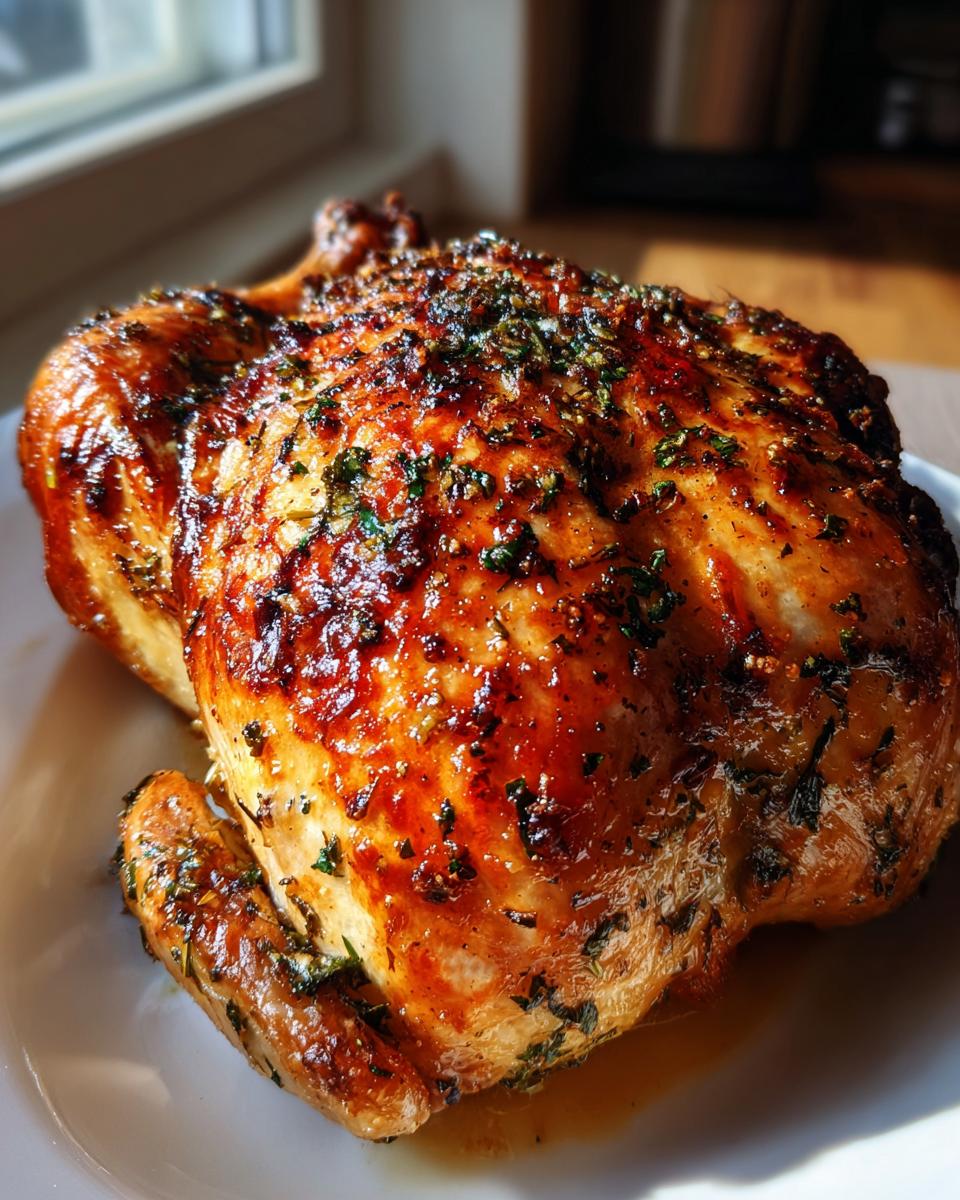
- Seriously Crispy Skin: We use a two-temperature roast and make sure the skin is totally dry first. That means golden-brown, crackling perfection that shatters when you cut it.
- Juicy Pink Meat Guaranteed: By applying the herb butter *under* the skin directly onto the breast meat, we self-baste from the inside out. No dry chicken breasts here, I promise you!
- Minimal Fuss, Maximum Flavor: Seriously, it’s just butter, garlic, and herbs. There aren’t twenty ingredients to track down. It’s pure, honest flavor payoff for very little work.
- It’s Weeknight Ready: While it takes about an hour and a half total, most of that is hands-off oven time. You can easily fit this into your schedule after work.
- It’s a Fail Proof Roast Chicken: I literally test variations of this recipe constantly, and every time, the results are great. If you follow the temperature guide, you can’t mess this up. It’s built for home cooks!
- Simple Pan Drippings: We capture all that incredible buttery/herby chicken goodness right in the roasting pan for the easiest sauce you’ll ever make.
If you’ve ever been nervous about roasting a whole chicken, consider this your confidence booster. This is comfort food elevated just enough to feel special.
Ingredients for the Ultimate Easy Roasted Chicken Recipe
When I talk about approachable ingredients, I mean it. You probably have almost everything needed for this roasted chicken in your pantry right now. There’s no need to hit up specialty stores for this recipe; we’re sticking to the core lineup that makes the magic happen.
For a standard 4 to 5-pound whole chicken, here is what you’ll need by your side before you even think about turning on the oven.
For the Main Event: The Chicken
- 1 whole chicken (aim for about 4 to 5 lbs). Don’t go too huge—a smaller bird cooks more evenly, especially if you are new to roasting!
For the Garlic Herb Butter Mixture
This butter is everything; it’s our secret weapon for flavor penetration. Make sure your butter is truly softened, not melted. You should be able to press deeply into it easily with your finger.
- 4 tablespoons unsalted butter, softened
- 2 cloves garlic, minced incredibly fine (don’t leave big chunks in there!)
- 1 teaspoon dried rosemary
- 1 teaspoon dried thyme
- 1 teaspoon dried oregano
- 1 teaspoon salt (and maybe a tiny pinch more if your chicken is large)
- 1/2 teaspoon black pepper
For Flavoring the Cavity
Stuffing the cavity might seem old-fashioned, but these elements steam gently inside the bird, keeping the meat moist and fragrant while it cooks. It’s a simple trick!
- 1 lemon, halved
- 1 small onion, quartered (optional, but I highly recommend it for depth)
That’s the whole shopping list, folks! See? Simple, accessible, and ready to turn into the best roast chicken you’ve ever made.
The Best Roast Chicken Technique: Step-by-Step Instructions
This is where the magic happens! I’m walking you through my absolute favorite Best Roast Chicken Technique, the one that guarantees you walk away with a spectacularly Crispy Skin Whole Chicken that is juicy right down to the breast meat. It all comes down to these specific actions. Don’t rush the prep, and don’t skip the rest—that’s how we turn an ordinary bird into something heavenly. If you ever want to make a creamy dip for leftovers (which you will!), be sure to check out my recipe for garlic aioli later.
Preparation: Drying and Herb Butter Creation
First things first: we need dryness. Grab a stack of paper towels and pat that chicken all over, inside and out. I mean really pat it! Any surface moisture turns into steam, and steam means soggy skin. Remember that saying? Dry bird equals crispy skin! While you’re doing that, mix up your herb butter. Combine that soft butter with the minced garlic and all your dried herbs and seasoning. If you only have fresh herbs on hand, go ahead and use those—just chop them up really fine. This butter needs to be smooth so it spreads easily in the next step.
Applying the Butter and Stuffing the Roasted Chicken
Now for the fun part! Gently slide your fingers between the skin and the breast meat, just being careful not to tear the skin. Take about half of your prepared herb butter and rub it directly onto the meat under the skin. That’s our insurance policy for juicy breasts! Rub the remaining butter all over the outside of the bird. After all that beautiful coating, stuff those lemon halves and onion quarters right into the cavity. They steam in there, adding lovely flavor from the inside out.
Roasting Times and Temperature Adjustments
This two-step temperature method is essential for a Juicy Roast Chicken. Preheat your oven way up high to 425 degrees Fahrenheit. Put the chicken in and roast it hard for just 15 minutes. That initial blast is what gets the skin looking fantastic. After those 15 minutes, immediately knock the temperature way down to 375 degrees Fahrenheit. Now, let it roast for another 60 or 75 minutes. You must check the temperature—use a meat thermometer right in the thickest part of the thigh, away from the bone. When it hits 165°F, pull it out. That’s how we ensure safety without overcooking!
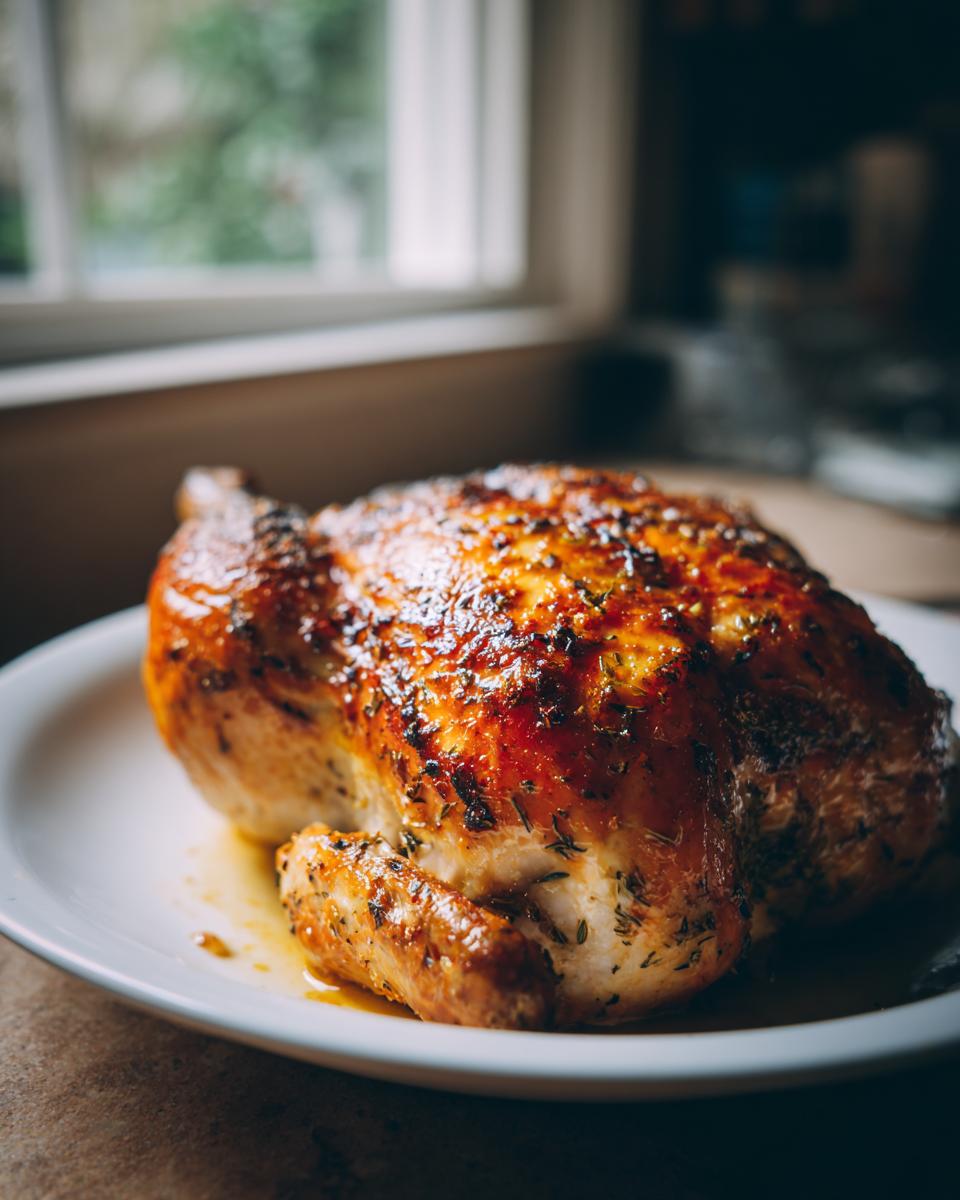
Resting the Classic Roast Chicken
I know you’re starving, and the chicken looks perfect sitting there, golden brown, calling your name. But you absolutely must wait! Take that beautiful Classic Roast Chicken out, tent it loosely with foil, and walk away. Set a timer for 15 minutes. Why? Because those juices that are bubbling near the surface need time to redistribute throughout the meat. If you carve it right away, all that moisture runs onto the cutting board. Resting is the final, non-negotiable step to guarantee your meat stays incredibly juicy.
Ingredient Notes and Simple Substitutions for Your Roasted Chicken
One thing I learned early on is that while this recipe for roasted chicken is pretty specific, you don’t have to be a slave to the exact seasoning blend if you’re missing one thing. Remember, we focus on flavorful harmony here. This builds your confidence in the kitchen because you learn the *why* behind the ingredients, which is way more helpful than just following a list!
Let’s talk substitutions for the butter and herbs. I’ve always used unsalted butter because it lets me control the salt level precisely, but if you only have salted butter on hand? Go for it! Just cut back that teaspoon of salt in the recipe by about half. If you ever make a batch of homemade applesauce to serve alongside your chicken, you’ll find the salt balance in the butter blend works perfectly with that sweetness, too.
Butter Choices
Margarine? Please, no. We need the flavor and fat content of real butter for that beautiful skin texture. However, if you want to mix things up a little, you could use half butter and half ghee. Ghee has a higher smoke point, which is excellent, but you’ll lose that milky richness that the herbs cling onto so well.
The Herbs Matter
If you don’t have the rosemary/thyme/oregano blend listed, feel free to use a prepared Italian seasoning blend. It works beautifully! Just use about 2 or 3 teaspoons of the blend instead of measuring out the individual dried herbs. If you happen to have fresh herbs from the garden, it’s amazing! Use twice the amount as listed in the dried measurements, and chop them finely so they mix into the butter easily.
Don’t Waste Those Drippings! Making a Quick Pan Sauce
Remember all that seasoned butter and chicken juice sitting in the bottom of your roasting pan after you pull the bird out? That is liquid gold! Don’t just pour it down the sink. While the chicken is resting, put the roasting pan right on the stovetop over medium heat. If there’s a ton of fat, carefully spoon out some, leaving about 2 tablespoons. Whisk in about 1 tablespoon of flour to make a quick roux—it will bubble up instantly. Slowly whisk in 1 cup of chicken broth (or even water in a pinch) until smooth. Let it bubble for a minute or two until it thickens just slightly. Taste it, add a little salt and pepper if you need it, and boom—you have a delicious, instant gravy to pour over your perfectly cooked comfort food chicken dinner!
Variations: Lemon Garlic Roasted Chicken and More
Okay, so you’ve mastered the classic garlic and herb combination, and maybe your kitchen smells amazing right now. That’s fantastic! But part of the joy of perfecting a base recipe like this roasted chicken is knowing you can tweak it based on what looks good at the store or what mood you’re in. Since we nailed the fat ratio and the dual-temperature roasting technique, we can swap out the flavor profile without worrying if the skin will crisp up or if the meat stays juicy. It’s the real beauty of having a solid foundation!
We love sticking close to the Italian flavors already in there, but sometimes you want something brighter or bolder. Don’t overthink this part; keep it simple, like we always do here at Delish Symphony. If you’re looking for other bright poultry ideas after you carve this bird up, my bruschetta chicken recipe is a great lighter option for summer!
Swapping Herbs for Italian Seasoning
If you are running low on rosemary or just prefer a stronger oregano punch, this swap is seamless. Just use about 2 to 3 teaspoons of your favorite store-bought Italian seasoning blend in place of the rosemary, thyme, and oregano listed in the butter. That’s it! It’s so easy to pivot to an Italian seasoned roast chicken in about thirty seconds of prep time. The blend still relies on those classic savory notes that pair perfectly with butter.
Going for the Lemon Garlic Roasted Chicken Vibe
This variation is probably my favorite when I want something zesty and bright—maybe for a spring dinner or when I’m serving lighter sides. To make this delicious Lemon Garlic Roasted Chicken, you do two things differently than the classic recipe. First, take the zest from one whole lemon and toss that zest right into your herb butter mixture along with the garlic. Second, instead of using onions in the cavity, use the entire lemon, poked several times with a fork, right inside.
The lemon zest melts into the butter and coats the outside, giving you this amazing citrus aroma when roasting. The lemon inside steams and infuses the meat, making it taste incredibly fresh. You absolutely need to try this version!
Adding Color and Warmth with Spices
Sometimes you just want that deep, golden-orange color on your bird for presentation—maybe for a holiday dinner. This is the easiest way to add visual pop! Simply add about 1 teaspoon of sweet paprika (not smoked, unless you want that flavor) to your herb butter mixture when you are stirring everything together. Paprika dissolves right into the fat and gives the skin an absolutely stunning, deep color as it roasts. It adds zero heat but tons of visual appeal, setting up your simple whole chicken dinner for rave reviews.
Remember, the key in all these variations is that the core roasting technique stays exactly the same. You control the flavor; the oven controls the cooking!
Serving Suggestions for Your Simple Whole Chicken Dinner
So, you’ve pulled this gorgeous, golden-brown, shatteringly crisp roasted chicken out of the oven, and it’s currently resting beautifully under foil. Fantastic achievement! Now, we need to talk about what to serve alongside it, because a perfect centerpiece demands equally wonderful (but equally easy) companions. My philosophy here is that if the chicken requires an hour and a half of cooking time, the sides should really be quick or something you can prep ahead of time so you aren’t juggling everything at the last minute. We want a simple whole chicken dinner, remember?
Since our chicken is rich with garlic and herbs, we want sides that are either creamy to absorb those amazing pan drippings or bright and fresh to cut through the richness. I always aim for one comforting starch and one green vegetable. It just balances the plate so nicely!
Starch: Creamy and Comforting
If you want to go straight for the ultimate comfort food experience, you cannot beat potatoes. But we aren’t boiling them for ages! If you’re feeling ambitious while the chicken is roasting at the lower temperature, whip up a batch of garlic parmesan mashed potatoes. The garlic flavor ties in perfectly with the butter we used inside the bird, and the creaminess is just begging for those salty pan drippings spooned over the top.
However, if you need something truly faster, skip the mashing! Roast some small potatoes right in the roasting pan alongside the chicken for the last 30 minutes. Toss them in the pan drippings before you carve. Simple, flavorful, and fewer dishes!
Vegetable Side: Quick and Bright
To balance out all that incredible butter and savory herb flavor, you need something green that offers a nice little snap. You have a couple of great options that take mere minutes to prepare:
- Green Beans: Quickly blanch some fresh green beans in boiling water for about three minutes until they turn bright green and are slightly tender. Right before serving, sauté them quickly in a tiny bit of olive oil with a sprinkle of salt and maybe a tiny squeeze of lemon juice (if you didn’t use lemon inside the chicken).
- Roasted Asparagus: If you have an extra roasting tray leftover from making the potatoes, toss your asparagus spears with olive oil, salt, and pepper. Roast them for just 10–12 minutes at 400°F. They get beautifully tender-crisp and are done right around the time your chicken is done resting.
Don’t Forget the Drippings!
I mentioned this before, but I have to say it again: those pan drippings are the key to elevating this simple meal into a masterpiece. Whether or not you make a quick pan gravy during the resting period (and you should!), make sure you drizzle some of that seasoned, melted butter and chicken juices right over the carved slices of meat. It’s the easiest sauce in the world, and it proves that even the simplest oven roasted chicken can taste legendary just because you paid attention to the delicious stuff left behind in the pan!
Storage and Reheating Instructions for Leftover Roasted Chicken
Okay, let’s talk about the glorious problem of having leftover roasted chicken! If you made this recipe correctly—meaning you didn’t devour the whole thing right there on the spot—you’re in luck. Leftover roast chicken is honestly one of the best things ever, super handy because it makes lunches or easy second night dinners. But we have to treat those leftovers right so they don’t turn into dry, sad little pieces of poultry!
My advice is always to get that chicken tucked away as soon as you finish carving it. Don’t just leave the platter sitting out on the counter while you clean up—the sooner it gets cold, the better it stays fresh. This is key for any leftover protein to prevent sneaky summer bacteria!
Refrigerator Storage: Keeping it Juicy
When storing your juicy roast chicken, you want an airtight environment. You can store the carved meat in a good quality, sealed container. However, my real trick for keeping the meat nice and tender is this: If there’s still some bone meat left on the carcass, toss the carcass into the sealed container with the carved pieces! Those bones release a tiny bit of moisture and fat into the air space, helping to keep the meat from drying out while it chills.
In the fridge, this chicken should keep great for a solid three to four days. If you want it to last longer than that—say, up to five days—I suggest shredding the white and dark meat separately, putting just the meat into a container, and drizzling a tablespoon or two of chicken broth right over the top before sealing it. Trust me, that tiny bit of liquid makes a difference.
Reheating Like a Pro (No Dry Chicken Allowed!)
This is the critical part. If you just throw leftover chicken into the microwave, you’re guaranteed to end up with rubbery meat. We are aiming for moist, tender reheat every time! The method totally depends on how much chicken you’re reheating.
For large portions or whole pieces: The oven is your best friend here. Preheat your oven super low, around 300 degrees Fahrenheit. Place the chicken pieces (or carved portions) in a baking dish. Pour just a few spoonfuls of the reserved pan drippings—or even some simple store-bought chicken broth—over the meat. Cover the dish tightly with aluminum foil. This traps the steam and slowly warms the meat without blasting it with dry heat. It takes longer, maybe 15–20 minutes, but the results are vastly superior.
For smaller servings or shredding (like for tacos or soup): A quick blast in the microwave is fine, but you must remember the broth trick! Put your portion of chicken (or shredded meat) in a microwave-safe bowl. Add about a teaspoon of broth or water per serving. Cover the bowl loosely with a damp paper towel. The steam created keeps the surface from hardening. It only takes about 60–90 seconds, giving you warm, flavorful chicken ready for whatever comes next.
This effort takes five extra minutes, but it turns those delicious leftovers into a fantastic second meal instead of a disappointment!
Frequently Asked Questions About Oven Roasted Chicken
When people ask me for quick tips on making a great oven roasted chicken, it usually circles back to the core worries: “Will it be dry?” or “How do I get that beautiful color?” I totally get those concerns! I’ve tried every trick in the book over the years, and I’ve narrowed down the most important things to remember so you can stop worrying and start enjoying that incredible aroma. Think of these little FAQs as your troubleshooting guide for perfect results, every time you make my garlic herb roast chicken.
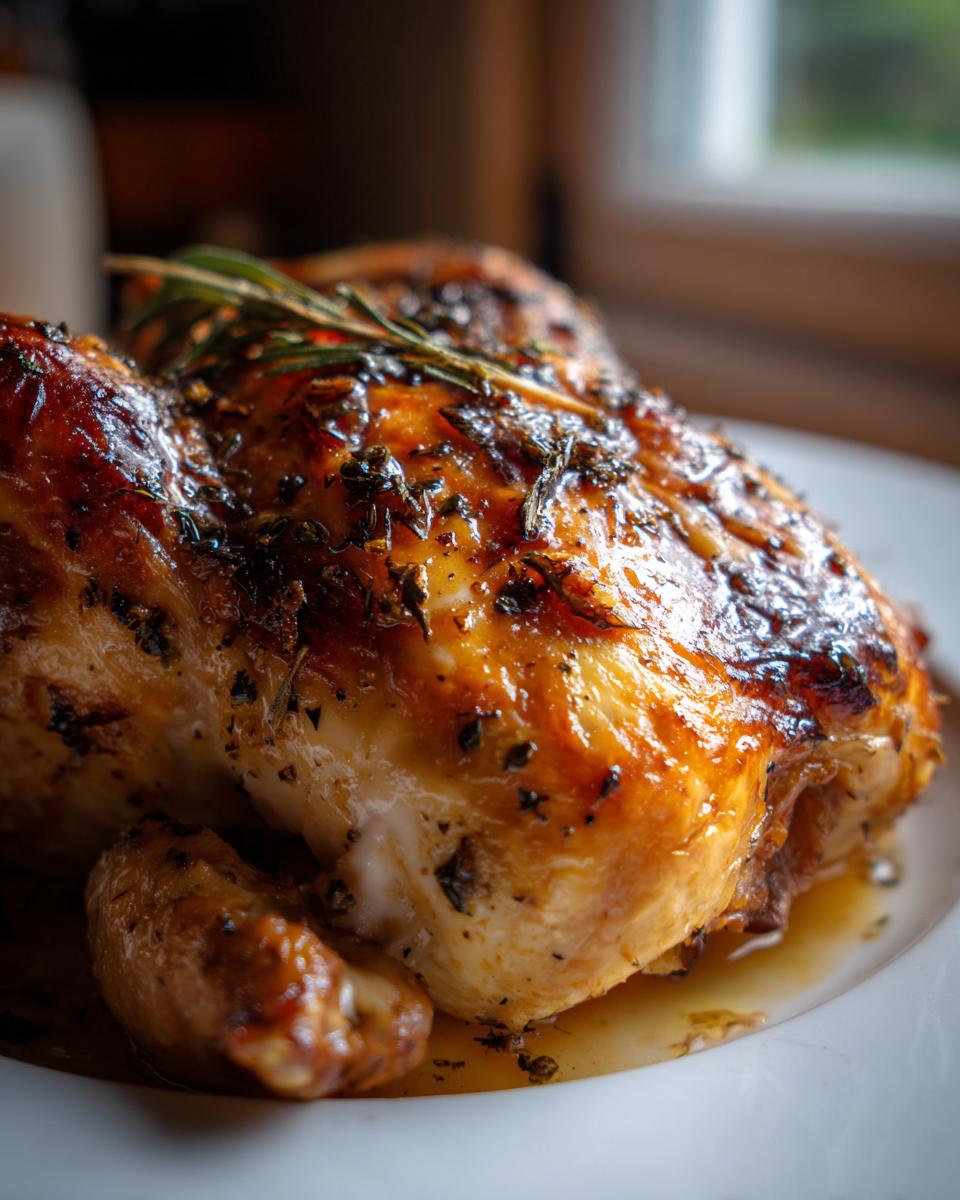
How do I ensure my roasted chicken skin gets crispy without drying out the meat?
Oh, the eternal struggle! The secret is a two-pronged approach, honestly. First, you MUST pat the skin bone-dry with paper towels before you do anything else. Seriously, moisture is the enemy of crispiness. Second, remember the dual temperature trick we use in the recipe: that initial blast at 425°F wakes up the skin and starts rendering the fat beautifully. Then we drop it down to 375°F to gently cook the inside. If you really want to go above and beyond, my note mentioned chilling the seasoned, dried chicken uncovered in the fridge overnight—that’s like a dry brine and it dehydrates the skin even more. A dry bird plus a hot oven start equals the best crispy skin whole chicken you can imagine!
Can I make this Garlic Herb Roast Chicken ahead of time?
Yes and no, depending on what you mean! Making the herb butter ahead of time? Absolutely! Mix it up, put it in a little covered container, and keep it in the fridge. It’ll firm up, so just let it sit on the counter for 20 minutes before you need to massage it under the skin. That saves you crucial minutes when dinner time rolls around!
Now, putting the *entire chicken* together ahead of time is great too, but I don’t recommend stuffing it with the lemon and onion until an hour or so before roasting. If you’re trying to get a jump start, I’d season the bird, put the herb butter under the skin, and let it sit in the pan uncovered in the fridge overnight. When you’re ready to cook, just pull it out while the oven heats up—no need to bring it quite to temperature—and proceed with the main recipe steps. That’s my go-to “prep ahead” strategy for a simple whole chicken dinner.
What is the best internal temperature for a perfectly cooked roasted chicken?
This is super important for safety and texture! The USDA says chicken is safe to eat when it reaches 165°F. That’s the number you are aiming for. When I test my birds, I usually look for the thigh temperature (the thickest part, remember?) to hit about 162°F or 163°F *before* I pull it out of the oven. Why slightly under? Because of carryover cooking! As the chicken rests outside of the oven (which you must do!), the internal temperature will creep up those last few degrees, settling right at that perfect, juicy 165°F. This little bit of patience ensures your roasted chicken stays moist and never gets overcooked.
If you’re looking for ways to use up any extra delicious chicken meat you happen to have (not that you will!), check out my recipe for garlic chicken and rice!
Nutritional Estimates for This Comfort Food Chicken Dinner
I always like to give a general heads-up on what you’re eating, even though tracking every single gram isn’t really my style here at Delish Symphony. We focus on simple, whole ingredients, which naturally leads to great nutrition without a ton of fuss. Remember, these numbers are estimates based on a 4-5lb bird yielding four roughly equal servings, with the fat distributed naturally, so take them as a guideline for this wonderful comfort food chicken dinner.

- Serving Size: 1/4 chicken (about 6 oz of meat and skin per serving, estimating average partitioning)
- Calories: Around 450 calories
- Protein: A hearty 45 grams!
- Total Fat: Approximately 28 grams (Yes, that includes the delicious skin fat!)
- Saturated Fat: About 10 grams (Mostly from the butter we used for flavor)
- Carbohydrates & Sugar: Zero! This recipe is naturally carb-free.
- Sodium: Around 450 mg (This depends heavily on the salt you use!)
See? You get a meal packed with stellar protein and flavor from the butter and herbs, without any hidden sugars. It’s wholesome food made the easy way.
Share Your Perfect Roasted Chicken Experience
Now it’s your turn! I’ve shared all my secrets for achieving that perfect juicy roast chicken with shatteringly crisp skin. You have the two-temperature technique, the under-the-skin butter application, and crucial resting time down pat. I sincerely hope this becomes your go-to recipe for everything from a Tuesday night treat to a bigger Sunday dinner!
When you give this Ultimate Easy Garlic Herb Butter Roasted Chicken a try, please leave me a rating below. Did you stick with the classic herbs, or did you try the lemon zest variation? I absolutely love hearing how you made it your own. Every comment and review helps the next home cook feel confident taking on a whole bird! If you need something sweet to round out the meal, maybe try my easy moist banana bread later in the week!
Nutritional Estimates for This Comfort Food Chicken Dinner
I always like to give a general heads-up on what you’re eating, even though tracking every single gram isn’t really my style here at Delish Symphony. We focus on simple, whole ingredients, which naturally leads to great nutrition without a ton of fuss. Remember, these numbers are estimates based on a 4-5lb bird yielding four roughly equal servings, with the fat distributed naturally, so take them as a guideline for this wonderful comfort food chicken dinner.
- Serving Size: 1/4 chicken (about 6 oz of meat and skin per serving, estimating average partitioning)
- Calories: Around 450 calories
- Protein: A hearty 45 grams!
- Total Fat: Approximately 28 grams (Yes, that includes the delicious skin fat!)
- Saturated Fat: About 10 grams (Mostly from the butter we used for flavor)
- Carbohydrates & Sugar: Zero! This recipe is naturally carb-free.
- Sodium: Around 450 mg (This depends heavily on the salt you use!)
See? You get a meal packed with stellar protein and flavor from the butter and herbs, without any hidden sugars. It’s wholesome food made the easy way.
Share Your Perfect Roasted Chicken Experience
Now it’s your turn! I’ve shared all my secrets for achieving that perfect juicy roast chicken with shatteringly crisp skin. You have the two-temperature technique, the under-the-skin butter application, and crucial resting time down pat. I sincerely hope this becomes your go-to recipe for everything from a Tuesday night treat to a bigger Sunday dinner!
When you give this Ultimate Easy Garlic Herb Butter Roasted Chicken a try, please leave me a rating below. Did you stick with the classic herbs, or did you try the lemon zest variation? I absolutely love hearing how you made it your own. Every comment and review helps the next home cook feel confident taking on a whole bird! If you need something sweet to round out the meal, maybe try my easy moist banana bread later in the week!
PrintThe Ultimate Easy Garlic Herb Butter Roasted Chicken

Make a whole roasted chicken that is juicy inside with crispy skin using simple garlic and herb butter. This fail-proof recipe is perfect for a weeknight dinner or Sunday meal.
- Prep Time: 15 min
- Cook Time: 75 min
- Total Time: 90 min
- Yield: 4 servings 1x
- Category: Dinner
- Method: Oven Roasting
- Cuisine: American
- Diet: Low Fat
Ingredients
- 1 whole chicken (about 4–5 lbs)
- 4 tablespoons unsalted butter, softened
- 2 cloves garlic, minced
- 1 teaspoon dried rosemary
- 1 teaspoon dried thyme
- 1 teaspoon dried oregano
- 1 teaspoon salt
- 1/2 teaspoon black pepper
- 1 lemon, halved
- 1 small onion, quartered (optional)
Instructions
- Preheat your oven to 425 degrees Fahrenheit. Remove the giblets from the chicken cavity and pat the entire chicken dry, inside and out, with paper towels. This step helps achieve crispy skin.
- In a small bowl, combine the softened butter, minced garlic, rosemary, thyme, oregano, salt, and pepper. Mix until you have a uniform herb butter.
- Gently loosen the skin over the chicken breasts and thighs. Rub about half of the herb butter mixture directly onto the meat under the skin. Rub the remaining butter mixture all over the outside of the chicken.
- Place the lemon halves and onion quarters inside the chicken cavity.
- Place the chicken in a roasting pan or a large oven-safe skillet.
- Roast the chicken at 425 degrees Fahrenheit for 15 minutes to start crisping the skin.
- Reduce the oven temperature to 375 degrees Fahrenheit. Continue roasting for about 60 to 75 minutes more, or until a meat thermometer inserted into the thickest part of the thigh registers 165 degrees Fahrenheit. Baste with pan juices halfway through the lower temperature roasting if desired.
- Remove the chicken from the oven. Tent loosely with foil and let it rest for 15 minutes before carving. This resting period keeps the meat juicy.
Notes
- For extra crispy skin, you can place the chicken uncovered in the refrigerator for several hours or overnight before roasting.
- If you do not have fresh herbs, dried herbs work well in the butter mixture.
- Use the pan drippings to make a simple gravy or serve them over the carved chicken.
Nutrition
- Serving Size: 1/4 chicken
- Calories: 450
- Sugar: 0
- Sodium: 450
- Fat: 28
- Saturated Fat: 10
- Unsaturated Fat: 18
- Trans Fat: 0
- Carbohydrates: 0
- Fiber: 0
- Protein: 45
- Cholesterol: 150