

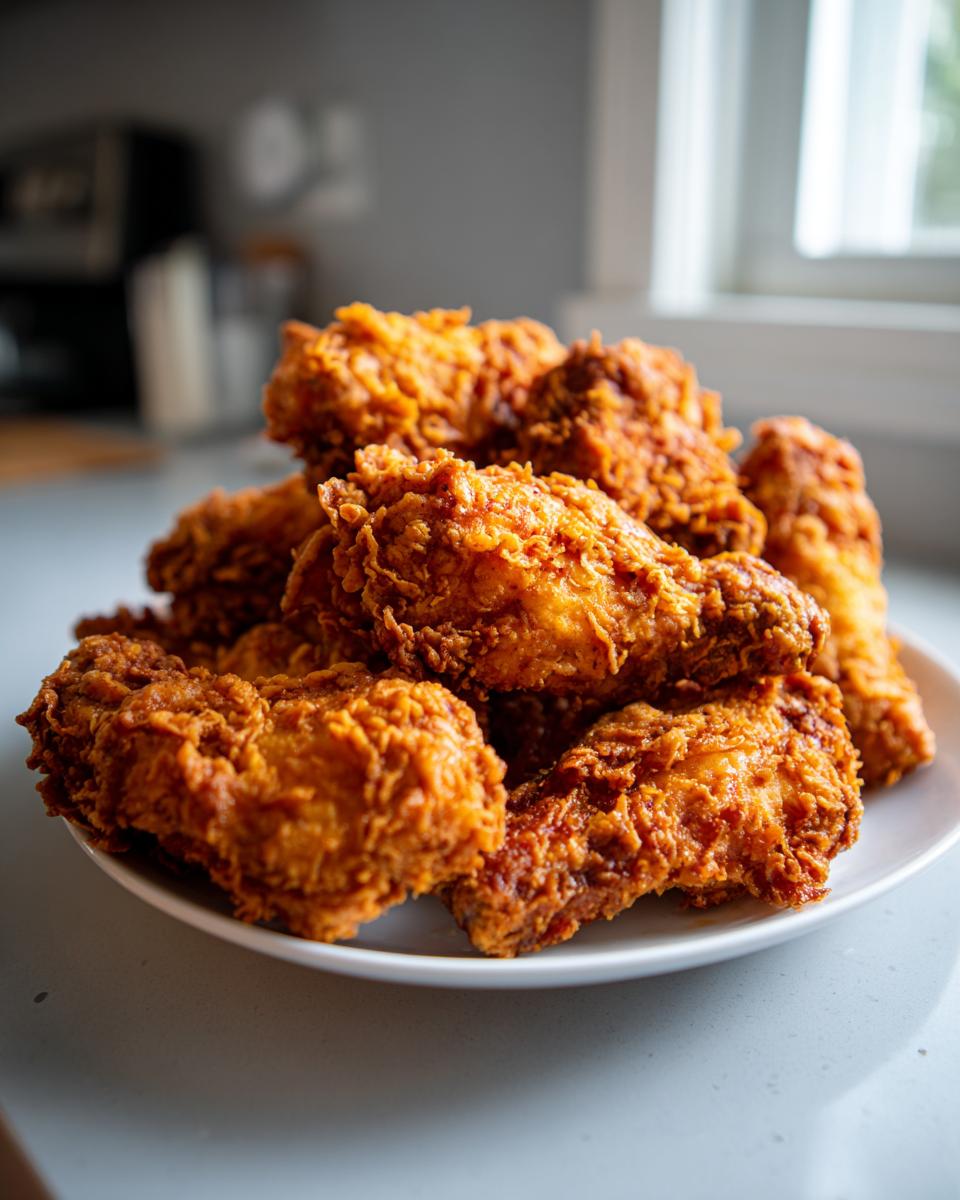
Alright, listen up, because this is the only Fried Chicken Wings recipe you’ll ever need. Seriously! We aren’t messing around with soggy skin here. If you’ve ever dreamed of getting that shatteringly crisp, restaurant-style crunch on the outside while keeping the meat unbelievably juicy inside? Stop dreaming and start marinating. That’s the promise here—the ultimate crispy exterior and juicy interior thanks to our buttermilk base and, don’t skip this part, the double-fry technique. Michael Carter poured hours into testing every single variable here in the Delish Symphony kitchen to make sure this American classic is absolutely foolproof for you, even on your busiest Wing Night Dinner Ideas.
- Why This Southern Buttermilk Fried Chicken Wings Recipe Delivers Crunch
- Gathering Ingredients for Your Perfectly Crispy Chicken Wings
- Step-by-Step Instructions for Restaurant Style Fried Chicken Wings
- Tips for Success Making Homemade Fried Wings
- Game Day Chicken Wings Serving Suggestions
- Storage and Reheating Instructions for fried chicken wings
- Frequently Asked Questions About Crispy Fried Chicken Wings
- Estimated Nutritional Data for Flavorful Fried Wings
- Share Your Perfect fried chicken wings Experience
Why This Southern Buttermilk Fried Chicken Wings Recipe Delivers Crunch
Okay, so why are these the Fried Chicken Wings you’ll want to make every single week? It really comes down to chemistry, folks! We’re fighting the good fight against sogginess, and we have two heavy hitters on our team. First, the buttermilk soak isn’t just for flavor, oh no. That lactic acid gets in there and breaks down the muscle fibers, giving you incredibly Juicy Fried Wings Recipe meat that stays tender even around the bone. Then we hit it with the double-fry. I’ve seen so many people try to fry wings once and call it a day—that’s how you get pale, oily wings!
Mike’s personal rule? Make sure those wings come out of the fridge, sit for about 30 minutes after coating, and *then* hit the oil. That resting period is crucial so the coating doesn’t just instantly dissolve. When you’re ready to serve, you might want a side of my easy homemade honey BBQ sauce—it pairs perfectly with these crunchy wings!
The Secret to Tender Inside Crispy Outside Wings
The magic is in the marriage of opposites. The buttermilk works overtime to tenderize, ensuring that Tender Inside Crispy Outside Wings texture we crave. But for that crunch? You absolutely need cornstarch in that flour dredge. It’s a game-changer! Cornstarch absorbs less water while frying, which means your coating stays thin, light, and incredibly crunchy instead of turning into a dense batter shell. When you press that flour onto the wet wing, the cornstarch helps lock in the surface moisture and creates those craggy, beautiful little pieces that catch the flavor. It’s an easy addition that brings serious payoff for making the Best Fried Chicken Wings.
Gathering Ingredients for Your Perfectly Crispy Chicken Wings
You know I’m all about accessible ingredients, right? No weird specialty spices needed here; we’re using what you can grab at any standard grocery store to make these the most Flavorful Fried Wings you’ve ever had. But you do need to be precise when measuring the dredge, because that coating is everything! We are splitting our haul into two main groups: the wet bath that tenderizes, and the dry mix that makes the magic happen. Trust me on the cornstarch—it is non-negotiable for that crispy shell!
Buttermilk Marinade Components
- 3 lbs chicken wings (make sure you get a mix of flats and drumettes if you can!)
- 2 cups buttermilk (full fat is always my go-to here)
- 1 tablespoon hot sauce (Use your favorite! A dash of Frank’s or Crystal works beautifully because the vinegar helps tenderize.)
- 1 tablespoon salt
- 1 teaspoon black pepper
- 1 teaspoon paprika
Dredge Mix for Crunchy Chicken Wings
This is the secret sauce for your Crunchy Chicken Wings layer. Make sure you whisk these components really well so you don’t get pockets of pure spice or just flour!
- 2 cups all-purpose flour
- 1/2 cup cornstarch (The MVP for crispiness!)
- 1 tablespoon salt
- 1 tablespoon black pepper
- 1 tablespoon garlic powder
- 1 tablespoon onion powder
- 1 teaspoon cayenne pepper (Only if you like a little kick!)
Step-by-Step Instructions for Restaurant Style Fried Chicken Wings
This method requires a little patience, especially the waiting part, but I promise you, every minute spent waiting is a minute closer to the best Deep Fried Chicken Wings you’ve ever made. Seriously, don’t rush the marination or that resting time after dredging! We need to build those layers of texture through time, not speed. Make sure your oil is ready to go before you start the final coating stage; that precise timing is everything when we get to the heat, something I still check constantly when making these for fried chicken wings.
Marinating the Wings for Ultimate Flavor
First things first: we marinate! You want maximum flavor bomb action here, so follow Step 1 exactly. Whisk together the buttermilk, hot sauce, and all those seasonings in a big bowl. Toss those 3 pounds of wings right in there until they are swimming. Cover that bowl and honestly, try to leave them alone for at least four hours. If you can swing it, stick them in the fridge overnight—that’s when the buttermilk really gets into the meat and makes them that super Juicy Fried Wings Recipe perfection. Seriously, overnight is where the flavor compounds really marry.
The Critical Coating and Resting Process for fried chicken wings
Once marinated, take the wings out and just let the excess buttermilk drip off—don’t pat them dry! Then, you MUST dredge them well in that seasoned flour mix. This is where you need to act like you are trying to dry-pack mud onto a brick wall, okay? You have to press that flour coating onto every single surface to build up that satisfying crunch. After you’ve coated them all, lay them out on a wire rack for a solid 20 minutes. If you skip this rest, the coating gets instantly soft when it hits the oil, and we fought so hard for this armor—don’t let it dissolve!
Executing the Double Fry Chicken Wings Technique
This is how the pros do it, and it’s mandatory for that golden-brown, shatteringly crisp finish. First, heat your oil to 325°F (160°C). Fry your wings in small batches—don’t overcrowd the pot, please!—for about 8 to 10 minutes until they are light golden. Pull them out, let them rest briefly, and crank that temperature right up to 375°F (190°C). Now, drop them back in for just 2 to 4 more minutes. This second, hotter fry shocks the coating, forcing out any remaining oil and making them impossibly crisp. When they come out, place them straight on a clean wire rack to drain. If you want an amazing dipping sauce to go with these, you have to try my creamy garlic aioli while you wait!
Tips for Success Making Homemade Fried Wings
You’ve done the hard work with the marinade and the double-fry, but the absolute final hurdle to making these perfectly crispy chicken wings is managing your heat. If you want truly Easy Fried Wings Recipe results, you need a dedicated thermometer. Trust me on this one; guessing is how you end up with wings that are oily messes!
If your oil temperature dips too low—say, below 325°F—the coating starts to cook slowly, and instead of crisping, it just soaks up fat. That’s the number one cause of sogginess! Conversely, if you blast it past 380°F, the outside gets that beautiful dark brown color too fast, but the inside is still raw. We need steady, controlled heat, especially during that first fry, to cook the chicken through before we hit the high heat for crunch!
Oil Management for Golden Brown Fried Chicken Wings
Keep that thermometer handy! Think of your oil as the main character in the show. For the first fry, we’re aiming for that steady 325°F. It cooks the meat gently. Then, for the second round, we push the heat up to 375°F to dehydrate the crust and turn it perfectly Golden Brown Fried Chicken Wings. Don’t be tempted to throw ten wings in at once when you’re frying—it drops the oil temp instantly. Keep batches small so the oil recovers its heat fast. This control is how you get that thin, crackly crust that stays crisp even when you set them on the table for your game day chicken wings spread.
Game Day Chicken Wings Serving Suggestions
You’ve made the Best Fried Chicken Wings—now you need backups on the plate, right? Because these wings are rich, we want sides that cut through that richness a little. Forget heavy starches; for me, this is all about bright, cool elements. Think creamy slaw or maybe some crisp celery and carrot sticks for crunch contrast.
When it comes to dips, Ranch is classic, but if you want something that really wakes up the palate, you should try a homemade tangy dip. I often make a lighter sauce that contrasts the deep fried flavor beautifully, something like my tzatziki sauce. It’s cool, herby, and honestly divine next to that spicy buttermilk flavor. Keep them coming out hot, throw them on a big platter, and watch them disappear before kickoff!
Storage and Reheating Instructions for fried chicken wings
Okay, so you were smart enough to make too many of these crunchy beauties. Good job! Don’t just throw them in a sealed plastic container; that steam is the enemy and will instantly ruin that hard-earned crispiness. For storage, you need air circulation. Always cool down your leftover fried chicken wings completely on a wire rack, just like you did when they came out of the fryer. Once they are totally cool, stash them in a paper bag inside a larger Ziploc bag in the fridge.
When it comes time to bring them back to life, the microwave is strictly forbidden—it turns them into rubbery sadness. The oven on high heat (around 400°F) works great, but honestly, if you have an air fryer chicken wings recipe, that’s your best friend. Just a few minutes in the air fryer at a high temperature will bring that coating right back to life. They’ll taste almost as good as fresh—I promise!
Frequently Asked Questions About Crispy Fried Chicken Wings
Can I skip the buttermilk soak for these fried chicken wings?
Oh, I wouldn’t honestly recommend it, especially if you are aiming for that perfect, super Juicy Fried Wings Recipe result. You technically *can* skip the soak if you’re in a massive rush, but you’re missing out! The buttermilk is doing serious work tenderizing the connective tissue in the meat, making it tender, but it also acts as the perfect sticky adhesive for that fantastic flour dredge. If you just dredge wings straight out of water or plain chicken, the coating doesn’t grab as well, and you might find yourself with more straight flour falling off in the oil.
What is the best oil to use for Deep Fried Chicken Wings?
For Deep Fried Chicken Wings, we need oil that can handle high heat without smoking or breaking down halfway through the process. I stick to vegetable oil—it’s neutral in flavor and has a high smoke point, which is vital for that double-fry technique we use. Peanut oil is another fantastic choice if you have it, offering a slightly richer flavor. Canola oil is a totally good budget-friendly alternative, too! The most important thing, like I mentioned before, is cleanliness and temperature consistency. Don’t use old oil, and trust your thermometer!
Estimated Nutritional Data for Flavorful Fried Wings
Alright, now that we’ve figured out how to make these wings the crispiest, most flavorful things on the planet, we should probably talk about what they do to your daily count. Remember, these are indulgent, game-day superstars; they aren’t Tuesday night salad components! I ran the numbers based on the ingredients listed above, serving 4 people (about 4 wings each), but please keep in mind this is just an estimate.
Cooking methods, the exact amount of oil absorbed, and even the size of your wings can change things slightly, so take this as a general guide for planning your day, not as strict medical advice. We’re focusing on the joy here, but knowing the basics helps!
- Serving Size: 4 wings
- Calories: Around 450 calories
- Fat: Roughly 30g (That crispy coating takes up some room!)
- Protein: A solid 30g, thanks to all that chicken!
- Carbohydrates: About 15g, mostly from the flour dredge.
- Sodium: This one is higher, sitting near 650mg, because of the buttermilk brine, so maybe go light on the salt shaker later!
There you have it! A fantastic, crunchy treat that definitely anchors the meal. Enjoy them guilt-free because you made them perfectly at home, and you know exactly what (delicious) went into them!
Share Your Perfect fried chicken wings Experience
So, that’s it! You’ve mastered the marinade, you nailed the double-fry, and now you have the most amazing, crunchy, juicy fried chicken wings sitting on your cooling rack. Don’t just eat them in silence, folks! I genuinely want to know how they turned out for you. Did you get an amazing crust? Which hot sauce did you sneak into the brine? Tell me everything!
Head down to the comments section below and leave a rating, especially if you are shouting about how crispy they got. And if you snapped a photo of your beautiful Game Day Chicken Wings platter—because I know you did—tag me on social media! Seeing your success stories is seriously the best part of my job here at Delish Symphony. Now go eat those magnificent wings!
PrintSouthern Buttermilk Fried Chicken Wings for Ultimate Crispiness

Make restaurant-style fried chicken wings at home. This recipe focuses on using a buttermilk marinade and a specific dredging technique to achieve a deeply crunchy exterior while keeping the meat inside tender and juicy. Perfect for game day.
- Prep Time: 25 min
- Cook Time: 20 min
- Total Time: 4 hr 45 min
- Yield: 4 servings 1x
- Category: Dinner
- Method: Deep Frying
- Cuisine: American
- Diet: None
Ingredients
- 3 lbs chicken wings (flats and drumettes)
- 2 cups buttermilk
- 1 tablespoon hot sauce
- 1 tablespoon salt
- 1 teaspoon black pepper
- 1 teaspoon paprika
- For the Dredge:
- 2 cups all-purpose flour
- 1/2 cup cornstarch
- 1 tablespoon salt
- 1 tablespoon black pepper
- 1 tablespoon garlic powder
- 1 tablespoon onion powder
- 1 teaspoon cayenne pepper (optional)
- Vegetable oil, for frying
Instructions
- Combine the buttermilk, hot sauce, 1 tablespoon salt, 1 teaspoon pepper, and 1 teaspoon paprika in a large bowl. Add the chicken wings, toss to coat completely, cover, and refrigerate for at least 4 hours, or preferably overnight.
- In a separate shallow dish, whisk together the flour, cornstarch, 1 tablespoon salt, 1 tablespoon pepper, garlic powder, onion powder, and cayenne pepper for the dredge.
- Remove the wings from the buttermilk, letting excess drip off, but do not wipe them dry.
- Dredge each wing thoroughly in the flour mixture, pressing the coating onto the chicken firmly to create a thick layer. Place the coated wings on a wire rack set over a baking sheet. Let them rest at room temperature for 20 minutes; this helps the coating adhere during frying.
- Pour enough vegetable oil into a deep, heavy-bottomed pot or deep fryer to reach a depth of about 2 inches. Heat the oil to 325°F (160°C).
- Carefully place 4 to 6 wings into the hot oil, ensuring you do not overcrowd the pot. Fry for 8 to 10 minutes, turning occasionally, until the wings are light golden brown.
- Remove the wings and place them on a clean wire rack set over a baking sheet. Increase the oil temperature to 375°F (190°C). This is the double-fry step for extra crispiness.
- Return the partially cooked wings to the hotter oil in batches. Fry for an additional 2 to 4 minutes until they are deep golden brown and fully cooked through.
- Remove the finished wings and place them immediately on a clean wire rack to drain excess oil. Season lightly with a pinch of salt while hot. Serve immediately.
Notes
- For the juiciest results, ensure your buttermilk marinade time is adequate.
- Pressing the flour coating onto the wings firmly is key to achieving a thick, crunchy crust.
- Maintain your oil temperature strictly; if it drops too low, the wings will absorb oil and become soggy.
Nutrition
- Serving Size: 4 wings
- Calories: 450
- Sugar: 2
- Sodium: 650
- Fat: 30
- Saturated Fat: 8
- Unsaturated Fat: 22
- Trans Fat: 0
- Carbohydrates: 15
- Fiber: 1
- Protein: 30
- Cholesterol: 120