
When that first cool breeze hits and the scent of cinnamon starts floating around, you know it’s time to bake. For me, that means it’s time for pumpkin season, but forget pie—we’re going straight to the serious stuff: cheesecake! I spent way too many weekends trying to get this dessert right, ending up with sunken middles or cracked tops. It’s frustrating, especially when you want that perfect slice for Thanksgiving. Trust me, after trying everything, I finally cracked the code for the absolute best pumpkin cheesecake recipe. This version guarantees you get that unbelievably creamy pumpkin cheesecake texture every single time. It’s the recipe I perfected right here in my Midwest kitchen, blending classic technique with simple, accessible ingredients. If you head over to the About page, you can read more about my journey from coding screens to kitchen countertops!
- Why This Creamy Baked Pumpkin Cheesecake Recipe Works
- Ingredients for Your Best Pumpkin Cheesecake
- Step-by-Step Instructions for Baked Pumpkin Cheesecake
- Ingredient Notes and Substitutions for Pumpkin Cheesecake
- Tips for the Best Pumpkin Cheesecake Success
- Serving Suggestions for Your Autumn Dessert Ideas
- Storage and Make Ahead Cheesecake Planning
- Frequently Asked Questions About Pumpkin Cheesecake
- Estimated Nutritional Data for Pumpkin Cheesecake
- Share Your Thoughts on This Autumn Dessert
Why This Creamy Baked Pumpkin Cheesecake Recipe Works
Look, there are a million recipes out there, but this one is my go-to for Fall Desserts because it just works. We focus on making sure your final pumpkin cheesecake is rich, smooth, and absolutely stunning—no sadness allowed!
- It uses just the right amount of spice so the pumpkin flavor truly shines through.
- The secret ingredient is the water bath, which keeps everything super gentle while baking.
- It’s designed to be a Thanksgiving Cheesecake showstopper without forcing you into complicated steps.
Achieving the Perfect Creamy Pumpkin Cheesecake Texture
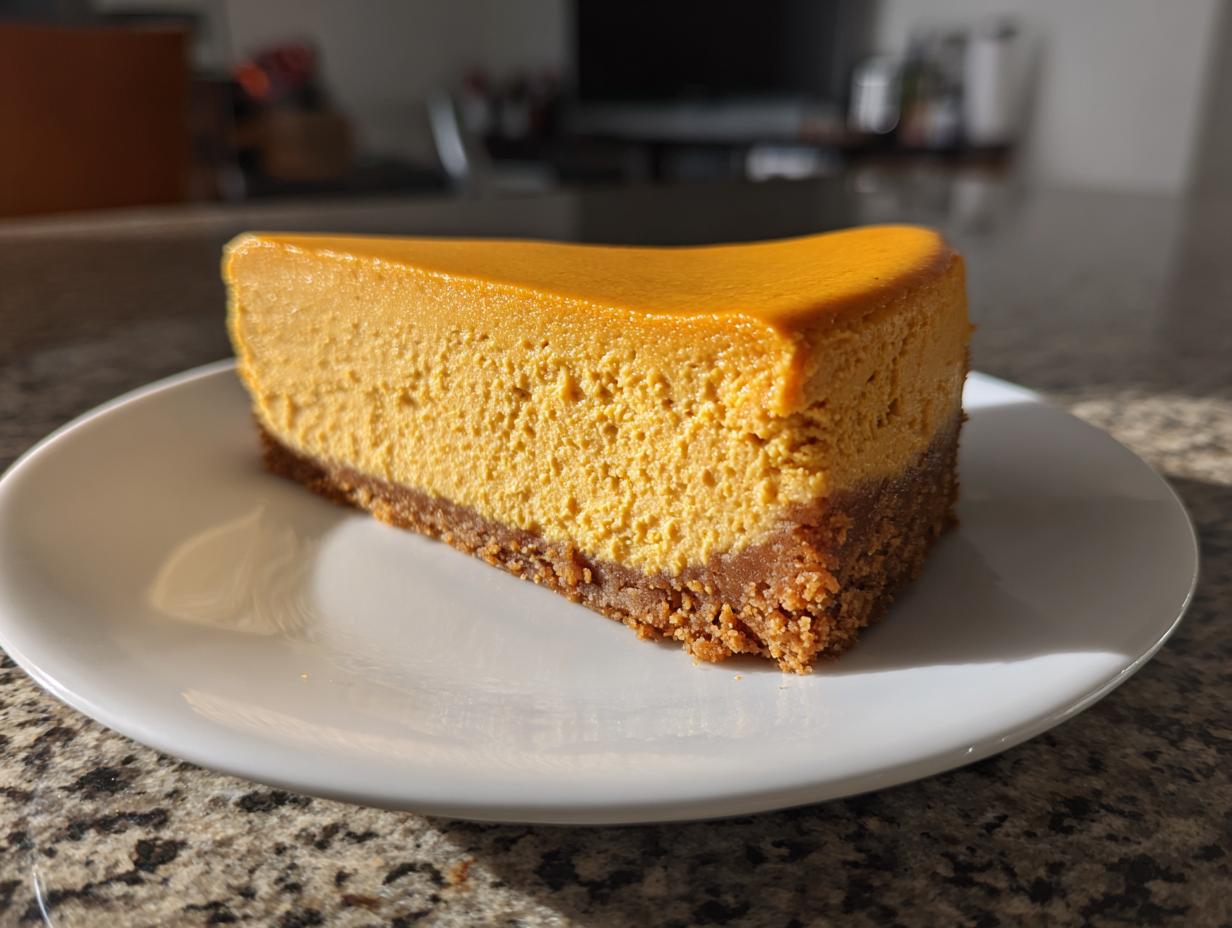
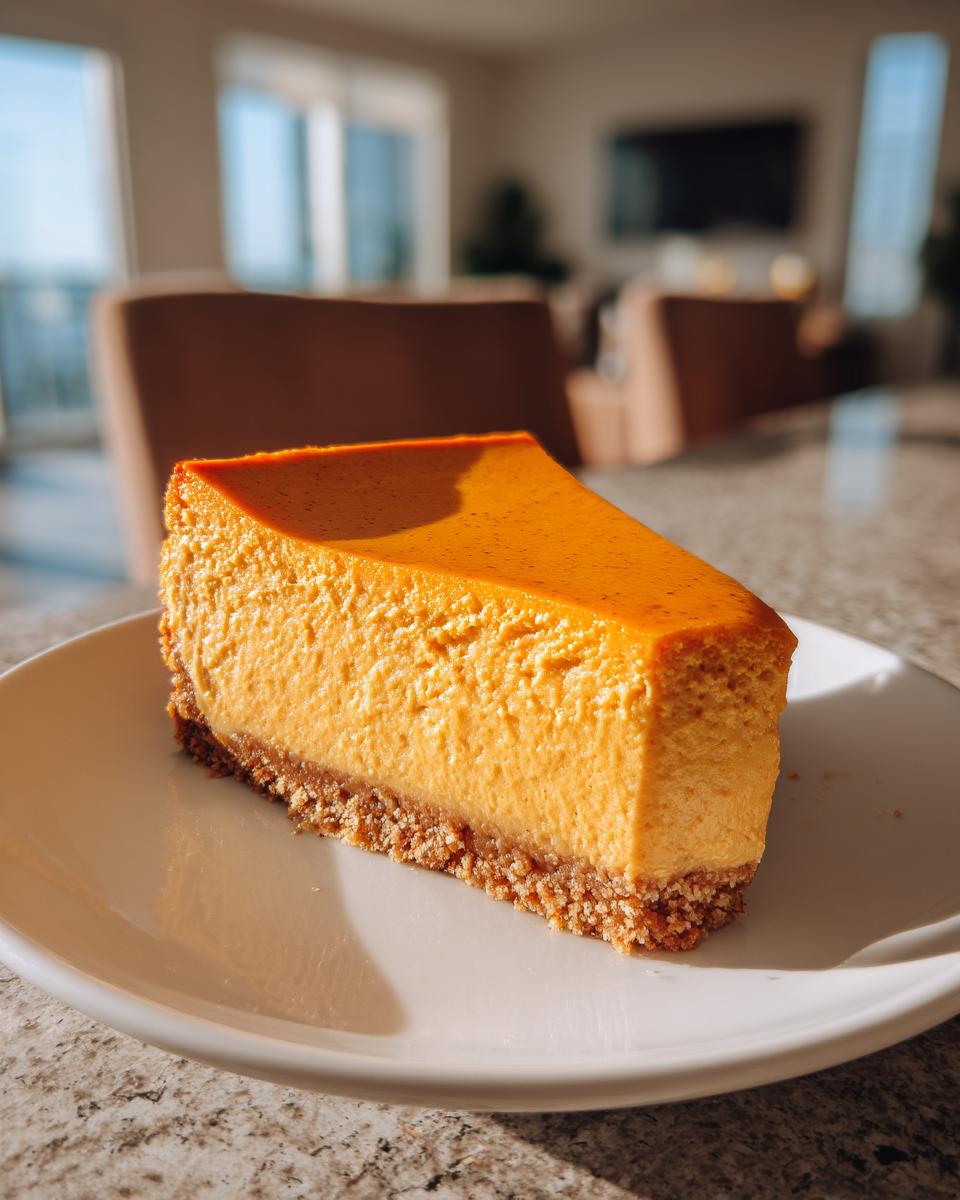
Okay, this is the most important part: you must use room-temperature cream cheese. If it’s cold at all, you’ll never mix it smooth, and that leads to lumps we just can’t have in a creamy pumpkin cheesecake. Also, please don’t skip the water bath! It surrounds the pan with gentle, steamy heat, which cooks the filling slowly and evenly. That’s what saves you from getting those awful cracks in your beautiful, smooth pumpkin cheesecake.
Ingredients for Your Best Pumpkin Cheesecake
Ingredients are the blueprint, right? If you mess up the measuring or the temperature here, the final pumpkin cheesecake won’t behave in the oven. These measurements are tried and true here in my kitchen. Don’t substitute the cream cheese temperature—it’s non-negotiable for that dreamy texture!
For the Graham Cracker Crust
This crust is crunchy, buttery, and just sweet enough to balance the rich filling. I like to press it hard against the bottom so it really holds together when slicing.
- 1 1/2 cups graham cracker crumbs
- 1/4 cup granulated sugar (for crust)
- 6 tablespoons unsalted butter, melted
Quick Tip on Spicing: If you want to lean into those warm spices right from the start, go ahead and mix 1 teaspoon of ground cinnamon right into this graham cracker mixture. It gives the base a little extra kick that pairs beautifully with the pumpkin cheesecake filling!
For the Creamy Pumpkin Cheesecake Filling
This is where the magic happens, folks. You need quality ingredients here, especially those eggs and, seriously, make sure that cream cheese is absolutely room temperature. It needs to be soft enough to mash easily with a spoon.
- 3 (8 ounce) packages cream cheese, softened
- 1 1/2 cups granulated sugar (for filling)
- 1 teaspoon vanilla extract
- 1 teaspoon ground cinnamon
- 1/2 teaspoon ground ginger
- 1/4 teaspoon ground nutmeg
- 1 (15 ounce) can pumpkin puree (Make sure it’s puree, not pie filling!)
- 3 large eggs
See those three large eggs? They help provide the structure we need for a sturdy but still incredibly creamy pumpkin cheesecake. Don’t try to sneak in fewer; we need those binding agents!
Step-by-Step Instructions for Baked Pumpkin Cheesecake
Alright, now that we have our heavenly ingredients lined up, it’s time to put them together! The key to a successful baked dessert, especially something as temperamental as cheesecake, is following the order and being gentle. If you’re aiming for that gorgeous, crack-free surface, pay close attention to the cooling phase—that’s where most homemade desserts go sideways. Get ready, because soon your kitchen will smell amazing!
Preparing the Crust and Pan Setup
First things first, we need to get heat-ready! Go ahead and crank that oven up to 325 degrees Fahrenheit. This recipe requires a 9-inch springform pan, and since we are using the water bath technique, protection is crucial. Take heavy-duty aluminum foil—and I mean heavy duty—and wrap the outside of that pan tightly. I usually do three layers, making sure the bottom and sides are fully sealed. If water sneaks in, we’re making soup, not a pumpkin cheesecake!
For the crust, mix those graham cracker crumbs, the little bit of crust sugar, and the melted butter. Press that mixture really firmly into the bottom of your wrapped pan. Then, pop it into the oven for 10 minutes just to set it. Let it cool down a bit while you whip up the filling.
Mixing the Pumpkin Cheesecake Filling
This mixing order is the whole secret sauce for preventing lumps. Grab your biggest mixing bowl. Start by beating that softened cream cheese together with the 1 1/2 cups of sugar until it’s completely smooth, like velvet. Then, mix in the flavor makers: vanilla, cinnamon, ginger, and nutmeg. Follow that up by beating in the pumpkin puree until everything looks uniformly orange.
Now, the eggs. This is non-negotiable: add them in one at a time. Mix on LOW speed *just* until the yolk disappears after each addition. If you overmix once the eggs are in, you beat too much air into the batter, and that air causes the cake to rise too fast and then collapse and crack later. We want slow and steady here for the smoothest pumpkin cheesecake possible!
Baking and Cooling the Pumpkin Cheesecake
Time for the water bath, which is your insurance policy for a perfect bake. Set your foil-wrapped springform pan inside a larger roasting pan. Now, very carefully, pour hot water into the roasting pan until it comes about halfway up the sides of your springform. This creates a humid environment!
Slide that whole setup into the oven. Bake it for about 60 to 75 minutes. You’ll know it’s done when the edges look set, but the very center, maybe a half-inch spot, still has a slight jiggle when you nudge the pan hard. Don’t bake it until it’s totally firm—we’re aiming for creamy!
The cooling process is almost as important as the baking! Turn off the oven, crack the door open just a tiny bit (a wooden spoon works wonders holding it ajar), and let the pumpkin cheesecake cool down inside the oven for one full hour. Then you can remove it from the water bath and let it finish cooling on a wire rack. Seriously, don’t rush this. After that, cover it up and chill it overnight—trust me, it earns its stripes chilling!
Since we’re talking great autumn baking, if you want another cozy recipe, check out my directions for my Classic Apple Crisp while you wait for this to set up!
Ingredient Notes and Substitutions for Pumpkin Cheesecake
When you’re making a showstopper like this pumpkin cheesecake, readers always have questions about what they can change up. I get it! Sometimes you’re missing that one specific thing, or maybe you just want to give it a fun twist for a party. I’ve tested a few swaps over the years, and while I stand by the original ingredients for that ultimate silkiness, these adjustments can definitely still get you to a fantastic, flavorful end result.
The biggest thing I always have to clarify is the difference between regular pumpkin puree and pumpkin pie filling from the can. Please, please, please use the puree! The pie filling already has all the sugar and spices mixed in, and adding that to our already spiced filling is just going to make things weird, mushy, and too sweet. We want control over our spice, right?
Crust Variations: Beyond Graham Crackers
While the graham cracker crust is classic and comforting, sometimes I get in the mood for something with more bite! These are great for leaning into other Autumn Dessert Ideas, too.
- Gingersnap Crust: If you love spice, swap those graham crackers out for crushed gingersnap cookies! The molasses flavor in the gingersnaps is unbelievable mixed with the pumpkin. It creates a beautiful, slightly spicy foundation for your creamy pumpkin cheesecake.
- Shortbread or Vanilla Wafers: These keep things lighter and sweeter, leaning more toward a standard vanilla cheesecake base while still holding up strong underneath.
No matter what you use for the crust, just make sure you press it down firmly. A loose crust makes a messy slice later! If you want to check out another great fall recipe I have, my Easy Pumpkin Bars Recipe uses a similar concept for the base! Everything comes together so nicely when you have a sturdy base for all that creamy goodness.
Tips for the Best Pumpkin Cheesecake Success
I’m going to let you in on a few hard-won secrets now. You followed the instructions, you used the water bath, but these extra steps are what separate a good pumpkin cheesecake from the *Best Pumpkin Cheesecake* that people rave about later. It’s all about managing temperature and expectation!
First rule: Patience with the chilling process. Yes, I know I told you to chill it for at least 6 hours, but honestly, overnight is the magic number. Cheesecake firms up significantly as it chills, and the flavors really meld together when they have time to mingle. Trying to cut into it too early means a sloppy mess, and nobody wants that for their Holiday Cheesecake centerpiece.
Another huge thing that always helps with texture—and this applies even after it’s baked—is to let the cooling cheesecake sit on the counter, still wrapped but out of the roasting pan, for about an hour before you even think about sliding it into the fridge. This allows the internal temperature to drop gradually before that final cold shock. It’s gentle transitions all the way for a creamy pumpkin cheesecake!
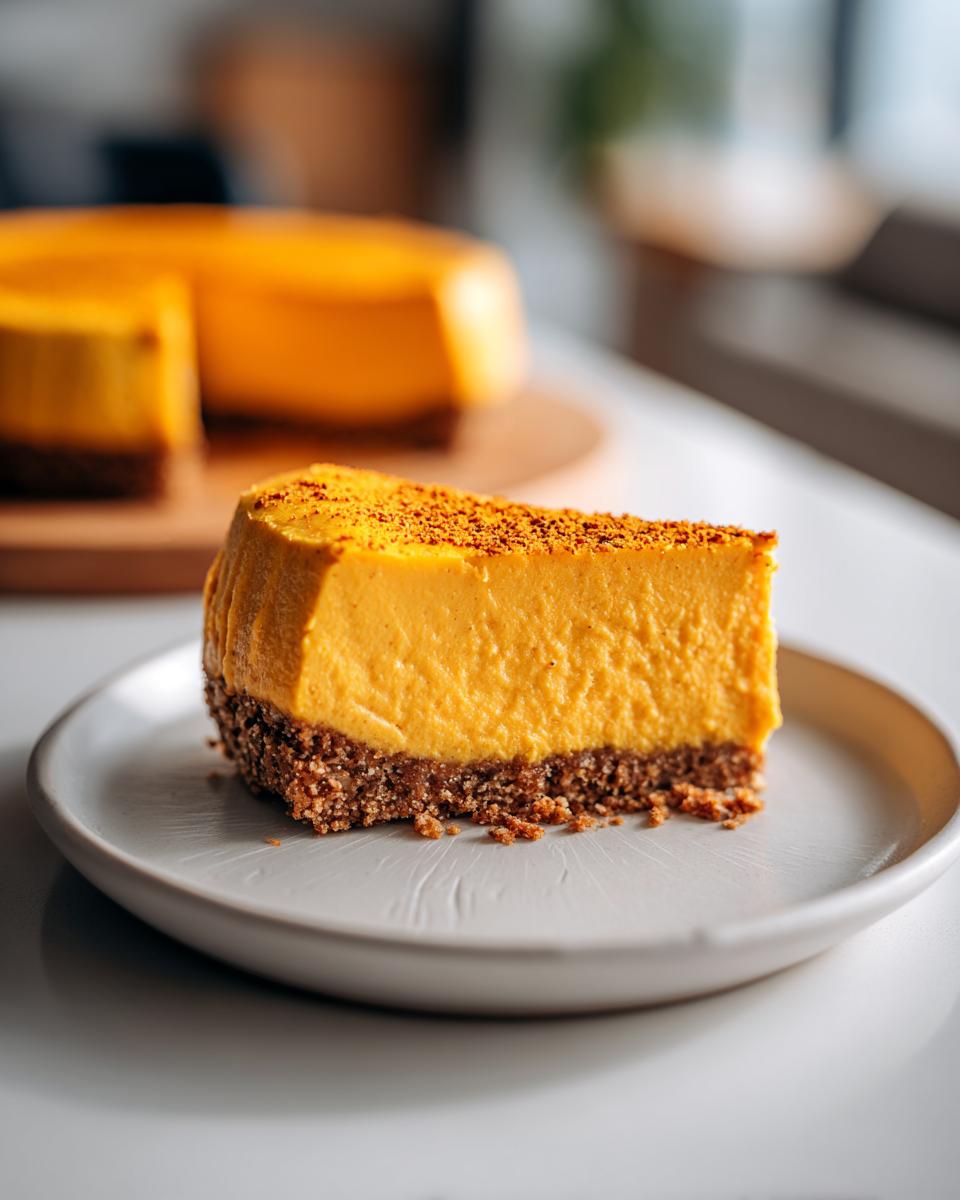
If you’re worried about presentation, try mixing just a tiny bit of extra cinnamon into some reserved topping (like whipped cream) to pipe little decorative swirls on top after it’s chilled. I have a fantastic recipe for Cinnamon Sugar Cream Cheese Rolls, and that frosting’s texture gives me ideas for quick, elegant toppings for this dessert, too. Small details go a long way in making a homemade pumpkin dessert look magazine-worthy without adding any actual stress!
Remember: room temperature cream cheese, low mixing speeds once eggs are added, and a very slow cooling ramp down. Do those three things, and you’ve got a winner!
Serving Suggestions for Your Autumn Dessert Ideas
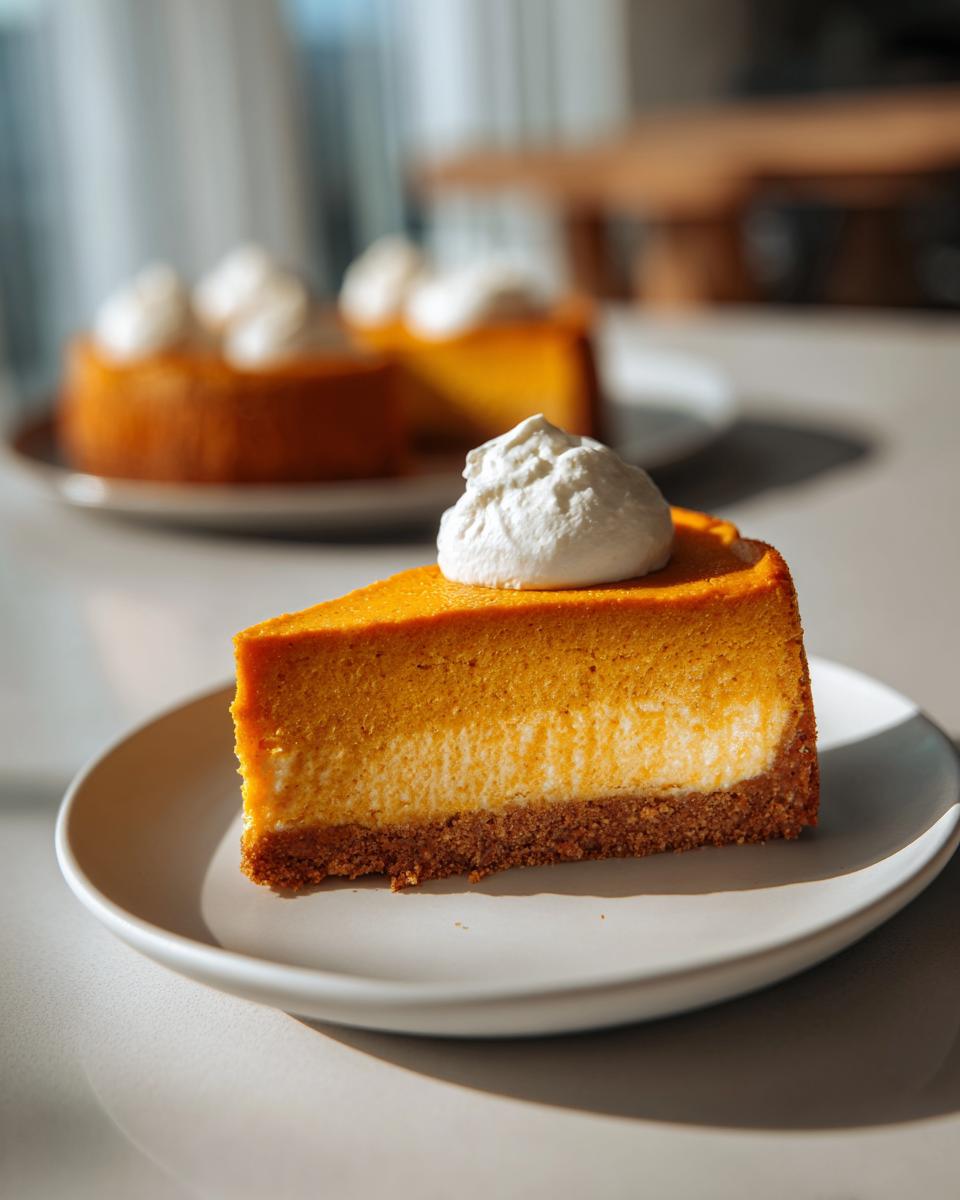
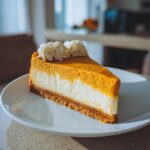
So, you’ve successfully navigated the baking, the water bath, and the overnight chilling process. Congratulations! Now it’s time for the fun part: dressing up this gorgeous, creamy pumpkin cheesecake so it’s ready for the table. This dessert is so rich and perfect on its own, but a little something extra on top really takes it to the next level, especially when you’re planning your menu for Autumn Dessert Ideas.
I always say that simplicity reigns supreme here. You don’t need complicated layers of frosting or tons of different textures fighting with the cheesecake. You just need things that complement the earthy pumpkin and cozy spices you worked so hard to balance. Think about what makes a great topping for a slice of classic pumpkin pie—that’s usually where you want to start!
My absolute favorite, go-to topping is just a simple dollop of freshly whipped cream. It doesn’t need to be overly sweetened; the slight tang cuts through the richness of the cream cheese perfectly. If you make it fresh, you can even dust that whipped cream lightly with a pinch of cinnamon or nutmeg right before serving. Instant elegance!
If you’re going for a truly decadent look—maybe for a big gathering like Thanksgiving—a drizzle of salted caramel sauce is heavenly. The saltiness with the sweet cream and the spices? Wow. It’s incredible and looks professionally done with almost zero effort. Just warm your caramel up slightly so it flows nicely off the spoon when you pour it over the slices.

For something slightly different, consider a chopped pecan topping, maybe lightly toasted. If you’re interested in other great holiday sides that pair well with this kind of hearty dessert, check out my notes on the Sweet Potato Casserole with Pecan Streusel—you can serve both for the ultimate fall feast! But truly, for the Thanksgiving Cheesecake standout, keep the topping focused, elegant, and delicious.
Storage and Make Ahead Cheesecake Planning
One of the best parts about making a fantastic pumpkin cheesecake is that it’s actually *better* when you make it ahead of time! Seriously, this dessert begs you to prepare it in advance. Because it has to chill for so long anyway—we talked about that overnight requirement, right?—you can totally bake this beauty a day or even two before your big fall dinner or celebration. It’s such a relief not having to juggle a massive dessert right before the turkey comes out!
Once it’s fully chilled and set in the fridge, keep it covered lightly with plastic wrap or foil. Just make sure the plastic doesn’t touch the top surface if you happen to have any topping on it, otherwise, you’ll mess up the pretty presentation. Stored correctly in the refrigerator, your pumpkin cheesecake will stay wonderfully moist and incredibly delicious for about 4 to 5 days. That makes it a lifesaver for Thanksgiving prep!
Now, let’s talk about freezing. Can you freeze it? Yes, absolutely! If you need to make this even further out, freezing is a great option for your make ahead cheesecake planning. You want to chill it completely first. Then, cover the cold cheesecake tightly with a couple of thick layers of plastic wrap, and then wrap it again in aluminum foil to prevent any freezer burn or strange freezer smells from migrating in.
It freezes really well for up to about two months. When you’re ready to eat it, just move the whole wrapped package from the freezer straight into the refrigerator and let it thaw slowly overnight. Don’t try to rush thawing it on the counter! I actually have a whole guide on my site about make ahead cheesecake tips if you want to look at different methods, but for this rich, spiced version, slow and steady thawing always wins.
The bottom line is this: prepping this dessert ahead of time lowers your stress and actually improves the texture of your creamy pumpkin cheesecake. It’s a win-win situation for all you busy home cooks!
Frequently Asked Questions About Pumpkin Cheesecake
It’s totally normal to have questions when you tackle a bakery-level dessert like this! Cheesecake can feel intimidating, but these are the things people ask me constantly. Get ready, because we’re sorting out the most common things that pop up when folks are hoping to nail this pumpkin cheesecake.
Can I make this Easy Pumpkin Cheesecake without a water bath?
I know, I know, the water bath sounds like a giant hassle, but if you are chasing that perfectly smooth, crack-free surface—the hallmark of a truly creamy pumpkin cheesecake—you really should use it. The water creates steam, which locks in moisture and cooks the outside edges very gently, stopping them from setting up faster than the middle. That difference in setting speed is what causes cracks!
If you absolutely cannot swing the water bath, here’s my slightly less ideal backup plan: bake it on the lowest rack and place an empty broiler pan on the rack underneath it. The pan will catch some of the direct heat from the bottom element. It won’t be as perfect as a true water bath, but it’s better than nothing. Just promise me you’ll stick to the slow cooling inside the turned-off oven!
What is the difference between this and a No Bake Pumpkin Cheesecake?
That’s a great question, especially since folks love a no-bake option when the oven is tied up! The main difference is honestly the texture and structure. This baked version we just made uses eggs and slow baking to create a texture that is dense, rich, and almost fudge-like. It sets up firm but creamy.
A No Bake Pumpkin Cheesecake, on the other hand, usually relies on gelatin, stabilized whipped cream, or a lot of powdered sugar mixed with cream cheese to set up in the fridge. It’s lighter, fluffier, and more mousse-like. If an Easy Pumpkin Cheesecake is what you need fast, go no-bake! But if you want that decadent, classic, heavy layer of holiday dessert, you need this baked recipe. If you want to see my simple version, check out my guide on No Bake Pumpkin Cheesecake!
How long do I need to chill the cheesecake after baking?
We talked about the slow cooling in the oven, but let’s chat about the final stage! You must chill this dessert for a minimum of 6 hours. Seriously, don’t even slice it before then. If you try to cut it too soon, it will just smear into a glorious mess, which, while tasty, isn’t great for presentation. For the absolute firmest, easiest slicing—and the best flavor synergy—let it chill overnight, ideally 8 to 12 hours. It really firms up and all those spices settle into the creamy layers beautifully.
Why are my spices so important in this Easy Pumpkin Cheesecake?
The spices are what pull it away from being just a plain cheesecake and firmly into the “Fall Dessert Ideas” category! Since we are using pure pumpkin puree, which is fairly mild on its own, we need to boost that autumnal flavor. I use standard amounts of cinnamon, ginger, and nutmeg because they are warm and traditional. If you use too much, it can taste dusty or bitter, but the proportions here are balanced so that the spice notes lift the pumpkin without overpowering the rich cream cheese base. It’s that perfect spiced cheesecake blend!
Estimated Nutritional Data for Pumpkin Cheesecake
Okay, let’s talk about the numbers behind the deliciousness. While this pumpkin cheesecake is certainly a decadent treat, especially as part of your Thanksgiving Cheesecake spread, it’s helpful to see what you’re consuming when you dive into a slice.
Keep in mind that these figures are straight estimates based on the ingredients we used in the recipe provided. If you swap out the graham crackers for gingersnaps or add a heavy drizzle of caramel sauce, those numbers—especially sugar and fat—are going to change! This nutrition summary is just here to give you a baseline for this amazing, creamy pumpkin cheesecake treat.
- Serving Size: 1 slice
- Calories: 420
- Fat: 26g (Be sure you see that 16g is the saturated fat portion)
- Carbohydrates: 40g
- Sugar: 35g (Molasses in the brown sugar adds so much flavor!)
- Protein: 7g
When you look at those figures, remember you’re getting a full, rich slice of baked dessert rich in dairy. It’s meant to be enjoyed as a special occasion treat, not an everyday snack! Don’t let the sugar count scare you off—it’s what makes this fall dessert so comforting and satisfying. Enjoy every bite!
Share Your Thoughts on This Autumn Dessert
And there you have it! You’ve successfully navigated the world of water baths and slow cooling to bring forth this magnificent, crack-free, creamy pumpkin cheesecake. Now that you’ve gotten to enjoy the fruits—or should I say, the spices—of your labor, I really want to hear about it!
Every home cook making a pumpkin cheesecake has a slightly different kitchen setup or oven quirk, so your feedback is amazing! Did it come out perfectly smooth? If you added a sprinkle of extra nutmeg or tried a gingersnap crust, tell me how that went! Don’t be shy—drop a comment down below and tell me how you rated this recipe. Was it the best fall dessert you’ve ever made?
Honestly, seeing pictures of your creations is the best part of doing this whole recipe thing. If you snapped a great photo of your slice ready for Thanksgiving or just enjoying a quiet evening, feel free to tag me on social media! It truly warms my heart to see my recipes making their way into your busy, flavorful lives.
If this recipe was the perfect addition to your spread, maybe take a look at some other sweet treats I love sharing, like this whole collection of my Delicious Dessert Recipes. Happy baking, and thank you so much for stopping by my kitchen!
PrintCreamy Baked Pumpkin Cheesecake Recipe
Make a rich, creamy pumpkin cheesecake with a graham cracker crust. This recipe focuses on simple techniques for a smooth texture perfect for fall holidays.
- Prep Time: 25 min
- Cook Time: 75 min
- Total Time: 100 min
- Yield: 12 servings 1x
- Category: Dessert
- Method: Baking
- Cuisine: American
- Diet: Vegetarian
Ingredients
- 1 1/2 cups graham cracker crumbs
- 1/4 cup granulated sugar (for crust)
- 6 tablespoons unsalted butter, melted
- 3 (8 ounce) packages cream cheese, softened
- 1 1/2 cups granulated sugar (for filling)
- 1 teaspoon vanilla extract
- 1 teaspoon ground cinnamon
- 1/2 teaspoon ground ginger
- 1/4 teaspoon ground nutmeg
- 1 (15 ounce) can pumpkin puree
- 3 large eggs
Instructions
- Preheat your oven to 325 degrees Fahrenheit. Wrap the outside of a 9-inch springform pan tightly with heavy-duty aluminum foil.
- Prepare the crust: Mix graham cracker crumbs, 1/4 cup sugar, and melted butter in a bowl. Press the mixture firmly into the bottom of the prepared springform pan. Bake for 10 minutes. Remove from oven and let cool slightly.
- Prepare the filling: Beat the softened cream cheese and 1 1/2 cups sugar in a large bowl until smooth. Mix in vanilla extract, cinnamon, ginger, and nutmeg. Beat in the pumpkin puree until combined.
- Add eggs one at a time, mixing on low speed just until incorporated after each addition. Do not overmix the batter.
- Pour the filling over the cooled crust in the springform pan.
- Bake using a water bath: Place the foil-wrapped springform pan into a larger roasting pan. Carefully pour hot water into the roasting pan until it reaches about halfway up the sides of the springform pan.
- Bake for 60 to 75 minutes, or until the edges are set but the center still jiggles slightly when gently nudged.
- Turn off the oven, crack the oven door open slightly, and let the cheesecake cool inside the oven for 1 hour. This slow cooling prevents cracking.
- Remove the cheesecake from the water bath and foil. Cool completely on a wire rack.
- Chill the cheesecake in the refrigerator for at least 6 hours, or preferably overnight, before serving. Remove the springform ring before slicing.
Notes
- For a guaranteed smooth texture, ensure your cream cheese is fully softened to room temperature before mixing.
- If you prefer a spiced crust, substitute 1 teaspoon of ground cinnamon into the graham cracker mixture.
- This cheesecake pairs well with a dollop of lightly sweetened whipped cream or a light dusting of cinnamon.
Nutrition
- Serving Size: 1 slice
- Calories: 420
- Sugar: 35g
- Sodium: 280mg
- Fat: 26g
- Saturated Fat: 16g
- Unsaturated Fat: 10g
- Trans Fat: 0.5g
- Carbohydrates: 40g
- Fiber: 1g
- Protein: 7g
- Cholesterol: 125mg