
There’s a certain magic that happens in the kitchen when the holidays roll around, isn’t there? It’s the smell, the anticipation, and the satisfaction of pulling something truly spectacular out of the oven. If you ask me, the absolute pinnacle of festive baking is the iconic, deep, dark **chocolate crinkle cookies**. Now, I know what you’re thinking: getting that perfect, snowy crackle on a cookie that is simultaneously soft and unbelievably fudgy inside can feel like a puzzle. Don’t worry, that’s why I’m here! After years of testing in my own kitchen, I’ve landed on the absolute best recipe structure that guarantees those bakery-style results without needing any fancy choreography. Get ready to make the creamiest, fudgiest chocolate crinkles you’ve ever tasted, simply.
My goal here at Delish Symphony is always to simplify the process, and this recipe is a fantastic example of that. We are stripping away the stress and focusing only on the harmony between the rich cocoa dough and that crisp exterior dusting. If you want to read more about the philosophy that drives my recipes and why I believe in making the everyday extraordinary, you can check out the story behind Delish Symphony right here. Trust me, once you nail this technique, these cookies will become your go-to for every single gathering. You won’t need to peek at another recipe ever again!
- Why This is the Best Chocolate Crinkle Cookie Recipe You Need
- Gathering Ingredients for Perfect Chocolate Crinkle Cookies
- Step-by-Step Instructions for Classic Crinkle Cookies
- Tips for Success When Making Chocolate Crinkle Cookies
- Variations: Creating Brownie Cookie Recipe Style Chocolate Crinkle Cookies
- Storage and Make-Ahead Tips for Homemade Christmas Cookies
- Serving Suggestions for Your Chocolate Crinkle Cookies
- Frequently Asked Questions About Chocolate Crinkle Cookies
- Estimated Nutritional Data for Chocolate Crinkle Cookies
- Share Your Symphony of Chocolate Crinkle Cookies
Why This is the Best Chocolate Crinkle Cookie Recipe You Need
Look, there are hundreds of recipes out there, but what sets these **fudgy chocolate crinkle cookies** apart is their reliable texture. We aren’t aiming for dry, cakey hockey pucks here—we want melt-in-your-mouth chocolate heaven. This recipe hits that sweet spot every single time, making them one of my top choices for easy holiday cookies that look incredibly impressive but require very little fuss.
The whole process flows beautifully, especially if you give the dough an hour to chill. You’ll find the complexity here isn’t in the steps, but in the quality of the final product compared to how simple the ingredient list actually is. If you want to compare this technique to another essential cookie recipe, my guide on classic chocolate chip cookies shows similar attention to creaming butter, but this one leans into that rich cocoa flavor we all crave.
Achieving the Signature Crinkle Effect on Your Chocolate Crinkle Cookies
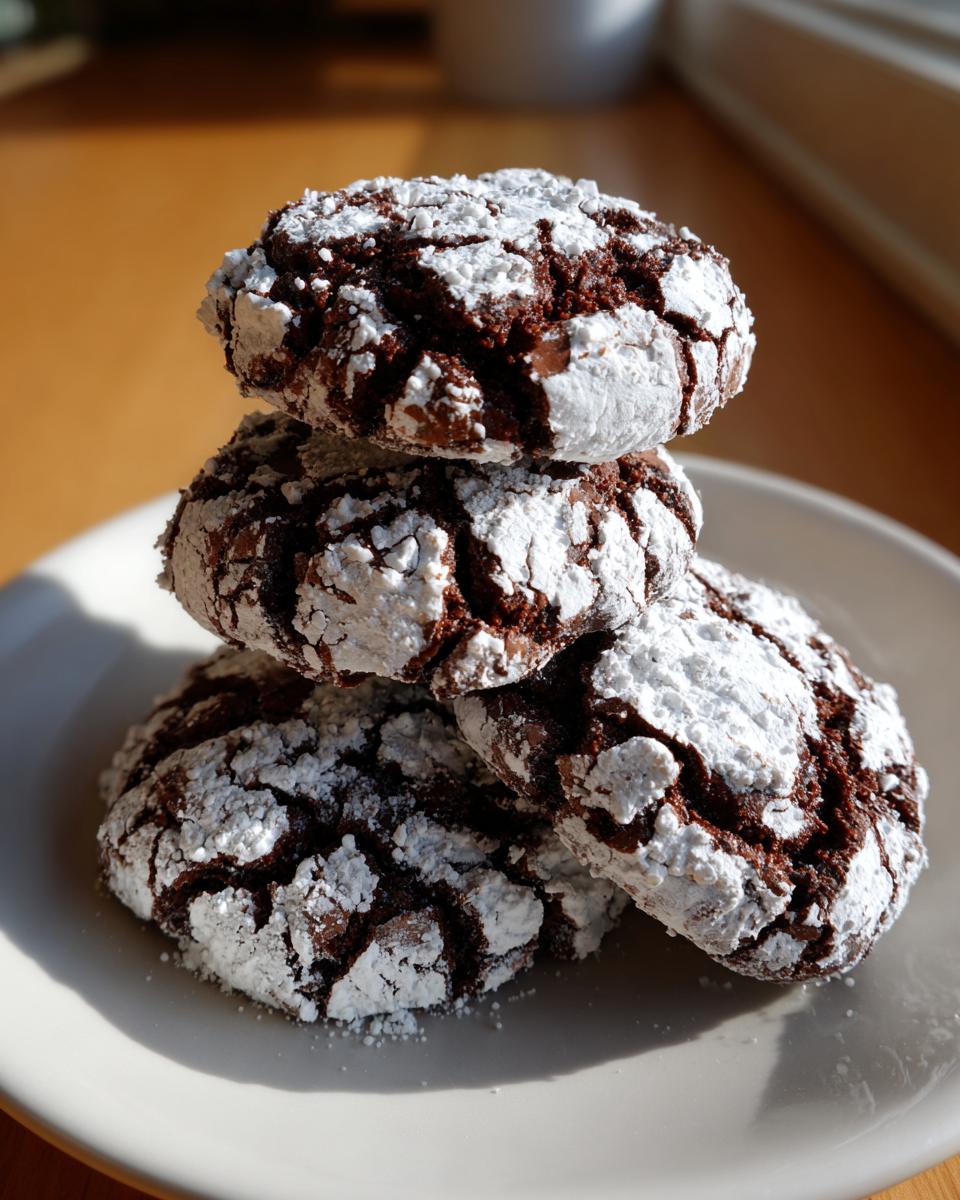
This look is non-negotiable for a classic crinkle cookie, right? It’s all about the sugar coating, folks. We aren’t just dusting them once! We roll them first in granulated sugar. This gives the dough a texture that the final layer of powdered sugar can grab onto tightly. When the cookie bakes and spreads, that thick outer coating cracks perfectly, creating those beautiful, snowy fissures. Don’t skimp on that final, heavy coat of powdered sugar; it’s the visual signature!
Texture Focus: Soft Centered Cookies vs. Cakey Results
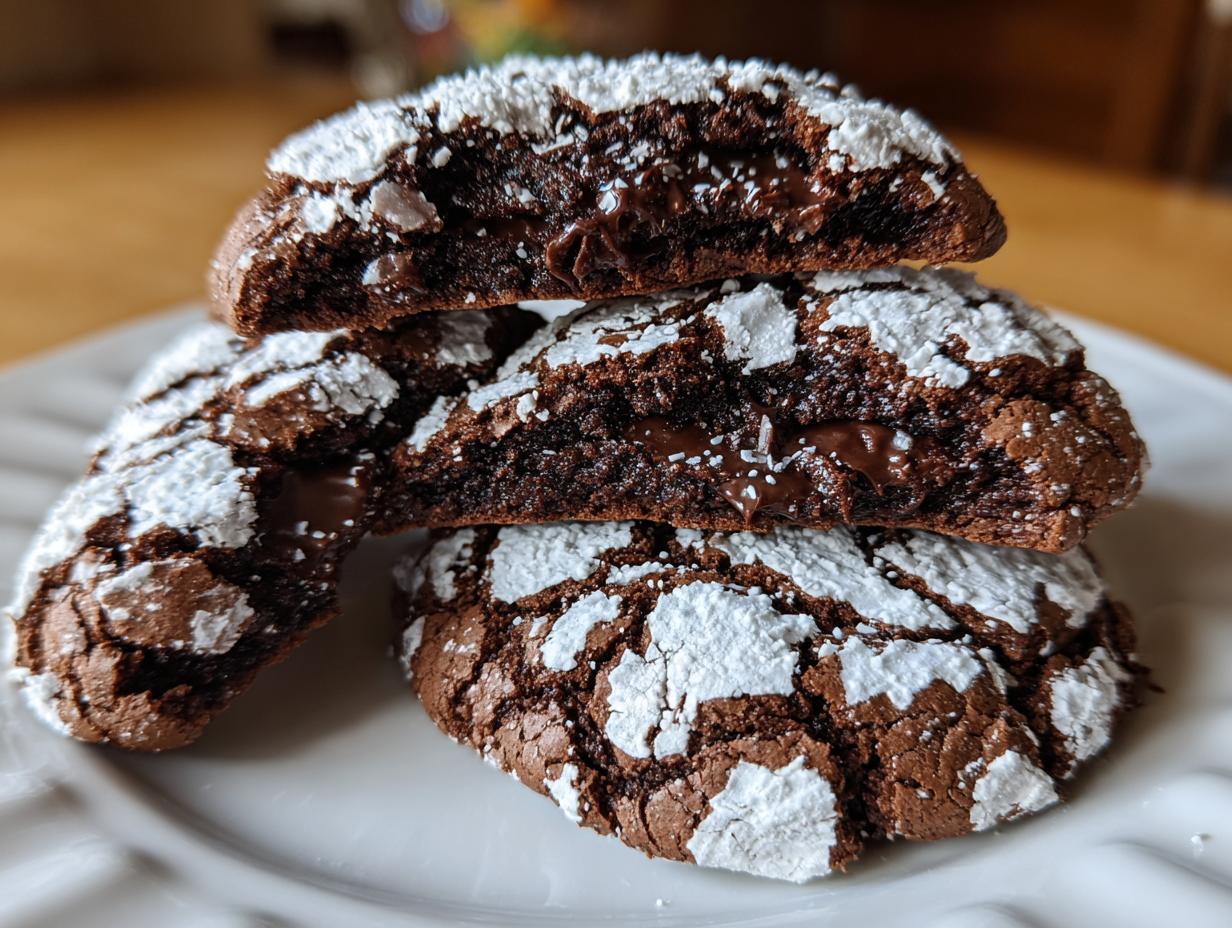
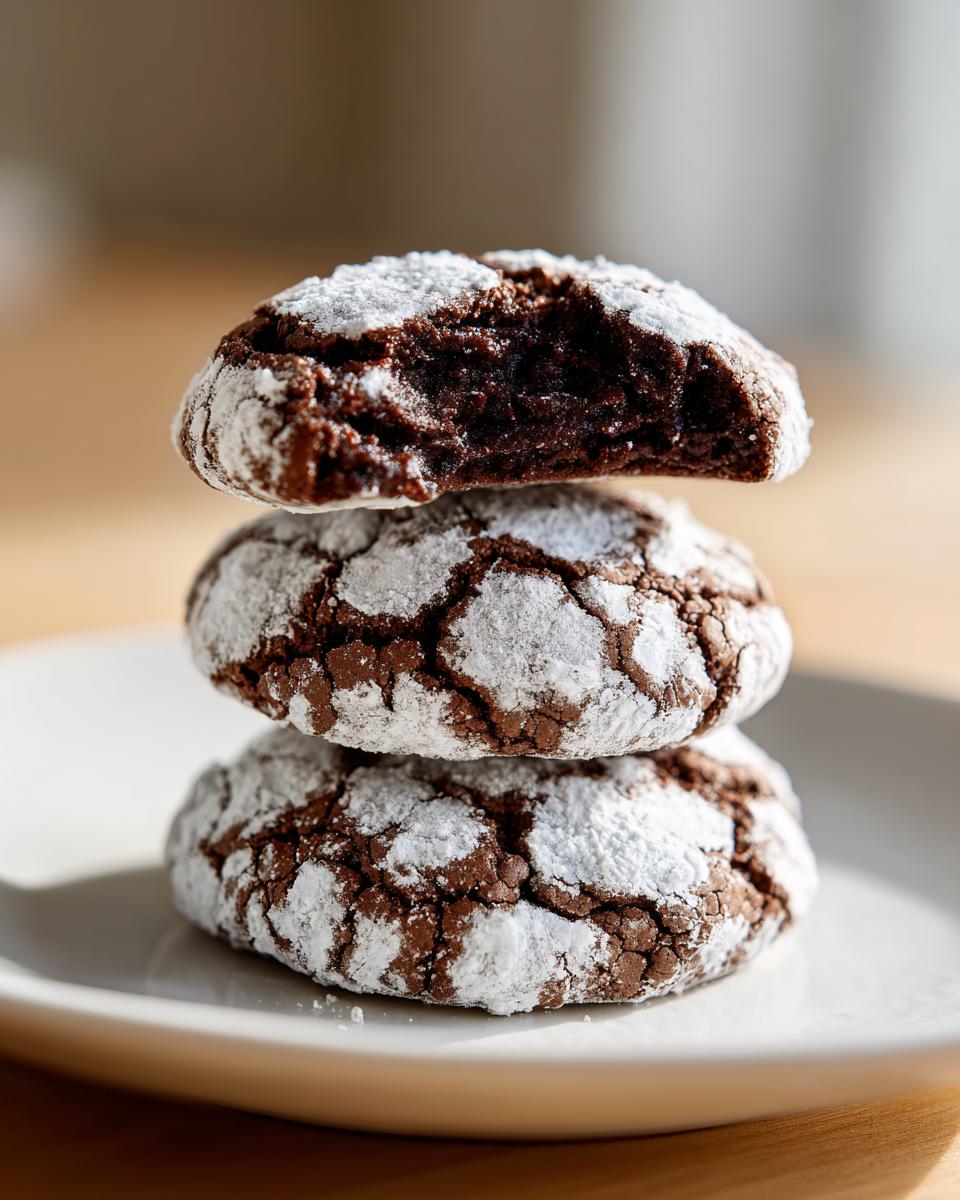
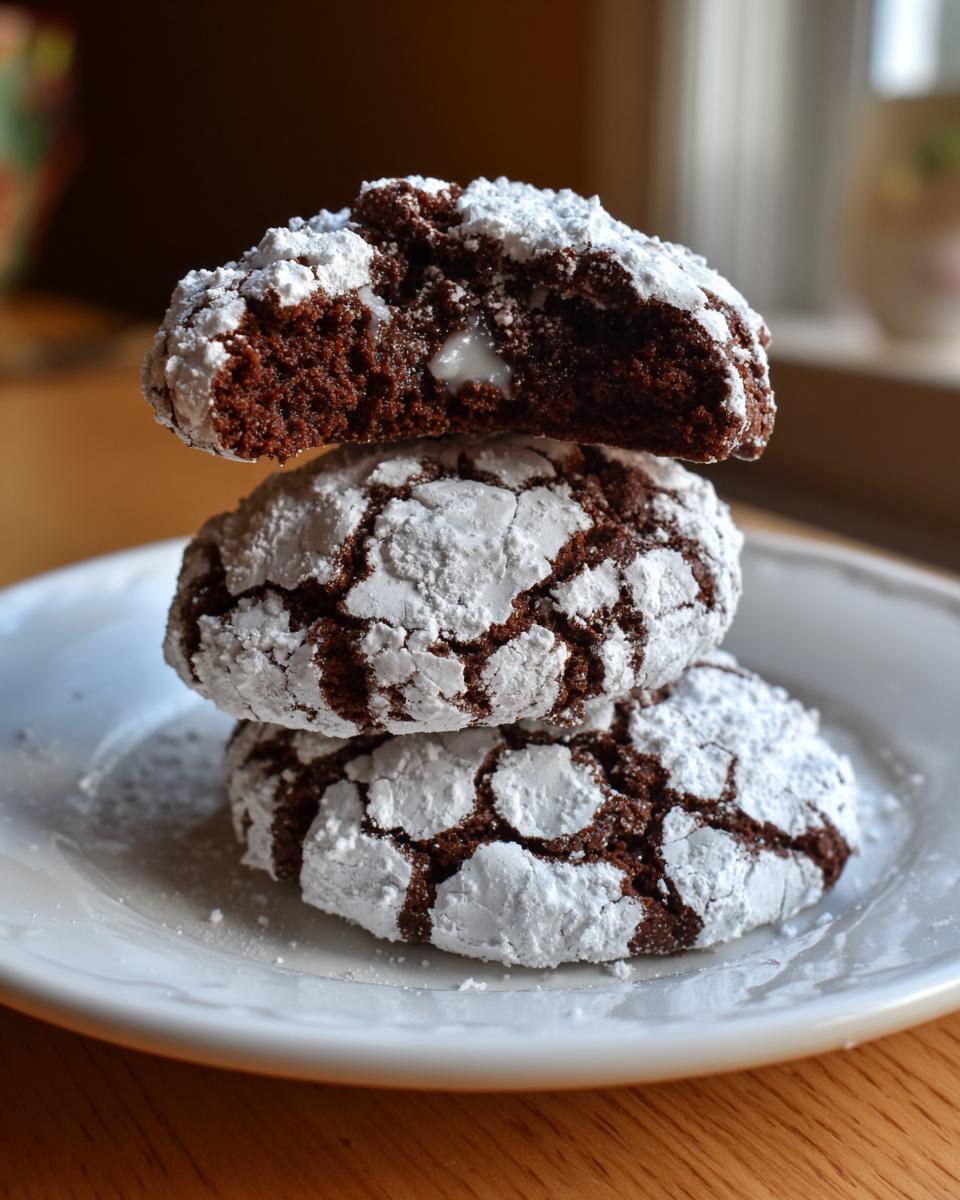
This is where many people go wrong. If you bake these until they look ‘done’ by traditional cookie standards, you’ll lose the fudgy payoff. We are aiming for **soft centered cookies**. Pull them out when the edges are just set and the center still looks slightly underdone—almost fragile. As they sit on that warm baking sheet, carry-over heat takes them to perfection, leaving you with that amazing, slightly gooey chocolate interior. That’s how you get that deeply satisfying bite.

Gathering Ingredients for Perfect Chocolate Crinkle Cookies
Okay, let’s talk about what goes into these amazing treats. One of the things I love most about this recipe is that it relies on things I almost always have on hand. We aren’t chasing down some rare, imported ingredient here! This sticks perfectly to my philosophy about keeping things accessible. This batch will give you about 24 cookies, and while the active prep is only about 20 minutes, remember we need a little chill time to get those perfect crinkles, so plan for about an hour and a half total.
We are using simple flour, basic leavening, and the essentials of sugar and eggs. If you’re looking to streamline your kitchen workflow in general, I often share my go-to pantry essentials over on my weeknight dinner resources page, and most of these items overlap!
Ingredient Notes and Substitutions for Rich Cocoa Cookies
You have four main components here that really dictate the final texture and flavor: the butter, the sugars, the eggs, and especially that cocoa powder. For the best results, use European-style or high-quality unsweetened cocoa powder if you can find it. It makes a huge difference in getting that deep, intense chocolate flavor we want in these **rich cocoa cookies**.
Please, please, please pay attention to your butter! It needs to be truly softened—yielding easily to light pressure—but not melted or greasy. If it’s too warm, your dough will instantly spread too thin when you bake it, and those beautiful high domes will flatten out. That’s a rookie mistake we are avoiding!
Now, for a little extra indulgence—especially if you want to push this into that brownie territory we talk about later—you can lean into the chocolate even more. Along those lines, if you want to go for a true double whammy of chocolate flavor, go ahead and substitute about 1/4 cup of your flour measurement with an equal amount of dark Dutch-process cocoa powder. It won’t change the structure much, but it will seriously boost that deep chocolate background note. It’s a simple swap that makes these extra special.
Step-by-Step Instructions for Classic Crinkle Cookies
Alright, now we get to the fun part where everything comes together! Remember my philosophy: practical techniques lead to the best results. We are going to treat this dough gently so we don’t knock out all the air we worked so hard to beat in when creaming the butter and sugar. Keep your mixer speed low when combining the dry and wet ingredients. The goal is just combined, nothing more!
First, make sure your wet bowl—where your creamed butter/sugar/eggs are—is ready. In a separate dish, whisk your dry ingredients: cocoa, flour, baking powder, and salt. Add those dry components to the wet mixture gradually. I mix only until I see the flour streaks disappear. Stop the mixer right there. If you keep going, you develop too much gluten, and those lovely, soft cookies turn firm; we definitely don’t want that cakey texture!
Once mixed, we move right into shaping. You’ll need two shallow dishes ready to go—one with the 3/4 cup of leftover granulated sugar, and the second with all that beautiful powdered sugar for the final coat. I suggest finding a good rhythm here; it’s almost therapeutic once you get into the flow. You can find some other great ideas for quickly assembling snacks on my page about simple snack recipes, but this rolling process is unique!
The Crucial Double-Sugar Rolling Technique for Chocolate Crinkle Cookies
This is where the visual magic happens, so pay close attention! We take our 1-inch dough ball first and roll it thoroughly in the granulated sugar. I mean *thoroughly*. You want every single bit of that dark dough covered in the clear sugar crystals. This layer acts like a buffer and gives the outer surface texture.
Once it’s sugar-coated, immediately transfer it to the plain powdered sugar. This rolling must be generous. Press the ball gently into the powder until it has a thick, cakey-white covering. You want excess powder clinging to it. Don’t wipe it off! This thick layer is what stretches and cracks open as the cookie bakes, creating that stunning, signature look. Seriously, make that white coating chunky!
Baking Times and Temperature for Chewy Chocolate Cookies
We bake these at 350°F (175°C). The time window is usually 10 to 12 minutes, but trust me, watch them closely during minute 10. We are deliberately pulling these cookies out early. I tell people: the edges should look firm and set, almost dry, but when you look at the very center of the cookie, it should still look soft and slightly shiny. That’s the indicator. If you wait until the center looks baked through, you’re going to end up with dry, less fudgy centers.
Once they are out, leave them alone! Don’t touch them for a full five minutes right there on the parchment-lined baking sheet. This allows the carry-over heat to finish setting the interior structure without overbaking the exterior. After five minutes, gently move them over to your wire rack to cool completely. As they cool down, those lovely cracks will finalize their shape—that’s how you guarantee perfect **chewy chocolate cookies**.
Tips for Success When Making Chocolate Crinkle Cookies
Even with a straightforward recipe, those few little details make all the difference between good and unforgettable cookies. If you follow my lead, you’ll get consistently beautiful results every time you make these.
The absolute number one tip is chilling the dough—seriously, don’t skip it! Chilling the dough for at least an hour firms up the butter and concentrates the flavor. This prevents the cookies from spreading into thin puddles while baking, which keeps your **powdered sugar dusted cookies** tall and puffy, leading to those high, dramatic cracks.
If you’re aiming for that picture-perfect look, also remember that you can’t have too much powdered sugar in the final coating. A light dusting won’t crack properly; you need a thick blanket of white snow covering that dark dough to maximize contrast.
Troubleshooting Common Issues with Chocolate Crinkle Cookies
So what happens when things go slightly sideways? Happens to me too, trust me! If your cookies spread out way too thin on the baking sheet, it almost always points back to warm dough or butter that was too soft when you started creaming. Next time, be stricter about room temperature, not ‘melted’ temperature, for that butter!
If you pull them out and the tops barely cracked, that usually means one of two things: either you didn’t coat them heavily enough in the second layer of powdered sugar, or—and this is more common—you baked them too long. Like I said, pull them while the center looks suspiciously soft. If you bake them until they look perfectly set, you’ve already gone past the fudgy stage and missed the window for a good crinkle pattern.
For more inspiration on turning out flawless desserts, take a look at my collection of delicious dessert recipes for more practical guidance!
Variations: Creating Brownie Cookie Recipe Style Chocolate Crinkle Cookies
Now, I know the standard version of these cookies is heavenly, but sometimes, you just need that intensely rich, almost dark-chocolate experience—you want that true brownie texture in cookie form, right? That’s where we get to play a little bit and lean into making these the ultimate **brownie cookie recipe** hybrid. It’s all about bumping up the chocolate intensity!
If you’re craving that heavy, dense, slightly gooey center that mimics a perfect brownie edge, we have a couple of easy adjustments you can make without totally rewriting the foundation of this recipe. This lets us keep the classic crinkle look while digging deep into that chocolate flavor profile. You can see how I approach similar flavor boosting in my easy pumpkin bars recipe, where subtle changes make a huge difference.
The first way, which I already touched on, is leaning into the cocoa powder. If you swap out a quarter-cup of the all-purpose flour for an equal amount of Dutch-process cocoa powder, you’ll get a smoother, deeper, less acidic chocolate taste. That darker flavor really helps sell the ‘brownie’ illusion.
But here’s my absolute favorite move for maximum fudginess: add some melted chocolate chips right into the dough during the final mixing stage! Don’t dump them in when everything is still hot, wait until the flour is *just* incorporated. Fold in about half a cup of semi-sweet or bittersweet chips. They won’t fully melt during the quick bake time, leaving little pockets of melted, gooey chocolate goodness throughout your cookie. When you bite in, you get the fudgy cake, the crisp sugar shell, and then BAM—a burst of melted chocolate. It takes these from great to absolutely epic. That’s how you make a simple treat feel like a decadent dessert creation!
Storage and Make-Ahead Tips for Homemade Christmas Cookies
When you’re deep in holiday baking mode, making things ahead of time is a lifesaver, isn’t it? Because these **homemade christmas cookies** look so pretty, we want to make sure they stay that way, especially that gorgeous powdered sugar coating. That white dusting can be a little fussy if stored improperly. Don’t worry, I have you covered on timing and preservation so your cookies look fresh, even if they were baked a few days before the party.
The biggest issue you run into with crinkles is moisture transfer. If you stack them too tightly too soon, or put them in an airtight container before they are completely cool, that delicate powdered sugar layer starts to dissolve and get sticky. It loses that beautiful, crisp, matte finish we worked so hard for!
For the best possible presentation when gifting or serving, I always recommend letting the cookies cool completely—and I mean *completely*—on the wire rack for at least an hour after they come off the pan. This allows the centers to firm up slightly and seals that cracked exterior before it hits any storage vessel. If you want ideas for other make-ahead recipes that follow similar rules, check out my guide on cinnamon roll casserole; the concept of letting things set is similar across baking!
If you need to store them for a few days at room temperature, go for an airtight container, but line the bottom layer with a paper towel first. This absorbs any stray moisture the cookies might release. Only stack them one layer deep if possible! If you must stack two layers, put another paper towel in between the two layers. They usually keep beautifully like this for about four or five days.
Can you freeze the dough? Absolutely! Freezing the dough balls is actually one of my favorite ways to streamline holiday baking. Roll the dough into balls, give them the full double-sugar coating, place them on a parchment-lined sheet, and freeze until solid. Then, transfer the frozen, coated balls into a zip-top freezer bag or rigid container. You can bake them straight from frozen—just add 2 to 4 minutes onto your normal baking time. Since they are frozen solid, they hold their shape beautifully and give you those stunning, tall crinkles!
Now, freezing the *baked* cookies is also doable. Just make sure they are fully cooled and follow the same process: line the container with paper towels and avoid stacking too many layers. If you notice the sugar getting a little soft after thawing, just quickly roll them in extra powdered sugar right before serving for an instant refresh. Easy peasy!
Serving Suggestions for Your Chocolate Crinkle Cookies
I love looking at a full cookie platter during the holidays, and these beauties are always the centerpiece! What’s the point of making the best cookie for holiday box if you don’t serve them up right? Even though these are intensely chocolatey all on their own, the right pairing can take them from a great dessert to a truly memorable moment.
First off, never underestimate tradition. A tall, frosty glass of cold milk is the perfect partner for a seriously fudgy cookie like this. The cold milk cuts through that richness beautifully. If you are serving these after a big meal or during a coffee break, a strong, freshly brewed coffee is a must. I’ve written about my love for coffee desserts, and honestly, a simple black coffee really lets the deep, dark cocoa notes shine through without any added sweetness.
If you are assembling a big holiday spread, think about contrast! Since these cookies are so dark and rich, pair them visually and texturally with something light. Think about serving them alongside something bright and tangy, maybe some lemon shortbread or lemon bars. That little tartness cleanses the palate between bites of deep chocolate. It’s all about harmony, just like in a symphony!
For a really luxurious finish, especially if you’re enjoying these with a coffee after dinner, try a small scoop of vanilla bean ice cream right on the side while the cookie is still slightly warm. The contrast between the warm chocolate, the cold creaminess, and that crisp powdered sugar coating? Perfection. If you want to experiment with pairing rich desserts with coffee, you might enjoy the way I approached flavors in my New Orleans Iced Coffee Creme Brulee recipe; it shares a similar dark, comforting flavor profile.
Frequently Asked Questions About Chocolate Crinkle Cookies
I always get so many great questions after people try this recipe for the first time! Dealing with doughs that rely on that powdered sugar coating can sometimes throw people off, but once you understand the ‘why’ behind the steps, everything becomes simple. I’ve pulled together the most common things I hear about baking these perfect **chocolate crinkle cookies** right here for you. Like any good recipe, once you master the basics, you can tweak things to your liking. If you’ve had success with my easy moist banana bread, you already know I love solving baking roadblocks!
Can I make chocolate crinkle cookies without chilling the dough?
You absolutely *can* make no chill chocolate crinkle cookies if you are in a major rush! If you skip the chilling step, you can roll and bake them immediately. However, I have to warn you about the trade-off: skipping the chill time means the dough is softer. Softer dough spreads more quickly when it hits the hot oven. You will likely end up with flatter cookies that don’t develop those beautiful, tall, dramatic crinkles we are looking for. If speed is your absolute priority, go for it, but expect a denser, less puffy cookie.
What makes these the best chocolate crinkle cookie recipe?
What makes this iteration the **best chocolate crinkle cookie recipe**? It’s the textural tension! So many recipes produce dry cookies or cookies that crack but are cakey inside. My focus, as you’ve seen throughout this guide, is on underbaking them slightly. By pulling them when the center still looks soft and slightly gooey, we guarantee that melt-in-your-mouth, fudgy center contrasts perfectly with the sweet, crisp, jagged powdered sugar shell. It’s that combination that makes everyone ask for the recipe!
How do I keep my chocolate crinkle cookies soft for days?
Keeping that center soft after that first day takes a little strategy, which is why storage is so important! The biggest thing is making sure they are 100% cool before you store them. Once cooled, place them in an airtight container, but use one of my favorite tricks: place a thin paper towel on the very bottom of the container before you add the first layer of cookies. That paper towel will absorb any ambient moisture released by the cookies or the powdered sugar, which prevents that dissolving effect that makes them sticky. As long as they aren’t exposed to too much air, they should stay wonderfully soft for four to five days!
Estimated Nutritional Data for Chocolate Crinkle Cookies
When we’re focused on flavor harmony—making sure the sweetness balances the deep cocoa, or that rich butter provides the right structure—we sometimes forget about the numbers, right? But I respect that many of you track what you eat, so I pulled together the estimates for this recipe.
Here is the breakdown based on making 24 cookies total, using standard ingredient brands and measuring techniques. Remember, my goal is flavor first, but this gives you a good idea of what you’re enjoying! For reference on all my site standards, you can check out my contact page if you ever need to reach out about testing or ingredients, linked here.
- Serving Size: 1 cookie
- Calories: 180
- Sugar: 18g
- Fat: 9g (5g Saturated Fat)
- Carbohydrates: 24g
- Protein: 3g
It’s a richer cookie, for sure—that’s the butter and the deep cocoa doing their work! But keep in mind that these are just estimates. If you swap granulated sugar for coconut sugar or use reduced-fat butter, those numbers shift. This is the classic flavor profile breakdown, pure and simple. Enjoy these gorgeous cookies as a perfect, indulgent treat!
Share Your Symphony of Chocolate Crinkle Cookies
Well, that’s it! We’ve mixed, we’ve rolled, and you’ve baked a batch of the most beautiful, fudgy, melt-in-your-mouth **chocolate crinkle cookies** around. Doesn’t that smell amazing? That deep cocoa scent filling your kitchen is the sound of harmony, and I truly hope finishing these treats brought you that same joy it brings me every time I make them.
Now, the best part of cooking isn’t just eating it yourself—it’s sharing the experience! I pour hours into testing these recipes to make sure they are reliable and truly delicious, and I love hearing back from you home cooks about your successes. Did you manage to get those tall, dramatic crinkles? Did your family devour the entire batch in one sitting? Don’t keep all that deliciousness to yourself!
I really want to see your creations! Head over to social media and share a picture of your perfect, powdered-sugar-dusted beauties. Tag me so I can celebrate with you! And if you followed along and found this recipe to be a winner for your holiday cookie box or just a Tuesday night, please leave a star rating and tell me what you loved most in the comments below. Your feedback truly helps other bakers find their rhythm in the kitchen. If you want to look over the fine print on how we use site information, you can always check out the privacy policy here, but right now, focus on enjoying those cookies!
Keep composing that flavorful life, one delicious cookie at a time. Happy baking, everyone!
PrintSoft, Fudgy Chocolate Crinkle Cookies: The Best Recipe for Perfect Holiday Baking
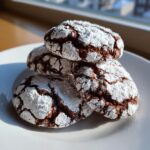
Follow this simple guide to create soft, fudgy chocolate crinkle cookies with the classic powdered sugar crackle top. This recipe is easy to manage and yields bakery-style results perfect for gifting or holiday cookie boxes.
- Prep Time: 20 min
- Cook Time: 12 min
- Total Time: 1 hour 32 min
- Yield: 24 cookies 1x
- Category: Dessert
- Method: Baking
- Cuisine: American
- Diet: Vegetarian
Ingredients
- 1 cup unsalted butter, softened
- 1 3/4 cups granulated sugar, divided
- 2 large eggs
- 1 teaspoon vanilla extract
- 3/4 cup unsweetened cocoa powder
- 1 1/2 cups all-purpose flour
- 1 teaspoon baking powder
- 1/2 teaspoon salt
- 1/2 cup powdered sugar, for rolling
Instructions
- In a large bowl, cream together the softened butter and 1 cup of the granulated sugar until light and fluffy.
- Beat in the eggs one at a time, mixing well after each addition. Stir in the vanilla extract.
- In a separate bowl, whisk together the cocoa powder, flour, baking powder, and salt.
- Gradually add the dry ingredients to the wet ingredients, mixing on low speed until just combined. Do not overmix.
- Place the remaining 3/4 cup granulated sugar in one shallow dish and the powdered sugar in another shallow dish.
- Roll the dough into 1-inch balls. Roll each ball first in the granulated sugar, coating completely, and then roll it thoroughly in the powdered sugar until heavily coated.
- Place the coated dough balls about 2 inches apart on baking sheets lined with parchment paper.
- Bake at 350°F (175°C) for 10 to 12 minutes. The edges should look set, but the centers will still appear soft.
- Let the cookies cool on the baking sheet for 5 minutes before transferring them to a wire rack to cool completely. The crinkles will set as they cool.
Notes
- For the best fudgy texture and pronounced crinkles, chill the dough for at least 1 hour before rolling and baking.
- If you want a double chocolate effect, substitute 1/4 cup of the flour with an equal amount of Dutch-process cocoa powder.
- Do not overbake; these cookies should remain soft and slightly gooey in the center for that desired fudgy bite.
Nutrition
- Serving Size: 1 cookie
- Calories: 180
- Sugar: 18
- Sodium: 95
- Fat: 9
- Saturated Fat: 5
- Unsaturated Fat: 4
- Trans Fat: 0
- Carbohydrates: 24
- Fiber: 2
- Protein: 3
- Cholesterol: 35