
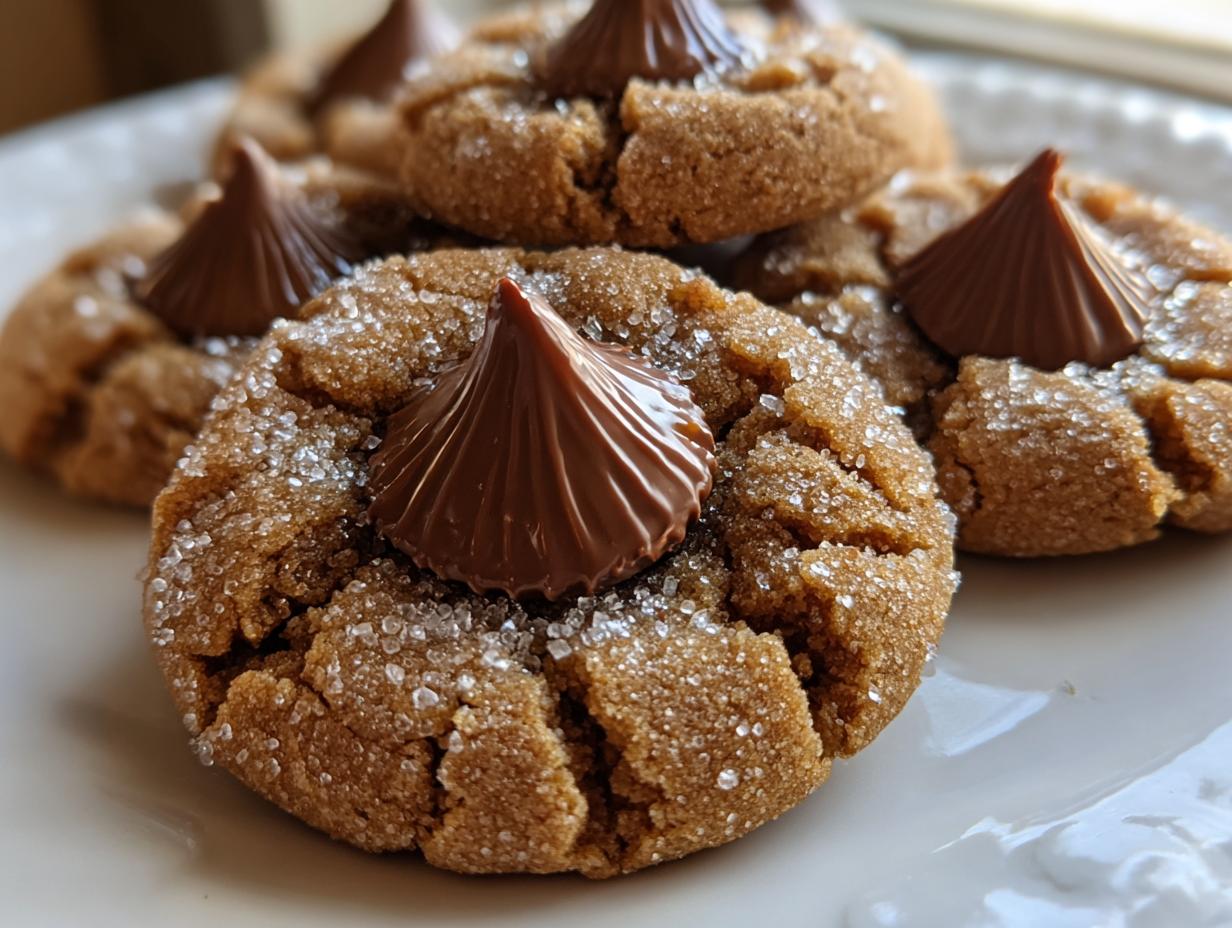
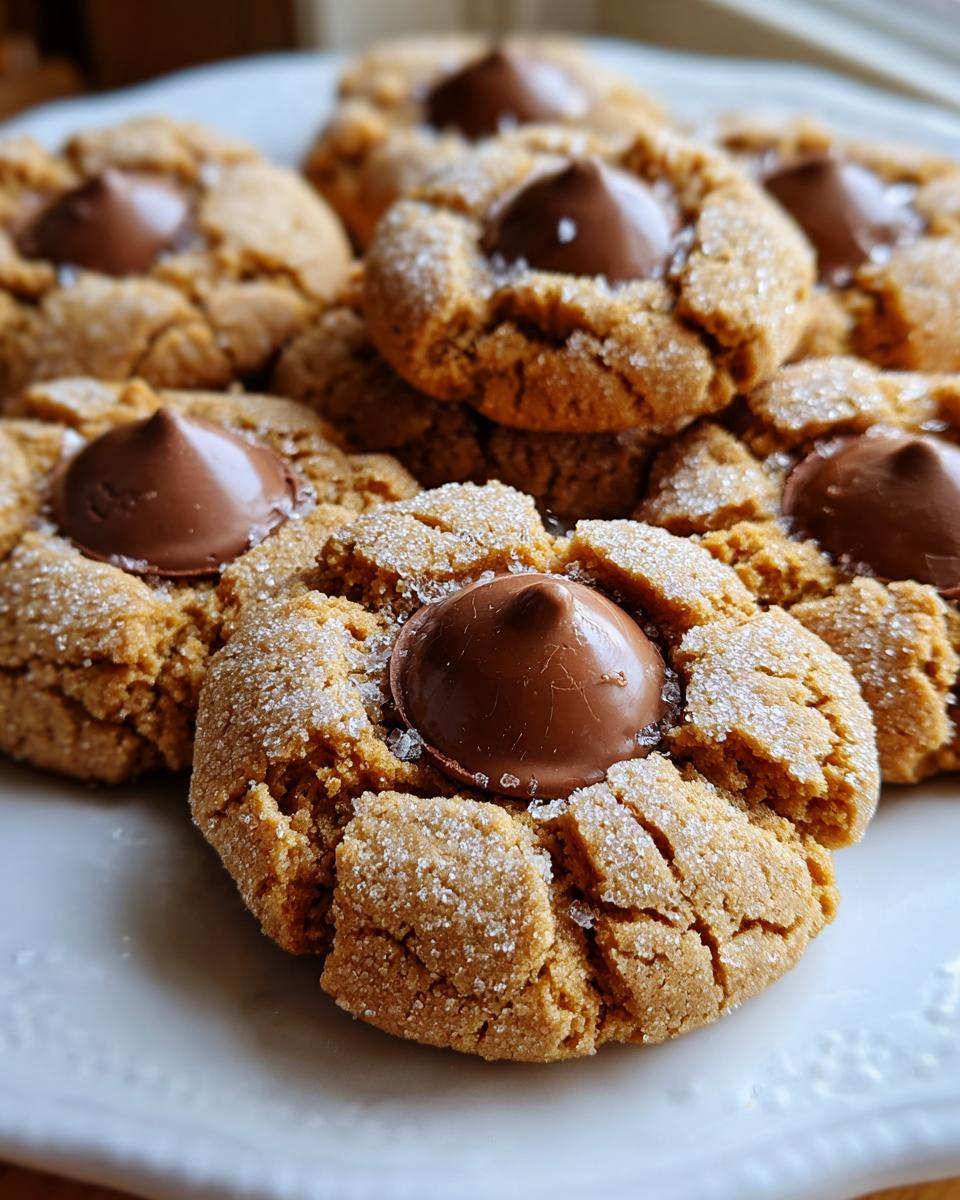
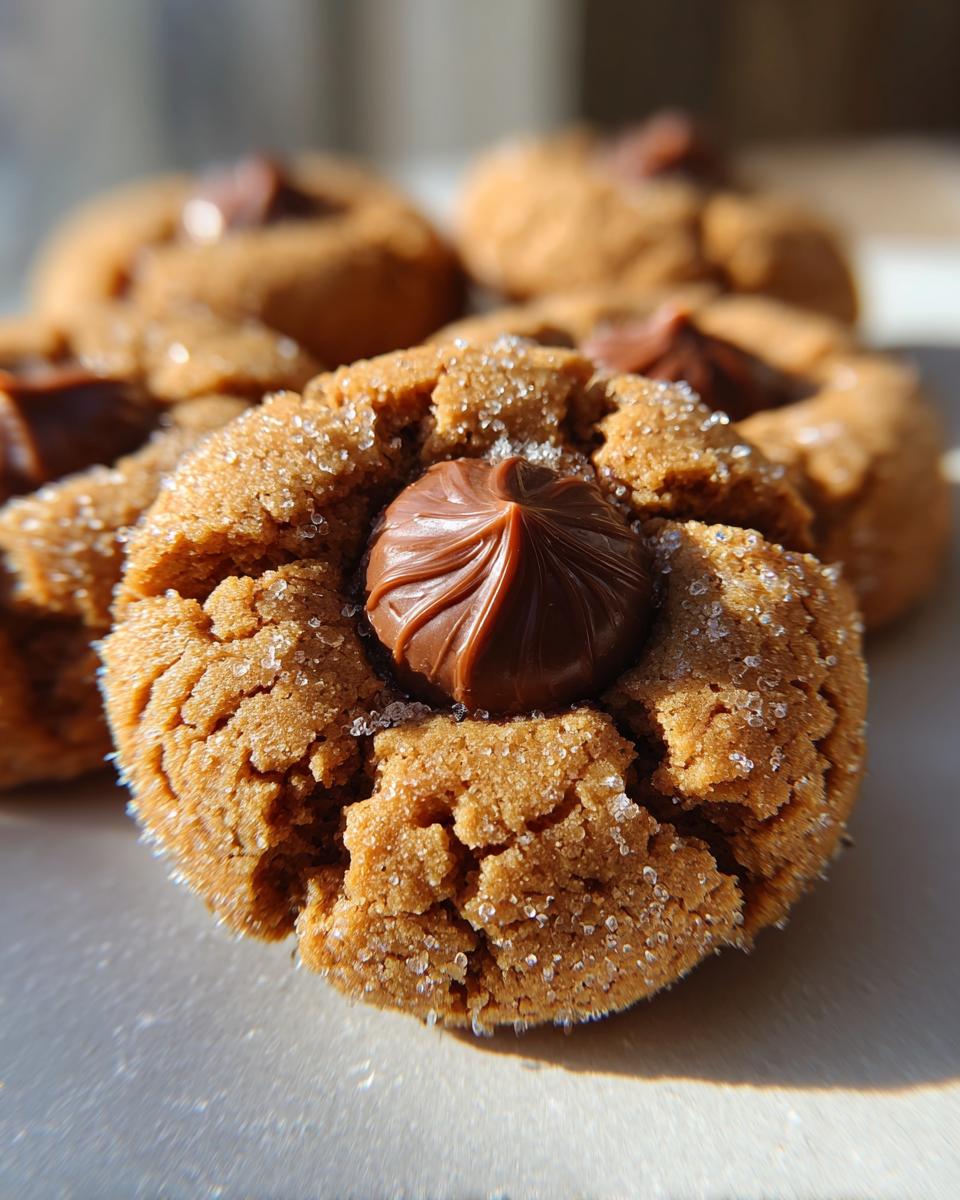
There’s a special kind of joy that comes from baking something truly classic, isn’t there? It’s not about fancy techniques or hard-to-find spices; it’s about that familiar, comforting smell filling up your whole kitchen. Here at Delish Symphony, we focus on dishes that bring people together easily, and nothing says ‘home’ quite like a batch of soft, sweet **kiss cookies**. Everyone knows them as those perfect peanut butter cookies with that signature chocolate dollop right in the middle. I’m talking about the legendary Peanut Butter Blossoms. Trust me, once you nail this **Best Peanut Butter Blossoms Recipe**, you’ll be making them for every holiday. For more simple, comforting sweets, check out our complete collection of delicious dessert recipes. It’s flavor harmony in a simple drop cookie!
- Why This Classic Peanut Butter Kiss Cookies Recipe Works (E-E-A-T)
- Gathering Ingredients for Your Kiss Cookies
- Step-by-Step Instructions for Perfect Kiss Cookies
- Tips for the Best Homemade Peanut Butter Kiss Cookies
- Making Kiss Cookies for Holiday Cookie Exchanges
- Variations on Classic Kiss Cookies
- Storage and Reheating Instructions for Kiss Cookies
- Frequently Asked Questions About Kiss Cookies
- Share Your Favorite Kiss Cookies Creations
Why This Classic Peanut Butter Kiss Cookies Recipe Works (E-E-A-T)
Look, when people search for Kiss Cookies, overwhelmingly they are looking for the classic Peanut Butter Blossoms, and there’s a reason why. These cookies are pure magic because they hit all the right notes: they are wonderfully simple, they use pantry staples, and you can have a whole batch ready in under thirty minutes! That speed is everything when you’re juggling kitchen duties. People love them because they are reliably delicious, which is why this version keeps showing up time and time again in searches.
Achieving Soft and Chewy Kiss Cookies Texture
The secret to moving from ‘good’ to ‘amazing’ in the **Soft and Chewy Cookies** category is all in the proportions. When you cream that butter, peanut butter, and both sugars together until they are genuinely fluffy—not just barely mixed—you’re creating the necessary air pockets. Those pockets are what stop your cookie from turning into a hard little cracker! Also, don’t walk away from the oven! You must pull these cookies out just as the edges look set, even if the center looks a little soft. That residual heat finishes the job perfectly, guaranteeing that melt-in-your-mouth texture. If you’re interested in tweaking my base peanut butter dough for other uses, I go into more detail here on peanut butter cookies.
Gathering Ingredients for Your Kiss Cookies
Alright, let’s get our list together! For the best results, we need to be precise here because every single item plays a role in that classic harmony. I’ve listed out exactly what my tested recipe calls for below. Remember, we aren’t changing much here because this specific ratio is what locks in that soft, sugary crust.
- 1 cup unsalted butter, softened
- 3/4 cup creamy peanut butter
- 3/4 cup granulated sugar, plus 1/4 cup for rolling
- 3/4 cup packed brown sugar
- 2 large eggs
- 1 teaspoon vanilla extract
- 2 1/4 cups all-purpose flour
- 1 teaspoon baking soda
- 1/2 teaspoon salt
- 1 bag (12 oz) milk chocolate Hershey’s Kisses, unwrapped
Ingredient Notes and Simple Substitutions
Now, about those ingredients. I insist on creamy peanut butter because crunchy throws off the cookie dough balance, making it too crumbly before baking. You can use salted butter, but if so, cut that added 1/2 teaspoon of salt completely from the dry mix. And please, make sure those Kisses are unwrapped before the cookies come out of the oven! That’s a lesson learned the hard way years ago when I was juggling too many things.
Step-by-Step Instructions for Perfect Kiss Cookies
Okay, let’s roll up our sleeves! I’ve timed this out dozens of times so you can get this done quickly, often even before your coffee finishes brewing. Since these are Simple Drop Cookies, we don’t need to chill anything, which is fantastic for weeknight baking. Everything happens fast, so make sure you have your baking sheets ready to go with parchment paper before you even hit the ‘on’ button on your oven.
Mixing the Dough for These Kiss Cookies
First things first: Preheat that oven to 375°F. Now, grab your big mixing bowl. We need to cream that butter, peanut butter, and both sugars together until they look lightened up and fluffy. That’s what traps the air—it’s fundamental if we want those Soft and Chewy Cookies! Once that’s pale yellow, you’ll add the eggs one at a time, mixing well after each one, followed by the vanilla extract. In a separate bowl, whisk your dry stuff—flour, baking soda, salt. Then, and try not to panic here, add the dry mixture to the wet mixture slowly. Mix until you *barely* see flour streaks. Seriously, stop mixing as soon as it comes together. Overmixing equals tough cookies, and we want harmony, not toughness!
Baking and Adding the Chocolate Kiss
After you roll those balls in that extra sugar coating—which gives you that classic crackle look—get them on the sheets about two inches apart. Bake them for just 8 to 10 minutes. That’s right, 8 to 10! You want them slightly underbaked in the very middle. The second they come out of the oven, you need to work fast! Gently but firmly press one unwrapped Hershey’s Kiss right into the center of each warm cookie. If you wait too long, the chocolate won’t melt slightly into the cookie top. If you do it too quickly, the cookie might collapse. It’s a tiny window, but it’s worth the effort! Then, just let them sit on the hot sheet for about five minutes before moving them over to the rack to finish setting up. You can see how I manage my time flow while whipping up other things, like easy breakfast recipes, right here!
Tips for the Best Homemade Peanut Butter Kiss Cookies
Listen, achieving that perfect, picture-perfect Peanut Butter Blossom look takes a tiny bit of finesse, but it’s never complicated. I want you to have the Best Peanut Butter Blossoms Recipe experience possible, so I live by a few little rules when I’m baking these—especially when I’m prepping them for a big holiday event. Paying attention to these small steps makes a huge difference in the final presentation!
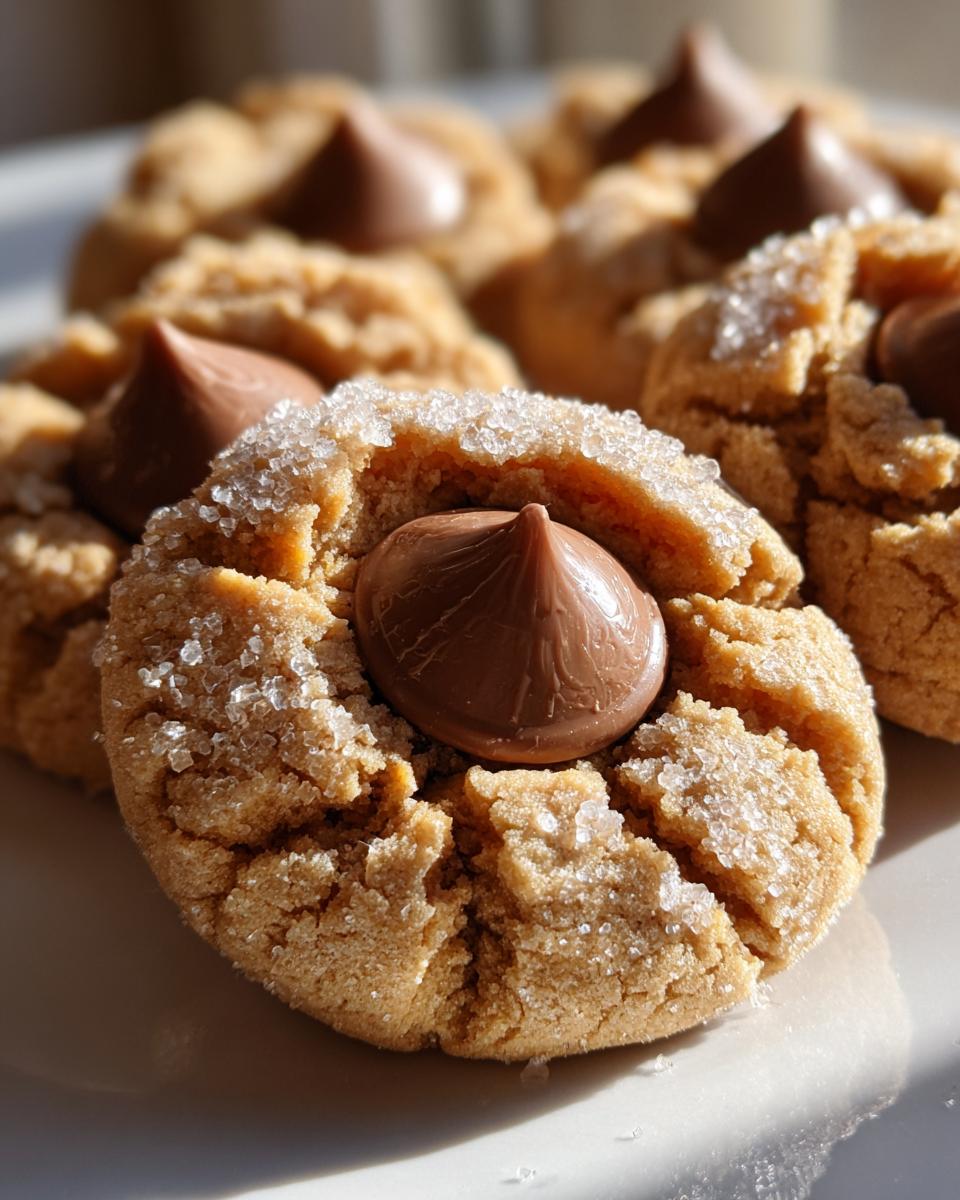
First, that sugar coating? Don’t skimp! Roll those dough balls generously in the granulated sugar. That coating is what gives the cookie its signature crackled, slightly rough surface that contrasts perfectly with the glossy Kiss pressed in the middle. If you have a really soft dough that struggles to hold the sugar, pop the balls in the freezer for just about five minutes before rolling. It firms them up just enough.
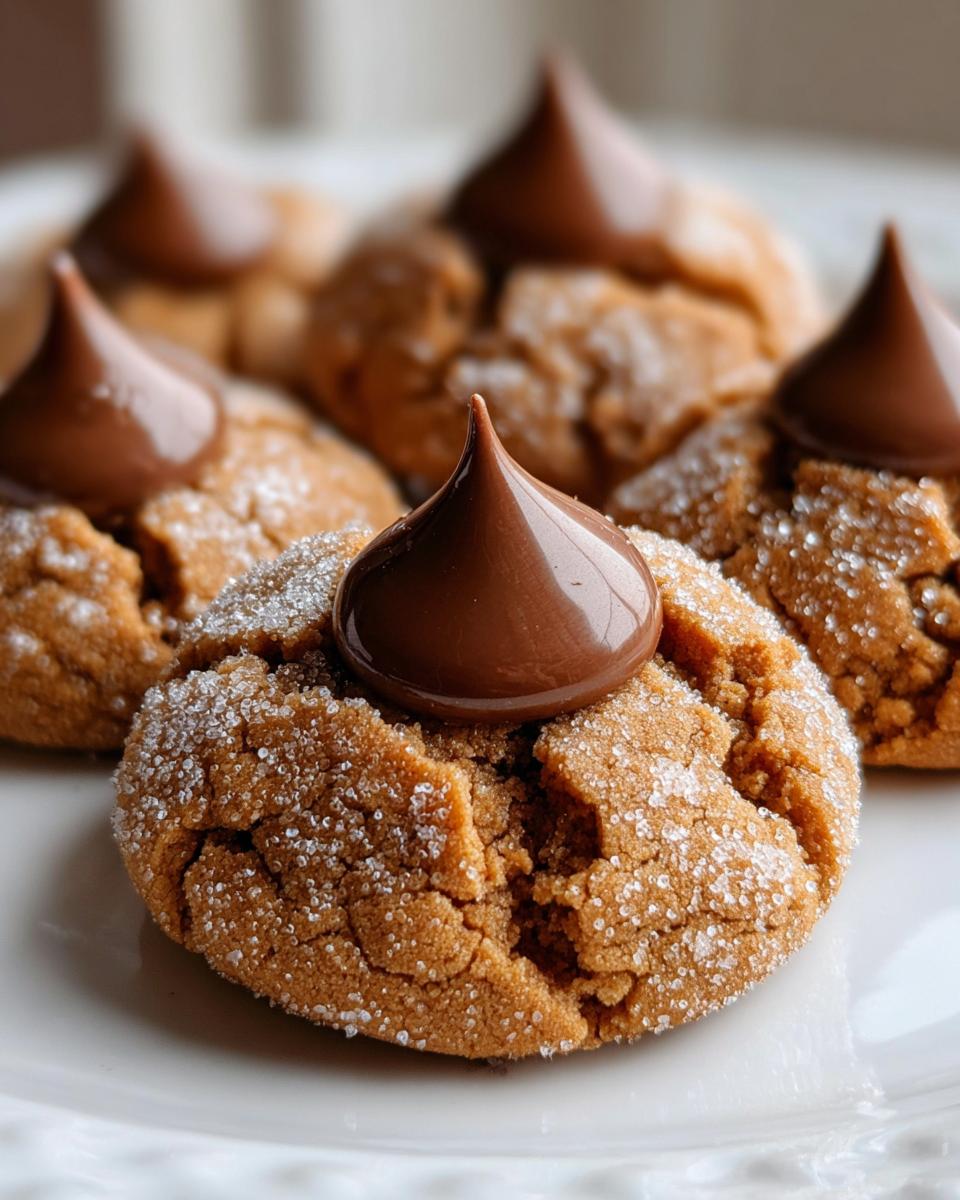
Now, let’s talk Kiss placement. If you want that clean imprint where the Kiss doesn’t look like it’s melting down the sides, pull the cookies out of the oven exactly when the edges look set. If you find they look a little flimsy once out, let them rest on the hot baking sheet for a full three minutes before pressing the chocolate in; that gives the cookie structure time to solidify slightly. If you need other simple ideas for quick bakes, I save tons of inspiration for speedy meals over at my weeknight dinner recipes section. For more insight on making them super soft, check out what my friends are doing over at Soft Peanut Butter Kiss Cookies.
Making Kiss Cookies for Holiday Cookie Exchanges
These Peanut Butter Blossoms truly shine when they are part of a big spread. When I think of Holiday Cookie Recipes, these are always near the top of the list. They are visually perfect for Christmas cookie plates, and honestly, they are practically mandatory for Valentine’s Day, especially if you swap out the milk chocolate Kisses for the pink/red Hugs Kisses wrappers!
I remember baking three dozen of these back when I was still in IT. I brought them to a neighborhood cookie exchange, and people went absolutely wild for them. They disappeared first, every single time! They look fancy because of that chocolate swirl on top, but they bake up faster than almost anything else. They look expensive when they are really just simple drop cookies. If you need ideas for other festive bakes that aren’t cookies, make sure you check out my recipe for easy pumpkin bars—they are another holiday favorite.
It’s easy to see why so many bakers look for easy Hershey Kiss Christmas Cookies recipes online. For your next party, you can whip up a double batch easily since this recipe is so straightforward! It’s the ultimate crowd-pleaser for any festive gathering.
Variations on Classic Kiss Cookies
I completely get it—sometimes you need a break from peanut butter, or maybe you have an allergy to contend with. The great thing about the structure of these Kiss Cookies is that it works beautifully with so many different base cookies! That classic chocolate Kiss on top is surprisingly versatile. We can easily turn this into a delightful vanilla or chocolate version, keeping that fantastic drop cookie simplicity.
If you love shortbread, you could adapt this base dough using richer butter content to create something like a Buttery Shortbread Kisses cookie. Or, think about how pretty a bright red cookie would look! I see so many people trying out Red Velvet Blossoms, which uses the same method but swaps the peanut butter for cocoa powder and red food coloring. It’s a fun way to shake things up for Valentine’s Day.
Making Chocolate Kiss Cookies Instead of Peanut Butter Kiss Cookies
Ready to make Chocolate Kiss Cookies? It’s so simple, you hardly need a new recipe! You basically follow the exact method for creaming the butter and sugars, but instead of adding peanut butter, you’ll introduce high-quality unsweetened cocoa powder—about 1/2 cup should do the trick to start. You might need an extra splash of milk or cream to get the texture right since the cocoa powder soaks up liquid differently than peanut butter does.
Then, instead of rolling the dough ball in plain sugar, you can dust it with powdered sugar for a beautiful contrast, making them look like little snowballs topped with chocolate. It keeps them nice and soft! For a great vanilla base that lets the Kiss shine, check out these fantastic Sugar Cookies with Hershey Kisses—they are a perfect example of a non-peanut base that still delivers that classic look. If you ever get into the shortbread realm, I’ve got my favorite light and airy whipped shortbread cookies recipe waiting for you!
Storage and Reheating Instructions for Kiss Cookies
So, you’ve just finished baking these incredible Kiss Cookies, and they are cooling perfectly on the rack. Now you have to figure out how to keep that glorious soft texture for more than just five minutes! That’s where proper storage comes in, and trust me, we want to protect that beautiful chocolate top from smudging or melting.
The biggest rule here is temperature control. These aren’t cookies you want getting warm or sitting next to anything steamy. If you plan on eating them all within a couple of days—which, let’s be honest, is usually my plan during the holidays—just store them in a single layer in a rigid, airtight container at room temperature. If you try to stack them too high, the weight will press down on the Kisses, and you’ll end up with a chocolate smear instead of a perfect little hat.
If you’re making a huge batch for your simple snack recipes rotation or saving them for later in the season, you can absolutely freeze them! Just stack them between sheets of parchment paper in a freezer-safe container. They hold up great for about three months this way. When you’re ready to eat them, just pull out what you need and let them thaw on the counter for about an hour. Don’t try to microwave them to reheat; the chocolate will turn into a soupy mess really fast. They are best enjoyed at room temperature!
Frequently Asked Questions About Kiss Cookies
I know you might have a couple of last-minute worries before you dive into the mixing bowl, so let’s clear up the most common things people ask me about these Hershey Kiss Cookies. Don’t worry if you’re looking to tweak things a little bit—I’ve got you covered!
What is the real difference between these and a regular Peanut Butter Blossoms Recipe?
Honestly, not much at all! For most home cooks, they are the exact same beloved cookie. Peanut Butter Blossoms is just the famous, copyrighted name for this specific style of peanut butter cookie topped with a chocolate Kiss. When people search for the general term, they usually mean this classic! It’s the king of all Chocolate Kiss Cookies.
Do I absolutely have to roll them in the extra sugar?
You certainly *can* skip it if you’re in a real rush, but I highly advise against it! That granular sugar coating is what gives the outside of the cookie that fantastic crackled look and a little bit of crunch that contrasts beautifully with the soft inside. If you skip it, you’ll notice the cookie is much smoother and won’t look quite as much like a classic Blossom.
Can these be made using a no-chill cookie dough method?
Absolutely! This recipe is already designed to be a quick bake, meaning it requires no chilling time to avoid spreading too much—that’s why it’s one of my absolute favorite Classic Holiday Baking staples! You mix it, roll it, and bake it right away. If you want to explore other quick bakes, feel free to send me a message over at my contact page!
For even more great advice on keeping these perfectly baked treasures fresh, I always reference what the other pros are doing. You can check out another take on Hershey Kiss Cookies if you’re curious!
Share Your Favorite Kiss Cookies Creations
Now that you’ve got the recipe for what I truly believe is the ultimate peanut butter Kiss Cookie, I’d absolutely love to hear how they turned out for you! Baking is a conversation, and I want to know what you brought to the table. Did you stick strictly to the milk chocolate Kiss, or did you get adventurous?
Did you try adding a little espresso powder to the dough to deepen the base flavor? Maybe you used those special peanut butter Kisses that come out around Halloween? Let me know! Drop a rating below—five stars if they brought harmony to your kitchen—and share any tweaks you made in the comments section. I read every single one, just like I read my favorite old family recipe cards.
Seeing your photos of these cookies makes my day and helps other home cooks feel more confident in trying the recipe next time. If you loved this journey into our Classic Holiday Baking stash, you can learn more about the philosophy behind Delish Symphony and why we focus on simple, flavorful harmony over here on my About Page. Happy baking, friends!
PrintClassic Peanut Butter Blossoms (Soft Kiss Cookies)

Make the classic Peanut Butter Blossoms, soft and chewy peanut butter cookies topped with a melted milk chocolate Hershey’s Kiss. This recipe is simple and perfect for holiday baking.
- Prep Time: 15 min
- Cook Time: 10 min
- Total Time: 25 min
- Yield: About 3 dozen cookies 1x
- Category: Dessert
- Method: Baking
- Cuisine: American
- Diet: Vegetarian
Ingredients
- 1 cup unsalted butter, softened
- 3/4 cup creamy peanut butter
- 3/4 cup granulated sugar, plus 1/4 cup for rolling
- 3/4 cup packed brown sugar
- 2 large eggs
- 1 teaspoon vanilla extract
- 2 1/4 cups all-purpose flour
- 1 teaspoon baking soda
- 1/2 teaspoon salt
- 1 bag (12 oz) milk chocolate Hershey’s Kisses, unwrapped
Instructions
- Preheat your oven to 375°F (190°C). Line baking sheets with parchment paper.
- In a large bowl, cream together the softened butter, peanut butter, 3/4 cup granulated sugar, and brown sugar until the mixture is light and fluffy.
- Beat in the eggs one at a time, then mix in the vanilla extract.
- In a separate bowl, whisk together the flour, baking soda, and salt. Gradually add the dry ingredients to the wet ingredients, mixing until just combined. Do not overmix the dough.
- Place the remaining 1/4 cup of granulated sugar in a shallow dish.
- Roll the cookie dough into 1-inch balls. Roll each ball in the sugar coating until fully covered.
- Place the sugared balls about 2 inches apart on the prepared baking sheets.
- Bake for 8 to 10 minutes, or until the edges are lightly set. The cookies will look slightly underbaked in the center.
- Immediately upon removing the cookies from the oven, gently press one unwrapped Hershey’s Kiss into the center of each warm cookie. The residual heat will soften the chocolate slightly.
- Let the cookies cool on the baking sheet for 5 minutes before transferring them to a wire rack to cool completely. The Kiss will set as the cookie cools.
Notes
- For the softest cookies, remove the cookies from the oven when the edges are just beginning to set.
- If you want a firmer Kiss, wait 2 to 3 minutes after removing the cookies from the oven before pressing the chocolate in.
- You can use different types of Kisses, such as Hugs or colored holiday Kisses, for variation.
Nutrition
- Serving Size: 1 cookie
- Calories: 180
- Sugar: 15
- Sodium: 110
- Fat: 10
- Saturated Fat: 5
- Unsaturated Fat: 5
- Trans Fat: 0
- Carbohydrates: 21
- Fiber: 1
- Protein: 4
- Cholesterol: 25