
There is just something truly magical about taking simple pantry staples and turning them into something spectacularly indulgent, right? I live for that moment when you take the first bite of a perfectly made candy, and the coating snaps just right. Forget those firm, overly sweet store-bought versions! My goal here at Delish Symphony is to show you how to nail the absolute best part: achieving that heavenly, runny, liquid center in your own chocolate covered cherries. It feels like a high-end treat, but trust me, the process is pure, simple harmony in the making.
- Why You Will Make These Homemade Chocolate Covered Cherries
- Essential Ingredients for Classic Chocolate Covered Cherries
- How to Make Chocolate Covered Cherries: Step-by-Step Instructions
- Tips for Success When Making Chocolate Cherry Cordials Recipe
- Variations on Chocolate Covered Cherries
- Serving Suggestions for Your Gourmet Cherry Candy
- Storage & Shelf Life for Homemade Chocolate Covered Cherries
- Frequently Asked Questions About Chocolate Covered Cherries
- Share Your Homemade Chocolate Covered Cherries Creations
Why You Will Make These Homemade Chocolate Covered Cherries
I always preach about simplicity, but sometimes, you just need that showstopper dessert, you know? Making these at home guarantees maximum payoff for the effort. You are going to adore these because:
- You finally get that true, decadent liquid center that melts in your mouth.
- They taste infinitely fresher and more gourmet than anything you buy in a box.
- They make the absolute best holiday chocolate gifts—homemade always feels more special!
- The whole process is surprisingly straightforward; it’s easy candy making with huge results.
Essential Ingredients for Classic Chocolate Covered Cherries
Okay, getting the ingredients right is half the battle, especially when we are aiming for that perfect, smooth fondant shell. It might look like a long list, but honestly, most of this is going into that sweet syrup base. I link to this great resource later that breaks down the basics, too! Remember, for truly gourmet cherry candy from old-fashioned recipes, use the best chocolate you can find.
For the Fondant Cherry Center
This is where the magic starts! You need the sugar, plus the corn syrup to keep things from crystallizing on us—that’s key for smooth texture. The vanilla and almond extracts are non-negotiable; they give those cherries their classic, nostalgic flavor profile.
- 1 cup granulated sugar
- 1 cup water
- 1/4 cup light corn syrup
- 1/2 teaspoon vanilla extract
- 1/4 teaspoon almond extract
- 1 jar (10 ounces) maraschino cherries, drained well AND patted very dry. Seriously, dry them like you mean it!
For the Rich Chocolate Coating Ideas
For the actual chocolate covered cherries coating, you have options, but remember what I said about quality? If you’re going for a rich chocolate experience, spring for the good stuff here. Sometimes, I add a tiny bit of shortening just to make the dipping easy—it thins the chocolate just enough so you don’t get a clumsy, thick coat.
- 12 ounces dark chocolate or milk chocolate, chopped finely (Dark chocolate gives you that wonderful contrast!)
- 1 tablespoon vegetable shortening or coconut oil (optional, just helps with dipping smoothness)
Getting those cherries paper-towel dry is critical before they even see the fondant. It seriously prevents 90% of candy-making disasters!
How to Make Chocolate Covered Cherries: Step-by-Step Instructions
Alright, let’s get down to the fun part! Making chocolate covered cherries comes down to two main achievements: getting that sugary, creamy coating perfect, and then giving it time to turn into that luscious liquid center. It requires a bit more focus than just mixing batter since we are working with temperatures, but don’t let candy making intimidate you! I use the same double-checking methods I use when I make my chocolate chip cookies—precision matters here!
Preparing the Cherries for Perfect Coating
This step is the first secret handshake of candy making, and if you skip it, you’re asking for trouble. Water is the enemy of melted chocolate; it causes it to seize up and turn gritty instead of smooth. So, take those drained maraschino cherries and lay them out on a sturdy stack of paper towels. I press down on them gently—not so hard that they fall apart, but enough to wick away every bit of surface moisture. If they feel sticky or damp, your chocolate coating won’t want to stick properly later on.
Creating the Classic Liquid Center Fondant
You absolutely need that candy thermometer here! Combine your sugar, water, and corn syrup in a saucepan. Heat it until the sugar dissolves, but stop stirring once it starts boiling. We need to hit that sweet spot: 238 degrees Fahrenheit—the soft-ball stage. If you go too high, your center will be firm; too low, and it won’t set enough. Once it hits temperature, pull it off the heat immediately. Here is the part where patience kicks in: let that syrup cool completely, undistributed, down to 110 degrees. Seriously, don’t poke it or try to speed it up. This cooling is crucial before we mix in the flavorings.
Setting the Fondant Base for Your Chocolate Covered Cherries
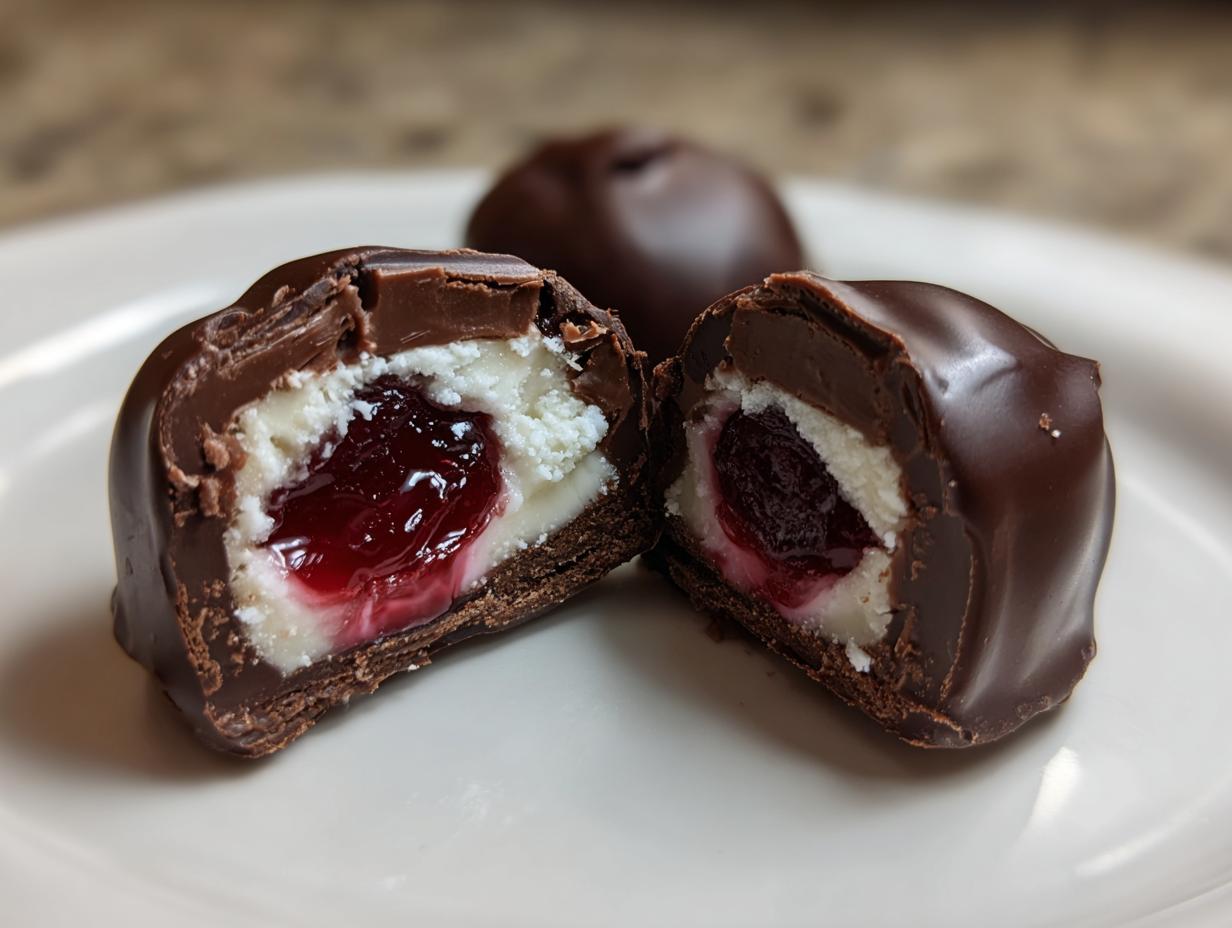
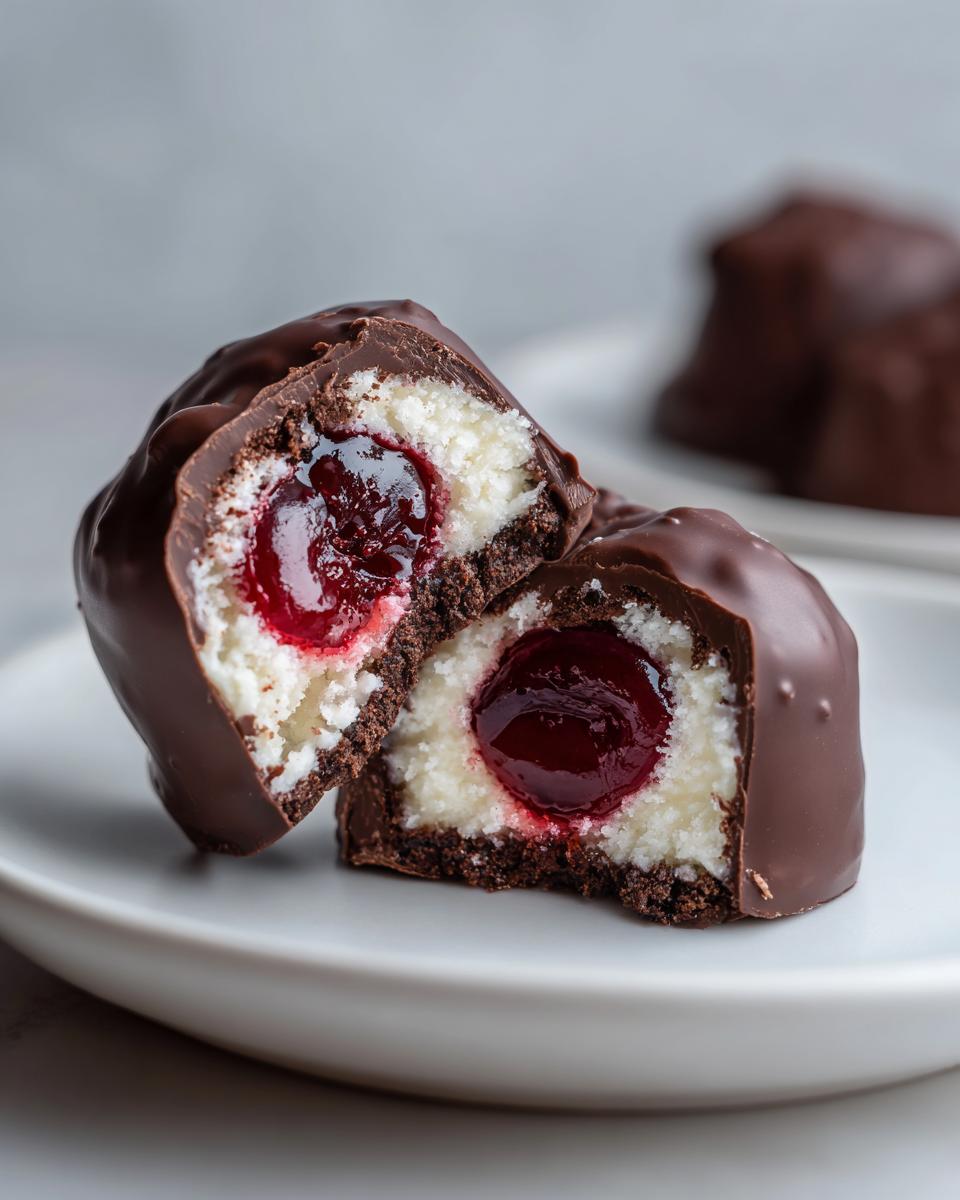
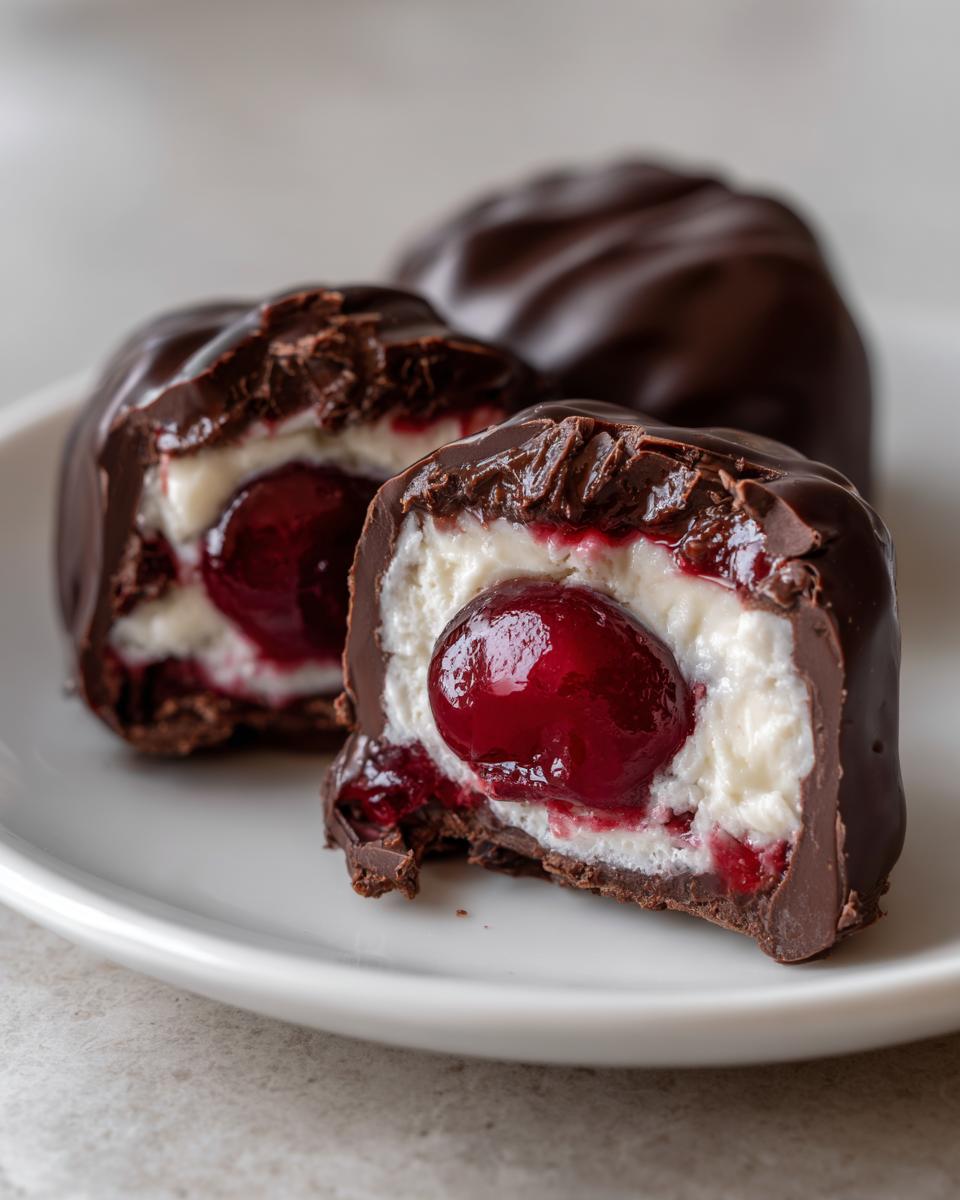
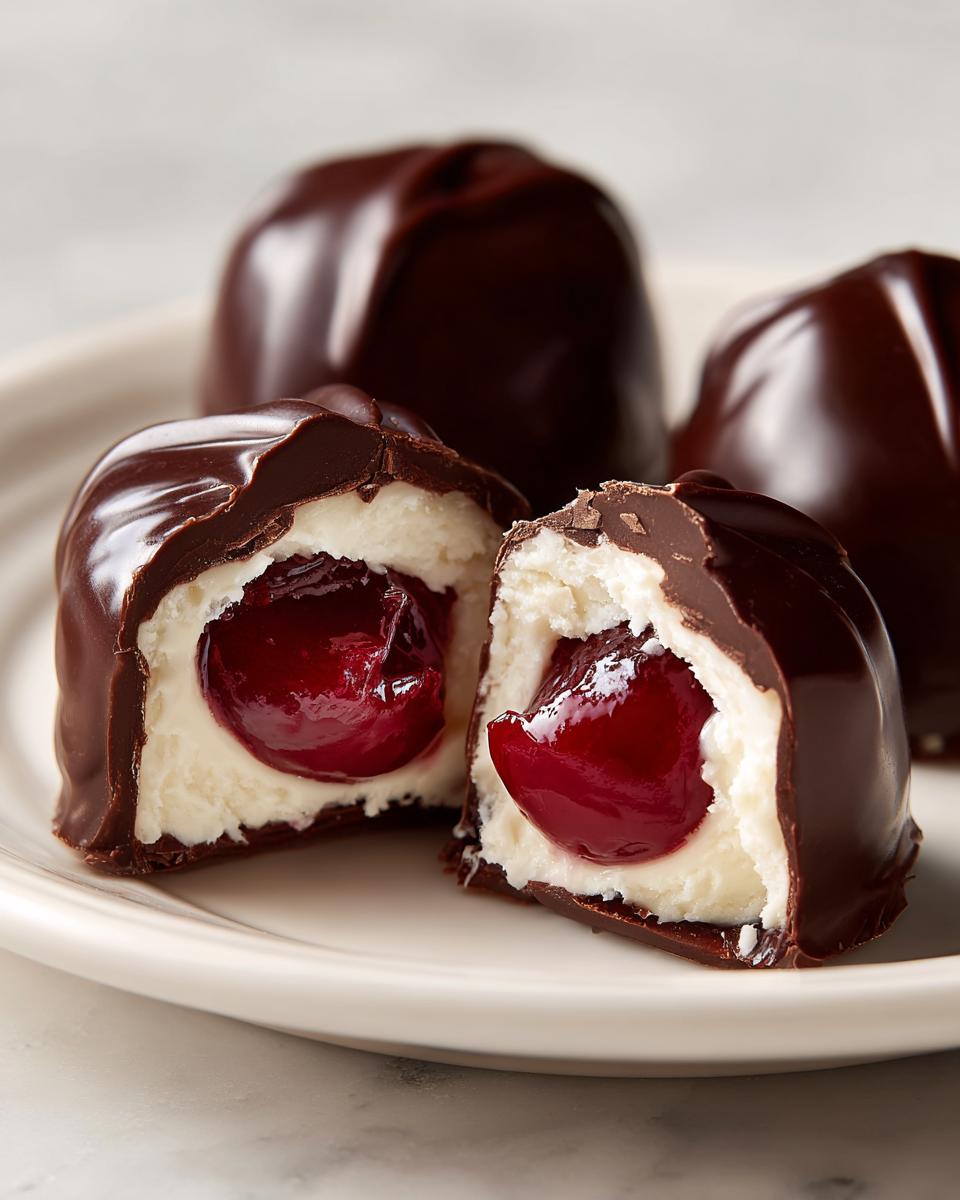
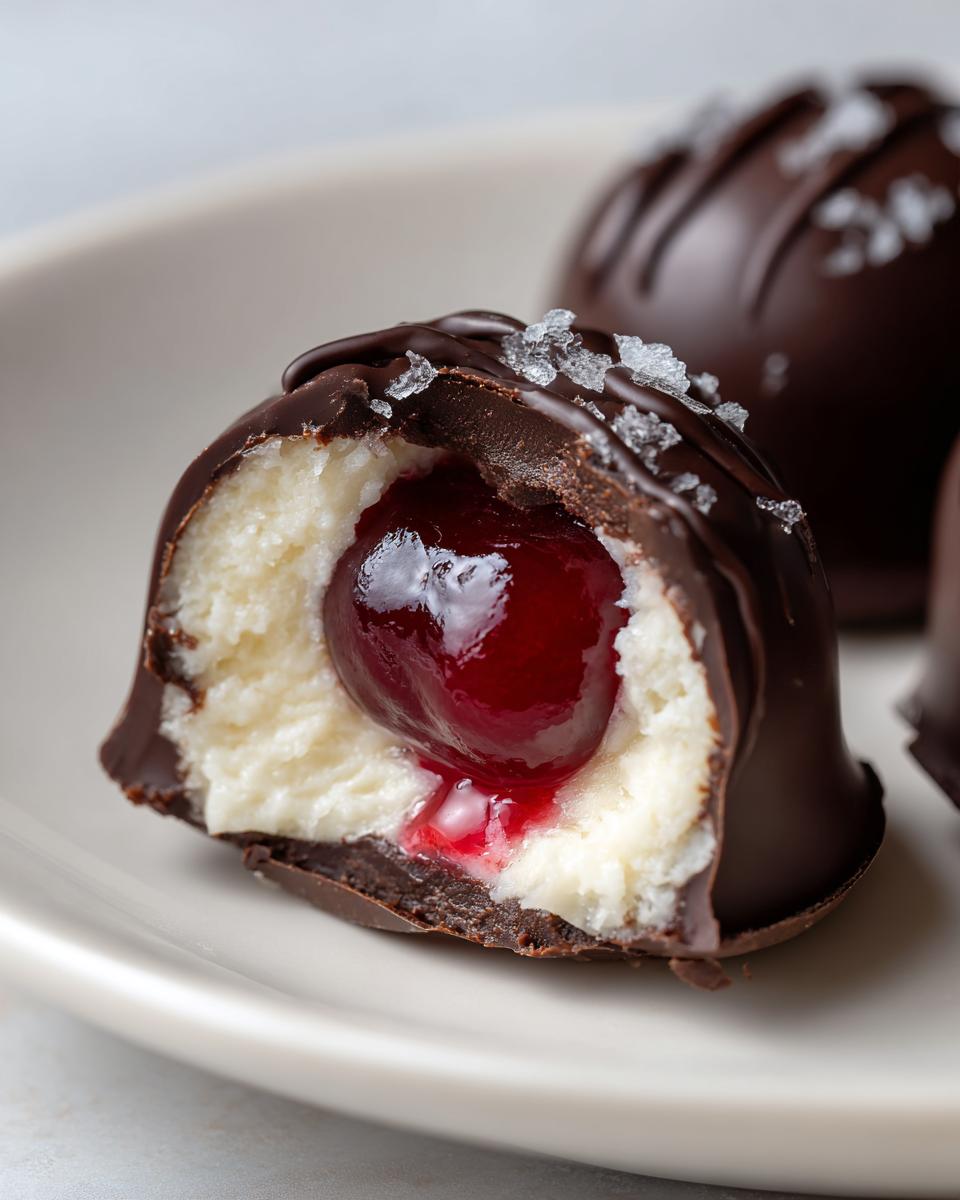
Once it’s cooled down, stir in your vanilla and almond extracts. Now comes the hard part—stirring slowly until it thickens into an opaque, creamy frosting texture. Then, we dip! Coat each dried cherry completely in this fondant and place it on parchment paper. Now, go away! You need to let these sit for at least four hours, but honestly, overnight is best. This resting time lets the sugar mixture slowly interact with the inner cherry moisture, creating that spectacular liquid center cherries experience we’re after. You can check out more tips on that tricky process over at The Kitchen is My Playground.
The Decadent Chocolate Dip
Once those centers are rock hard, it’s chocolate time. Chop your chocolate fine and melt it low and slow. I use the microwave, doing 30-second bursts and stirring really well between each buzz to avoid scorching it. If it still seems too thick, stir in that option teaspoon of shortening for a better melt. Use a skewer or two forks to dunk the fondant cherry completely. Give it a little jiggle while lifting it out so the excess drips off. Back onto the parchment they go! Just let them sit until that coating snaps hard.
Tips for Success When Making Chocolate Cherry Cordials Recipe
I know candy making can feel fussy, but tackling the chocolate cherry cordials recipe is all about controlling a few key variables. If your chocolate seems too thick when dipping, don’t panic! That’s usually because the ambient air is dry or your chocolate cooled slightly. Add that little bit of shortening or coconut oil and stir gently; it loosens everything up so you still get a beautiful, shiny coat.
Another huge thing that trips people up is getting that liquid center. If your cordial cherries seem solid days later, it means you rushed Step Three—the cooling time for the fondant. It needs that natural, slow cooling to ensure the sugar is ready to break down the cherry sugars. Patience pays off hugely here, or you just end up with a very fancy, soft truffle instead of a true cordial! For troubleshooting stubborn chocolate, I always check out how others handle it, like on One Sweet Mama.
And listen, humidity is the enemy of sugar work. If it’s raining buckets outside, I try to make sure my kitchen fan is off and I work as quickly as possible during the chocolate dipping phase itself. We want snappy, glossy coatings, not dull, soft ones!
If you’re fighting with your mixture and need a quick solution to bring back that smooth texture in other desserts, I often rely on techniques similar to when I stabilize my garlic aioli; sometimes just a little fresh fat helps marry everything back together. But for these cherries, stick to temperature and time, and you’ll be golden!
Variations on Chocolate Covered Cherries
While the recipe above gives you that timeless, perfect combination, half the fun of making these DIY chocolate treats at home is that you can personalize them! Why stick to one flavor when you have a whole world of combinations waiting? After all, variety is the spice of a flavorful life, right?
Small changes to the fondant mixture can drastically change the overall taste profile of your homemade chocolate covered cherries. It’s such an easy swap. If you aren’t huge on almond, try something brighter! For a festive twist—especially if you are making these for the holidays—swap out the almond extract entirely and use some orange extract instead. It cuts through the sweetness wonderfully. Or, if you’re feeling bold, try a splash of good quality cherry liqueur in place of some of the vanilla. Just be aware that adding extra liquid might slightly slow down how quickly that liquid center forms, so make sure your fondant is thick before dipping the cherries!
Then there’s the chocolate coating! We talked about dark chocolate being my go-to, but don’t rule out the other options. White chocolate makes an incredibly striking, elegant look, especially when you drizzle it with a contrasting dark chocolate later on. Or, use milk chocolate if you prefer a sweeter coating overall. I even like making a batch of all three types when I make my holiday punch—like my Cranberry Orange Punch—so I can offer variety on the platter. When dipping in white chocolate, just be super mindful of the heat, because it burns much faster than dark or milk chocolate, trust me. You can find some gorgeous visual inspiration for unique coatings over at Buttery Sweet!
Remember, once you master the technique for that liquid center, every variation is just a simple flavor exchange away from being a brand new, incredibly decadent sweet treat!
Serving Suggestions for Your Gourmet Cherry Candy
You’ve done the hard part—you’ve made amazing, decadent, incredible chocolate covered cherries! Now, let’s talk about showing these little gems off. Candy making is all about presentation, especially when you are putting them out for a party or gifting them during the holiday season. These aren’t just treats; they’re little pieces of edible art!
For Christmas candy recipes, presentation is everything. I love setting them out on tiered serving trays. Maybe you could dip half in dark chocolate and half in white chocolate, then arrange them alternately? It creates a really nice visual pop. Think about lining small paper candy cups with foil wrappers—they instantly look professional, the kind you’d see in a fancy candy shop.
If it’s Valentine’s Day desserts you’re preparing for, lean into the romance! A clear glass pedestal dish filled high with these cordials, maybe scattered with a few edible gold flakes (if you’re feeling super extra!), looks stunning. Seriously, the way the light catches that glossy chocolate is gorgeous. You can even use them as toppers for a simple chocolate mousse or alongside a slice of something rich, like my coffee cake muffins if you need a contrasting texture on the dessert table.
As for pairings, these rich, sweet, slightly tart beauties pair wonderfully with something slightly bitter or refreshing to cut through the chocolate. A hot cup of black coffee is the classic choice, but they are also amazing balanced out by a sparkling dry Prosecco. The bubbles and the acidity really make that cherry burst forward! Or, if you want a non-alcoholic pairing, a strong iced black tea works wonders.
If you’re prepping these for giving away, check out the presentation advice on Grace Cooks—they have some simple, beautiful ideas for boxing them up that I always steal!
Storage & Shelf Life for Homemade Chocolate Covered Cherries
Okay, you’ve made this incredible, decadent batch of homemade chocolate covered cherries, and now you’re wondering, “How long can I keep these beautiful things?” Because we are dealing with sugar work and moisture—that liquid center we worked so hard for—storage is a little different than just tossing cookies in a jar.
My biggest rule here is to keep them cool and dry. Avoid the refrigerator if you can! Seriously, put the fridge out of your mind unless it’s blazing hot outside. Cool air is fine, but humidity is the sworn enemy of perfectly tempered chocolate. If you put these lovely things in the fridge, the chocolate coating tends to get that dull white film—that’s blooming—and it can actually interfere with that slow-forming liquid center.
The best place to keep them, provided your kitchen isn’t an oven, is an airtight container stored at a cool room temperature. Think 65 to 70 degrees Fahrenheit if you can manage it. When stored correctly, these gourmet cherry candy treats are actually pretty resilient. They are best enjoyed within two weeks, but honestly, the texture holds up really well for a full month. Why? Because that thick fondant layer we made acts as a good seal!
It’s the moisture interaction that changes things over time. As that liquid center fully develops, it might eventually start to soften the fondant shell slightly more than you want. So, if you plan on having them for a big holiday party, make them about a week or so ahead of time. That gives them time to set up perfectly but keeps them at their peak freshness. If cutting them for a platter, make sure they are completely set up firm before stacking them, or you’ll end up with a chocolate mess!
Frequently Asked Questions About Chocolate Covered Cherries
When you’re diving into candy making, especially something as classic as this, you’re bound to have a few questions pop up. Don’t worry; that’s totally normal! These homemade chocolate covered cherries are wonderful, but they do have a couple of precision steps. Here are the things I get asked most often when folks try out this chocolate cherry cordials recipe for the first time.
How do I guarantee a runny liquid center in my chocolate covered cherries?
This is the million-dollar question! You absolutely must be patient between the fondant coating and the final chocolate dip. After you coat the cherries in the fondant mixture, you have to let them sit, undisturbed, for at least four hours, but truly, overnight is my preference. That waiting period allows the sugar in the fondant to slowly start drawing the moisture out of the cherry itself. If you dunk them in chocolate too soon, that cherry is just going to be soft and chewy—not the glorious, runny liquid center cherries you want! It’s a waiting game, but that resting time is the secret sauce.
Can I use fresh cherries instead of maraschino cherries for this easy candy making?
For this specific cordial recipe, no, I highly recommend sticking to maraschino cherries that are already stored in syrup. Why? Because we are making a sugar-based fondant center that relies on drawing out moisture to create that liquid effect. Fresh cherries have too much natural acidity and water content, and they just won’t cooperate with the fondant process. Plus, the maraschino cherries already have that distinct, sweet, slightly artificial flavor that makes a traditional chocolate covered cherry taste exactly like it should!
What is the best way to store these DIY chocolate treats?
Keep them cool and away from humidity! I try to treat these like delicate things that need respect. Store them in a single layer—if you stack them, the chocolate bottoms might stick—in an airtight container at a cool room temperature, ideally under 70 degrees. Definitely avoid the fridge unless your house is physically hot, because the condensation can ruin that beautiful, glossy chocolate coating. If you’re storing them for something like easy breakfast recipes for a morning platter, make sure they’re solid before you put the lid on!
For more details on how to keep high-quality candies shelf-stable, I always peek at the methods used by the pros, like the team over at CookThink.
Share Your Homemade Chocolate Covered Cherries Creations
Now that you’ve gone through all the steps—drying the cherries, nailing that soft-ball temperature, and waiting patiently for the liquid center to form—I want to hear about it! Seriously, stepping into candy making is a big deal, and you totally earned bragging rights.
Was the chocolate dip as glossy and perfect as you hoped? Did your family immediately snatch them up the second they set? Tell me! Drop a comment down below with your experience. If you had a tricky moment or found a little genius shortcut that made your version of these homemade chocolate covered cherries even better, share that too! We are all learning together here at Delish Symphony.
And hey, if you took a beautiful photo of your glossy, finished cordials—maybe sitting next to a cup of coffee or bundled up as a holiday gift—I would absolutely love to see it! Tag me online or send it over. Seeing your delicious creations is seriously the best part of my day. It proves that anyone can achieve this level of gourmet cherry candy right in their own kitchen.
If you want to see what others have been whipping up lately, or just need more dessert inspiration, check out the amazing bakes over at Bakes by Emily—it might give you ideas for your next project!
Don’t forget to give this recipe a star rating if you enjoyed the harmony of flavors! I’m always refining things, and your feedback helps me keep these instructions perfectly clear and practical for everyone. Ready to bake something wonderful together next time? You can always read a little more about my philosophy over on the About Page!
PrintHomemade Liquid Center Chocolate Covered Cherry Cordials

You can create decadent, gourmet chocolate cherry cordials at home that rival store-bought versions. This recipe focuses on achieving the classic liquid center using simple ingredients and straightforward candy-making techniques.
- Prep Time: 45 min
- Cook Time: 15 min
- Total Time: 4 hours 55 min
- Yield: About 20 cherries 1x
- Category: Dessert
- Method: Candy Making
- Cuisine: American
- Diet: Vegetarian
Ingredients
- 1 cup granulated sugar
- 1 cup water
- 1/4 cup light corn syrup
- 1/2 teaspoon vanilla extract
- 1/4 teaspoon almond extract
- 1 jar (10 ounces) maraschino cherries, drained well and patted very dry
- 12 ounces dark chocolate or milk chocolate, chopped (for dipping)
- 1 tablespoon vegetable shortening or coconut oil (optional, for smoother dipping)
Instructions
- Prepare the cherries: Drain the maraschino cherries completely. Lay them on several layers of paper towels and pat them dry. This step is crucial for preventing the chocolate from seizing. Set aside.
- Make the fondant center: In a small saucepan, combine the sugar, water, and corn syrup. Stir gently over medium heat until the sugar dissolves. Stop stirring once it boils.
- Cook the syrup: Insert a candy thermometer. Boil the syrup without stirring until it reaches 238 degrees Fahrenheit (soft-ball stage). This usually takes about 8 to 10 minutes.
- Cool the syrup: Immediately remove the pan from the heat. Let the syrup cool undisturbed to 110 degrees Fahrenheit. Do not rush this cooling process.
- Finish the fondant: Once cooled, stir in the vanilla and almond extracts. Continue to stir slowly and steadily until the mixture becomes thick, opaque, and creamy, resembling thick frosting. This process may take several minutes.
- Coat the cherries: Take one dried cherry at a time and dip it into the fondant mixture, ensuring it is fully coated. Use a toothpick inserted into the cherry to handle it. Place the fondant-covered cherry on a parchment-lined baking sheet. Repeat until all cherries are coated.
- Set the fondant: Allow the fondant-covered cherries to set at room temperature for at least 4 hours, or preferably overnight, until the coating is firm. The liquid center forms as the sugar mixture slowly dissolves the cherry moisture.
- Melt the chocolate: Chop the chocolate finely. Place it in a microwave-safe bowl with the shortening or coconut oil, if using. Microwave in 30-second intervals, stirring well after each, until the chocolate is smooth and fully melted.
- Dip the cordials: Working quickly, use a dipping tool or two forks to dip each fondant-covered cherry into the melted chocolate. Allow excess chocolate to drip off.
- Final set: Place the chocolate-dipped cherries back onto the parchment-lined sheet. If desired, drizzle with contrasting chocolate. Let the chocolate set completely at room temperature or briefly in the refrigerator until firm.
Notes
- For a true liquid center, the fondant must be allowed to rest on the cherries long enough for the sugar to draw moisture from the fruit. Patience here makes the difference between a creamy center and a runny cordial.
- If you want a richer flavor, use high-quality dark chocolate for the coating.
- Store finished cordials in an airtight container at cool room temperature, away from direct sunlight.
Nutrition
- Serving Size: 1 cordial
- Calories: 180
- Sugar: 25g
- Sodium: 10mg
- Fat: 9g
- Saturated Fat: 5g
- Unsaturated Fat: 4g
- Trans Fat: 0g
- Carbohydrates: 25g
- Fiber: 1g
- Protein: 2g
- Cholesterol: 5mg