
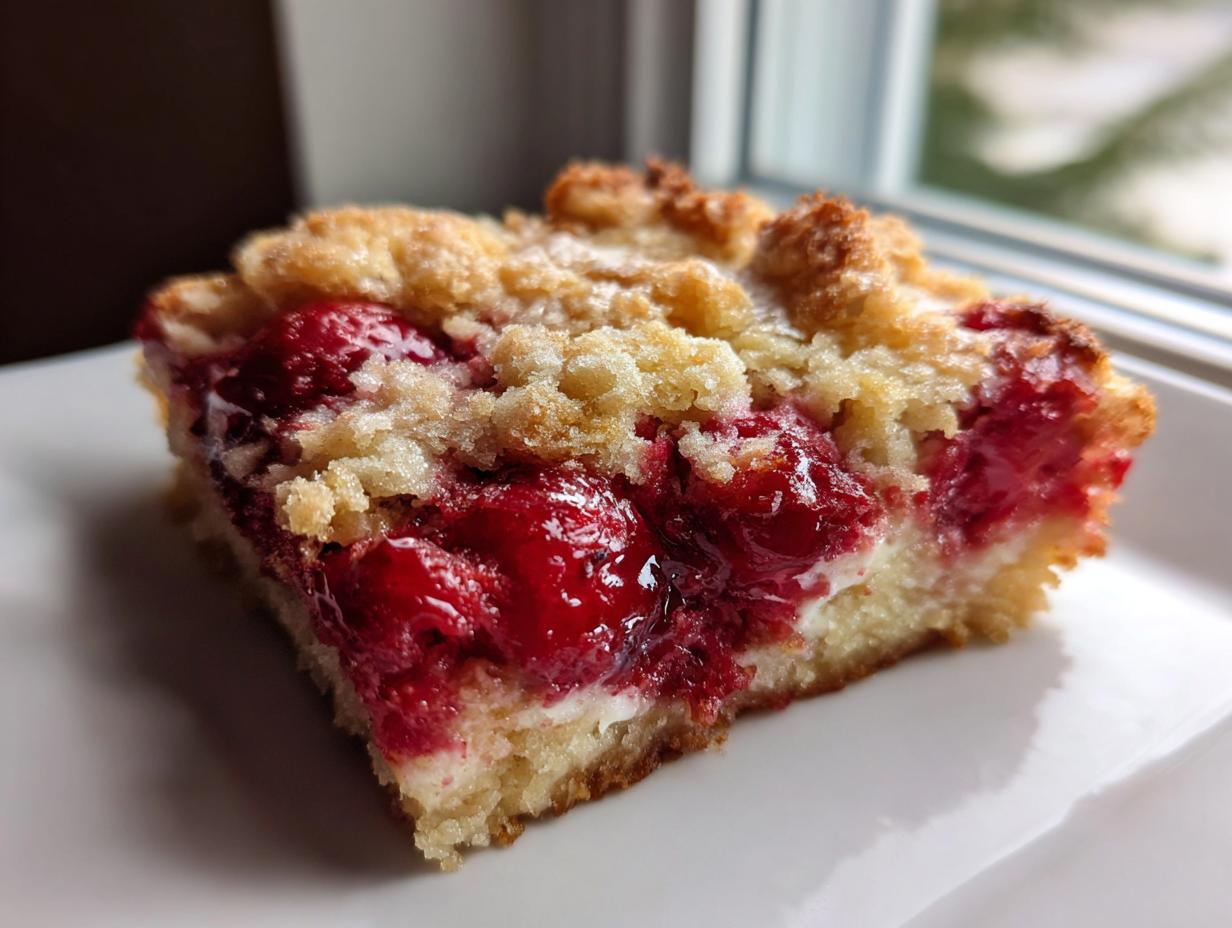
Sometimes, when you want a proper, satisfying dessert, the idea of complicated steps just sucks the joy right out of it, doesn’t it? That’s the beauty of finding harmony in simplicity. Today, we’re diving into what I genuinely believe is the easiest thing you can pull out of your oven: the cherry dump cake. Seriously, this recipe requires zero mixing bowls, no complicated creaming, and minimal cleanup. It strips away all that fussy choreography so you can focus on that incredibly sweet, warm fruit hitting your palate. As a home cook who values efficiency, this recipe proves that “simple” doesn’t have to mean sacrificing that wonderful, comforting flavor we crave.
- Why This Easy Cherry Dump Cake Recipe Works for Busy Cooks
- Gathering Ingredients for Your Cherry Dump Cake
- Step-by-Step Instructions for the Quick Cherry Dessert
- Tips for Success with Any Dump Cake Variation
- Serving Suggestions for This Warm Fruit Dessert
- Storage and Reheating Instructions for Leftover Cherry Dump Cake
- Troubleshooting Common Issues with Your Simple Baked Fruit Dessert
- Frequently Asked Questions About the **Cherry Dump Cake**
- Estimated Nutritional Data for One Serving of Cherry Dump Cake
- Share Your Cherry Dump Cake Experience
Why This Easy Cherry Dump Cake Recipe Works for Busy Cooks
If you love the idea of a warm dessert but dread pulling out every measuring cup we own, this is for you. This entire process relies on pantry staples, which is why I find it so reliable for a spontaneous weeknight treat. We’re aiming for absolute **no fuss baking** here. There’s almost no way to mess this up, which is why it’s my go-to when I need a really satisfying **quick cherry dessert** without any stress.
The Appeal of Minimal Ingredient Cake
What I love most is seeing people’s faces when I tell them our base **cherry dump cake** is basically just three ingredients! You are simply layering the flavors, not trying to incorporate them through diligent mixing. That ease makes it a phenomenal potluck dessert; you just assemble it quick and let the oven do the heavy lifting. It’s dessert philosophy made practical for real life, and you can trust it every single time. If you’re looking for more streamlined ideas for getting dinner on the table fast, check out my suggestions for amazing weeknight meals.
Gathering Ingredients for Your Cherry Dump Cake
Okay, let’s talk what you need for this glorious mess of deliciousness. Since the magic of the **cherry dump cake** lies in its assembly—not its preparation—getting the ingredients ready is basically the hardest part, and even that is ridiculously easy. Remember, we are building harmony here; every single component has a job to do, so try not to skip anything fundamental!
Here’s the lineup you’ll need to pull out:
- One big can of cherry pie filling—that’s the 21-ounce size. This is our gooey base.
- One standard box of yellow cake mix, the 15.25-ounce one. Make sure it stays dry for now!
- One full cup of unsalted butter—that’s two regular sticks, melted down.
- Oh, and because I always think things need just a little extra melodic note, I add one teaspoon of vanilla extract, but this is totally optional if you’re sticking strictly to the three ingredients.
Ingredient Notes and Substitutions for the Best Cherry Dump Cake
While yellow cake mix gives you that beautiful classic flavor, please know you have wiggle room here. If you find yourself with white cake mix or even a butter cake mix, grab it! They all work just fine in this straightforward recipe. They still yield that wonderful, crumbly, almost shortbread-like topping that makes this more than just a casserole; it’s practically a **cherry cobbler dessert**!
Now, for texture junkies like me—and this is how we turn it into that slightly crisper, more substantial **Southern style dump cake**—feel free to stir a half cup of chopped pecans or walnuts into the melted butter before you drizzle it. That little bit of nut nestled in the butter layer adds such a great crunch against that sweet, soft cherry base. It really elevates the whole experience without adding any extra steps to the mixing madness!
Step-by-Step Instructions for the Quick Cherry Dessert
This is where the fun starts, and I mean that literally, because there’s virtually no technique required. This is peak **no fuss baking**! We want to maintain those distinct layers so the cake mix crisps up nicely, giving us that incredible texture reminiscent of a pie crust or cobbler top. First things first: get your oven warmed up to 350 degrees Fahrenheit and make sure you’ve got that 9×13 baking dish lightly greased. We definitely don’t want this gem sticking! I know this is a dessert recipe, but if you’re ever looking for some super simple things to whip up early in the day, check out my ideas for easy breakfast recipes.
Assembling the Layers of Your Cherry Dump Cake
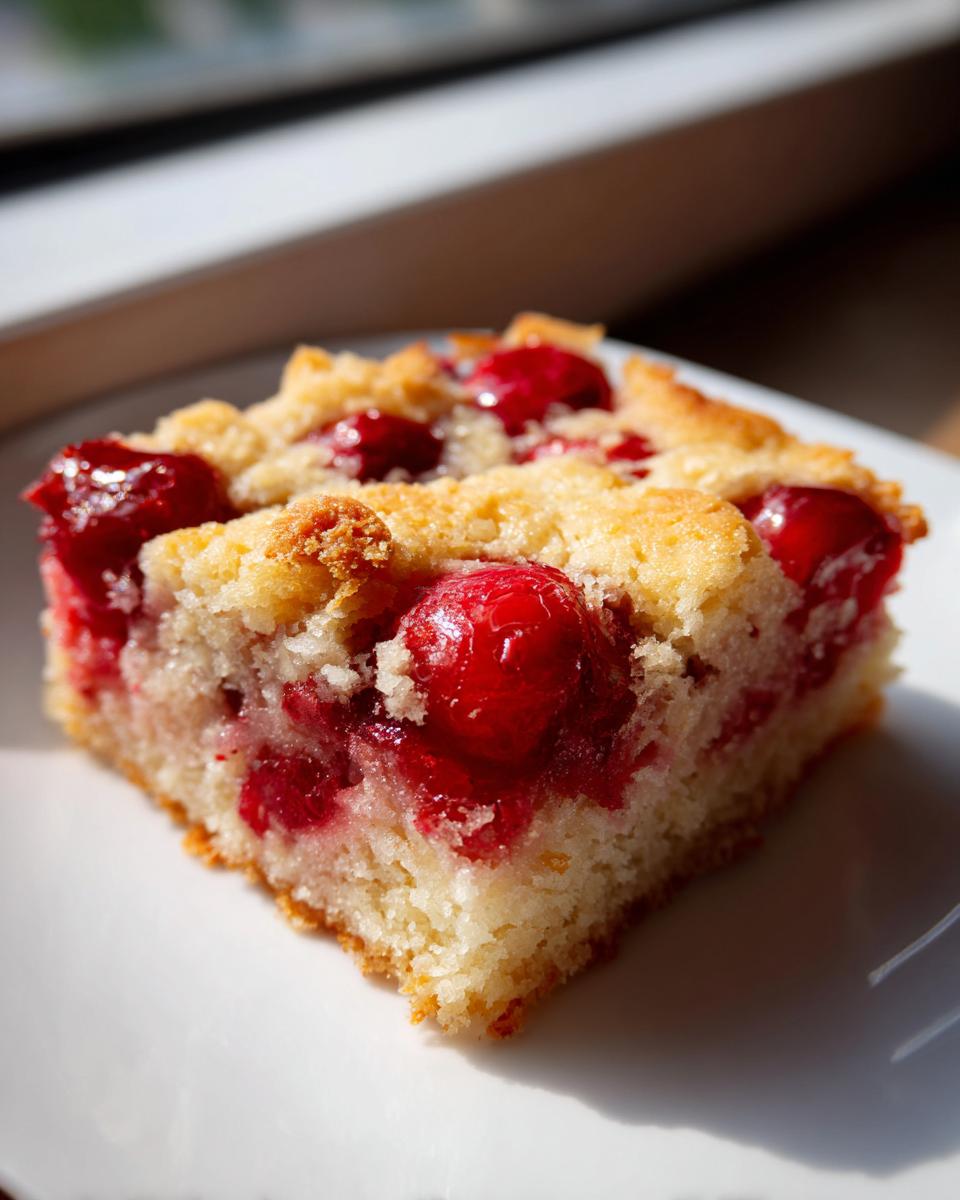
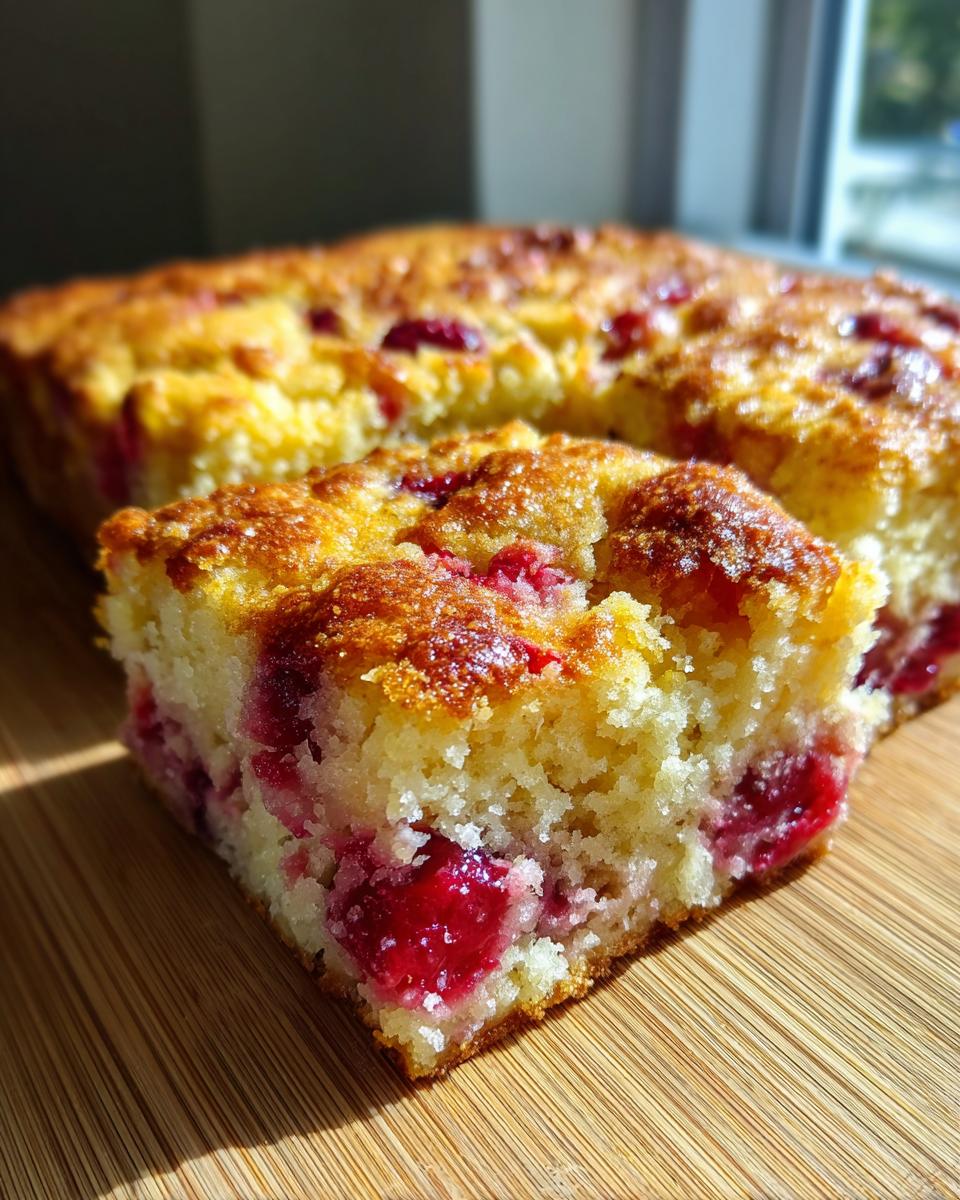
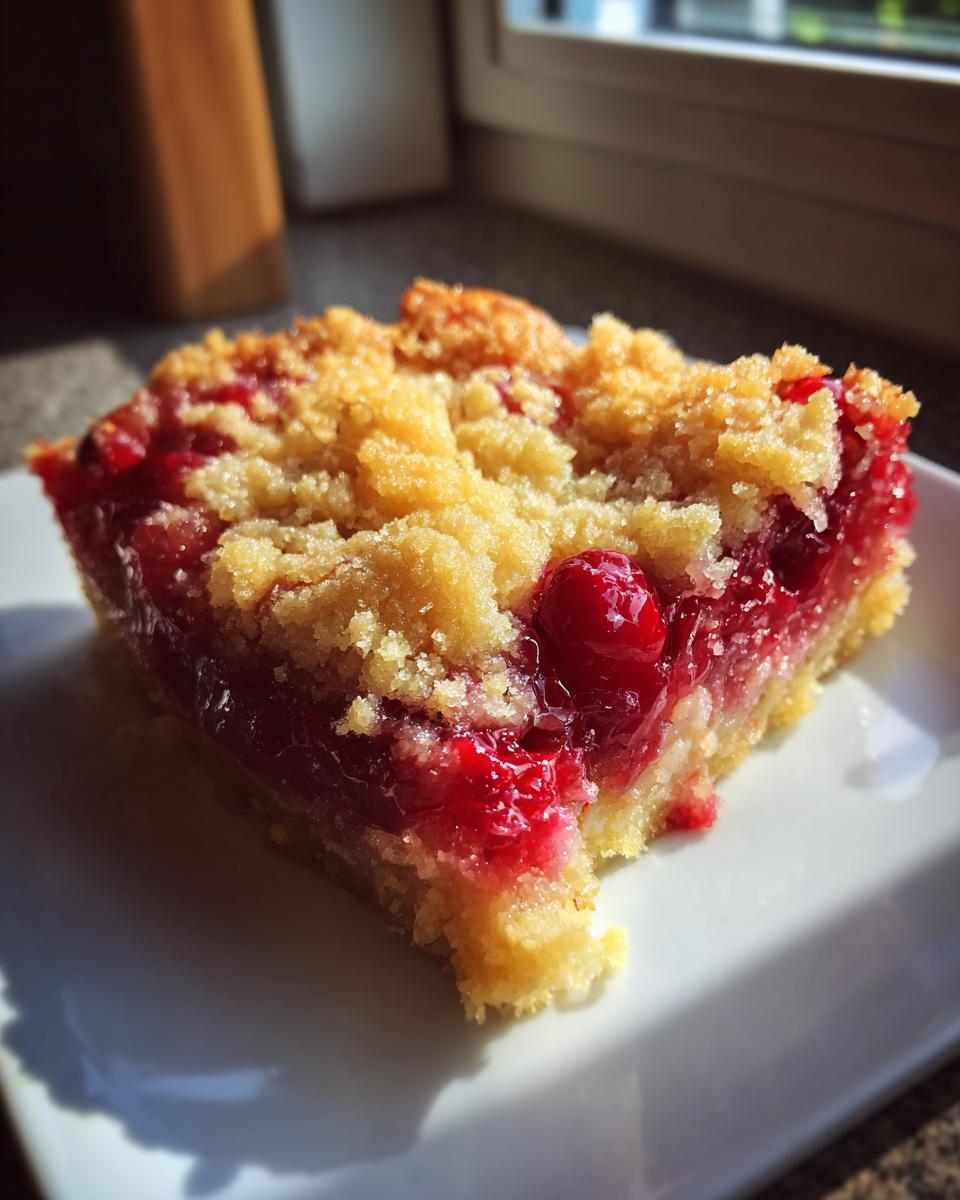
The order is crucial here, it’s like setting up a delicious musical chord! Start by pouring that whole can of syrupy cherry pie filling right into the bottom. Don’t stir it around, just let it sit there. Next, take your dry yellow cake mix and sprinkle it gently and evenly over the top of the cherries. Don’t whisk it, don’t fold it—just sprinkle! If you’re including that teaspoon of vanilla extract for extra depth, now is the time to mix it right into your melted butter. Then, slowly drizzle that melted butter evenly over all that dry cake mix. Make sure you get every corner, as that butter is going to crisp up the top layer of our **cherry dump cake**.
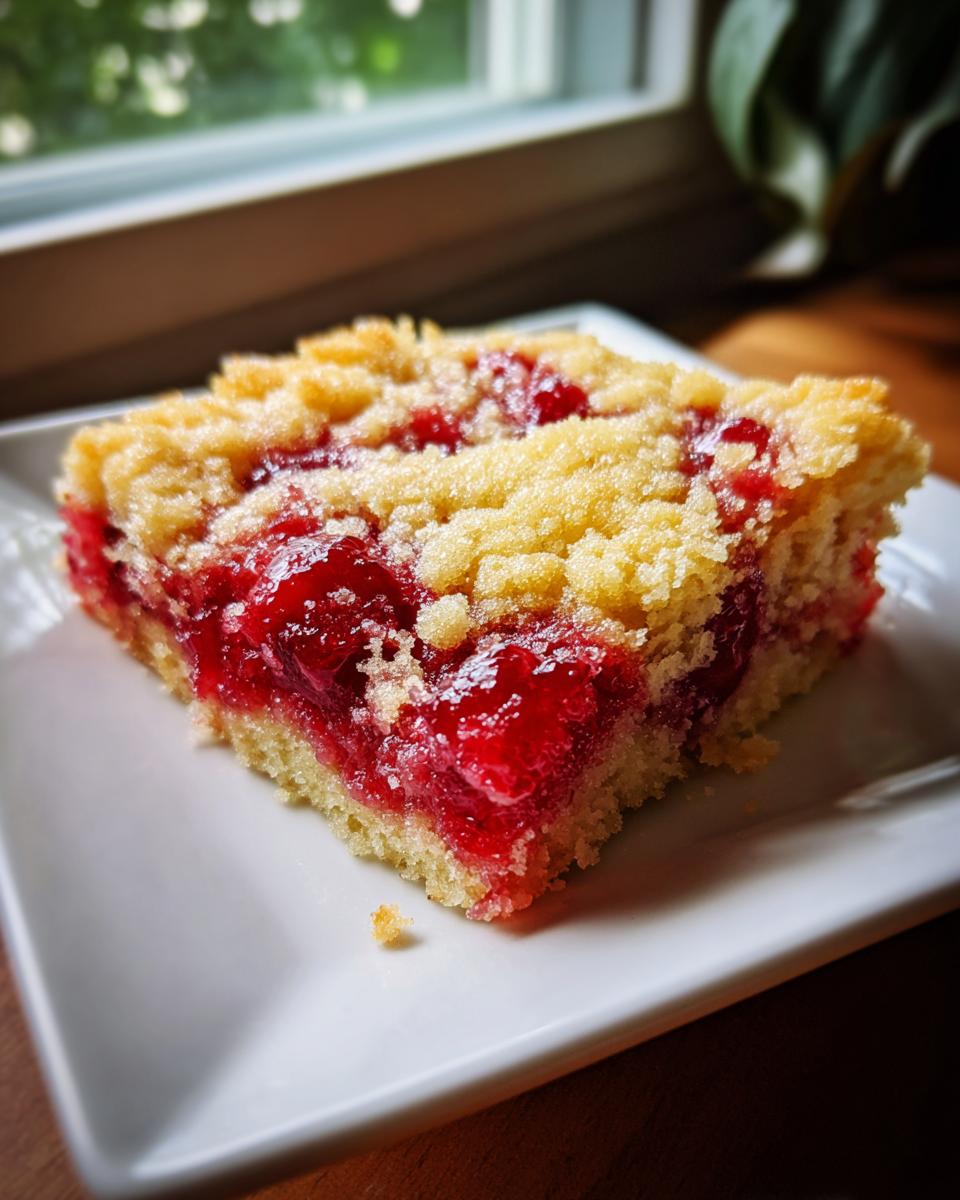
Baking Times and Checking for Doneness in the Dump Cake with Cake Mix
Into the oven it goes! You’re looking at 45 to 55 minutes of baking time. Now, remember, every oven is a little different, so keep an eye on it. The perfect sign of completion isn’t just the color; you want to see those rich cherry juices bubbling up around the edges of the dish. The top should be a gorgeous, even golden brown. Once you pull it out—and trust me, the whole kitchen will smell heavenly—let it rest! You absolutely must let this **dump cake with cake mix** cool for a minimum of 15 minutes before you dig in. If you cut it too soon, it might collapse a little, and we worked too hard (ha!) to let that happen. If you want to see how professionals handle fast recipes, take a peek at this external guide for another quick recipe idea.
Tips for Success with Any Dump Cake Variation
Even though this recipe is designed to be foolproof, I always want you to achieve that symphony of texture—that buttery crisp topping over the soft fruit filling. That crispness is what elevates this from just baked filling to *the* **best cherry dump cake** in the neighborhood. The biggest mistake I see people make is uneven butter coverage. If you miss a patch of that dry yellow cake mix, that spot will just turn into hot, dry powder instead of that golden, wonderful crust we are aiming for.
When you are drizzling the melted butter, take your time. Don’t just pour it all in the center. I like to move the butter back and forth, coating the surface slowly, almost like you’re painting. You want every single area of that dry cake mix to get a good dose of fat. It’s this fat that essentially fries the top layer as it bakes!
If you’re not using the optional nuts, sometimes the top layer can look a little pale near the end. Don’t panic! You can always switch your oven to the broiler for the final minute or two, but stand right there and watch it like a hawk. I mean it—broilers are fast and can turn golden perfection into burnt disaster in seconds. This technique is also fantastic if you’re using a recipe that calls for a thinner layer of topping, like in many variations of a crisp, similar to my favorite classic apple crisp recipe.
Another trick for texture, especially if you are making a different fruit base, is to make sure the filling itself isn’t too watery. If you happen to be using frozen fruit instead of canned pie filling, thaw it completely and drain off a good amount of the excess juice first. Too much liquid sinks and steams the cake layer instead of letting it bake into that glorious crust. For more inspiration on keeping your baked fruit toppings crispy, peek at some great ideas on balancing texture shared over at Kippi at Home.
Serving Suggestions for This Warm Fruit Dessert
Okay, you’ve successfully created harmony in the pan! But a **cherry dump cake** isn’t just about the bake time; it’s about the presentation and that first, satisfying bite. Because this dessert comes out of the oven piping hot, you really need that cool contrast to bring the flavors into balance. It’s truly a showstopper, easily becoming my favorite for last-minute dinner parties or when I need something simple for **holiday baking easy** spreads.
The absolute classic pairing, and my personal favorite, is a big, generous scoop of high-quality vanilla bean ice cream placed right on top while the cake is still warm. That creamy chill melts into the buttery cake and warms the tart cherry filling—it’s pure bliss! If you’re looking for something a little lighter, a dollop of freshly whipped cream works wonderfully, too. Just add a tiny splash of almond extract to the cream before whipping for a flavor twist that complements the cherries so well.
Another way I like to elevate this **quick weeknight dessert** for guests is by treating it more like a **cherry cobbler dessert**. Think about turning it into a plated experience! Serve a square in a lovely little bowl, maybe a drizzle of caramel sauce, or if you’re feeling extra fancy (but still keeping it super simple!), try topping it with a small crumble made from crushed shortbread cookies mixed with a pinch of cinnamon. It’s all about those finishing notes. If you enjoy making show-stopping sides for gatherings, you should check out my tips for my sweet potato casserole with pecan streusel—it uses similar topping principles!
Storage and Reheating Instructions for Leftover Cherry Dump Cake
Now, the best part about a **cherry dump cake** is that it rarely lasts long enough to need serious storage planning! But hey, sometimes we manage to have leftovers, and we certainly don’t want them turning into a soggy mess, right? We worked hard to get that glorious, crisp top layer, and we need to protect that harmony.
For general storage, just let the cake cool completely first. Once it’s room temperature, you can cover the baking dish tightly with plastic wrap or transfer individual slices into an airtight container. Because this dessert is so moist from the filling, I find that storing it on the counter at room temperature is fine for a day or so, especially if it has a good amount of cake mix crust protecting the top.
If you made a huge batch and need it around for longer than two days, definitely move it to the refrigerator. Just know that any time baked goods meet the fridge, they tend to lose a little bit of that fresh-baked charm. Don’t worry, though; we have a simple trick for bringing it back to life!
When you’re ready for a second serving, reheating is key to rescuing that texture. Absolutely avoid the microwave if crispness is your goal! The microwave heats the moisture in the cherry layer first, which instantly steams the top, turning that lovely crust soft. Instead, I recommend reheating individual slices in a toaster oven or a regular oven set to about 300 degrees Fahrenheit for about 8 to 10 minutes. This gently warms the cherries while crisping up the butter on top again. It’s like granting it a second chance at being perfectly baked! For more tips on keeping your simple favorites tasting fresh, check out my recipe for easy moist banana bread; the storage principles are similar.
Troubleshooting Common Issues with Your Simple Baked Fruit Dessert
Look, even when you take all the stress out of baking by choosing a **cherry dump cake**, sometimes things don’t turn out exactly as planned. That’s gardening, right? It happens in the kitchen, too! But because this dessert is so minimal, the solutions are usually very straightforward. My goal is always to help you find that beautiful harmony, so let’s troubleshoot the two most common issues I see pop up with this **simple baked fruit dessert**.
The number one complaint is usually a soggy or powdery top layer. If your topping seems damp, like it didn’t quite crisp up after 50 minutes, nine times out of ten it means the butter didn’t cover all the dry cake mix. Remember what I said about painting that butter over the surface? If you missed a patch, that dry patch doesn’t get the fat it needs to turn golden, and it absorbs moisture from the fruit below instead.
The Fix: If it’s just *slightly* damp, don’t rush it back into the oven on a low temperature. Instead, give it 10 more minutes at 350°F, or if it looks pale, use that broiler trick I mentioned earlier—just watch it constantly! A slightly soggy top will often firm up as it finishes cooling, too, so resist the urge to cut into it too soon.
On the flip side, sometimes folks end up with a topping that’s a little too crunchy or even burnt on the edges. This is usually just a case of overbaking. Since the cherry filling cooks relatively quickly, the butter topping can dry out fast, especially if your oven runs hot.
The Fix: If you see the edges getting dark before the center looks bubbly, pull the dish out slightly toward the front of the oven rack, or loosely tent the entire dish with aluminum foil for the last 15 to 20 minutes of baking. This shades the topping while letting the heat finish cooking the fruit underneath. It’s all about balancing those powerful notes! If you’re looking for other recipes where efficiency meets fantastic flavor, you have to check out my guide to easy chili—it’s another one where layering ingredients properly makes all the difference. And if you are looking for other reliable crowd-pleaser recipes that involve minimal effort, check out the ideas shared by Eating on a Dime!
Frequently Asked Questions About the **Cherry Dump Cake**
People always have questions when something seems this easy, and honestly, I get it! When a recipe is this straightforward, you start wondering what the catch is. It’s not complicated, but getting the little details right ensures you get that perfect, buttery symphony on top rather than clumps of dry mix.
Can I use other fruit fillings besides cherry?
Absolutely, you can! That’s the wonderful flexibility of this **easy dump cake recipe**. The structure relies on canned pie filling, which is nice and thick. I’ve made this with apple pie filling, blueberry, and even tropical fruit filling—which turns it into a fantastic **4 ingredient dessert** variation. Just remember that the structural integrity relies on the filling being relatively thick and sweet. If you use something naturally very tart, you might want to add a tablespoon or two of extra sugar right onto the filling layer before you sprinkle the cake mix on top.
Does this really taste like a Cherry Cobbler Dessert?
Yes, it really does! That comparison comes up all the time, and I think it’s spot on. The base is warm, sweet, gooey fruit, much like a classic cobbler. The difference is the topping. Traditional cobblers use a biscuit dough or a simple batter, but because we are using dry cake mix that absorbs the melted butter and bakes up crisp, it creates a texture that’s almost like a crunchy streusel. It’s got that rustic, **Southern style dump cake** feel, but with way less effort. For more ideas on simple fruit desserts, check out my go-to simple snack recipes archive!
Can I make this ahead of time for parties?
This is a tricky one, honestly. For the absolute best crisp topping, you really need to bake it the day you serve it. Like I mentioned in the storage section, the moisture migration starts immediately once it cools, meaning that crisp top will inevitably soften overnight. If you must prepare ahead for a big event or holiday gathering, assemble the layers (fruit, dry mix, and butter drizzle) in your baking dish, cover it tightly, and refrigerate it for up to 24 hours. Then, add about 10 to 15 minutes to the total baking time since you are putting a cold dish into a hot oven. If you’re making it precisely according to the recipe, I suggest reading these tried-and-true tips over at She’s Not Cookin’ to get the most out of your prep time.
What is the best cake mix to use for the ultimate Cherry Dump Cake?
For my absolute favorite, classic version, I stick to yellow cake mix because it offers that slight vanilla note that pairs beautifully with the cherry. However, as I mentioned earlier, white cake mix or butter cake mix are excellent swaps. If you are looking for a slightly richer flavor, Duncan Hines or Betty Crocker brands tend to perform the best for that signature crumble quality. Avoid mixes that specify ‘angel food’ or ‘chiffon,’ as those are designed for much lighter structures and won’t hold up when drenched in butter and fruit filling!
Estimated Nutritional Data for One Serving of Cherry Dump Cake
Now, listen, just because this is a super simple dessert doesn’t mean it’s light—it’s rich, buttery, and wonderful! I always share estimated nutritional info for my recipes, so you know exactly what you’re serving up. Here are the ballpark figures for one slice, based on our standard recipe. Keep in mind these are just estimates, kind of like a rough sketch before the final performance, and they can change depending on the exact brand of cake mix or butter you use. If you want to know more about my process in the kitchen, check out my About Me page!
- Calories: Around 350 per slice
- Fat: Roughly 18 grams
- Carbohydrates: About 45 grams
- Sugar: This one clocks in around 35 grams (thanks, cherry filling!)
- Protein: A small 3 grams
It’s definitely a treat, not an everyday thing, but oh boy, is it worth every bite!
Share Your Cherry Dump Cake Experience
Well, that’s it! We’ve composed the perfect symphony for your dessert table with this incredibly easy **cherry dump cake**. Now that you’ve tried it out—and I sincerely hope you did, because the smell alone is worth the 50 minutes of waiting—I really want to hear what you think!
Here in my kitchen at Delish Symphony, feedback is what keeps the music playing. Did this recipe bring that much-needed harmony to your busy weeknight? Did it magically satisfy a sudden sweet craving?
Please, don’t be shy! Head down to the comments section. I’d absolutely love it if you could leave a rating for the recipe—give it those five stars if you felt the harmony was perfect. More importantly, tell me about any little variations you tried. Did you sub in pineapple filling? Did you add that extra nut crunch I suggested?
Knowing how you adapt these simple foundations makes my day! Let’s keep this wonderful, no-fuss baking tradition going strong. If you have any questions about technique or just want to say hello, you can always reach out via my contact page. Happy baking, friends!
PrintEasy 3-Ingredient Cherry Dump Cake

Make this simple cherry dump cake using only three ingredients. It creates a sweet cherry base with a buttery, crisp topping, similar to a cobbler.
- Prep Time: 5 min
- Cook Time: 50 min
- Total Time: 55 min
- Yield: 8 servings 1x
- Category: Dessert
- Method: Baking
- Cuisine: American
- Diet: Vegetarian
Ingredients
- 1 (21 ounce) can cherry pie filling
- 1 (15.25 ounce) box yellow cake mix
- 1 cup (2 sticks) unsalted butter, melted
- 1 teaspoon vanilla extract (optional addition for flavor)
Instructions
- Preheat your oven to 350 degrees Fahrenheit. Lightly grease a 9×13 inch baking dish.
- Pour the entire can of cherry pie filling into the prepared baking dish. Spread the filling evenly across the bottom.
- Sprinkle the dry yellow cake mix evenly over the cherry filling layer. Do not mix the layers.
- Drizzle the melted butter evenly over the dry cake mix layer. If you are using vanilla extract, mix it into the melted butter before drizzling.
- Bake for 45 to 55 minutes, or until the topping is golden brown and the cherry filling is bubbly around the edges.
- Remove the dump cake from the oven and let it cool for at least 15 minutes before serving.
Notes
- For a richer flavor, substitute the yellow cake mix with white cake mix or butter cake mix.
- Serve this warm fruit dessert with a scoop of vanilla ice cream or whipped cream for an enhanced experience.
- If you want a slightly crispier topping, you can add a sprinkle of chopped pecans or walnuts over the butter layer before baking.
Nutrition
- Serving Size: 1 slice
- Calories: 350
- Sugar: 35
- Sodium: 280
- Fat: 18
- Saturated Fat: 11
- Unsaturated Fat: 7
- Trans Fat: 0.5
- Carbohydrates: 45
- Fiber: 1
- Protein: 3
- Cholesterol: 45