
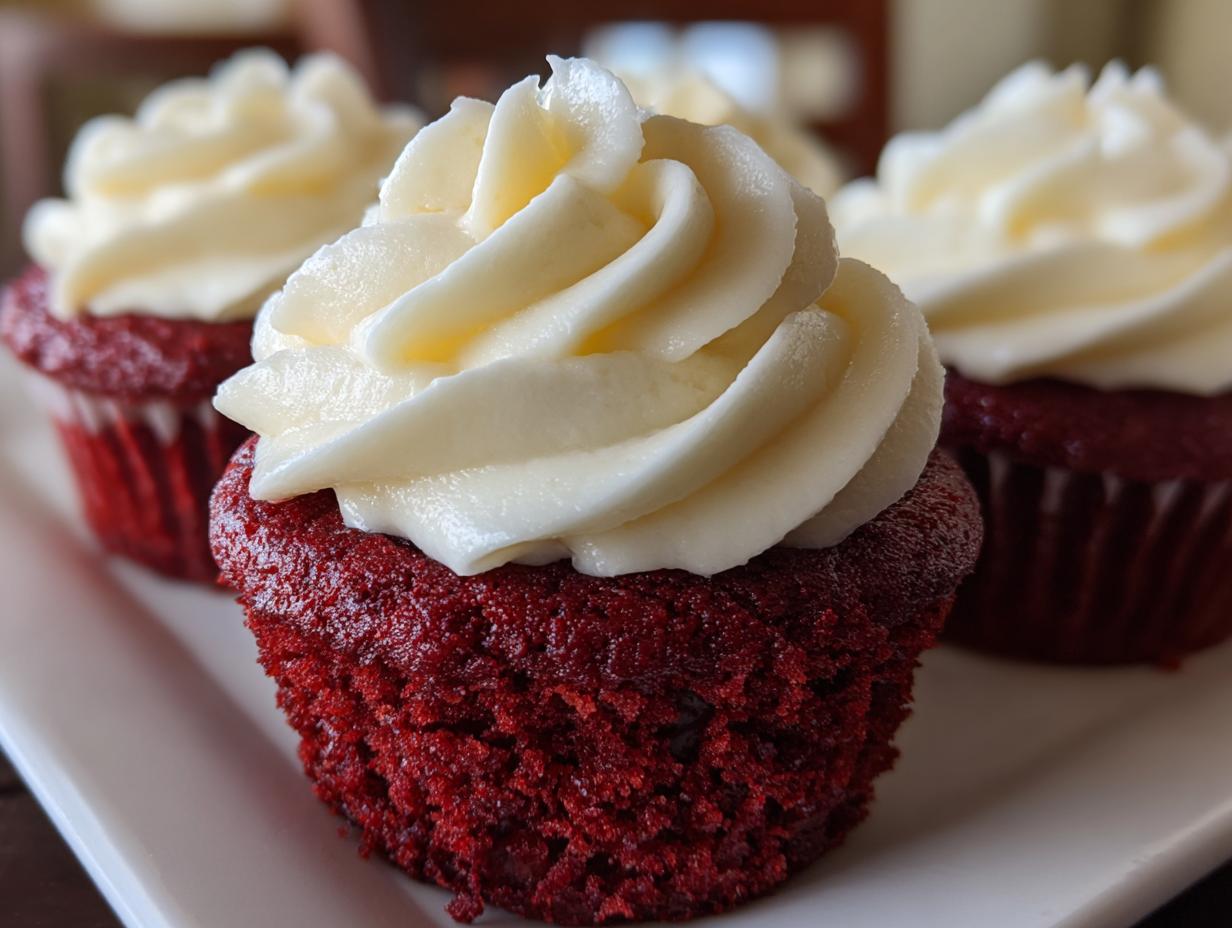
There’s a certain magic that happens when you bite into a truly exceptional cupcake. For me, Michael Carter, in my own kitchen sanctuary, that magic hinges entirely on texture. Too often, classic desserts fall flat—they’re dry, or the flavor gets lost. Forget those experiences! We’re making the best red velvet cupcakes right here, and I promise you two things: a guaranteed moist, velvety crumb, and a silky, tangy cream cheese frosting that pulls everything together perfectly. If you’re looking for that genuine bakery-style experience without the hassle, stick with me. We’re stripping away the pressure and focusing only on the delicious harmony of a classic Southern treat.
We keep things simple here at Delish Symphony, focusing on approachable ingredients that deliver big flavor. You can find out more about my mission to simplify home cooking over on my About page, but for now, let’s get mixing!
- Why This Is the Best Red Velvet Cupcakes Recipe You Will Make
- Ingredients for Delicious Homemade Red Velvet Cupcakes
- Step-by-Step Instructions for Perfect Red Velvet Cupcakes with Cream Cheese Frosting
- Tips for Success When Making Red Velvet Cupcakes
- Storage and Reheating Instructions for Red Velvet Cupcakes
- Variations on Classic Red Velvet Cupcake Treats
- Serving Suggestions for Your Red Velvet Cupcakes
- Frequently Asked Questions About Red Velvet Cupcakes
- Estimated Nutritional Data for Red Velvet Cupcakes
- Share Your Delicious Homemade Desserts
Why This Is the Best Red Velvet Cupcakes Recipe You Will Make
Listen, when it comes to these moist red velvet cupcakes, people want that real Southern comfort, and they want it quick. That’s why this recipe consistently delivers the best results. We’re aiming for true bakery style red velvet cupcakes—bright color, unmistakable cocoa notes, and frosting that sings with tang. We skip fussy steps too; this method relies on simple chemistry to keep things tender.
My secret to that incredible texture? It comes down to buttermilk and oil. Oil keeps things softer than butter does in the cake structure, and the buttermilk is the real workhorse for flavor and lift.
Achieving Velvety Crumb Cupcakes Texture
The key to that signature ‘velvet’ texture isn’t luck; it’s the reaction happening right in the bowl. When you combine the buttermilk, vinegar, and baking soda, you get a small, controlled fizz. Think of it like miniature volcanoes preparing your batter! This gentle activation creates the most tender, airy structure possible, stopping those dry, crumbly results dead in their tracks. It’s simple science, but it makes all the difference in achieving that perfect, soft feel.
If you’re looking to streamline your kitchen routine overall, you might want to check out some of my go-to weeknight dinner recipes—I apply the same efficiency principles to everything!
Ingredients for Delicious Homemade Red Velvet Cupcakes
When you’re getting ready to bake, having everything laid out just right makes the whole process feel calm instead of chaotic. That’s why I always swear by separating the components clearly. We need different things for the batter than we do for that amazing topping. You can see my general approach over at my page about easy baking recipes for cupcakes, but here are exactly what you’ll need for these flavorful treats.
For the Moist Red Velvet Cupcakes Batter
- 1 1/2 cups all-purpose flour
- 1 cup granulated sugar
- 1 teaspoon baking soda (the first one, for the dry mix!)
- 1 teaspoon cocoa powder
- 1/2 teaspoon salt
- 1 cup buttermilk
- 1/2 cup vegetable oil
- 1 large egg
- 1 teaspoon white vinegar
- 1 teaspoon vanilla extract
- 1 tablespoon red food coloring (liquid or gel—gel is best!)
For the Tangy Cream Cheese Frosting
This is where so many people mess up the frosting texture, but we aren’t going to! The ingredients have to cooperate, which only happens when they hit that perfect room temperature.
- 1 teaspoon baking soda (this is for the frosting structure, trust me!)
- 8 ounces cream cheese, softened
- 1/2 cup unsalted butter, softened
- 3 cups powdered sugar
Step-by-Step Instructions for Perfect Red Velvet Cupcakes with Cream Cheese Frosting
Now that we have our fantastic ingredients ready, let’s talk practical technique. When baking, the order you put things together seriously impacts the final texture. I’ve learned that efficiency in the kitchen doesn’t mean rushing; it means following a smart, deliberate flow. If you’re interested in seeing how smart workflow applies to other areas, I share my tips on easy cupcake recipes that keep things tidy!
Preparing the Red Velvet Cupcakes Batter
First things first, always preheat your oven to 350°F (175°C). Get that temperature stable! While it warms up, line your 12-cup muffin tin with those pretty paper liners. Now, grab a big bowl.
In that bowl, gently whisk together the dry stuff: the flour, sugar, that first teaspoon of baking soda, and the cocoa powder, plus the salt. You just want them acquainted, nothing too vigorous.
In a separate, medium bowl, whisk your wet ingredients: the buttermilk, oil, egg, vinegar, and vanilla. Once that’s blended, stream in your red food coloring. Mix until the color sings—a deep, uniform red is what we’re aiming for!
Pour all those lovely wet ingredients right into your dry mix. Mix them only on low speed or by hand until they are *just* combined. And I mean just. If you see a tiny flour streak or two, that’s fine! That’s our defense against dense cupcakes.
Here’s the small trick that makes these red velvet cupcakes really shine: take that remaining teaspoon of baking soda and dissolve it in just one tablespoon of hot water. It foams up slightly. Gently fold that mixture right into your batter. This is the final activation step that ensures we get that incredibly soft, velvety crumb texture!

Baking and Cooling Your Red Velvet Cupcakes
Divide that beautiful batter evenly between your 12 prepared liners. Don’t fill them more than two-thirds full, or you’ll have cakes trying to escape their paper houses!
Bake them for about 18 to 20 minutes. You know they are done when a toothpick inserted right into the center pops out clean. If it has wet batter, give it two more minutes and test again. Don’t overbake them, or we lose that precious moisture!
Let them rest in that hot pan for about 5 minutes. It gives them structure before you move them. Then, carefully transfer every single one to a wire rack immediately. They have to cool completely before we even think about frosting. Seriously, cold cupcakes are the only way to guarantee that silky frosting doesn’t just melt into a sweet puddle.
Making the Silky Cream Cheese Frosting
This is my favorite part. Remember how I emphasized room temperature for the cream cheese and butter? That’s non-negotiable for that fluffy cream cheese frosting texture. Put the softened cream cheese and the softened butter into a large bowl.
Beat them together until they are completely smooth, light, and creamy—no lumps allowed here! This initial creaming builds the foundation for silkiness.
Once smooth, start adding the powdered sugar slowly, about a cup at a time. Beat well after each addition. Keep beating until everything is fully incorporated and the frosting is light and beautifully fluffy. It should hold its shape perfectly when piped.
Tips for Success When Making Red Velvet Cupcakes
Look, making these cupcakes is easy, but getting that vibrant color and that signature tang is all about handling a few details correctly. If you follow these tips, you’ll always end up with amazing homemade red velvet cupcakes!
First, about the color: If you can find it, skip the liquid food coloring and grab the gel paste version. Gel is concentrated, so a little bit goes a long way, and it doesn’t thin out your batter like the liquid dye tends to do. This helps maintain the integrity of our rich cocoa flavor cupcakes.
Second, remember that buttermilk and vinegar combo? That reaction needs the baking soda to be fresh. If your baking soda is old, your rise will be sad, and the tang won’t cut through the sweetness the way it should.
And finally, for the tangiest flavor, stick to that white vinegar! I know some people try replacing it with apple cider vinegar, but white vinegar keeps the flavor profile clean, letting the cocoa and buttermilk really shine through. If you mess around with substitutions too much, you might accidentally end up with something closer to a spicy chocolate cake rather than our beautiful classic red velvet cake treats.
For tips on keeping other beloved baked goods moist, you might find my post on easy moist banana bread helpful!
Storage and Reheating Instructions for Red Velvet Cupcakes
Since we’re using real cream cheese in that amazing frosting, we need to be smart about storage. Don’t just leave these sitting out on the counter for days, especially if your kitchen is warm!
Keep your frosted appetizing velvet treats in an airtight container. They do best stored in the refrigerator. If you’re making them a day or two ahead for a party, cover them tightly. The plastic shouldn’t touch the frosting directly, or you’ll smudge all your hard work!
The big secret? Never serve them straight from the fridge. Cold mutes flavor, I promise! Take them out on the counter about 30 to 45 minutes before you plan to serve them. That slight warming brings back the creaminess of the frosting and softens the cake just enough to feel perfectly tender again.
Variations on Classic Red Velvet Cupcake Treats
While I firmly believe this version is perfect—it nails those delicious homemade desserts vibes—I absolutely love seeing how people adapt these treats for different holidays or birthdays. It’s the joy of home cooking: taking a base recipe and making it your own!
For bright red holiday cupcakes, I sometimes like to add white chocolate shavings over the top of the frosting just after piping it on. Or, for a fancier birthday centerpiece, you can use a little swirl of finely chopped pecans around the base of the frosting swirl.
Creating Red Velvet Cupcakes with Buttercream Delight Alternative
The recipe calls for that classic tangy cream cheese, which provides the best contrast to the cake’s flavor. However, if you’re just not a cream cheese fan—or maybe you’re taking these to a place where keeping them cool is tough—you can use a good, stiff vanilla buttercream instead. Just use the same ratios for butter, sugar, and a splash of vanilla. It changes the overall flavor profile a bit, making it sweeter, but it still pairs beautifully with the rich cocoa flavor cupcakes.
If you’re looking for other easy ideas for festive baking, check out my thoughts on easy pumpkin bars!
For more inspiration on classic red velvet, check out the approach taken by the bakers over at In Bloom Bakery.
Serving Suggestions for Your Red Velvet Cupcakes
These are showstoppers! They are one of my favorites for Valentine’s Day desserts when you want something dramatic yet comforting. They are also fantastic for any major celebration, making them perfect for your next list of birthday cupcake ideas.
Because the flavor is rich, I love pairing these holiday cupcakes recipes with something bright and clean. A simple, chilled sparkling beverage works amazingly well. If you’re looking for a simple punch recipe that cuts through the richness without competing with the cocoa, I highly recommend my Cranberry Orange Punch recipe. It keeps things light and festive!
Frequently Asked Questions About Red Velvet Cupcakes
Why are my red velvet cupcakes not red enough?
That’s usually the coloring! If you used standard liquid food coloring, it takes a lot to get that deep shade, and it can sometimes thin out the batter slightly. For the absolute best, vibrant hue, use gel food coloring. You only need a teaspoon or so, and you’ll get that gorgeous, intense red color you see in the bakeries every time.
Can I make these red velvet cupcakes without buttermilk?
Oh, you totally can, especially if you don’t keep buttermilk stocked! The buttermilk is important because the acid helps react with the baking soda, but you can simulate it easily. Just take 1 cup of regular milk (whole milk is best) and stir in 1 tablespoon of white vinegar or lemon juice. Let it sit on the counter for about 5 minutes until it looks slightly curdled. That’s your substitute buttermilk, ready to go!
How do I get the perfect fluffy cream cheese frosting consistency?
It all comes down to temperature and patience. Your cream cheese and butter must both be at true room temperature—soft enough to press a finger into easily but definitely not melted or oily looking. Beat them together thoroughly until they are smooth, light, and creamy—no lumps allowed here! This initial creaming builds the foundation for silkiness. Once smooth, start adding the powdered sugar slowly, about a cup at a time. Beat well after each addition. Keep beating until everything is fully incorporated and the frosting is light and beautifully fluffy. It should hold its shape perfectly when piped.
If you’re looking for more quick ideas using pantry staples, check out my collection of simple snack recipes.
Estimated Nutritional Data for Red Velvet Cupcakes
Just so everyone knows what they are getting into with these incredibly delicious treats, here is the estimated nutritional breakdown. Remember, this is based on using the exact measurements and serving size listed in the recipe, so your results might vary slightly depending on how much frosting you pile on (which, let’s be honest, is the best part).
- Serving Size: 1 cupcake
- Calories: 350
- Sugar: 35
- Sodium: 250
- Fat: 18
- Saturated Fat: 8
- Unsaturated Fat: 10
- Trans Fat: 0
- Carbohydrates: 45
- Fiber: 1
- Protein: 4
- Cholesterol: 45
These figures are estimates only, so if you are counting meticulously, you’ll want to adjust for your own specific products and portion sizes.
Share Your Delicious Homemade Desserts
I truly hope you bake these! When you make these red velvet cupcakes, I want to know everything! Did they turn out perfectly moist? Did your frosting stay smooth? Don’t keep the symphony to yourself—come back and leave a rating below. Even better, share a picture of your final spread!
Your feedback helps me refine these recipes for everyone else looking for delicious homemade desserts. Happy baking, and I can’t wait to hear how you enjoyed these classic treats!
You can explore even more of my tested favorites in my complete collection of delicious dessert recipes.
Tips for Success When Making Red Velvet Cupcakes
Look, making these cupcakes is easy, but getting that vibrant color and that signature tang is all about handling a few details correctly. If you follow these tips, you’ll always end up with amazing homemade red velvet cupcakes!
First, about the color: If you can find it, skip the liquid food coloring and grab the gel paste version. Gel is concentrated, so a little bit goes a long way, and it doesn’t thin out your batter like the liquid dye tends to do. This helps maintain the integrity of our rich cocoa flavor cupcakes.
Second, remember that buttermilk and vinegar combo? That reaction needs the baking soda to be fresh. If your baking soda is old, your rise will be sad, and the tang won’t cut through the sweetness the way it should.
And finally, for the tangiest flavor, stick to that white vinegar! I know some people try replacing it with apple cider vinegar, but white vinegar keeps the flavor profile clean, letting the cocoa and buttermilk really shine through. If you mess around with substitutions too much, you might accidentally end up with something closer to a spicy chocolate cake rather than our beautiful classic red velvet cake treats.
For tips on keeping other beloved baked goods moist, you might find my post on easy moist banana bread helpful!
Storage and Reheating Instructions for Red Velvet Cupcakes
Since we’re using real cream cheese in that amazing frosting, we need to be smart about storage. Don’t just leave these sitting out on the counter for days, especially if your kitchen is warm!
Keep your frosted delectable treats in an airtight container. They do best stored in the refrigerator. If you’re making them a day or two ahead for a party, cover them tightly. The plastic shouldn’t touch the frosting directly, or you’ll smudge all your hard work!
The big secret? Never serve them straight from the fridge. Cold mutes flavor, I promise! Take them out on the counter about 30 to 45 minutes before you plan to serve them. That slight warming brings back the creaminess of the frosting and softens the cake just enough to feel perfectly tender again. When they come back up to room temperature, they taste exactly like they were freshly baked that morning.
Variations on Classic Red Velvet Cupcake Treats
While I firmly believe this version is perfect—it nails those delicious homemade desserts vibes—I absolutely love seeing how people adapt these treats for different holidays or birthdays. It’s the joy of home cooking: taking a base recipe and making it your own! These are fantastic for adding a little flair to your holiday cupcakes recipes!
For bright red holiday cupcakes recipes, I sometimes like to add white chocolate shavings over the top of the frosting just after piping it on. Or, for a fancier approach when planning birthday cupcake ideas, you can use a little swirl of finely chopped pecans around the base of the frosting swirl. They offer a nice crunch against the softness.
Creating Red Velvet Cupcakes with Buttercream Delight Alternative
The recipe calls for that classic tangy cream cheese, which provides the best contrast to the cake’s flavor. However, if you’re just not a cream cheese fan—or maybe you’re taking these to a place where keeping them cool is tough—you can use a good, stiff vanilla buttercream instead. Just use the same ratios for butter, sugar, and a splash of vanilla (maybe even try almond extract instead of vanilla for a different spin next time).
It changes the overall flavor profile a bit, making it sweeter, but it still pairs beautifully with the rich cocoa flavor cupcakes. This is one of those easy swaps that keeps things exciting! If you’re looking for other easy ideas for festive baking, check out my thoughts on easy pumpkin bars!
Speaking of classics, if you want to see another beautiful take on these iconic treats, take a peek at the approaches used by the bakers over at In Bloom Bakery.
Serving Suggestions for Your Red Velvet Cupcakes
These are showstoppers! They are one of my favorites for Valentine’s Day desserts when you want something dramatic yet comforting. They are also fantastic for any major celebration, making them perfect for your next list of birthday cupcake ideas.
Because the flavor is rich—that beautiful blend of cocoa, buttermilk, and tang—I love pairing these holiday cupcakes recipes with something bright and clean on the side. You don’t want another heavy dessert fighting for attention!
A simple, chilled sparkling beverage cuts through that richness so well. If you’re looking for a simple punch recipe that keeps things festive and cleanses the palate without competing with the chocolate notes, I highly recommend my Cranberry Orange Punch recipe. It fits right in with that festive, sweet vibe, making the cupcakes feel even brighter!
Honestly, though, these are so balanced that they barely need anything else. A warm cup of coffee or a glass of cold milk is sometimes the perfect companion when you are just enjoying a quiet moment with one of these classic red velvet cake treats.
Frequently Asked Questions About Red Velvet Cupcakes
Whenever I test recipes, I always end up with a pile of questions from my test kitchen helpers, so I figured I should write down the ones I hear most often about these treats. Getting these classic red velvet cupcakes right is all about understanding those little details!
Why are my red velvet cupcakes not red enough?
That’s usually the coloring! If you used standard liquid food coloring, it takes a lot to get that deep shade, and it can sometimes thin out the batter slightly. For the absolute best, vibrant hue—the one that makes people stop and stare—you need to go for gel food coloring. You only need a teaspoon or so, and you’ll get that gorgeous, intense red color you see in the bakeries every time. It keeps your batter consistency perfect while delivering maximum impact!
Can I make these red velvet cupcakes without buttermilk?
Oh, you totally can, especially if you don’t keep buttermilk stocked! The buttermilk is important because the acid helps activate that baking soda for lift and tang, but you can simulate it easily. Just take 1 cup of regular milk (whole milk is best) and stir in 1 tablespoon of white vinegar or lemon juice. Let it sit on the counter for about 5 minutes until it looks slightly curdled. That’s your substitute buttermilk, ready to go! The resulting texture might be just a *tiny* bit less tender than the original, but they will still be fantastic moist red velvet cupcakes.
How do I get the perfect fluffy cream cheese frosting consistency?
It all comes down to temperature and patience, the two things I always preach about in the kitchen! Your cream cheese and butter must both be at true room temperature—soft enough to press a finger into easily but definitely not melted or oily looking. Beat them together thoroughly until they are smooth and lump-free before you even think about adding the powdered sugar. If you rush that initial creaming step, the sugar will just sit there in chunks, no matter how long you beat it afterward! That initial smooth base is what gives us that dreamy, fluffy cream cheese frosting finish.
If you ever need quick inspiration for simple flavor boosters while baking, have a look at some of my simple snack recipes.
Estimated Nutritional Data for Red Velvet Cupcakes
Just so everyone knows what they are getting into with these incredibly delicious treats, here is the estimated nutritional breakdown. Remember, this is based on using the exact measurements and serving size listed in the recipe, so your results might vary slightly depending on how much frosting you pile on (which, let’s be honest, is the best part).
- Serving Size: 1 cupcake
- Calories: 350
- Sugar: 35
- Sodium: 250
- Fat: 18
- Saturated Fat: 8
- Unsaturated Fat: 10
- Trans Fat: 0
- Carbohydrates: 45
- Fiber: 1
- Protein: 4
- Cholesterol: 45
These figures are estimates only, so if you are counting meticulously, you’ll want to adjust for your own specific products and portion sizes. Don’t sweat the small stuff when it comes to treats like this, just enjoy the beautiful harmony of flavor!
Share Your Delicious Homemade Desserts
I truly hope you bake these! When you make these red velvet cupcakes, I want to know everything! Did they turn out perfectly moist? Did your frosting stay smooth? Don’t keep the symphony to yourself—come back and leave a rating below. Even better, share a picture of your final spread!
Your feedback helps me refine these recipes for everyone else looking for delicious homemade desserts. Happy baking, and I can’t wait to hear how you enjoyed these classic treats.
You can explore even more of my tested favorites in my complete collection of delicious dessert recipes.
PrintBest Homemade Moist Red Velvet Cupcakes with Tangy Cream Cheese Frosting

Create bakery-style red velvet cupcakes that are incredibly moist with a rich cocoa flavor, topped with a silky, tangy cream cheese frosting. This easy recipe delivers classic Southern dessert perfection for any celebration.
- Prep Time: 20 min
- Cook Time: 20 min
- Total Time: 40 min
- Yield: 12 servings 1x
- Category: Dessert
- Method: Baking
- Cuisine: American
- Diet: Vegetarian
Ingredients
- 1 1/2 cups all-purpose flour
- 1 cup granulated sugar
- 1 teaspoon baking soda
- 1 teaspoon cocoa powder
- 1/2 teaspoon salt
- 1 cup buttermilk
- 1/2 cup vegetable oil
- 1 large egg
- 1 teaspoon white vinegar
- 1 teaspoon vanilla extract
- 1 tablespoon red food coloring (liquid or gel)
- 1 teaspoon baking soda (for frosting)
- 8 ounces cream cheese, softened
- 1/2 cup unsalted butter, softened
- 3 cups powdered sugar
Instructions
- Preheat your oven to 350°F (175°C). Line a 12-cup muffin tin with paper liners.
- In a large bowl, whisk together the flour, granulated sugar, 1 teaspoon baking soda, and cocoa powder.
- In a separate medium bowl, whisk together the buttermilk, oil, egg, vinegar, and vanilla extract. Add the red food coloring and mix until the color is uniform.
- Pour the wet ingredients into the dry ingredients. Mix on low speed or by hand until just combined. Do not overmix.
- In a small bowl, mix the remaining 1 teaspoon of baking soda with 1 tablespoon of hot water; stir until dissolved. Gently fold this mixture into the batter.
- Divide the batter evenly among the 12 cupcake liners, filling each about two-thirds full.
- Bake for 18 to 20 minutes, or until a toothpick inserted into the center comes out clean. Let the cupcakes cool in the pan for 5 minutes before transferring them to a wire rack to cool completely.
- To make the cream cheese frosting, beat the softened cream cheese and butter together in a large bowl until smooth.
- Gradually add the powdered sugar, beating until fully incorporated and fluffy.
- Once the cupcakes are completely cool, pipe or spread the fluffy cream cheese frosting onto each cupcake.
Notes
- For the most vibrant color, use gel food coloring instead of liquid.
- Buttermilk reacts with the baking soda and cocoa to give the classic subtle tang and tender crumb.
- Make sure your butter and cream cheese are at true room temperature for the smoothest frosting.
Nutrition
- Serving Size: 1 cupcake
- Calories: 350
- Sugar: 35
- Sodium: 250
- Fat: 18
- Saturated Fat: 8
- Unsaturated Fat: 10
- Trans Fat: 0
- Carbohydrates: 45
- Fiber: 1
- Protein: 4
- Cholesterol: 45