
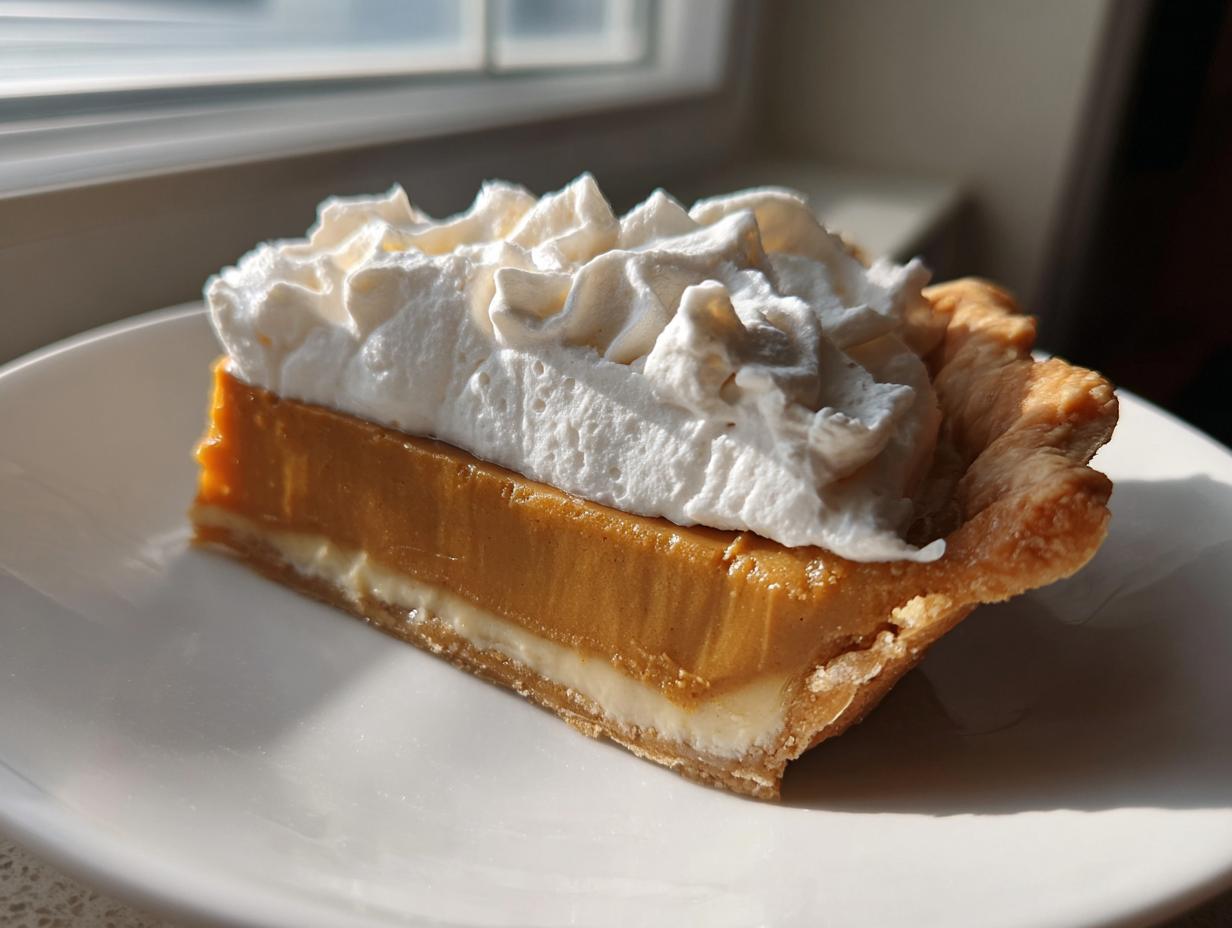
There’s just nothing that compares to the sweet, familiar comfort of a truly classic dessert, right? When I think about the best things to pull out for a holiday gathering or just to end a tough week on a high note, my mind goes straight to something rich and golden. That’s why I’m thrilled to share what I truly believe is the definitive butterscotch pie recipe. Forget the thin, overly sweet stuff; this is the old-fashioned, incredibly creamy version that tastes exactly how you remember it should. As a home cook, Michael Carter, my entire goal here at Delish Symphony is to give you foolproof techniques, and trust me, we are going to nail that silky-smooth pie filling together. You deserve a pie that sings! It’s the kind of spectacular treat you can find more of in our collection of delicious dessert recipes.
- Why This Old-Fashioned Butterscotch Pie Recipe Works
- Ingredients for the Ultimate Butterscotch Pie
- How to Prepare the Best Butterscotch Pie Recipe
- Tips for a Perfect Creamy Butterscotch Pie
- Storing and Serving Your Homemade Butterscotch Pie
- Frequently Asked Questions About Butterscotch Pie
- Nutritional Estimates for this Classic Dessert Recipe
- Share Your Butterscotch Pie Creations
Why This Old-Fashioned Butterscotch Pie Recipe Works
When you make a butterscotch pie from scratch, you’re chasing a specific feeling: deep, caramelized sweetness balanced by a texture that melts on your tongue. This recipe delivers that every time without making you feel like you need a culinary degree to manage it. It’s pure comfort food, elevated.
- It guarantees a truly creamy butterscotch pie thanks to whole milk and heavy cream interaction.
- We rely on cornstarch, making the scratch made pie filling stable yet unbelievably smooth.
- The steps are clear and direct, designed for the home kitchen.
Achieving Silky Smooth Pie Filling
The biggest fear with custard pies is getting those awful scrambled egg chunks. We avoid that drama entirely! The real magic trick, developed over years of testing, is called tempering. You take a little bit of the hot sugar mixture and whisk it slowly into your raw egg yolks first. This gently warms them up so they don’t seize when they hit the main pot. Keep stirring constantly, even before the eggs go in, and you’ll never have a lump.
Best Pie Crust Guide for Your Butterscotch Pie
You have choices here, and I won’t judge! The filling is the star, so feel free to use a good quality store-bought crust if you need to save time. Just make sure your crust is fully pre-baked—blind baked—and completely cooled before you even think about pouring in that hot custard. If you do want to make it homemade, I find that a basic shortcrust pastry holds up beautifully underneath this rich filling. You really want that crisp snap right before you hit the creamy part!
Ingredients for the Ultimate Butterscotch Pie
Okay, gathering your supplies is half the battle won! When we make an old-fashioned butterscotch pie, we want that deep, caramelized flavor, which means we can’t skimp on the sugar types or the dairy. Because this is a scratch made pie filling, having everything measured out before you start is essential—you won’t have time to run to the pantry once the stovetop action starts! This recipe is built for comfort and rich flavor. Don’t worry about the pie crust too much here; we just need it ready to go, totally cool, and waiting patiently.
For the Rich Butterscotch Custard
This is where the magic—and the incredible color—comes from. Remember, using packed light brown sugar is non-negotiable for that classic depth that makes this pie so unforgettable. It really builds that rich butterscotch custard base we’re aiming for.
- 1 cup packed light brown sugar
- 1/2 cup granulated sugar
- 1/4 cup cornstarch
- 1/2 teaspoon salt
- 1 1/2 cups whole milk
- 1/2 cup heavy cream
- 4 large egg yolks, lightly beaten
- 4 tablespoons unsalted butter, cut into pieces
- 1 teaspoon vanilla extract
For the Whipped Cream Topping
You need a light, simple topping to cut through that dense, sweet filling. A cloud of homemade whipped cream is the absolute perfect finish. It contrasts so beautifully with the warm, deep flavor of the butterscotch!
- 1 cup heavy whipping cream (make sure it’s cold!)
- 2 tablespoons powdered sugar
How to Prepare the Best Butterscotch Pie Recipe
Alright, time to roll up our sleeves and get serious! Making this scratch-made filling feels way more complicated than it actually is. If you stick to these steps, you’ll end up with a perfect, velvety pie that rivals any bakery version. Remember, efficiency is key in my kitchen; check out my guide on weeknight dinner recipes for more smart time savers, but for this pie, we need focus!
Step 1: Preparing the Crust and Dry Ingredients
First things first: get your pie crust baked! It needs to be completely cooled down—seriously, room temperature or colder—before that hot custard goes in. While it’s cooling, grab that medium saucepan. Whisk together your brown sugar, white sugar, cornstarch, and salt until they look like one uniform sandy mixture. This dry start is important for preventing lumps later on.
Step 2: Cooking the Custard Base
Now, slowly whisk in your whole milk and heavy cream into that sugar blend. Set the heat to medium. You have to stir this constantly; don’t walk away! We are looking for the mixture to get thick enough to actually bubble—a slow, slow bubble, not a violent boil. This part usually takes about 8 to 10 minutes, and you’ll know it’s ready when it coats the back of a spoon nicely.
Step 3: Tempering Eggs for a Velvety Pie
This is where we earn that silky smooth pie filling! In a separate small bowl, whisk those 4 egg yolks until they are pale. Now, take about a cup of that hot sugar liquid and drizzle it *very slowly* into the yolks while whisking them like crazy—remember, you’re coaxing them, not shocking them! Once they look happy, pour that warmed yolk mixture right back into the saucepan. Cook this whole thing together briefly until it thickens even more. No scrambling allowed!
Step 4: Finishing, Chilling, and Topping the Butterscotch Pie
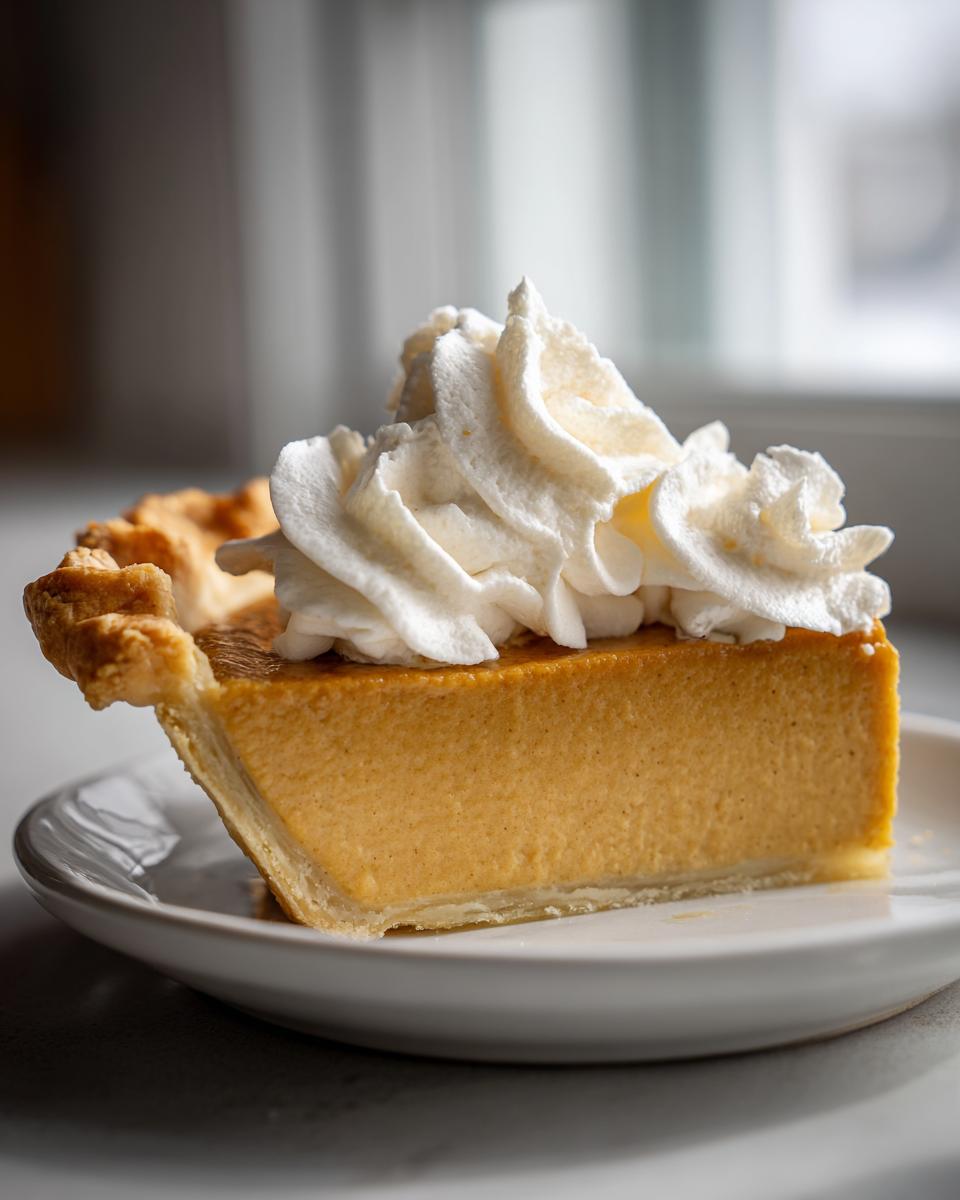
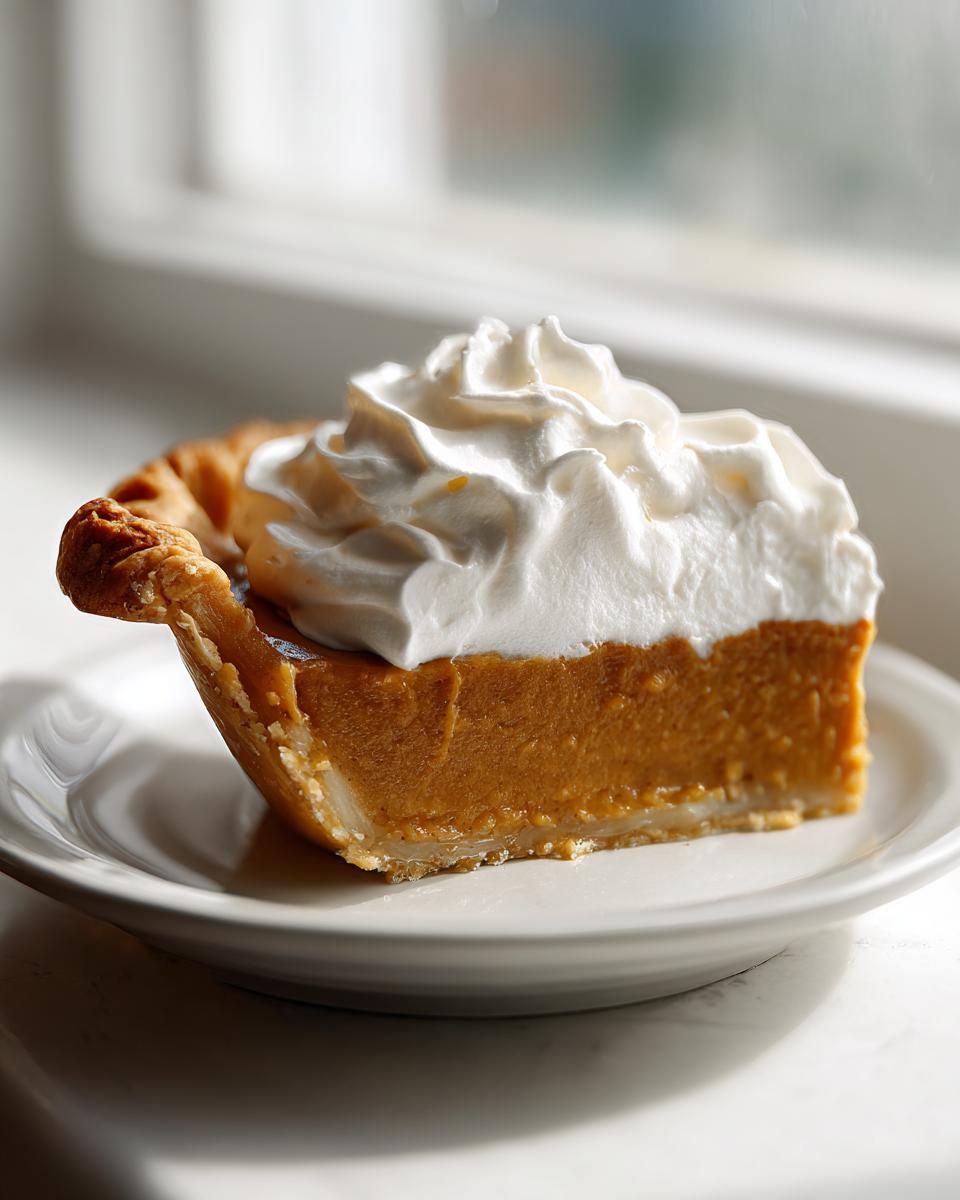
Take the pot off the heat immediately. Stir in your butter chunks until they melt beautifully into the custard, and then add that splash of vanilla. Pour that hot, dreamy mixture straight into your cooled crust. Now, this is key: press plastic wrap right down onto the surface of the filling. This stops that ugly skin from forming while it chills. You must refrigerate it for at least four hours, or until it’s fully firm before you whip up that cream topping.
Tips for a Perfect Creamy Butterscotch Pie
Even with the best recipe, sometimes you need a little nudge to get that ideal texture for your butterscotch pie. My best advice for achieving that silky smooth pie filling remains the constant, patient whisking, especially when handling the eggs! But here are a couple of other tricks that make this a show-stopper.
If you want to lean into that smoky, complex sweetness you sometimes find in the South, try adding a tiny splash of bourbon or even just some rum extract right when you stir in the vanilla. It wakes up the brown sugar flavor beautifully! For a fun twist, you can even peek at how Dolly Parton does her version for inspiration when thinking about adding a little zip to that classic profile. You can check out her flavors over at Dolly Parton’s Butterscotch Pie recipe for some great ideas on flavor enhancements. Remember, we are always focused on creating wonderful flavors, and you can find inspiration for even more great recipes in our delicious dessert recipes collection.
Quick Substitutions for an Easy Butterscotch Pie
Look, I’m all about making things from scratch, but sometimes life is moving too fast. If you need an easy butterscotch pie right now, you can absolutely use some short cuts! Ditch the custard base entirely. Just use a pre-made crust—maybe even a cookie crust if you’re feeling fancy—and mix one box of instant butterscotch pudding with cold milk. Fold in a cup of stabilized whipped topping—like Cool Whip—and chill. It won’t be the same rich butterscotch custard, but it’s fast and still pretty delicious!
Storing and Serving Your Homemade Butterscotch Pie
So, the hardest part—waiting for it to chill—is over! Now that you have this gorgeous, rich, creamy butterscotch pie finished with soft whipped cream, let’s talk about how to keep it happy until it hits the plates. Since this is a real custard pie, we definitely need to keep it chilled. Don’t even think about leaving this beauty on the counter for long; it needs to stay snug in the refrigerator. It holds up really well for about three days, but honestly, it’s usually gone by day two!

And here’s a big rule for custard pies: we don’t reheat them! Warming it up will ruin that perfect set we worked so hard for. Serve it straight from the fridge when it’s cold and firm. It contrasts beautifully with a warm beverage, though. If you’re looking for the perfect pairing, I always recommend a bold, slightly bitter drink to balance the sweetness. You might just love making a batch of New Orleans Iced Coffee to serve alongside those cold slices!
Frequently Asked Questions About Butterscotch Pie
I get questions about this butterscotch pie all the time, which just goes to show how much everyone loves this flavor! Don’t hesitate to send me your own questions in the comments, but here are the ones I hear most often about nailing that perfect texture and serving schedule.
Can I make this rich butterscotch custard ahead of time?
You absolutely can make the custard filling ahead of time, yes. I usually make it a full day in advance; just remember to keep that plastic wrap pressed right onto the surface before chilling. The only catch is, you should wait to whip up that heavenly cream topping and spread it on right before serving. It holds its shape way better that way!
What makes this a true old fashioned butterscotch pie?
What sets this apart from the lighter, quicker versions is that rich, dense base. This is a true rich butterscotch custard because we are cooking it from scratch using milk, cream, and eggs, rather than just dissolving a boxed pudding mix. That scratch method gives you that deep, slow-cooked caramel taste that defines the southern style pie tradition.
Is this butterscotch pie suitable for Thanksgiving pie ideas?
It’s perfect! This recipe is truly one of my favorite Thanksgiving pie ideas. It brings a warm, homey flavor that complements pumpkin and pecan beautifully, but it’s different enough that everyone gets excited for a slice. Just make sure you give yourself enough time to chill since that long set is crucial for clean slices!
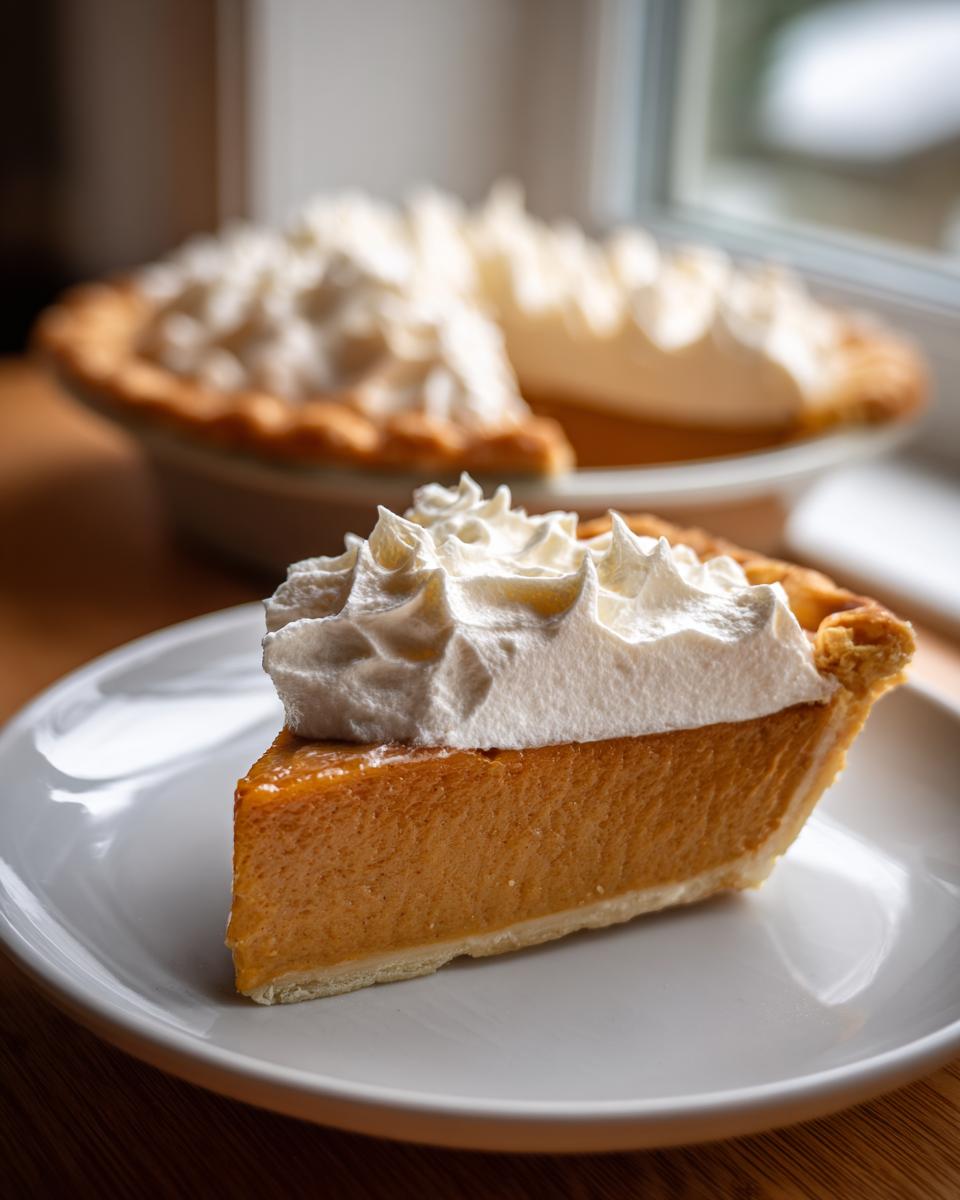
If you’re planning your holiday menu, you might also love my recipe for easy pumpkin bars!
Nutritional Estimates for this Classic Dessert Recipe
Now, I know we are all making this butterscotch pie for the love of flavor and tradition, not necessarily for the health benefits! But since you asked for the full picture, here are the estimated nutritional facts based on the ingredients list above. Please remember, these numbers are just a great guideline—they are based on dividing the recipe into 8 standard slices and using a typical store-bought crust, so your final count might shift a little depending on how generous your slices are!
This is a true indulgence, just like any great holiday dessert should be. If you’re looking for lighter baking options in general, I have plenty of posts on that, but for this rich butterscotch custard, we embrace the deliciousness fully!
- Serving Size: 1 slice
- Calories: 410
- Sugar: 45g
- Fat: 22g
- Protein: 5g
- Carbohydrates: 50g
- Sodium: 250mg
These values reflect the decadent nature of a traditional, homemade butterscotch pie recipe built with butter, cream, and sugar. Enjoy it responsibly, knowing you made something spectacular completely from scratch!
Share Your Butterscotch Pie Creations
That’s it—the ultimate, velvety pie is done and chilling! I truly hope you found making this butterscotch pie as joyful as I do. Now, this is the fun part: hearing from you! Did it turn out perfectly smooth? Drop a rating for the recipe down below, and please leave a comment sharing any little tweaks you made. And if you snapped a picture of your finished beauty, share it with us! I love seeing your successes. For more cooking adventures with me, Michael Carter, check out my About Page. Happy baking, friends!
PrintOld-Fashioned Creamy Butterscotch Pie

Make a rich, velvety butterscotch pie from scratch with a silky-smooth custard filling. This recipe focuses on classic flavor and texture for a comforting dessert.
- Prep Time: 20 min
- Cook Time: 15 min
- Total Time: 4 hours 35 min
- Yield: 8 servings 1x
- Category: Dessert
- Method: Stovetop Custard
- Cuisine: American
- Diet: Vegetarian
Ingredients
- 1 (9 inch) unbaked pie crust (store-bought or homemade)
- 1 cup packed light brown sugar
- 1/2 cup granulated sugar
- 1/4 cup cornstarch
- 1/2 teaspoon salt
- 1 1/2 cups whole milk
- 1/2 cup heavy cream
- 4 large egg yolks, lightly beaten
- 4 tablespoons unsalted butter, cut into pieces
- 1 teaspoon vanilla extract
- 1 cup heavy whipping cream (for topping)
- 2 tablespoons powdered sugar (for topping)
Instructions
- Prepare your 9-inch pie crust and bake it according to package directions or your preferred method until lightly golden. Let the baked crust cool completely on a wire rack.
- In a medium saucepan, whisk together the brown sugar, granulated sugar, cornstarch, and salt.
- Gradually whisk in the whole milk and heavy cream until the mixture is smooth.
- Cook the mixture over medium heat, stirring constantly, until it thickens significantly and begins to bubble. This should take about 8 to 10 minutes. Reduce the heat to low once it starts to bubble.
- In a separate small bowl, whisk the 4 egg yolks.
- Temper the egg yolks: Slowly pour about 1 cup of the hot sugar mixture into the egg yolks while whisking the yolks continuously. This prevents the eggs from scrambling.
- Pour the tempered egg yolk mixture back into the saucepan with the remaining sugar mixture, whisking constantly.
- Continue to cook over medium-low heat for 1 to 2 minutes, stirring constantly, until the filling thickens further and coats the back of a spoon. Do not let it boil vigorously.
- Remove the saucepan from the heat. Stir in the butter pieces until they are completely melted and incorporated. Stir in the vanilla extract.
- Pour the hot, rich butterscotch custard filling immediately into the cooled, pre-baked pie crust.
- Press plastic wrap directly onto the surface of the filling to prevent a skin from forming. Chill the pie in the refrigerator for at least 4 hours, or until the filling is completely set.
- Before serving, prepare the topping: In a chilled bowl, beat the 1 cup of heavy whipping cream with the 2 tablespoons of powdered sugar until stiff peaks form.
- Spread or pipe the whipped cream topping over the chilled pie. Slice and serve immediately.
Notes
- For a quick, no-bake version, substitute the homemade filling with 1 box (3.4 oz) instant butterscotch pudding mixed with 1 1/2 cups cold milk, then fold in 1 cup of stabilized whipped topping (like Cool Whip) before pouring into a graham cracker or Biscoff cookie crust.
- To achieve a silky smooth pie filling, whisk the mixture constantly, especially when tempering the eggs, and avoid letting the custard boil rapidly after the eggs are added.
- If you want a Dolly Parton-inspired flavor profile, consider adding a small splash of bourbon or rum extract to the cooled filling before topping.
Nutrition
- Serving Size: 1 slice
- Calories: 410
- Sugar: 45
- Sodium: 250
- Fat: 22
- Saturated Fat: 13
- Unsaturated Fat: 9
- Trans Fat: 0.5
- Carbohydrates: 50
- Fiber: 1
- Protein: 5
- Cholesterol: 110