
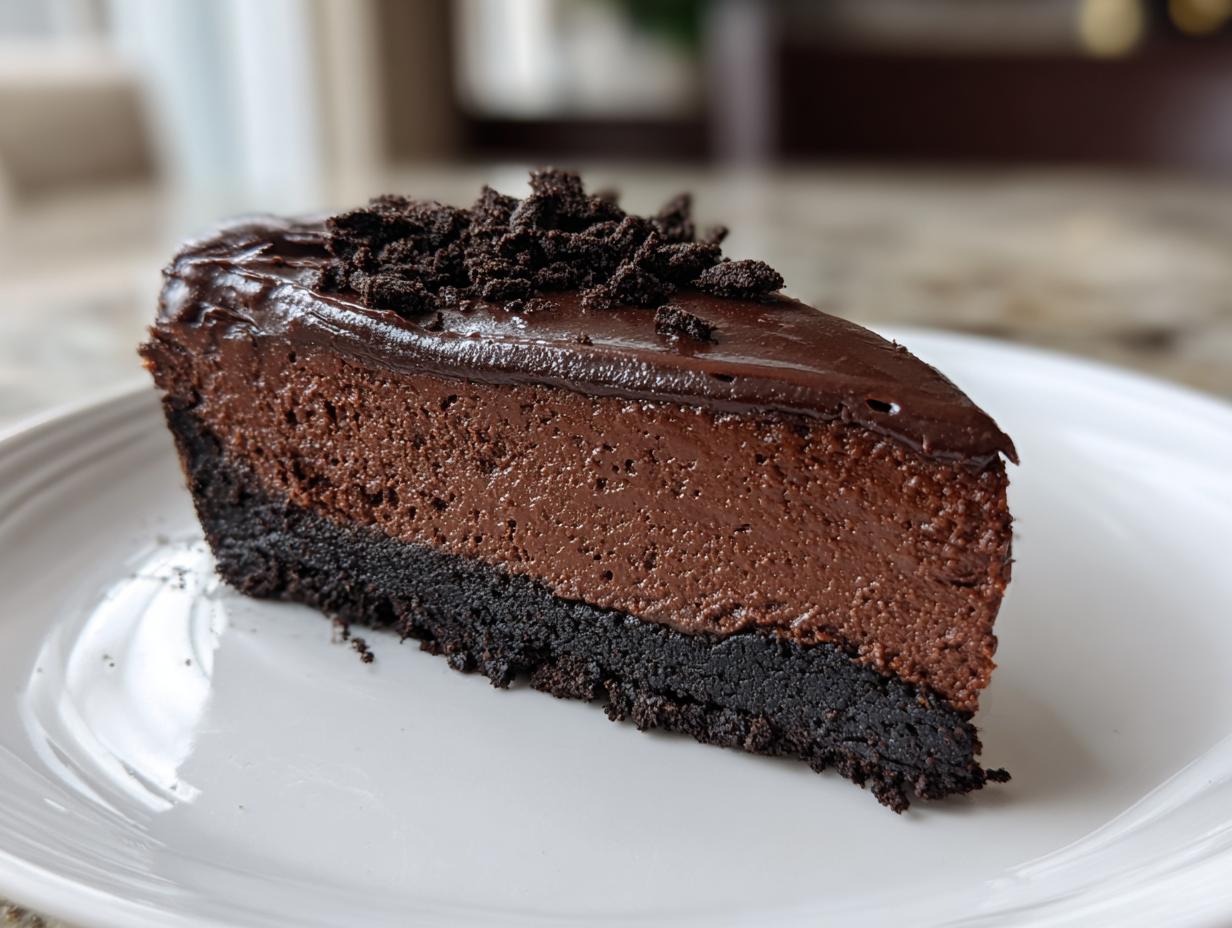
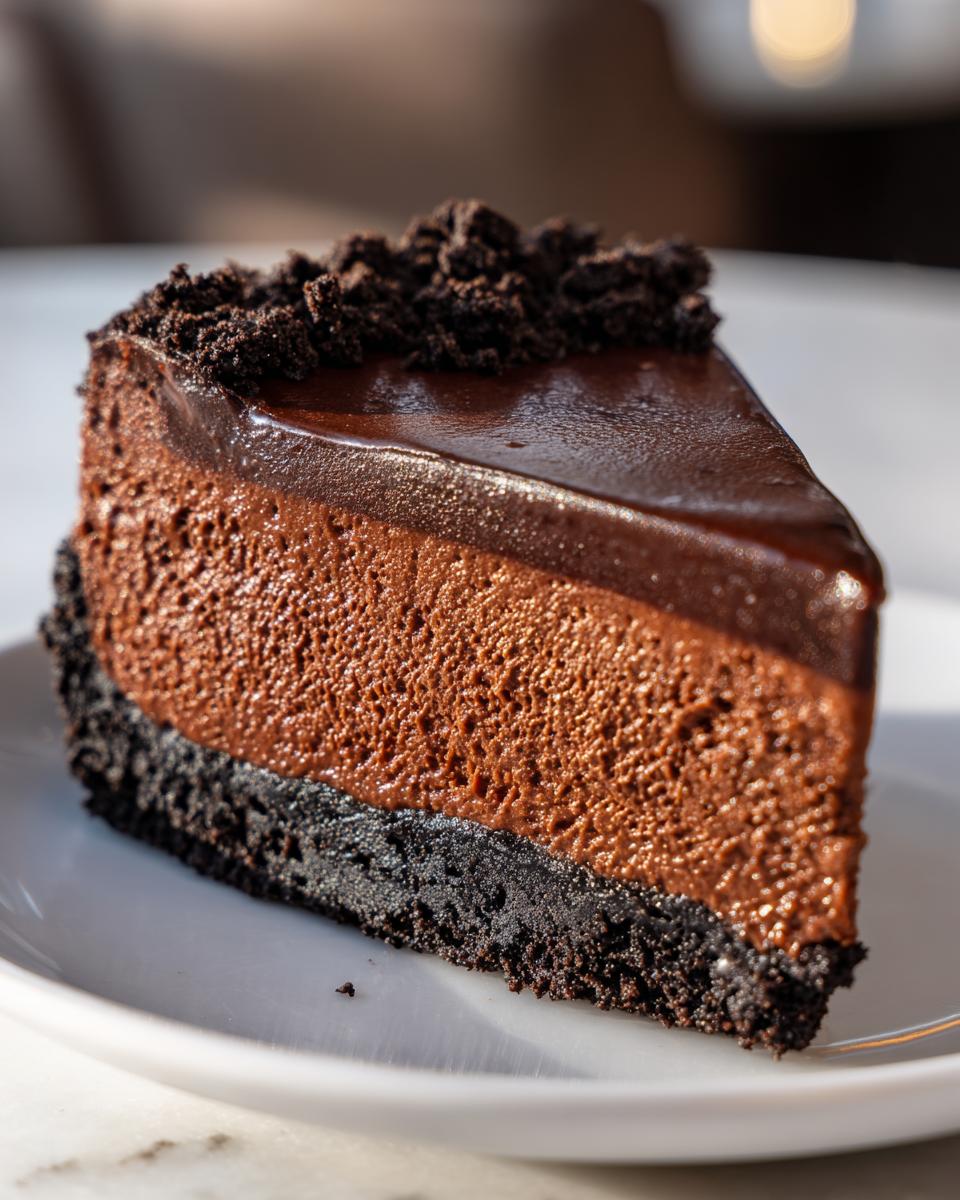
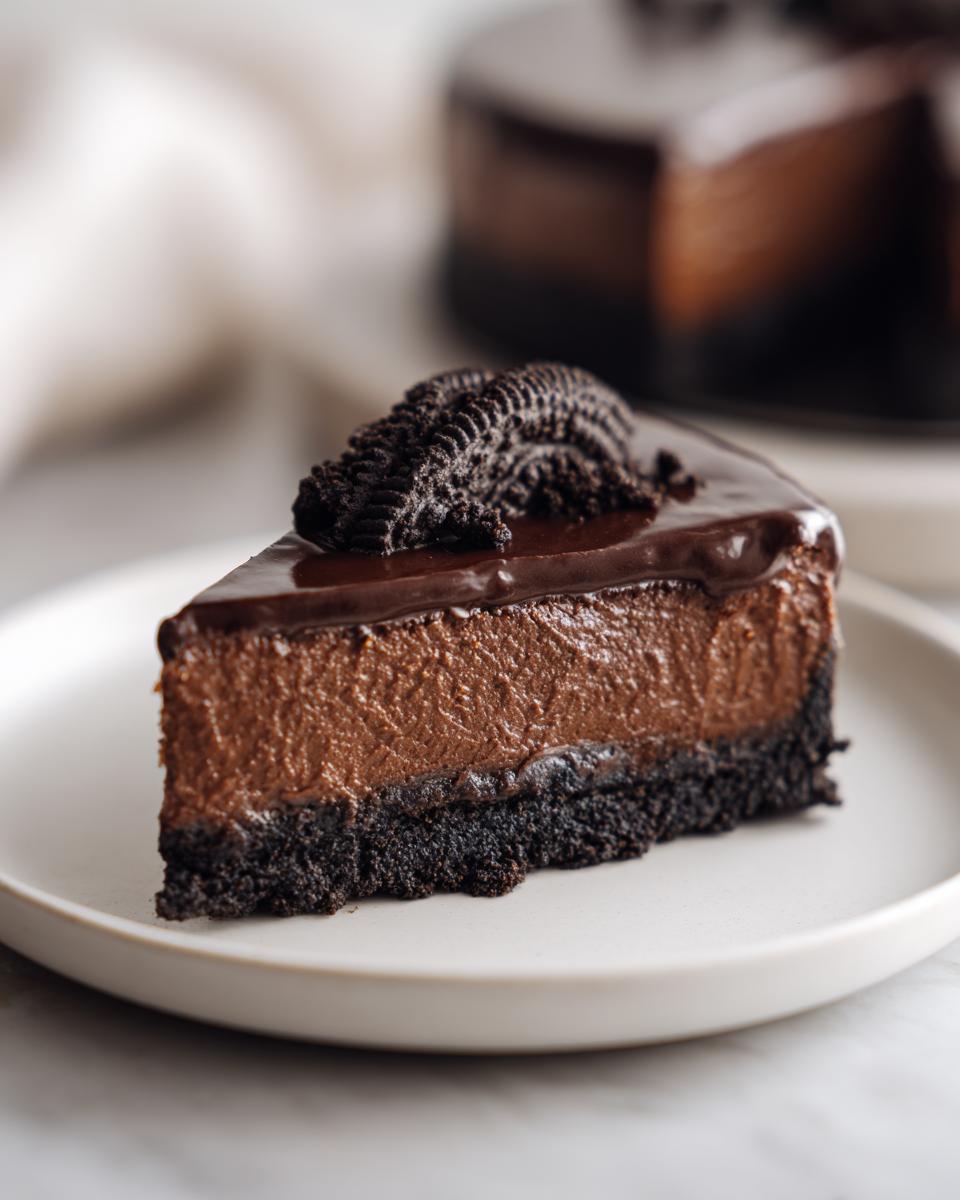
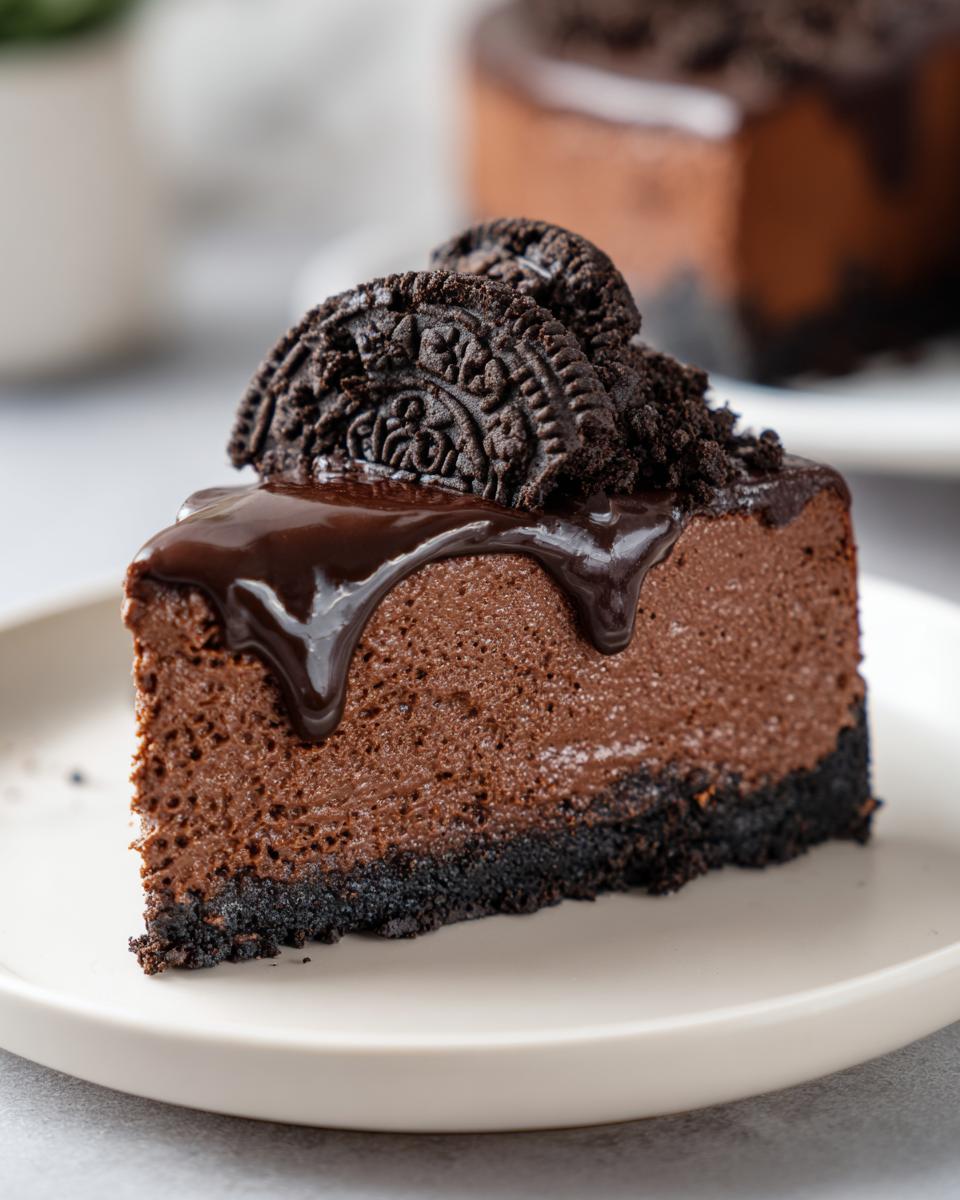
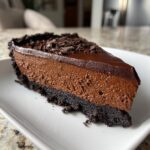
Oh, are you ready for utter bliss? Because when I say ultimate indulgence, I really mean it. Forget fussing with water baths or worrying about cracked tops; this recipe is my go-to for pure, unadulterated chocolate heaven. I’m talking about the Ultimate Decadent No-Bake Chocolate Cheesecake with Oreo Crust. When I left the tech world to start Delish Symphony, it was desserts like this—simple, powerful, and deeply satisfying—that inspired me. This creamy chocolate cheesecake delivers that rich, silky texture without ever turning on the oven. Trust me, once you try this, it’s going straight into your collection of favorite dessert recipes.
- Why This Ultimate Decadent No-Bake Chocolate Cheesecake is Your New Favorite
- Ingredients for the Best Chocolate Cheesecake with Oreo Crust
- Step-by-Step Instructions for Easy Chocolate Cheesecake
- Expert Tips for a Perfect Chocolate Cheesecake Every Time
- Variations: Making Your Chocolate Cheesecake Unique
- Serving Suggestions for This Decadent Chocolate Cheesecake
- Storage and Reheating Instructions for Homemade Chocolate Cheesecake
- Frequently Asked Questions About No Bake Chocolate Cheesecake
- Estimated Nutrition for This Rich Dark Chocolate Cheesecake
- Share Your Decadent Chocolate Cheesecake Creations
Why This Ultimate Decadent No-Bake Chocolate Cheesecake is Your New Favorite
You know I’m all about making life easier without sacrificing flavor, and this recipe is the perfect example! It’s quick enough for a weeknight craving but impressive enough for any holiday gathering. If you’ve ever been scared of traditional cheesecake, get ready, because this truly is the best chocolate cheesecake for beginners.
Key Benefits of Our No Bake Chocolate Cheesecake
- No oven means no stress—perfect for summer or just when you don’t want to heat up the house!
- It achieves that incredibly silky smooth cheesecake filling you dream about.
- Talk about fast! The prep is done in under 30 minutes, leaving you time to relax.
- That crunchy Oreo crust base? It provides the perfect textural contrast to the rich filling.
Ingredients for the Best Chocolate Cheesecake with Oreo Crust
Okay, so for this chocolate cheesecake, we keep things super straightforward—no weird specialty stores needed! Since we aren’t baking, the temperature of your ingredients matters a lot for that silky texture. I promise, using the exact measurements here guarantees you get that decadent, rich result every single time. Let’s break down what you need for the base and the incredible filling.
For the Crunchy Oreo Crust
- 2 cups Oreo cookie crumbs (Use the whole cookie, folks, chocolate equals flavor!)
- 6 tbsp unsalted butter, melted
For the Creamy Chocolate Cheesecake Filling
- 3 (8 ounce) packages cream cheese, and listen up, they absolutely MUST be softened to room temperature.
- 1 cup granulated sugar
- 1/2 cup unsweetened cocoa powder
- 1 tsp vanilla extract
- 1/4 tsp salt
- 1 cup heavy whipping cream, icy cold (We need this stiff!)
- 4 ounces semi-sweet chocolate, melted and only slightly cooled—we don’t want hot chocolate in our smooth base!
Step-by-Step Instructions for Easy Chocolate Cheesecake
Making this easy chocolate cheesecake might seem simple because we skip the oven, but technique still counts! We need that creamy chocolate cheesecake filling to be absolutely perfect—silky, not grainy. Don’t rush the chilling, though; that time in the fridge is what sets the whole thing up beautifully. Just follow my lead, and you’ll have a showstopper ready for any occasion. This recipe is a perfect example of why I love finding quick (easy dessert recipes) that still pack a major flavor punch.
Creating the No Bake Chocolate Cheesecake Crust
First things first, let’s get this base locked down. You’re just combining those Oreo cookie crumbs with the melted butter until it all looks like damp, dark sand. Now grab your 9-inch springform pan—use the bottom piece only, don’t lock the sides on yet! Press that crumb mixture firmly and evenly across the bottom. I like to use the base of a measuring cup to really pack it down tight. Stick that pan right into the freezer for about 15 minutes while you handle the amazing filling.
Mixing the Silky Smooth Cheesecake Filling
Time for the magic! Use a big bowl and your electric mixer on the cream cheese until it’s totally smooth—no lumps allowed if you want that silky texture. Then, slowly mix in your sugar, cocoa powder, vanilla, and salt. In a separate cold bowl, whip the heavy cream until stiff peaks form—this is what gives us that airy lift! Now, gently fold that whipped cream into the cream cheese mixture until barely combined. Finally, stream in your slightly cooled melted chocolate. Remember, this is a gentle fold; you stop mixing the second the streaks disappear. Overmixing is the enemy of **creamy chocolate cheesecake**!
Chilling and Serving Your Chocolate Cheesecake
Pour that gorgeous chocolate filling right over your chilled Oreo crust and smooth the top with an offset spatula. That’s it for assembly! Now, cover it loosely with plastic wrap—make sure it doesn’t sag into the filling itself. This chocolate cheesecake needs serious chill time to firm up, so plan on at least 6 hours, but overnight is always my recommendation. When you’re ready to serve, run a thin, hot knife around the inner edge before releasing the springform sides. A clean slice is always satisfying!
Expert Tips for a Perfect Chocolate Cheesecake Every Time
Look, even though this chocolate cheesecake doesn’t go into the oven, you still need a few secrets up your sleeve to guarantee that bakery-quality result. I’ve tested this recipe dozens of times in my own kitchen, so I can tell you exactly what makes it go from good to absolutely mind-blowing. Remember those little notes I stuck on my recipe card? They all boil down to temperature and gentleness.
Achieving Maximum Creaminess in Your Chocolate Cheesecake
Seriously, the cream cheese needs to be soft—I mean completely pliable. If you try to beat cold chunks into the sugar, you’ll end up with grainy bits, and nobody wants that! Also, a big one about the chocolate: melt it down, and then you have to let it cool slightly before you add it to the filling. If it’s hot, it melts your beautifully whipped cream, and suddenly you’ve lost all that air we worked so hard to whip in!
Troubleshooting Common Chocolate Cheesecake Issues
If your finished cheesecake feels a little soft when you go to cut it, don’t panic! It just needs more time to let those fats firm up in the cold. Pop it back in the fridge for a few more hours, or even overnight. If you notice uneven color, that just means you didn’t fold the melted chocolate in enough. Next time, use a wide spatula and cut down the center a couple of times to swirl it better. For the cleanest slice, try dipping your serving knife in hot water and wiping it dry between cuts—it separates like a dream. You can check out some other great ideas over here, like this best chocolate cheesecake approach.
Variations: Making Your Chocolate Cheesecake Unique
You’ve mastered the classic, rich, chocolate cheesecake, but why stop there? I love tweaking this recipe, especially when I’m making it for my family who always wants something extra special. Whether you’re aiming for a triple chocolate cheesecake experience or just want to sneak in a surprise flavor, it’s super easy to customize!
Adding Layers: Triple Chocolate Cheesecake Ideas
If you really want to go overboard—and honestly, why wouldn’t you?—you absolutely must try topping this with a simple glaze. Melt another four ounces of your favorite chocolate chips with a splash of heavy cream until it’s beautifully pourable, creating a perfect chocolate ganache cheesecake layer. For a true triple threat, try gently folding a half-cup of white or milk chocolate chips right into the filling before you pour it into the crust. It adds pockets of creamy sweetness!
Flavor Twists for Your Chocolate Cheesecake
Sometimes you need a little punch to cut through all that decadent chocolate, right? A teaspoon of good quality instant espresso powder dissolved in a tiny bit of hot water and mixed into the filling is my secret move—it just deepens the cocoa flavor without tasting like coffee. Or, if it’s the holidays, mix in a quarter teaspoon of peppermint extract instead of vanilla. It turns this into a total showstopper! Don’t forget, you can always find more fun dessert recipes over on my main page when you’re ready for a new adventure.
Serving Suggestions for This Decadent Chocolate Cheesecake
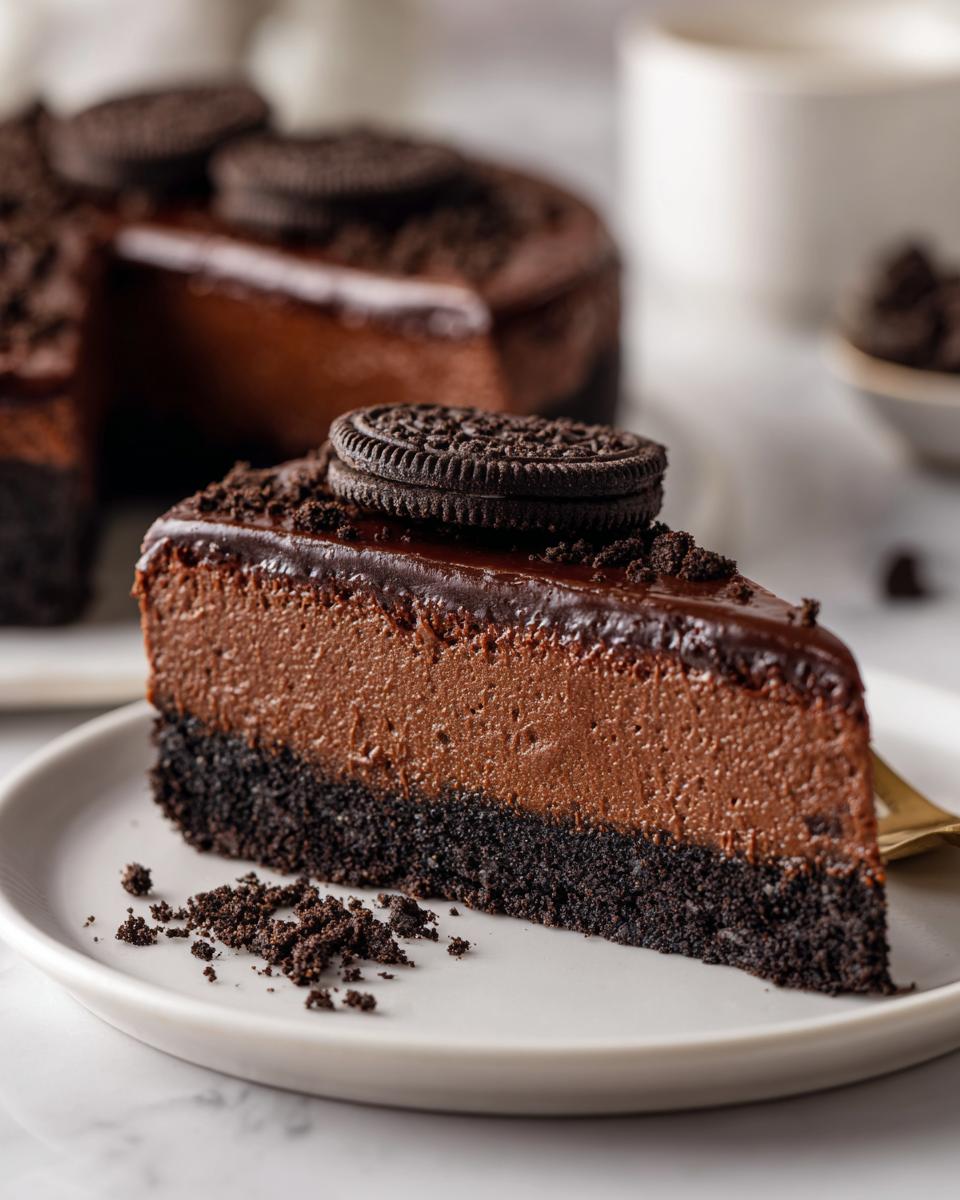
Now that you have perfected this absolute dream of a dessert, how should you present it? A slice of this incredibly rich dark chocolate cheesecake is practically perfect on its own, but wow, it looks even better dressed up a bit! I love serving mine topped high with fresh, bright red raspberries; the tartness is just divine next to the deep cocoa flavor. For parties, if you’re serving a crowd, pair it with something festive like my Cranberry Orange Punch. It truly is a chocolate lover’s dream dessert, and a little fresh topping just makes it sing!
Storage and Reheating Instructions for Homemade Chocolate Cheesecake
Since this amazing homemade chocolate cheesecake skips the oven entirely, storage is super simple! You must keep it well covered in the fridge. I usually use plastic wrap, making sure it doesn’t actually touch the surface of the filling—a slightly tented foil works great too. It stays perfectly creamy for about four to five days. Don’t even think about freezing it solid; this creamy base doesn’t love hard freezes!
Frequently Asked Questions About No Bake Chocolate Cheesecake
I know when you’re making something as rich as this, you want to get it right! That’s why I gathered up the most common questions I get about making this creamy chocolate cheesecake. Since we are focusing on baking without an oven desserts, the rules for setting up the filling are slightly different than a traditional cake, but I promise it’s manageable!
Can I use a different crust besides Oreos for this chocolate cheesecake?
Oh absolutely! The Oreo crust is amazing, but if you don’t have them, go for it! Graham cracker crumbs work beautifully—you might want to add a tablespoon more butter to help them bind since they are a bit drier than Oreos. You could also use any chocolate wafer cookie you find at the store. Just treat the ratio—crumbs to melted butter—the same way!
How do I ensure my no bake cheesecake chocolate filling sets up firm?
This is crucial for a perfect slice! The secret is twofold: First, make sure your heavy whipping cream is ice-cold when you whip it. You need stiff peaks, meaning when you lift the whisk, the tip stands straight up. Second, you cannot cheat the chill time! That minimum of six hours in the fridge allows the fats and whipped cream structure to solidify the filling. If you cut it early, it will droop, so be patient!
Is this considered an easy dessert for parties?
It’s the definition of easy dessert for parties! Because there’s zero baking required, you can make this the day before, or even two days ahead of time, which is a huge help when entertaining. Just keep it covered nicely in the fridge, and you’ve taken one major item off your to-do list for game day or holiday gatherings. For even more simple meals, check out my guide on weeknight dinner recipes!
Estimated Nutrition for This Rich Dark Chocolate Cheesecake
I always love seeing the numbers, but take these with a little grain of salt because I’m testing things in my own kitchen, not in a fancy lab! This information gives you a really good idea of what you’re digging into when you dive face-first into a slice of this rich dark chocolate cheesecake. Remember, since we are using real butter, cream cheese, and Oreos, it’s going to be decadent—which is exactly what we want!
Here is the estimated nutritional breakdown per slice, based on this recipe yielding 10 servings. If you make bigger slices for a party, these numbers will naturally change.
- Serving Size: 1 slice
- Calories: 450
- Sugar: 35g
- Fat: 32g
- Saturated Fat: 19g
- Carbohydrates: 38g
- Protein: 7g
A quick disclaimer from me: These figures are estimates based on using standard grocery store ingredients listed in the recipe. They can vary slightly depending on the exact brands of chocolate or cocoa powder you decide to use. But hey, when it tastes this good, who’s going to worry about the details?
Share Your Decadent Chocolate Cheesecake Creations
Now you have the secret to the best chocolate cheesecake recipe—the one that proves you don’t need an oven to achieve true dessert perfection! I’ve poured my heart into explaining every creamy step, from that crunchy Oreo crust to folding in the melted chocolate just right. But the recipe’s journey isn’t finished until it lands on *your* dessert table.
I would absolutely love to hear how this turned out for you! Did you keep it simple, or did you go wild with toppings? Please scroll down and drop a comment below telling me your experience! If you tried this, leaving a star rating really helps other home cooks feel confident diving into this recipe. And honestly, if you snap a picture of your gorgeous, silky slice, tag me on social media! Seeing your creations is honestly the best part of running Delish Symphony, and it helps build this amazing community of enthusiastic cooks. Ready to share your chocolate masterpiece? You can always learn more about *why* I obsess over recipes like this over on my About page.
PrintUltimate Decadent No-Bake Chocolate Cheesecake with Oreo Crust
Make this easy, no-bake chocolate cheesecake for a rich and creamy dessert. It features a crunchy Oreo crust and a silky smooth chocolate filling, perfect for any gathering.
- Prep Time: 25 min
- Cook Time: 0 min
- Total Time: 6 hr 25 min
- Yield: 10 servings 1x
- Category: Dessert
- Method: No Bake
- Cuisine: American
- Diet: Vegetarian
Ingredients
- 2 cups Oreo cookie crumbs
- 6 tbsp unsalted butter, melted
- 3 (8 ounce) packages cream cheese, softened
- 1 cup granulated sugar
- 1/2 cup unsweetened cocoa powder
- 1 tsp vanilla extract
- 1/4 tsp salt
- 1 cup heavy whipping cream, cold
- 4 ounces semi-sweet chocolate, melted and cooled slightly
Instructions
- Prepare the crust: Mix the Oreo cookie crumbs and melted butter in a bowl until combined. Press the mixture firmly into the bottom of a 9-inch springform pan. Chill the crust in the freezer for 15 minutes.
- Make the filling: In a large bowl, beat the softened cream cheese with an electric mixer until smooth. Add the granulated sugar, cocoa powder, vanilla extract, and salt. Beat until fully incorporated and creamy.
- Whip the cream: In a separate, clean bowl, whip the cold heavy whipping cream until stiff peaks form. Gently fold the whipped cream into the cream cheese mixture until just combined.
- Fold in chocolate: Gently fold the cooled, melted semi-sweet chocolate into the filling until streaks disappear, creating a marbled or uniform dark chocolate color, depending on your preference. Do not overmix.
- Assemble: Pour the chocolate cheesecake filling over the chilled Oreo crust. Smooth the top with a spatula.
- Chill: Cover the pan loosely with plastic wrap and refrigerate for at least 6 hours, or preferably overnight, until the cheesecake is firm.
- Serve: Before serving, carefully release the springform side. Slice and serve cold.
Notes
- For a richer flavor, use dark chocolate instead of semi-sweet chocolate in the filling.
- If you want a cleaner slice, dip your knife in hot water and wipe it dry between cuts.
- You can top this cheesecake with chocolate ganache or fresh raspberries before serving.
Nutrition
- Serving Size: 1 slice
- Calories: 450
- Sugar: 35g
- Sodium: 280mg
- Fat: 32g
- Saturated Fat: 19g
- Unsaturated Fat: 13g
- Trans Fat: 0.5g
- Carbohydrates: 38g
- Fiber: 2g
- Protein: 7g
- Cholesterol: 110mg