
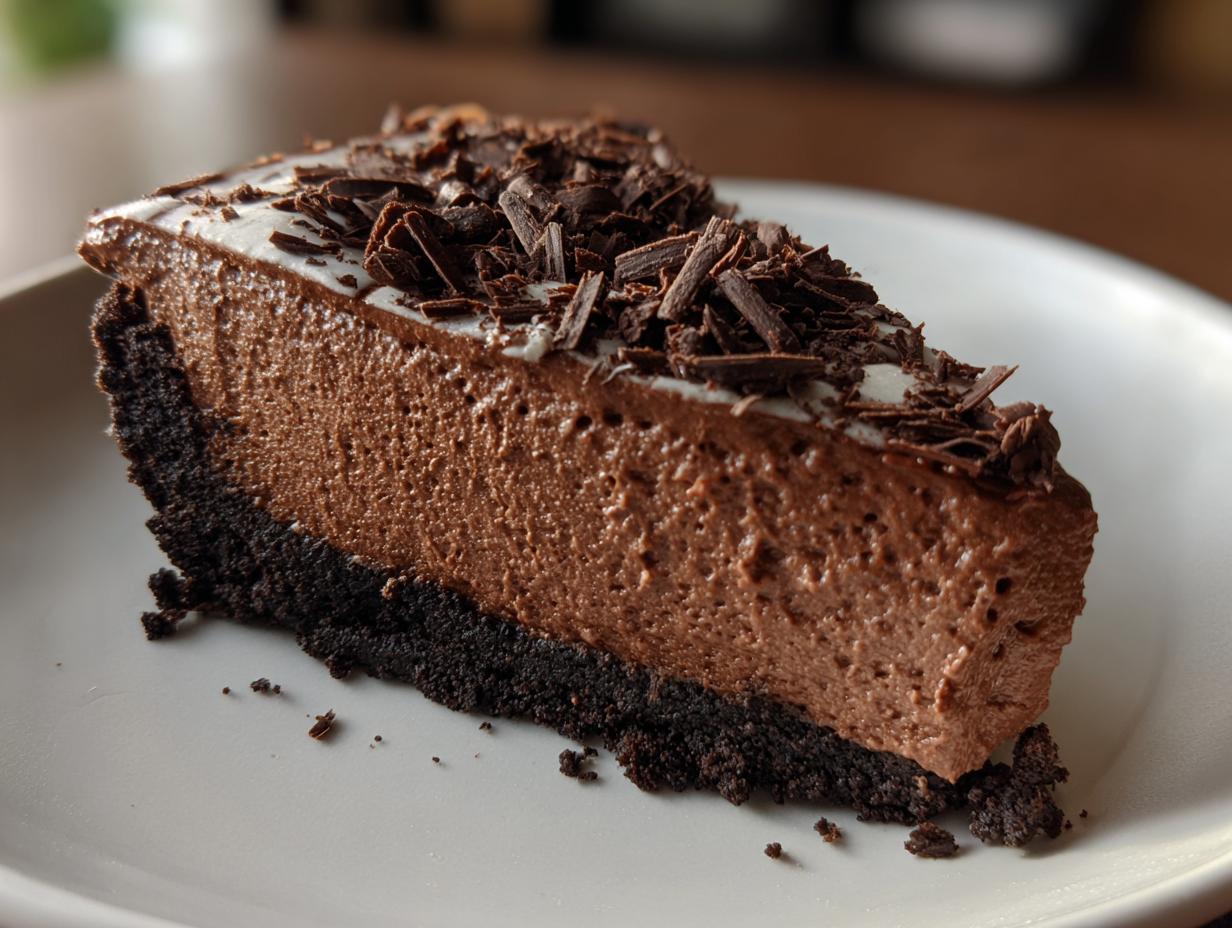
Sometimes you just need pure, unadulterated chocolate decadence without turning on the oven, right? That’s where this No-Bake Oreo Chocolate Mousse Pie comes in. Honestly, it’s the pinnacle of effortless indulgence. I developed this recipe because, even though I love the complexity of a baked dessert, some days you just need that stunning, creamy chocolate pie ready to go without any fuss. This recipe hits that sweet spot perfectly. It’s unbelievably rich, delightfully fluffy, and that homemade chocolate mousse filling just melts away. It instantly becomes the centerpiece of whatever gathering you bring it to. If you’re looking for the ultimate, easy chocolate mousse pie, you’ve landed exactly where you need to be. You can definitely find more complex dessert recipes, but sometimes the simple joys are truly the best, and this chocolate mousse pie is pure, simple joy.
You can check out some of my other favorite sweet endings over on my main dessert page, but trust me, this pie is special.
- Why This No-Bake Oreo Chocolate Mousse Pie is Your New Go-To (Rich Chocolate Dessert)
- Ingredients for the Ultimate Chocolate Mousse Pie
- How to Prepare This Easy Chocolate Mousse Pie Step-by-Step
- Ingredient Notes and Substitutions for Your Chocolate Mousse Pie
- Tips for a Perfectly Creamy Chocolate Pie Success
- Storage and Making Ahead for Your Chocolate Mousse Pie
- Serving Suggestions for This Decadent Chocolate Dessert
- Frequently Asked Questions About No Bake Chocolate Pie
- Nutritional Estimates for Your Homemade Chocolate Mousse
- Share Your Symphony: Rate This Ultimate Chocolate Pie
Why This No-Bake Oreo Chocolate Mousse Pie is Your New Go-To (Rich Chocolate Dessert)
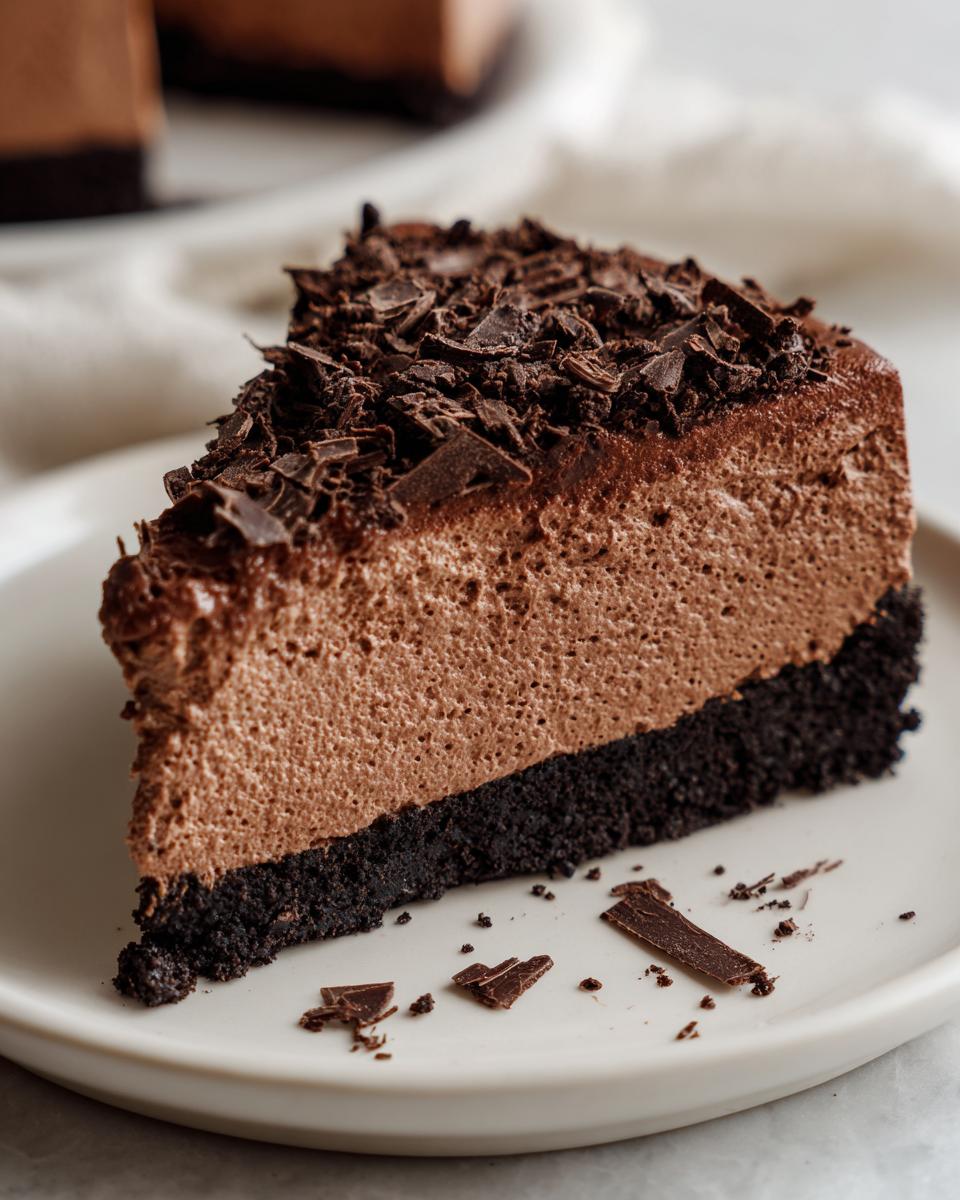
I want everyone, especially those busy folks out there, to feel like they can whip up something truly impressive. This No-Bake Oreo Chocolate Mousse Pie delivers 100% on that promise. It bypasses the oven entirely, which is a huge win on a hot day or when your oven is already busy. That combination of the crunchy Oreo crust and the light-as-air, rich chocolate dessert filling makes it addictive. When you need a last-minute, decadent chocolate dessert or just a quick chocolate treat that looks like it took hours, this is the one I always fall back on.
Key Benefits of Our Chocolate Mousse Pie Recipe
- It’s genuinely no bake—just mixing and chilling!
- The Oreo crust adds that salty, crunchy contrast people love.
- The filling has that amazing fluffy chocolate filling texture.
- It chills beautifully and sets up perfectly every time.
- It’s an incredibly easy chocolate mousse pie for beginners.
Ingredients for the Ultimate Chocolate Mousse Pie
Getting the ingredients organized is half the battle won when you’re making something this rich and decadent. For this recipe, we need to cover three main areas: the crust, the chocolate base, and that light, airy whipped topping that earns us the “mousse” title. I’ve listed everything below just as I use it in my own kitchen. Make sure that cream cheese is nice and soft and your heavy cream is straight out of the coldest part of the fridge—seriously, that coldness is key for the fluff factor!
Oreo Crust Components for Your Chocolate Mousse Pie
- 1 3/4 cups Oreo cookie crumbs (that’s about 28 cookies, give or take a few that sneak into my mouth first!)
- 6 tablespoons unsalted butter, melted
Creamy Filling and Whipped Topping Ingredients
- 1 package (8 ounces) cream cheese, softened
- 1 cup powdered sugar
- 1 teaspoon vanilla extract
- 1 package (8 ounces) semi-sweet chocolate chips
- 1/2 cup milk
- 1 cup heavy whipping cream, very cold
- 1/4 cup powdered sugar (for the whipped cream)
- 1 teaspoon vanilla extract (for the whipped cream)
- Chocolate shavings, for topping (because presentation matters!)
How to Prepare This Easy Chocolate Mousse Pie Step-by-Step
Okay, let’s get down to business. Making this chocolate mousse pie sounds fancy, but trust me, the heavy lifting is done by your freezer and fridge, not your stove! We’ll move through this logically: crust first, then the two parts of the filling, and finally, the assembly. Don’t rush the chilling parts, though; those are non-negotiable for that perfect slice!
Creating the Oreo Crust and Setting the Base
First up, the base! In a bowl, ditch the fancy equipment and just mix your Oreo crumbs with that melted butter until it looks like damp, dark sand. You need to press this mixture *firmly* into the bottom and all the way up the sides of your 9-inch pie plate. I use the bottom of a sturdy measuring cup to really pack it in there. Once it’s tight, pop that crust right into the freezer. It needs to firm up while we tackle the creamy layers, so give it about 10 minutes.
Building the Rich Chocolate Mousse Filling
Now for the heart of this creamy chocolate pie. In a separate big bowl, beat that softened cream cheese until it’s smooth as silk—no lumps allowed! Then cream in the cup of powdered sugar and the vanilla until it lightens up a bit. Next, melt your chocolate chips and milk together in the microwave in short bursts, stirring every time until it’s gorgeous and smooth. Let that chocolate cool for just five minutes; lukewarm is perfect. Gently fold that chocolate into the cream cheese mixture. Then, in another clean bowl, whip your heavy cream with the remaining sugar until you get nice stiff peaks. This is where the magic happens, folks:
Here’s my tip, and I learned this the hard way: Don’t just dump the whipped cream in! Take about a third of the whipped cream and fold it into the chocolate mixture *first*. This lightens up the base, making it easier on the rest of the whipped cream. Then, fold in the remaining cream very gently until you just see no white streaks. We want that fluffy chocolate filling, not deflated sadness!
Assembling and Chilling Your No Bake Chocolate Pie
Carefully pour all that wonderful mousse filling right into your chilled Oreo crust. Use an offset spatula to smooth the top evenly. Cover it loosely with plastic wrap—don’t let the wrap actually touch the mousse, or it’ll stick! Now, pop this beauty into the fridge. It needs a minimum of six hours to set, but honestly? Overnight is best for the ultimate slice. Since this is totally a no oven pies situation, all the work is done here in the chilling phase!
You can find some great ideas for quick meals to serve before this decadent dessert over on my weeknight dinner recipes page, just to keep your whole meal simple!
Ingredient Notes and Substitutions for Your Chocolate Mousse Pie
I always want you folks to feel empowered to tweak recipes without fear! Since this is an easy chocolate mousse pie, substitutions are easy, but I do have firm opinions on a few things. If you want to make this a truly rich chocolate dessert, swap out half of those semi-sweet chips for really good bittersweet ones. It deepens that dark chocolate profile beautifully.
If Oreos aren’t around, no sweat. You can absolutely use graham cracker crumbs mixed with a little sugar and melted butter for the crust—it’s still amazing. Now, why must the heavy whipping cream be ice cold? Simple physics! Cold cream whips up faster and the fat molecules hold air much better, giving you that necessary stiff peak structure for a proper homemade chocolate mousse. Warm cream just turns into sad, sloppy liquid, and we aren’t having that!
Tips for a Perfectly Creamy Chocolate Pie Success
We’ve made the crust, we’ve mixed the mousse—now we need to ensure it sets up like a dream and looks as good as it tastes. Achieving that perfect, smooth, creamy chocolate pie texture takes just a couple of little insider tricks I picked up along the way. Don’t worry if your first attempt isn’t gallery-worthy; that’s just practice!
I find these three things make the biggest difference when you are dealing with a cold-set filling like this No-Bake Oreo Chocolate Mousse Pie:
- The Gentle Fold Rule: This is number one! When folding the lighter whipped cream into the heavier chocolate base, you must be patient. If you beat it or overmix it, you knock all the air right out, and your light mousse turns into a heavy fudge layer. Use a rubber spatula and cut down the middle, then sweep up the side of the bowl. Stop folding the second you don’t see any more white streaks. It’s better to have a tiny streak of white than to deflate the air we worked so hard to whip in!
- Preventing the ‘Crust Crack’: Sometimes, when the filling is dense and the crust is rock-hard from the freezer, the pie cracks when you slice it. To avoid this, try taking the pie out of the fridge about 15 minutes before you need to slice it. This lets the filling relax just a touch. Also, use a long, thin knife dipped in hot water and wiped dry *between every single slice*. It sounds fussy, but it gives you those clean, gorgeous slices every time.
- The Hot Chocolate Pour Bath: When you melt your chocolate chips for the base, make sure they cool just enough before hitting the cream cheese mixture. If the chocolate is too hot, it can cook the cream cheese slightly, making it grainy or causing it to seize up when you go to fold in the whipped cream. That five-minute cool-down period I mentioned in the instructions? That’s your insurance policy for a smooth, velvety interior.
- For Smoothing the Top: If you want that professional-looking, perfectly flat top before chilling, use an offset spatula or the back of a large spoon dipped in warm water. Smooth the surface gently, then chill. This gives you a great base for those final chocolate shavings.
These simple steps should guarantee you get the absolute best texture from your pie. If you enjoyed these tips, you might like some of the simpler techniques I share for baking with fruit, like in my banana bread recipe!
Storage and Making Ahead for Your Chocolate Mousse Pie
One of the absolute best things about this chocolate mousse pie is that it’s basically designed to be made ahead of time! Since it’s a no-bake situation, we actually *want* it to sit in the cold to firm up properly. I always make mine the day before I plan to serve it—usually for weekend gatherings or when I know I’m going to be slammed busy the day of the party.
When it’s fully set in the fridge, this pie behaves beautifully and will keep well for about three to four days. The crust stays crisp enough, and the filling holds its glorious shape. The main thing you have to watch out for in the fridge, though, is smells. Refrigerators are sneaky; they can transfer the scent of last night’s leftovers right into your delicate mousse!
My secret for keeping it pristine is twofold. First, make sure the pie is completely covered, but don’t press the plastic wrap right onto the topping, especially if you’ve piled on those chocolate shavings or whipped cream peaks. I usually stick a few toothpicks strategically around the rim of the pie plate to create a little tent over the top layer. This keeps the plastic from sticking.
Now, about freezing—yes, you absolutely can! If you want that ultra-firm, almost frozen mousse pie texture, this recipe handles freezing well. Wrap it tightly in a layer of plastic wrap, followed by a layer of aluminum foil to prevent freezer burn. Freeze it for up to about a month. When you want to serve it, transfer it to the fridge overnight to gently thaw. It won’t be quite as pillowy as the refrigerated texture, but it’s still wonderfully creamy and cold. It’s a fantastic option for holiday prep!
If you’re looking for other easy make-ahead treats, check out this great easy chocolate mousse pie guide for more ideas on prepping desserts ahead of time!
Serving Suggestions for This Decadent Chocolate Dessert
Because this creamy chocolate pie is so intensely rich—it’s practically a chocolate bath in a crust!—the best way to serve it is usually by offering something that cuts through that thickness. We don’t want to overwhelm the amazing work you did getting that fluffy chocolate filling just right, but a little contrast can make every bite feel brand new.
When I serve this at a dinner party, I think about balancing the deep, dark sweetness. Here are a few things that make this chocolate mousse pie even better,
Tart Fruit Accents
You absolutely cannot go wrong with tartness. The acidity just cleanses the palate between bites of that heavy chocolate. My favorite idea here is fresh raspberries or halved strawberries scattered over the top just before serving, right next to that chocolate shaving garnish. If you want to get a little fancy, whip up a quick fruit reduction using cherries or tart blackberries. Just simmer them down with a tiny squeeze of lemon juice until it’s thick and glossy, then drizzle that warm sauce over a cold slice. Wow. Instant elegance!
A Little Bit of Crunch (Beyond the Oreo)
While that Oreo crust is doing heavy lifting, sometimes I want another texture element on the fork. Think salty! Sprinkle a few coarse shavings of sea salt right over the top of the whipped cream layer just after slicing. It seems simple, but salt is a flavor enhancer, and it keeps this rich dessert from tasting flat.
The Coffee Connection
If you’re a coffee person like me, this pie practically begs for a cup of something strong alongside it. The bitterness of a strong black coffee or a rich espresso pulls the chocolate flavor forward beautifully. If you want to incorporate that flavor right into the dessert presentation, try whipping a tiny bit of instant espresso powder into the heavy cream when you make your topping—just half a teaspoon goes a long way!
Speaking of coffee and rich desserts, if you love that flavor combination, you should see the recipe I have for a New Orleans style treat over on my iced coffee creme brulee page. That’s another symphony of textures!
Frequently Asked Questions About No Bake Chocolate Pie
I know you might have a few lingering questions before you dive in and make this incredible dessert. That’s totally fine! When something looks this decadent, you want to make sure you get it right, especially when skipping the oven. I’ve gathered the most common things people ask when trying to nail this easy chocolate mousse pie recipe. Ask away when you scroll down past these, because I love hearing about what you’re cooking up!
Can I make this chocolate mousse pie firmer, like a frozen mousse pie?
Yes, you certainly can shift this towards that chillier, frozen mousse pie vibe! Since our filling is built on cream cheese and whipped cream rather than gelatin or eggs that bake firm, it freezes quite well. If you want it firmer, just follow the chilling instructions, but instead of stopping in the fridge, pop it straight into the freezer. You’ll need at least 6 hours, but honestly, overnight yields the best solid texture. If you freeze it solid, just let it sit on the counter for about 30 to 45 minutes before you plan to slice it. It thaws just enough to be sliceable but stays wonderfully cold and firm. This is a lifesaver for busy holiday schedules!
What is the difference between this and a traditional chocolate silk pie?
That’s a great question, aiming right for the core structures of pie-making! While this chocolate mousse pie recipe delivers rich chocolate flavor, the structure is built around folding in whipped cream to create an airy, light mousse. It’s primarily cream cheese, melted chocolate, and cream.
A traditional chocolate silk pie, on the other hand, usually relies on a baked custard or cooked pudding base thickened with eggs, flour, or cornstarch, which results in a denser, smoother, almost pudding-like filling—less airy than a true mousse. My version here keeps things wonderfully light and cloud-like, achieving that homemade chocolate mousse effect without any fuss!
Can I replace the Oreo crust with something else?
Absolutely! If you don’t have Oreos or just prefer a different flavor profile, you have a couple of easy out options. As I mentioned in the notes, a standard graham cracker crust works perfectly. You’ll mix about 1 1/2 cups of graham cracker crumbs with 6 tablespoons of melted butter and maybe a couple of tablespoons of sugar for balance, then press and chill.
For something truly different—though it’s a bit more involved than a standard no bake chocolate pie—you could even press a layer of crushed shortbread cookies mixed with butter. Just ensure whatever crust you use is thoroughly chilled before pouring in that airy filling so the two layers don’t merge!
How long does the filling truly need to set up?
For the best texture—meaning firm enough to slice cleanly but soft enough to feel creamy when you bite into it—you need patience! Six hours in the refrigerator is the bare minimum, but if you can wait until the next day, you won’t regret it. It needs time for the fat in the cream cheese and the structure from the whipped cream to fully stabilize.
If you’re needing some other easy recipes to fill out your menu planning, take a look at my collection of simple snack recipes; sometimes the easiest things are the most satisfying!
Nutritional Estimates for Your Homemade Chocolate Mousse
Now, let’s talk about the fuel factor! I know that when you’re making something this heavenly, you might feel a little guilty, but don’t! Knowledge is power, and knowing what’s in your slice helps you enjoy it even more. Remember, since this is a highly customizable recipe, these estimates are based strictly on using the standard ingredients listed above for our chocolate mousse pie recipe—especially those Oreo crumbs and full-fat dairy!
I always pull these estimates using standard online calculators based on the ingredient list, so treat these numbers as a good guideline, not a strict accounting ledger. They really help put the richness of that decadent dessert into perspective!
Here is the breakdown per serving (this recipe yields 8 generous slices):
- Serving Size: 1 slice
- Calories: Approximately 450
- Fat: Around 30g (And yes, a decent chunk is saturated fat because of all that glorious cream cheese and butter!)
- Saturated Fat: About 18g
- Carbohydrates: Roughly 40g
- Sugar: Approximately 35g (That’s where the fun is, right?)
- Protein: About 5g
- Sodium: Around 250mg (Mostly from those salty Oreos!)
- Fiber: Close to 2g
See? It’s rich, it’s delightful, and it fits beautifully into a balanced life when enjoyed as the special treat it is. Every bite of that creamy chocolate pie is worth it!
Share Your Symphony: Rate This Ultimate Chocolate Pie
Wow, you made it! You navigated the world of cream cheese, melted chocolate, and perfect folding techniques, and now you have this incredibly rich chocolate dessert cooling in your fridge. That deserves a round of applause, truly!
The kitchen is only half the symphony, though. The other half happens when you share what you’ve created. I absolutely love hearing from everyone who tries this No-Bake Oreo Chocolate Mousse Pie. Did your Oreo crust get perfectly crisp? Did you find the secret to folding that mousse just right? Did someone inhale their slice before you could even take a picture? Tell me everything!
Your feedback isn’t just nice to read; it’s genuinely helpful for me and for other home cooks who are finding their way to this incredible creamy chocolate pie. Rating the recipe helps me know I’m developing things right, and sharing your little tweaks helps the entire Delish Symphony community grow.
Seriously, jump down to the comments if you can. I want to know how your ultimate chocolate pie turned out! If you have pictures, tag me on social media—it absolutely makes my day to see my recipes in your actual kitchens. And hey, if you need to get in touch about a specific issue or just want to say hello, you can always reach out through the contact page!
Go slice that pie and enjoy the delicious harmony you just created. Happy baking, or should I say, happy *no-baking*!
PrintNo-Bake Oreo Chocolate Mousse Pie

You can make this rich, creamy chocolate mousse pie with a simple Oreo crust. It requires no oven time and delivers a decadent dessert perfect for any gathering.
- Prep Time: 25 min
- Cook Time: 0 min
- Total Time: 6 hours 25 min
- Yield: 8 servings 1x
- Category: Dessert
- Method: No Bake
- Cuisine: American
- Diet: Vegetarian
Ingredients
- 1 3/4 cups Oreo cookie crumbs (about 28 cookies)
- 6 tablespoons unsalted butter, melted
- 1 package (8 ounces) cream cheese, softened
- 1 cup powdered sugar
- 1 teaspoon vanilla extract
- 1 package (8 ounces) semi-sweet chocolate chips
- 1/2 cup milk
- 1 cup heavy whipping cream, cold
- 1/4 cup powdered sugar (for whipped cream)
- 1 teaspoon vanilla extract (for whipped cream)
- Chocolate shavings, for topping
Instructions
- Prepare the crust: In a medium bowl, mix the Oreo cookie crumbs and melted butter until fully combined. Press the mixture firmly into the bottom and up the sides of a 9-inch pie plate. Place the crust in the freezer while you prepare the filling.
- Make the cream cheese layer: In a large bowl, beat the softened cream cheese, 1 cup of powdered sugar, and 1 teaspoon of vanilla extract until smooth and creamy. Set this aside.
- Melt the chocolate: Place the chocolate chips and milk in a microwave-safe bowl. Microwave in 30-second intervals, stirring well after each, until the chocolate is smooth and fully melted. Let the mixture cool slightly for about 5 minutes.
- Combine the mousse base: Gently fold the slightly cooled melted chocolate mixture into the cream cheese mixture until just combined. Do not overmix.
- Prepare the whipped topping: In a separate, clean bowl, beat the cold heavy whipping cream with 1/4 cup of powdered sugar and 1 teaspoon of vanilla extract until stiff peaks form.
- Fold the mousse: Gently fold about one-third of the whipped cream into the chocolate mixture to lighten it. Then, fold in the remaining whipped cream until no white streaks remain, creating a fluffy chocolate mousse filling.
- Assemble the pie: Pour the chocolate mousse filling into the chilled Oreo crust, spreading it evenly with a spatula.
- Chill: Cover the pie loosely with plastic wrap and refrigerate for at least 6 hours, or preferably overnight, until the mousse is firm.
- Serve: Before serving, top the pie with additional whipped cream (if desired) and chocolate shavings. Slice and serve cold.
Notes
- For a richer chocolate flavor, substitute half of the semi-sweet chocolate chips with bittersweet chocolate chips.
- If you do not have Oreo cookies, you can use graham cracker crumbs mixed with 1/4 cup of sugar and 6 tablespoons of melted butter for the crust.
- Make sure your heavy whipping cream is very cold for the best results when whipping the topping.
Nutrition
- Serving Size: 1 slice
- Calories: 450
- Sugar: 35g
- Sodium: 250mg
- Fat: 30g
- Saturated Fat: 18g
- Unsaturated Fat: 12g
- Trans Fat: 0.5g
- Carbohydrates: 40g
- Fiber: 2g
- Protein: 5g
- Cholesterol: 75mg