
There is just something magical that happens when you pull a loaf of fresh bread from your own oven, isn’t there? That warmth, that smell—it fills the whole house! If you’ve been buying your loaves because you think making terrific **whole wheat bread** at home is too hard or always results in something dense, I need you to stop right there. I’ve perfected this recipe specifically for you. This is my take on the Easy Soft Honey Whole Wheat Sandwich Bread that rivals anything you can find at the grocery store, guaranteed.
Here at Delish Symphony, we strip away the intimidation factor. We’re not aiming for fussy artisan loaves here; we’re aiming for simple, delicious harmony made practical for your busy life. That’s what Michael Carter focuses on—recipes that just work, every single time, using techniques drawn from years of real-world, practical home baking. For more on our philosophy and commitment to accessible cooking, check out our story over at Delish Symphony. Trust me, this wholesome homemade bread will become your new staple for toast and lunchboxes. Give it a try!
- Why This is the Best Whole Wheat Bread Recipe for Beginners
- Gathering Ingredients for Your Honey Whole Wheat Bread
- Step-by-Step Instructions for Easy Whole Wheat Bread Recipe
- Tips for Baking the Best Whole Wheat Bread Recipe That is Soft
- Storage and Reheating Instructions for Homemade Whole Wheat Bread
- Variations on This Whole Wheat Sandwich Bread Recipe
- Frequently Asked Questions About Whole Wheat Bread Baking
- Nutritional Estimates for This Whole Wheat Bread
- Share Your Homemade Whole Wheat Bread Success
Why This is the Best Whole Wheat Bread Recipe for Beginners
I get it, bread baking can look scary, but this particular easy whole wheat bread recipe is practically foolproof. We designed it so that even if this is your absolute first time working with yeast, you’ll end up with something amazing. No fuss, just fantastic results every time you want a healthy bread baking project.
- It delivers that famously fluffy whole wheat bread texture we all crave.
- The kneading time is short enough for a busy weeknight.
- It’s enriched with honey, making it taste subtly sweet and irresistible.
- It produces a reliable result perfectly suited for beginners.
Key Qualities of Our Soft Whole Wheat Loaf
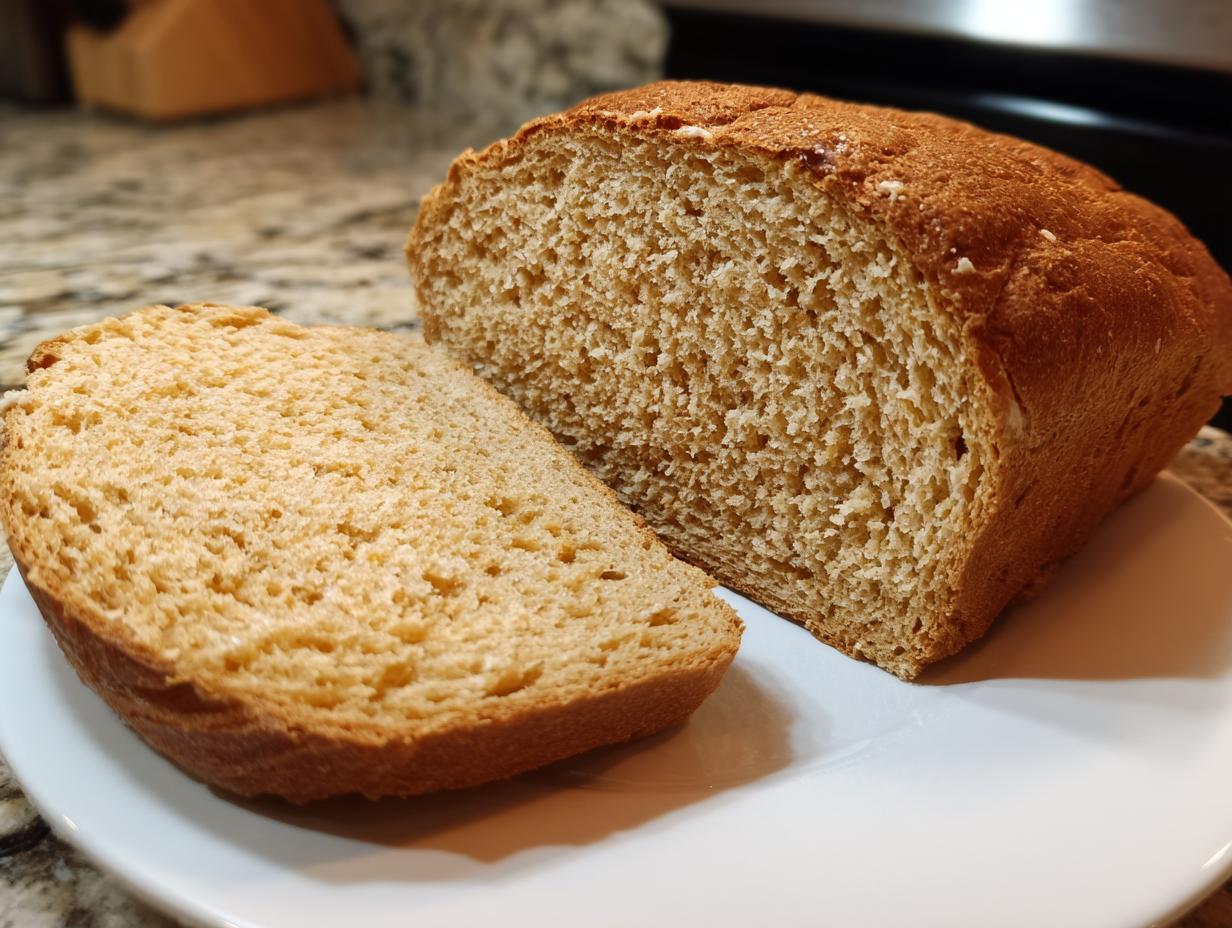
What sets this loaf apart is how incredibly tender the crumb is. Usually, whole grains can feel heavy or gritty, but because we use a blend of flours and just the right amount of honey and melted butter, this comes out wonderfully soft. It’s perfectly balanced—nutty from the grains but beautifully brightened by that touch of sweetness. It’s the softest loaf you’ll ever make at home, hands down.
Gathering Ingredients for Your Honey Whole Wheat Bread
When we’re baking something this wholesome, ingredient quality really sings through, and being precise here makes all the difference in your final loaf. For this honey whole wheat bread, you’ll need a few things ready to go before we even think about mixing them up. Make sure your water is warm—we’re talking 105–115°F. If it’s too hot, you’ll kill your yeast friendships before they even start! It’s a small step, but crucial for the rise.
Here is what you need sitting on your counter:
- 1 cup warm water (105-115°F)
- 2 1/4 teaspoons active dry yeast
- 1/4 cup honey
- 2 tablespoons unsalted butter, melted
- 1 1/2 teaspoons salt
- 3 cups whole wheat flour
- 1 cup all-purpose flour, plus more for dusting
If you want to see how we handle ingredients in other baked goods, you can peek at my easy moist banana bread post for comparison!
Ingredient Notes and Substitutions for Whole Wheat Bread
I often get asked why I split the flour requirement between whole wheat and all-purpose (AP). We do this to strike that perfect balance! The AP flour gives us that necessary gluten structure so we can achieve that lovely, soft whole wheat loaf texture without it turning into a brick. If you only used 100% whole wheat, it would be much denser.
If you’re out of honey? Don’t panic! Maple syrup works beautifully as a 1:1 swap for that necessary sweetness. For the yeast, if you only have instant yeast, you can skip the warming step and just dump it right into the dry ingredients later on, but I always find active dry yeast gives a better “wake-up call” soak first.
Step-by-Step Instructions for Easy Whole Wheat Bread Recipe
We’re now moving into the fun part! Baking should feel like a relaxing rhythm, and this simple process is designed to make you feel totally in control. Don’t rush the rising times on this recipe; that slow growth is what builds the flavor and the structure needed for the best homemade loaf. If you’re looking for great meals to serve with your fresh bread, I have some fantastic weeknight dinner recipes that pair perfectly.
Activating Yeast and Mixing the Whole Wheat Bread Dough
First thing’s first: wake up that yeast! Combine the warm water and yeast and let it hang out for about five minutes. You’re waiting for it to get foamy—that means it’s alive and hungry! Once it’s bubbly, stir in the honey, melted butter, and the salt. Now, dump in all your flours. Mix it aggressively with a sturdy wooden spoon. Seriously, stir until you can’t stir anymore and you just have a shaggy, messy dough ball. This is expected; we aren’t aiming for perfection yet.
Kneading Technique for a Soft Whole Wheat Loaf
Time to get your hands dirty! Turn that shaggy mess out onto your lightly floured counter. You need to dedicate about 6 to 8 solid minutes of kneading here. I know your arms might burn a little, but trust me, this is developing the strength for our soft whole wheat loaf. Keep folding and pushing until the dough transitions from sticky and lumpy to genuinely smooth and elastic under your hands. When it feels springy and holds its shape, that’s when you know you’ve earned that fluffy texture.
First Rise and Shaping the Whole Wheat Sandwich Bread
Once kneaded, toss the dough into a lightly oiled bowl—give it a little spin so it gets coated. Cover it loosely and let it sit somewhere warm for about an hour to an hour and a half, or until it’s doubled in size. Don’t poke it too soon! Gently punch the air out—it feels so satisfying! Then, shape it carefully into a tight log and tuck it right into your greased 9×5 loaf pan. This shaping step is vital for ensuring you get that beautiful structure for your whole wheat sandwich bread.
Second Proof and Baking Your Whole Wheat Bread
Now we let it rest one more time, covered lightly, maybe 30 to 45 minutes. You want it to crown about an inch above the rim of the pan—that means it’s ready for the heat! While it’s doing its final proof, crank that oven up to 375°F (190°C). Bake it for 30 to 35 minutes. My pro-tip, especially for baking whole grains at home, is to use an instant-read thermometer if you have one. When the center hits 200°F, it’s golden brown and done. Pull it out immediately and let it cool completely!
Tips for Baking the Best Whole Wheat Bread Recipe That is Soft
Okay, you’ve kneaded your dough and you’ve got a beautiful, golden loaf coming out of the oven. We don’t stop there! If you want to ensure you have the best whole wheat bread recipe that is soft—the kind that makes your family ask for seconds before it’s even cool—you need to pay attention to what happens *right* after it leaves the heat.
This extra step is small, but it’s the trick I learned to manage that slightly tougher crust whole grains sometimes develop. It’s all about locking that moisture in immediately. If you’re interested in making this bread part of your rotation, you’ll find it works perfectly for your easy breakfast recipes!
Achieving a Tender Crust on Your Whole Wheat Bread
Here’s the secret: as soon as you pull that hot loaf out of the pan, grab just one tablespoon of butter—it needs to be soft or melted—and brush it lightly all over the top crust. Why do we do this immediately? Because hot bread radiates steam, and that steam is moisture trying to escape. The butter acts like a little shield, coating the crust and keeping that steam trapped right against the crumb. It sounds simple, but it keeps the crust tender rather than allowing it to become hard or brittle as it cools down. It adds just a touch of richness, too!
Storage and Reheating Instructions for Homemade Whole Wheat Bread
Now that you’ve poured your heart into this bake, you want to make sure that beautiful loaf stays fresh for sandwiches and toast all week long! Homemade bread, especially the wholesome kind, tends to stale faster than the stuff loaded with preservatives, but we have smart ways to handle that.
The biggest mistake people make is sealing a warm loaf immediately. Resist that urge! You have to let it cool completely on a wire rack first. If you wrap it while it’s still warm, you’re basically trapping steam, and that steam guarantees mold growth. Nobody wants moldy bread!
Once it’s totally cool, wrapping is key. I find a linen bread bag or just keeping it stored in a dry bread box is ideal for a few days. If you use plastic wrap or a sealed bag, it will keep it soft longer, but be mindful—sometimes the moisture seals in too much and affects the crust texture after day two.
Life happens, and sometimes we can’t eat the whole loaf right away. That’s where the freezer comes in handy! Slice the entire loaf before freezing. Pop those slices into a freezer bag—squeeze out most of the air—it lasts beautifully for up to three months. When you want toast, just pull a slice out and pop it straight into the toaster. It comes back to life perfectly.
If you have a slice that’s starting to feel a little stiff, don’t throw it out! Reheating wakes it right up. Wrap that stiff slice loosely in foil and pop it in a 350°F oven for about five minutes. It’ll steam itself back into a soft texture, ready for a thick smear of butter. It’s like magic, proving that homemade bread is always worth the effort!
Variations on This Whole Wheat Sandwich Bread Recipe
Just because we aim for an easy soft whole wheat loaf doesn’t mean we can’t spice things up a bit! I love how this simple base recipe for **whole wheat bread** is just begging for extras. You can really customize this to make it your own favorite, whether you want something hearty or something a little sweeter for breakfast. Baking should be fun, right? It’s all about playing with textures and flavors!
If you’re looking for ways to jazz up your baking routine, check out my guide on making homemade granola—it uses a lot of the same whole grain principles!
Here are a couple of simple switches I often make when I want to shift the mood of the loaf:
- For a More Rustic Whole Wheat Loaf: This is an easy fix! Skip the loaf pan entirely. After the second rise, gently shape the dough into a tight round or oval loaf right onto a baking sheet lined with parchment paper. It won’t rise quite as tall, but it will develop a gorgeous, craggy, and crispy crust that feels much more artisan. Bake it just the same, but keep an eye on time, as free-form loaves sometimes bake slightly faster.
- Adding Seeds and Grains: For amazing texture and extra healthy fats, try boosting your loaf up to 100% whole grain goodness. Add about 1/2 cup of mixed seeds—sunflower, flax, pumpkin—right when you add the flour mixture in Step 3. If you want to use oats or cracked wheat, make sure you soak them in a little extra warm water for about 20 minutes first so they don’t steal moisture from your dough during the long proofing stages.
- Sweet Cinnamon Swirl: If you’re making this bread just for toast, a swirl is heavenly. After you shape the dough right before it goes into the pan (Step 5), carefully flatten it into a rough rectangle. Sprinkle a mixture of cinnamon, brown sugar, and a tiny bit of melted butter over the whole surface. Then, roll it up tightly like a jelly roll, pinch the seam closed, and place it seam-side down in your greased pan. It bakes up looking gorgeous!
See? It’s so versatile! You can take this foundation recipe and create something brand new every week.
Frequently Asked Questions About Whole Wheat Bread Baking
Baking is chemistry, and chemistry sometimes leads to questions! I always want to make sure you feel confident when you’re tackling this homemade whole wheat bread. Don’t worry if something seems confusing; most of the time, the fix is super simple. We’re aiming for a wholesome homemade bread experience, and a little troubleshooting goes a long way. For more quick tips, check out the ideas in my simple snack recipes archives!
Can I make this recipe a No Knead Whole Wheat Bread?
That’s a great question targeting a rustic whole wheat loaf vibe! This particular recipe is engineered around that 6–8 minutes of kneading to develop the structure needed for that signature *soft whole wheat loaf* texture and sliceability. If you specifically want a true no-knead outcome, you’ll get a much denser, more open crumb, which is delicious but different. You’d need to follow dedicated no-knead guides that allow for a much longer, cooler fermentation time—usually overnight—to achieve that unique texture without mixing at all.
My dough is too sticky! What went wrong?
This is the most common issue when we start baking whole grains at home! Whole wheat flour absorbs liquid differently than white flour. If your initial shaggy mix seems impossibly sticky, resist the urge to dump in a ton more flour, or you’ll make your final loaf dense. Instead, just keep kneading! Usually, after about three minutes of working it, the dough calms down and starts behaving. If it’s still super messy after five minutes, add just one tablespoon of extra all-purpose flour at a time until it cleans the bowl.
How long does this fluffy whole wheat bread stay fresh?
When stored correctly at room temperature in a bread box or wrapped tightly, you can expect this honey whole wheat bread to stay wonderfully soft for about 3 to 4 days. Because it lacks preservatives, it goes stale quicker than store-bought, but that’s the price of deliciousness! For longer storage, slice it first and freeze what you won’t eat within two days.
Why do I need two rises for this easy whole wheat bread recipe?
The first rise builds major flavor and strength in the dough—that’s when the yeast does its heavy lifting. The second rise is all about volume and setting the final structure for the loaf tin. Skipping the second rise results in a very small, dense brick, so don’t cheat that final proofing time!
Nutritional Estimates for This Whole Wheat Bread
I always like to give a quick rundown of what’s in our baking successes. Understanding the nutrition helps you feel good about making this homemade whole wheat bread a regular part of your meal planning. Remember, because we are using real ingredients like honey and butter, these numbers are estimates, of course. The exact final count changes depending on the kind of whole wheat flour you use or exactly how much honey sticks to the spoon before it hits the bowl!
Keep in mind these figures are calculated per single slice. It’s easy to devour more than one slice when it’s this fresh, so track that accordingly!
- Serving Size: 1 slice
- Calories: 130
- Sugar: 4g
- Sodium: 180mg
- Fat: 2g
- Saturated Fat: 1g
- Carbohydrates: 25g
- Fiber: 3g
- Protein: 5g
- Cholesterol: 3mg
This is why I love this recipe—it keeps the sugar low and the fiber naturally high, making it a fantastic, wholesome homemade bread option for the whole family without feeling heavy!
Share Your Homemade Whole Wheat Bread Success
Honestly, seeing my recipes come to life in your kitchens is the absolute best part of running Delish Symphony. When you pull that beautiful, golden whole wheat bread out of your oven and smell that honey aroma filling your home, I want to hear all about it!
Did it come out perfectly soft, just like you hoped? Did your kids devour the whole loaf before dinner? Don’t keep those triumphs to yourself!
Please take a moment to rate this recipe at the top of the page and leave a comment below. Tell me about your experience—did you stick to the loaf pan, or did you try the rustic free-form method? I love seeing photos of your beautiful loaves of whole wheat sandwich bread!
This journey into wholesome baking is about finding that simple, delicious harmony in our everyday lives, and I truly believe that baking this bread brings a little bit of that joy right to your table. If you have any lingering questions or feedback that didn’t get covered above, you can always reach out to me directly via the Contact Page. Happy baking, friends!
PrintEasy Soft Honey Whole Wheat Sandwich Bread

Bake a soft, wholesome loaf of whole wheat sandwich bread sweetened with honey. This easy recipe is perfect for beginners and yields a fluffy texture ideal for daily toast or sandwiches.
- Prep Time: 20 min
- Cook Time: 35 min
- Total Time: 2 hours 5 minutes
- Yield: 1 loaf 1x
- Category: Baking
- Method: Kneading and Baking
- Cuisine: American
- Diet: Vegetarian
Ingredients
- 1 cup warm water (105-115°F)
- 2 1/4 teaspoons active dry yeast
- 1/4 cup honey
- 2 tablespoons unsalted butter, melted
- 1 1/2 teaspoons salt
- 3 cups whole wheat flour
- 1 cup all-purpose flour, plus more for dusting
Instructions
- Combine the warm water and yeast in a large bowl. Let it stand for 5 minutes until foamy.
- Stir the honey, melted butter, and salt into the yeast mixture.
- Add the whole wheat flour and all-purpose flour to the wet ingredients. Mix with a wooden spoon until a shaggy dough forms.
- Turn the dough out onto a lightly floured surface. Knead for 6 to 8 minutes until the dough is smooth and elastic. You are looking for a soft whole wheat loaf texture.
- Place the dough in a lightly oiled bowl, turning to coat. Cover the bowl with plastic wrap or a clean towel and let it rise in a warm place for 1 to 1.5 hours, or until doubled in size.
- Gently punch down the dough. Shape it into a loaf and place it into a greased 9×5 inch loaf pan.
- Cover the pan loosely and let the dough rise again for 30 to 45 minutes, or until it has crowned about 1 inch above the rim of the pan.
- Preheat your oven to 375°F (190°C).
- Bake for 30 to 35 minutes, or until the top is golden brown and the internal temperature reaches 200°F (93°C).
- Remove the bread from the pan immediately and let it cool completely on a wire rack before slicing for the best whole wheat sandwich bread texture.
Notes
- For an even softer crust, brush the top of the loaf with 1 tablespoon of melted butter immediately after removing it from the oven.
- If you prefer a rustic whole wheat loaf appearance, you can omit the loaf pan and bake it free-form on a baking sheet.
- This recipe makes the best whole wheat bread recipe that is soft for your family’s needs.
Nutrition
- Serving Size: 1 slice
- Calories: 130
- Sugar: 4
- Sodium: 180
- Fat: 2
- Saturated Fat: 1
- Unsaturated Fat: 1
- Trans Fat: 0
- Carbohydrates: 25
- Fiber: 3
- Protein: 5
- Cholesterol: 3