

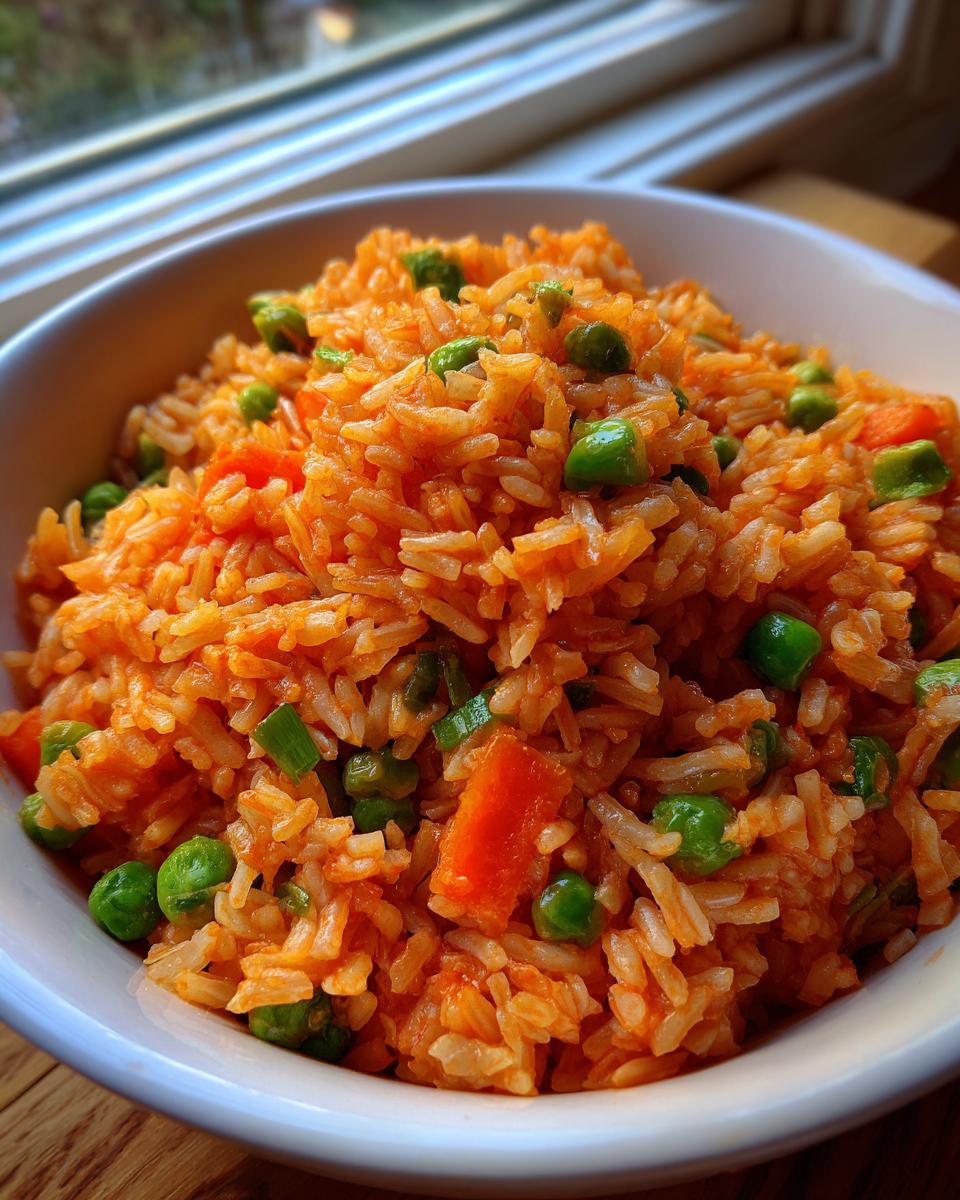
We all know that feeling, right? You’ve got the tacos ready, the enchiladas are bubbling, but the meal feels incomplete without that perfect, non-mushy side dish. Trying to nail the flavor of that amazing restaurant-style Mexican rice at home can feel like cracking a secret code! Well, stop stressing. As Michael Carter always says here at Delish Symphony, we cut through the fuss. We focus on accessible ingredients and practical techniques. This recipe for incredibly easy Mexican rice isn’t just fast; it’s foolproof. You get that rich color and fluffy texture we all crave, ready before your main dish is even plated. Sometimes the simplest sides make the biggest impression, and this one truly sings.
- Why This Easy Mexican Rice Recipe Works for Your Weeknight Dinner
- Essential Ingredients for Classic Mexican Side Dish
- How to Make Restaurant Style Mexican Rice Step-by-Step
- Tips for Success When Making Homemade Mexican Rice
- Serving Suggestions for Your Mexican Rice
- Storage and Reheating Instructions for Leftover Mexican Rice
- Frequently Asked Questions About Authentic Mexican Rice Recipe
- Estimated Nutritional Data for This Flavorful Rice Recipe
- Share Your Simple Rice Side Experience
Why This Easy Mexican Rice Recipe Works for Your Weeknight Dinner
Look, I get it. You want the taste of a real fiesta without spending an hour hovering over a pot. This Mexican rice delivers! People think authentic means complicated, but it really just means we use a few smart tricks to maximize flavor fast. This recipe is built for busy nights but tastes like you spent all afternoon on it.
Achieving Fluffy Mexican Rice Texture
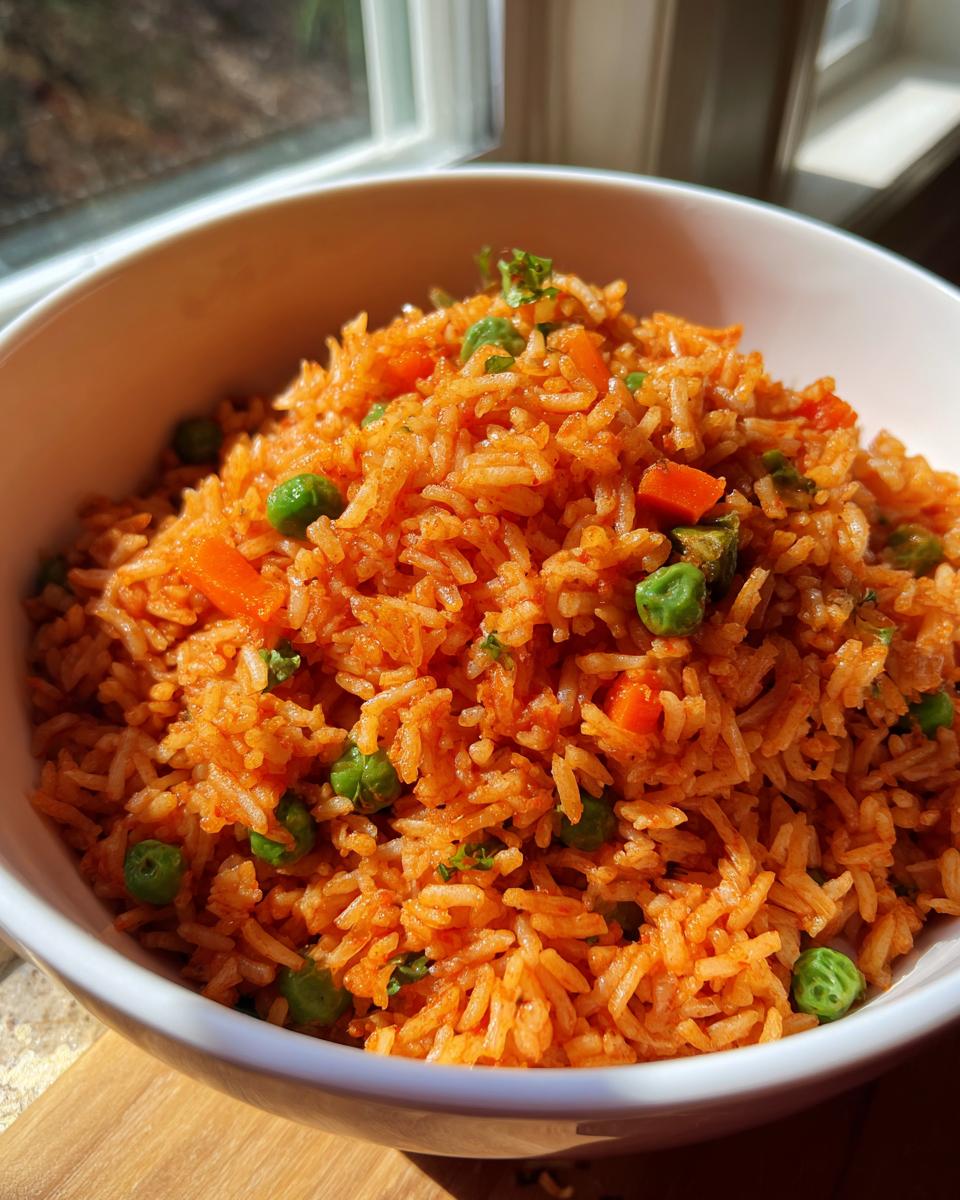
The absolute secret to Fluffy Mexican Rice is two-fold. First, you have to toast that raw rice until it’s golden brown—don’t skip it! Second, and this is critical, you must let it sit, covered, for ten full minutes *after* you take it off the heat. That steam works magic and keeps everything light, not clumpy.
Authentic Flavor Profile for Your Mexican Rice
What makes it taste like it came from your favorite local spot? It’s that classic pairing of cumin, oregano, and tomato sauce. If you follow my advice in the notes, using the tomato bouillon instead of plain broth really deepens the warmth in this Mexican rice. That’s the restaurant secret right there!

Essential Ingredients for Classic Mexican Side Dish
Okay, for this Classic Mexican Side Dish to sing, we need the right players on stage. Don’t worry, you won’t need a specialty store trip! Everything needed for this fantastic Mexican rice is usually right there in your pantry or at the corner market. We start with two tablespoons of veggie oil to get that essential base going, and one cup of good quality long-grain white rice. You’ll need half a medium white onion, chopped super fine, and just two cloves of garlic, minced small enough that it practically disappears into the flavor. For that classic warmth, make sure you have cumin, dried oregano, and your salt measured out. When you’re preparing your tacos later, having a bowl of homemade guacamole right next to this rice is just non-negotiable!
The liquid is really what defines this dish, so you need one cup of broth—chicken or veggie works fine—and a standard 8-ounce can of tomato sauce. That sauce is key! Oh, and if you like a little pop of color and an extra tender bite, toss in about half a cup of frozen peas and carrots at the end. They cook right there in the steam!
Ingredient Notes and Substitutions for Mexican Rice
Let’s talk swaps, because sometimes you just can’t get the exact thing. If you really want to lean into that deep, traditional flavor that tastes like it was simmering for hours—and this is a major tip—swap out the regular chicken broth for water mixed with one teaspoon of tomato bouillon base. Trust me, that tomato bouillon elevates the whole thing. That swaps beautifully for the broth measurement. And remember those peas and carrots? They are totally optional! If you skip them, just make sure you seal that pot tightly during the resting phase so all that steam stays trapped inside your Mexican rice.
How to Make Restaurant Style Mexican Rice Step-by-Step
Alright, this is where the magic happens! Making truly great Mexican rice isn’t hard, but you do have to respect the timing. You’re aiming for that perfect, separate grain that doesn’t look like goopy pudding. We jump right in on the stovetop—make sure you use a saucepan with a nice, tight-fitting lid for this whole operation. It’s really more about patience during the timing than complicated actions!
Browning the Rice: The Key to Flavorful Mexican Rice
Get your vegetable oil warm over medium heat. Then, dump in your measured rice. Now, this next part is non-negotiable if you want that light color and separation! You need to stir this rice constantly for about five to seven minutes until it turns a beautiful, light golden brown. Seriously, stir away! Cooking the rice grains like this slightly seals the outside, which is exactly what prevents it from breaking down and getting mushy when the liquid hits. Once it’s toasted, toss in your chopped onion and let it soften for just a few minutes until you can smell it.
Simmering and Steaming for Perfect Mexican Rice
Next, we awaken the spices! Add your garlic, cumin, oregano, and salt, stirring it for just sixty seconds until the kitchen smells incredible. Quick, now, pour in your two liquids—the chicken broth and the tomato sauce. Give it one good stir to make sure nothing sticks to the bottom, and bring that whole pot up to a rolling boil. The second it’s boiling fast, drop that heat to the absolute lowest setting possible, put that lid on tight as a drum, and walk away! Don’t mess with it for fifteen minutes flat. Set a timer! After the fifteen, kill the heat completely. Now is the resting time: keep the lid on and let that Mexican rice steam for another full ten minutes off the burner. This steaming is what makes it fluffy! Once rested, add your optional frozen veggies, fluff gently with a fork, and serve this amazing side dish, maybe with some garlic rice inspiration at hand, but trust me, this version, a true restaurant-style Mexican rice, is better!
Tips for Success When Making Homemade Mexican Rice
Even though this recipe is super simple, I always give my readers a few extra golden nuggets of advice to make sure your Homemade Mexican Rice turns out absolutely perfect every single time. We are aiming for fluffy, savory perfection here, not sticky clumps!
First off, remember that old saying about not peeking? It’s real, and it applies here exactly like it does when I make my famous no-peek chicken and rice! Once that lid goes on after the boil, do not lift it until the full cooking time plus the resting time is up. Lifting the lid lets all that essential steam escape, and that steam is what cooks the rice grains all the way through evenly.
Also, I can’t stress enough how much the flavor deepens if you use that tomato bouillon substitute instead of plain broth. It makes all the difference in achieving that rich, deep, almost smoky red color you see in the best restaurants. It’s a little trick I learned from testing batches until my kitchen smelled like a fiesta for a week!
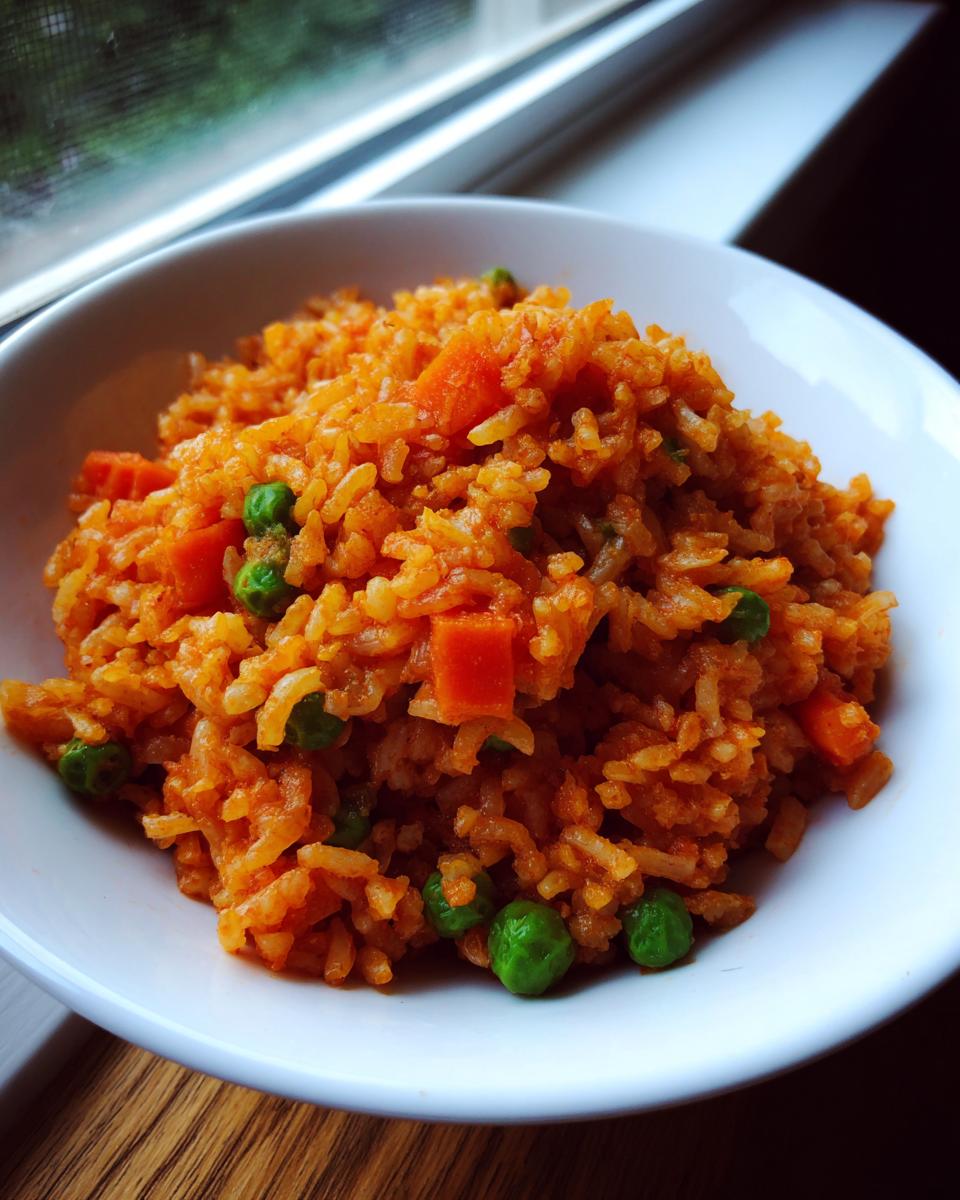
Finally, always fluff with a fork, never a spoon! A fork separates the grains delicately without smashing that beautiful texture we worked so hard to create while toasting.
Serving Suggestions for Your Mexican Rice
So you nailed the perfect Mexican rice! Now what goes next to this beautiful side dish? Honestly, this recipe is so perfectly seasoned that it stands up next to anything. It’s the ultimate companion for Taco Tuesday, of course. I often make a huge batch just for that!
But don’t stop at tacos! This flavorful rice fills out any platter perfectly. It’s fantastic alongside some simple grilled chicken or fish, or when you’re serving an entire spread of enchiladas. We even had it one night leftover with some of my famous beef and bowtie pasta rolls when we didn’t want to cook a full second Mexican dish. It just works as a wonderful, simple rice side.
Storage and Reheating Instructions for Leftover Mexican Rice
The best part about making a big batch of this Mexican rice? The leftovers are almost as good as the fresh stuff, provided you treat them right! First things first: you have to let the rice cool down a bit before you tuck it away for later. Don’t put a piping hot pot straight into the fridge; that’s just asking for trouble, and it can actually make the rice clump up weirdly as it cools.
Once it’s cooled down slightly—maybe just sitting on the counter for 15 minutes—transfer your leftover Mexican rice into a shallow, airtight container. This stops it from drying out too fast in the fridge. It should keep beautifully for about three to four days. If you try to push it past five days, you’re rolling the dice, so stick to that timeframe.
Now for reheating! You want to bring back that fluffy texture we worked so hard for. My go-to is the stovetop because it handles moisture best. Just put the rice in a small saucepan over medium-low heat. Add a tablespoon or two of water or broth for every cup of rice you are reheating. Cover it tight, let it warm up slowly, and then fluff it with a fork when it’s hot. If you’re in a huge rush, the microwave works, but make sure you sprinkle a tiny splash of water right over the top of the rice before covering it with a damp paper towel. That little bit of steam protects it while it heats up in the microwave so it doesn’t end up hard.
Frequently Asked Questions About Authentic Mexican Rice Recipe
I get so many wonderful questions after people try this side dish for the first time! People are constantly asking how to tweak it for their pantry or if they can switch up the cooking style. Here are the big ones I hear most often about making your Authentic Mexican Rice Recipe perfect.
Can I use brown rice instead of white rice?
That’s a great question about switching grains! You definitely *can* use brown rice, but it changes the game a little bit. Brown rice takes way longer to cook because that outer bran layer is tougher. You would need to increase your liquid by at least half a cup—maybe even more—and you’d probably need to simmer it for closer to 30 or 35 minutes *after* browning, then rest it. Honestly, for this particular quick recipe, I stick to long-grain white rice to guarantee that fluffy texture we are aiming for. If you are making easy breakfast recipes, brown rice is fine, but for this speedy side, stay white!
What exactly is tomato bouillon, and why use it?
Tomato bouillon or tomato base is basically dehydrated chicken broth that has been jazzed up with tomato powder, spices, and salt. When you use it instead of plain broth, you are instantly injecting that classic, deep tomato flavor right into the cooking liquid for your Mexican rice. It saves you from having to sauté tomato paste forever! It’s a shortcut to restaurant-level flavor without making extra work for yourself.
Can I manage this recipe in my Instant Pot?
You totally can adapt this! The Instant Pot is fantastic for saving time, though you still need to brown the rice first on the sauté setting—that’s the flavor step you can’t skip! For one cup of rice, I usually go with a 1:1 ratio of liquids, so one cup broth and one cup tomato sauce, totaling two cups of liquid. Pressure cook on High for 4 to 5 minutes, and then let it do a Natural Pressure Release (NPR) for at least 10 minutes before quick releasing the rest. It comes out great, just remember to check out tips from folks like those at authentic Mexican rice experts on timing in the pot!
How do I keep my Mexican Rice from sticking to the bottom?
If you’re finding the bottom gets scorched, it’s usually because the heat was too high when you brought it to a boil, or you didn’t scrape up all those lovely brown bits after toasting the rice. Make absolutely sure that when you bring the liquid to a boil, you immediately drop the heat down to the lowest setting your stove can manage before covering it. Low and slow is the rule post-boil!
Estimated Nutritional Data for This Flavorful Rice Recipe
Now, I know some of you are tracking macros or just curious about what you’re putting into your body while you enjoy this amazing side dish. Since Michael tests everything right here in his home kitchen using standard measurements, we can give you a pretty good idea of what one serving looks like. Remember, these numbers are just estimates based on the ingredients listed, and they can swing a bit depending on whether you skip the optional peas and carrots or use low-sodium broth!
For a standard serving size of about 3/4 cup of the cooked rice, here’s the rundown:
- Calories: Around 220
- Total Fat: About 6 grams (And don’t worry, most of that is healthy unsaturated fat!)
- Carbohydrates: You’re looking at about 37 grams, which gives you good energy for whatever the rest of the meal holds.
- Protein: Roughly 5 grams per serving.
- Sodium: We keep this around 450mg, but remember, I always suggest using low-sodium broth if you can, especially if you’re watching salt intake.
We always aim for that sweet spot here at Delish Symphony—food that tastes incredible but still fits into a real, balanced life. This recipe is straightforward without relying on heavy creams or excessive oil, keeping those numbers reasonable for a truly easy side dish!
Share Your Simple Rice Side Experience
Now that you’ve cooked up this amazing, fluffy batch of Mexican rice, I really want to know how it went for you! Seriously, hearing from you helps me know if I’ve explained things clearly, or if you discovered a trick I haven’t thought of yet.
Did you end up trying that tomato bouillon swap? Did you finally achieve that perfect light texture? Don’t keep it a secret! Head down to the comments below and give this recipe a star rating—five stars if it’s now officially your go-to Quick Dinner Side!
If you made any fun additions, like maybe some cilantro or corn kernels, tell us exactly what you did! I love seeing how everyone adapts these simple recipes to fit their own family’s taste. If you need anything else at all or have a question pop up later, you can always reach us over on the contact page. Happy cooking!
PrintEasy Restaurant-Style Mexican Rice

Make authentic, fluffy Mexican rice quickly. This simple recipe uses common ingredients to achieve the rich flavor found in your favorite Mexican restaurants, perfect for any weeknight dinner.
- Prep Time: 10 min
- Cook Time: 25 min
- Total Time: 35 min
- Yield: 4 servings 1x
- Category: Side Dish
- Method: Stovetop
- Cuisine: Mexican
- Diet: Vegetarian
Ingredients
- 2 tablespoons vegetable oil
- 1 cup long-grain white rice
- 1/2 medium white onion, finely chopped
- 2 cloves garlic, minced
- 1 teaspoon ground cumin
- 1/2 teaspoon dried oregano
- 1/4 teaspoon salt, or to taste
- 1 cup chicken broth (or vegetable broth)
- 1 (8 ounce) can tomato sauce
- 1/2 cup frozen peas and carrots mix (optional)
Instructions
- Heat the vegetable oil in a medium saucepan over medium heat.
- Add the rice to the pan. Cook, stirring constantly, until the rice turns light golden brown, about 5 to 7 minutes. This step is key for fluffy rice.
- Add the chopped onion to the pan and cook until soft, about 3 minutes.
- Stir in the minced garlic, cumin, oregano, and salt. Cook for 1 minute until fragrant.
- Pour in the chicken broth and tomato sauce. Stir well to combine, scraping up any browned bits from the bottom of the pan.
- Bring the mixture to a boil. Once boiling, reduce the heat to low, cover the saucepan tightly, and simmer for 15 minutes without lifting the lid.
- After 15 minutes, remove the pan from the heat. If using, gently stir in the frozen peas and carrots. Keep the lid on and let the rice steam for an additional 10 minutes off the heat.
- Fluff the rice gently with a fork before serving.
Notes
- For a more authentic flavor, substitute the chicken broth with water mixed with 1 teaspoon of chicken bouillon powder or tomato bouillon base.
- To achieve the fluffiest texture, do not stir the rice after it begins to simmer.
- This rice pairs well with tacos, enchiladas, or grilled meats.
Nutrition
- Serving Size: 3/4 cup cooked
- Calories: 220
- Sugar: 3
- Sodium: 450
- Fat: 6
- Saturated Fat: 1
- Unsaturated Fat: 5
- Trans Fat: 0
- Carbohydrates: 37
- Fiber: 3
- Protein: 5
- Cholesterol: 0