
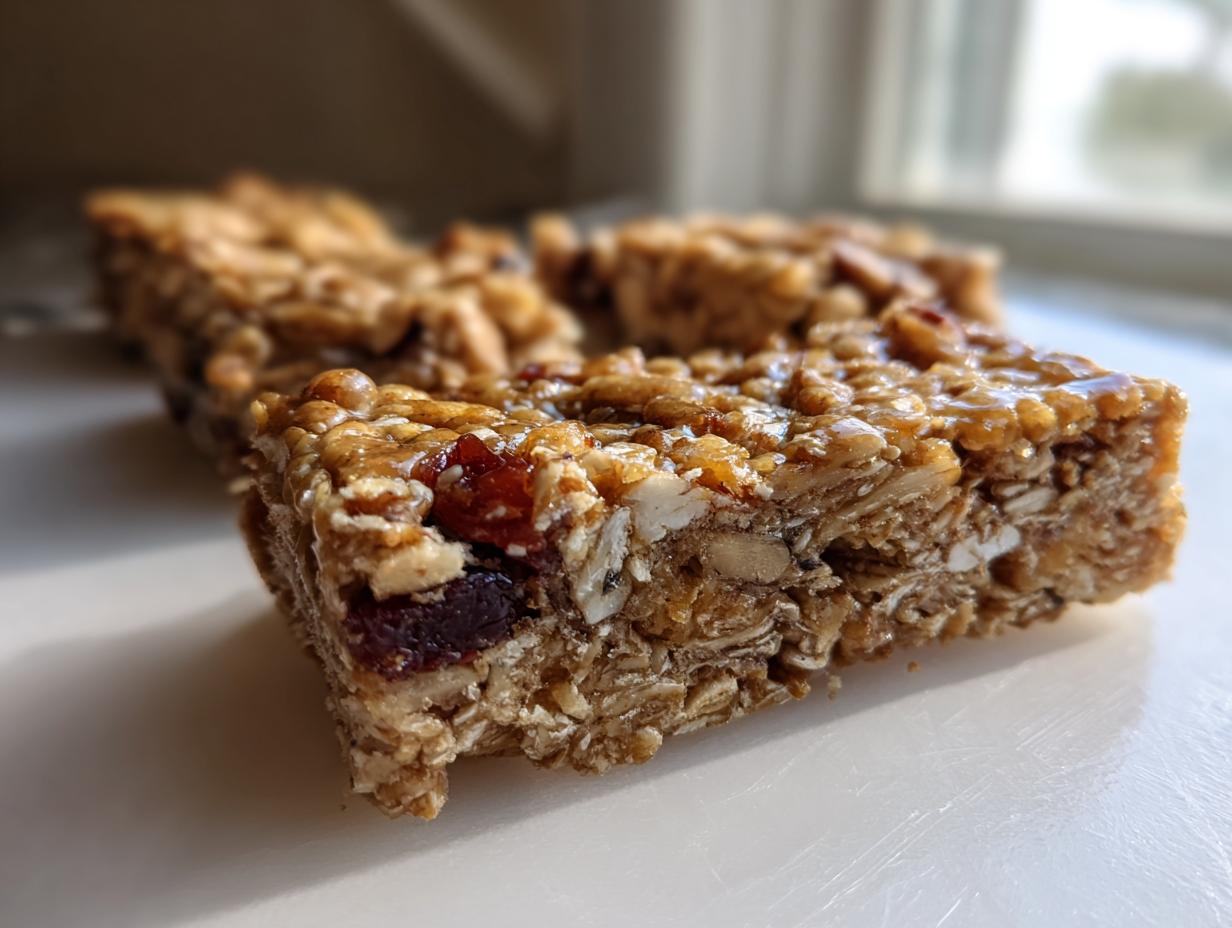
I’m going to be honest with you. Those rock-hard, overly sweet bars you grab at the checkout counter? We’re done with them. I got tired of needing a dental plan just to eat a quick snack, so I perfected a recipe for homemade granola bars that actually tastes like real food. Forget hauling out the oven; these are The Ultimate Chewy, No-Bake Homemade Granola Bars. For me, whether it’s complex dinner or a quick snack, the goal is always finding that simple, flavorful harmony that fits into a busy life. These bars are proof that you don’t need complicated choreography to get something delicious and wholesome ready for your week. You’re going to love how easy these healthful treats are to make, and they are perfect for grabbing on your way out the door. If you’re also looking for more ways to streamline your mornings, check out my favorite easy breakfast recipes!
- Why These Are the Best Homemade Granola Bars You Will Make
- Ingredients for Your Ultimate Homemade Granola Bars
- Quick Prep: How to Make No Bake Energy Bars
- Tips for Customizing Your Homemade Granola Bars
- Storing Your Wholesome Grab and Go Snacks
- Troubleshooting Common Issues with Homemade Granola Bars
- Frequently Asked Questions About Making Homemade Granola Bars
- Estimated Nutrition for These Homemade Granola Bars
- Share Your Perfect Homemade Snack Bars
Why These Are the Best Homemade Granola Bars You Will Make
Listen, I’ve tested dozens of recipes, and most of them end up being too dry or too crumbly—they just break apart when you try to pack them. That’s why these homemade granola bars are the ones I rely on week after week. They hit that sweet spot you usually only find in the expensive store brands. We’re aiming for wholesome, satisfying fuel without sorting through a long list of unpronounceable ingredients. You deserve better than chalky snacks, trust me!
- They deliver genuine flavor using only natural sweetener snacks bases like honey or maple syrup.
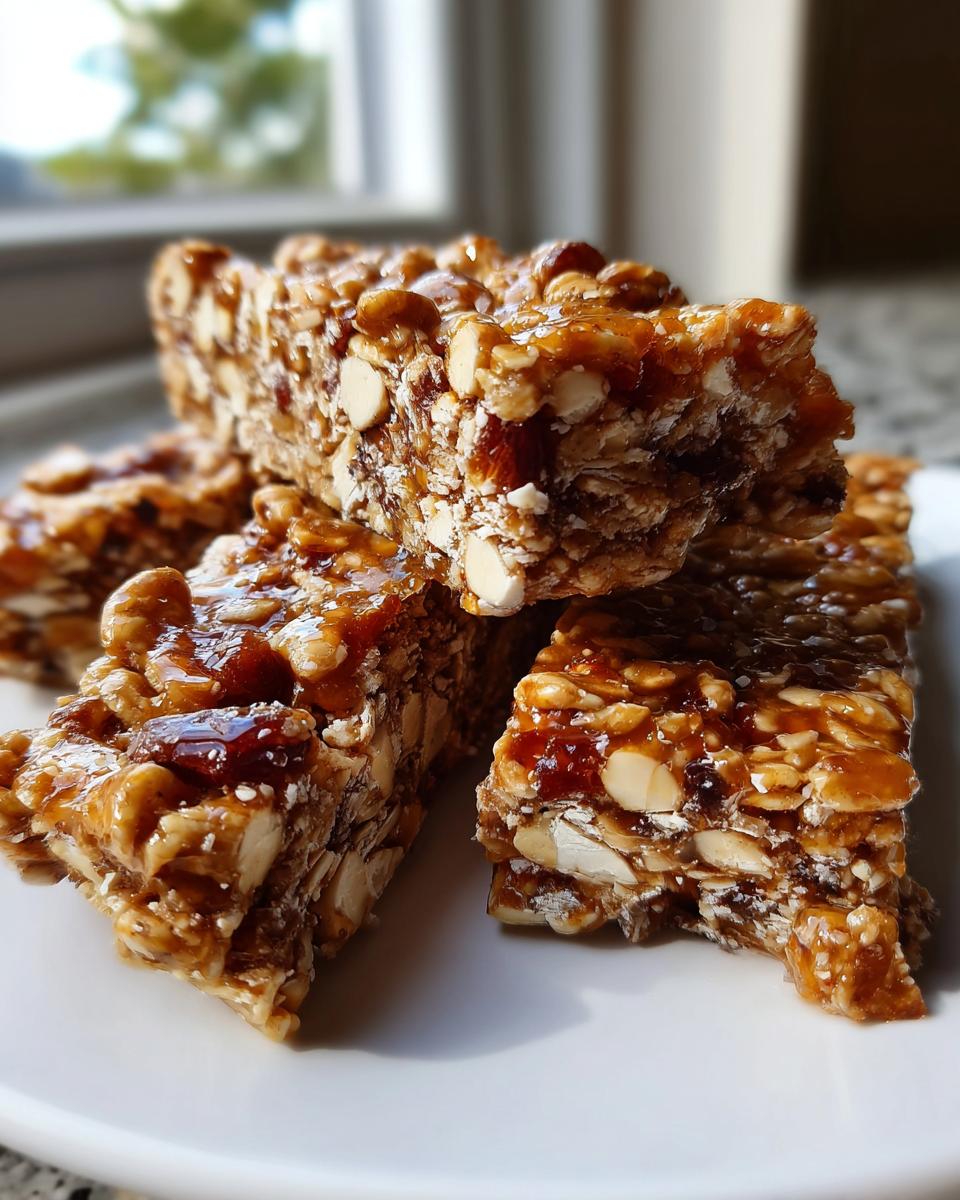
- You get those desired chewy snack bars that hold together beautifully.
- They are perfect for fueling up—think of them as truly healthy breakfast bars that you can eat any time.
- Since they are no-bake, you save oven space, which is a huge win when summer hits.
If you are looking for other ideas for reliable, quick bites, take a peek at my collection of simple snack recipes.
Achieving the Perfect Chewy Texture
So, what’s the secret to that perfect chew? It’s all about two things: the binder ratio and pure muscle. When you mix your peanut butter and honey, you have to make sure that warm, smooth liquid coats every single oat. Then, when the mixture goes into the pan, you cannot be gentle! You have to press down hard—think like you’re packing sand for a perfect sandcastle. That firm, even pressure locks everything together. If you skip the pressing step, you end up with a pile of delicious crumbs instead of a sturdy bar.
Ingredients for Your Ultimate Homemade Granola Bars
Okay, let’s talk about what goes into making these stellar homemade granola bars. The beauty here is that these ingredients are things I always keep stocked in my pantry, so whipping up a batch is never a problem. The focus is on quality and simplicity. We need structure from the oats, a little crunch from the cereal, and our binding agents must be perfect. Remember, this isn’t rocket science; it’s just smart ingredient gathering!
Ingredient Notes and Substitutions for Homemade Granola Bars
I want you to customize these, but stick to the core ratios for the binder, or you’ll end up with a sticky mess! If you are leaning into that super simple five ingredient granola bars approach, just skip the salt and vanilla—they are enhancements, not structural necessities. For our main binder, creamy peanut butter works best because it melts so smoothly, but if you have a nut allergy in the house, sunflower seed butter or tahini are your best friends here! Also, when choosing your sweetener between honey or maple syrup—honestly, use whichever you prefer. Maple syrup gives a slightly deeper, woodsy flavor that I love, but honey makes things incredibly chewy.
Quick Prep: How to Make No Bake Energy Bars
If there is one thing I champion here at Delish Symphony, it’s efficiency, which is why I adore these as homemade granola bars that double as amazing no bake energy bars. When it’s 7 PM and you realize tomorrow’s lunchboxes are empty, you don’t want to wait an hour for an oven to preheat and bake things dry! This recipe is truly fantastic for those emergency snack situations. It’s the definition of an easy granola bars recipe because the only part that involves heat is gently warming up the sticky binders. Seriously, your prep time is maybe 15 minutes total, and then the fridge does all the heavy lifting while you tackle literally anything else. If you’re looking for ways to keep things efficient all day, always have a look at my guide to weeknight dinner recipes!
Step-by-Step Instructions for Perfect Homemade Granola Bars
The process is straightforward, which is why this makes such great homemade granola bars. First things first: get your 8×8 pan lined with parchment paper. Make sure you leave an overhang; this is our handle for removal later. Next, mix all your dry ingredients—oats, cereal, and whatever fun extras you’ve chosen—in a big bowl. While that sits, gently warm your peanut butter and honey in a small pot until it’s perfectly smooth and drippy; we call this ‘liquid gold.’ Don’t boil it! Pour that warm mixture over the dry stuff and stir quickly until everything is coated. Now for the critical step for texture (Step 6): dump it into the pan and press down HARD. I mean *really* press into that mixture to get it tight! This serious pressing is what guarantees those chewy, sturdy bars. If you skip the pressing, you just get a pile of delicious crumbs, which reminds me of those simple, easy-to-make five ingredient granola bars recipes that sometimes fall apart. Pop the pan in the fridge for at least 2 hours to chill and set before you cut the bars!
Tips for Customizing Your Homemade Granola Bars
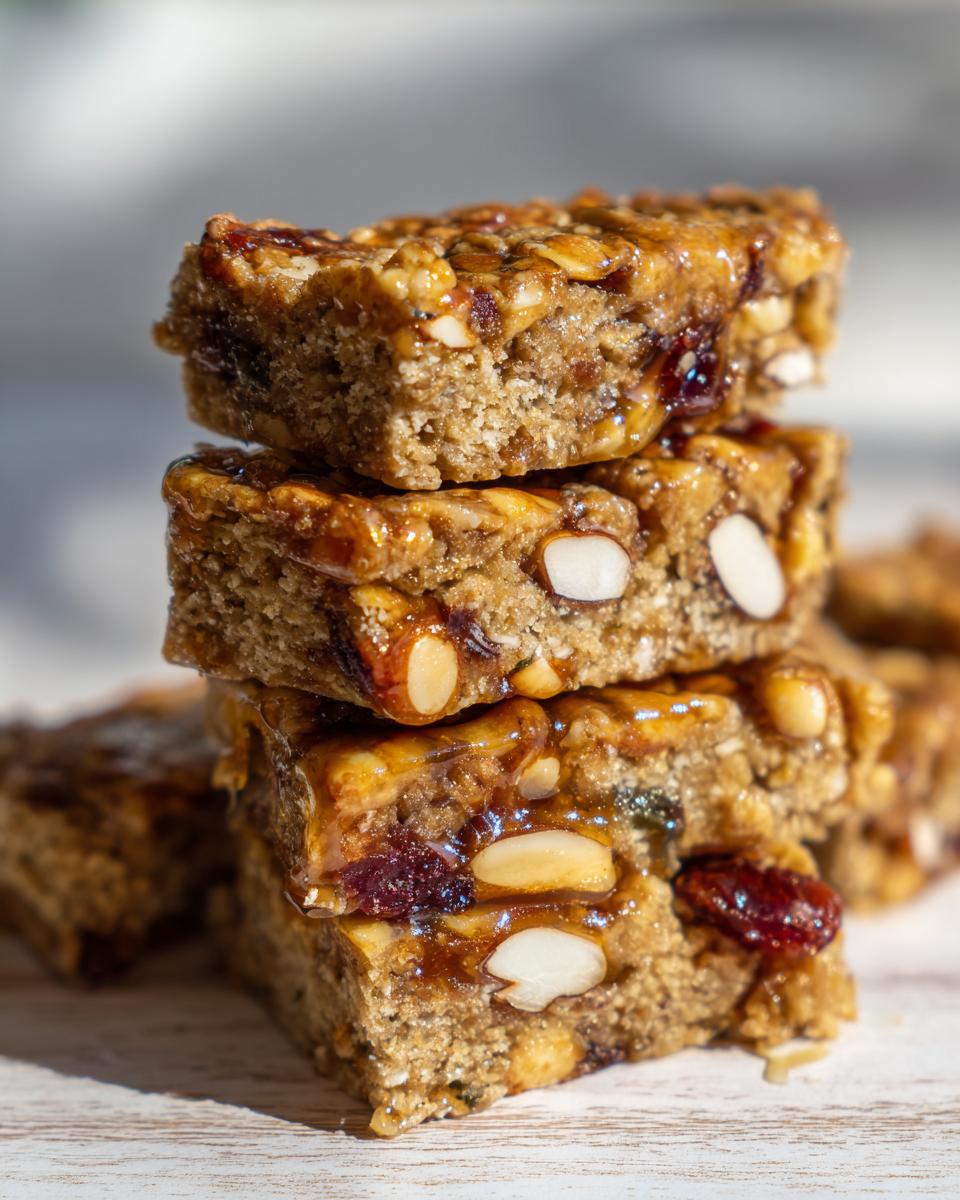
This is where the fun really starts, because these **homemade granola bars** are built to be completely yours! Since the base recipe is so reliable—oats, cereal, and that perfect sweet binder—you can basically toss in whatever makes your crew happy. Don’t feel like you have to stick to just nuts or chocolate chips. Think about adding dried cranberries or apricots for a little tartness, or maybe some shredded coconut for flavor. If you want to use a different base binder, like pure date paste instead of the honey/peanut butter combo, just know you might need to slightly adjust the liquid content, but I haven’t tested that route extensively. When you’re thinking about what to add, consider boosting the flavor with spices. A light sprinkle of cardamom or even a pinch of chili powder with dark chocolate chips creates some surprisingly sophisticated **natural sweetener snacks**!
Making These Kid Friendly Granola Bars Fun
If you’re trying to get the little ones excited about grabbing one of these when leaving for school or practice, you absolutely have to involve them in the assembly. Seriously, this is the secret to getting them to eat something wholesome without complaint! For these **kid friendly granola bars**, the best time for them to get their hands dirty is definitely the dry ingredient mixing stage. They love pouring the oats and cereal into the big bowl, which is totally safe. Once the warm binder mixture is added, that’s when you need to supervise closely, but they can still handle stirring as long as you use a sturdy spatula—just make sure they know the mixture is warm!
Let them be the official “Mix-In Selector.” Set out a few bowls with different fun things—sunflower seeds, mini M&Ms, raisins, whatever—and let them choose exactly two things to add for their batch. When baking becomes a family democracy, everyone is much more invested in the final product. They feel ownership over their **homemade snack bars**, and you get a break!
Since we aren’t baking these, cleanup is naturally fast, which is another big win for the busy parent. You just need the one big bowl and the small saucepan! It’s a fantastic way to build good associations with making your own snacks, away from those overly processed options. Feel free to check out my recipe for homemade guacamole party dip next if you need another easy, crowd-pleasing, no-heat recipe!
Storing Your Wholesome Grab and Go Snacks
Alright, now that you’ve successfully made these perfect homemade snack bars—and hopefully resisted eating the whole batch straight from the pan—we need to talk about keeping them fresh. Since these are no-bake and rely on the natural stickiness of nut butter and honey, they don’t have the stabilizers of those store-bought options. That’s why proper storage is the key to making sure your work lasts!
The very best place for these is the refrigerator. You want to layer them in an airtight container. I usually put a piece of wax paper or parchment paper between layers so they don’t just fuse into one giant granola brick overnight. Trust me on that separator sheet! Stored this way in the fridge, they stay beautifully firm and wonderfully moist for a full week. If you find yourself with leftovers past the seven-day mark, or if you made a double batch because, let’s be honest, you know you want to, they freeze really well too.
Flash-freeze them first—lay the cut bars out on a baking sheet lined with parchment paper and let them freeze solid for about an hour. Once they are hard little squares, you can transfer them to a freezer-safe zip-top bag. They last for a couple of months this way, which is fantastic for batch planning. When you need one, just pull it out and let it thaw on the counter for ten minutes while you grab a coffee. It will taste just as good as the day you pressed it into the pan. If you’re looking for another great make-ahead item, my recipe for easy moist banana bread is a freezer champion as well!
Troubleshooting Common Issues with Homemade Granola Bars
Even the best recipes can sometimes throw us a curveball, especially when we’re trying to nail that perfect texture in homemade granola bars. Don’t panic if your first batch doesn’t look exactly like the pictures—it’s all part of finding your rhythm in the kitchen. Most of the problems I hear about come down to either how much pressing you used or the exact consistency of your sticky binder. We’ve all been there, standing over the pan wondering why it turned into a chocolate chip oat salad instead of sturdy bars!
Let’s tackle the two biggest issues right here so you can perfect your next batch. Remember, learning why something went wrong is just as important as nailing it the first time. We want these to be reliably good, sturdy things you can count on when you grab them for a quick meal replacement or an after-school boost.
Bars Crumbly or Falling Apart
This is the most common complaint for any homemade granola bars recipe, and it nearly always comes down to one thing: you didn’t press hard enough! When we mix the wet and dry ingredients, it’s easy to think you’ve packed it down sufficiently when wiping the spatula around the pan. You need serious, focused pressure. Think about packing brown sugar tightly into a measuring cup—it takes effort!
If you know you pressed hard, the second culprit might be that your binder (the honey/peanut butter mix) wasn’t warm enough when you incorporated it, or it cooled too much before you got it into the pan. Warm binder coats the oats better, creating stronger, stickier connections. If you’re looking to ensure maximum strength next time, try slightly increasing the peanut butter by about one tablespoon. That extra fat will give you a beautiful, tightly bound bar that stays together perfectly for your lunchbox planning.
Bars Too Soft or Sticky After Chilling
If you pull your pan out of the fridge and the whole thing looks molten or you can barely handle cutting them, I’m sorry to say it: you used too much liquid sweetener or your nut butter was too runny. Honey and maple syrup are hygroscopic, meaning they *love* to suck up water, and too much of them keeps the structure permanently gummy instead of firming up correctly.
For the next batch, try reducing the honey or maple syrup by just one tablespoon. See how that goes! Also, make sure you are using creamy peanut butter, not natural peanut butter where the oil tends to separate easily. If you use a natural style, you must stir it vigorously beforehand to make sure the oil is fully emulsified back into the solids. If your bars are too soft right now, don’t worry—just put them back in the fridge for another hour. If they are still too soft to handle after a long chill, wrapping them individually in wax paper and storing them deep in the refrigerator helps stabilize them considerably until you can try again soon!
Frequently Asked Questions About Making Homemade Granola Bars
I know you might have a few lingering questions before you dive headfirst into making your new favorite batch of homemade granola bars. That’s smart! You want to make sure this recipe fits perfectly into your routine. I’ve gathered up the most common things people ask me when they are trying to switch from store-bought to homemade.
We want these to be perfect fuel, whether you’re prepping for a long day at work or packing up the kids’ gear. If you’re looking for other ways I simplify my planning, take a look over at my recipe for easy lasagna with ricotta—prep once, eat twice!
Can I bake these oatmeal bars recipe for a crispier texture?
That is a fair question if you’re used to those crispy cereal bars! These are designed specifically to be chewy snack bars, and chilling them in the fridge is what locks in that soft texture. Baking them slightly—say, 10 minutes at 325°F—will definitely dry out the oats and give you a crispier bite. However, you run the risk of making them brittle, and they won’t stick together as well when you cut them. If you prefer crisp, try toasting your oats lightly *before* you mix them in, then stick to the no-bake method for binding.
What is the best way to use these as lunchbox snack ideas?
For lunchbox snack ideas, the key is making them easy to grab and less messy! Once you’ve cut your set bars, I highly recommend wrapping each individual bar tightly in wax paper or small squares of parchment paper. This keeps them clean to handle, prevents them from sticking to each other if they warm up a bit in the lunch bag, and locks in that fresh refrigerator chill just a little longer. Also, cutting them slightly smaller than a typical bar size (maybe 16 bars instead of 12) is perfect for kids who only need a smaller boost midday.
Do I have to use peanut butter?
Nope! Like I mentioned earlier, you really don’t have to stick to peanut butter if you have allergies or just get bored easily. Almond butter is great, and cashew butter gives a really smooth, mild flavor. If you need to stay totally nut-free, sunflower seed butter is an excellent, hearty substitute. Just make sure whatever you use is relatively creamy so it melts down nicely with the honey when you heat it up!
Are these actually considered healthy breakfast bars?
I call them “healthy-ish” because they absolutely use whole ingredients and rely on natural sweeteners, which is miles better than the packaged stuff loaded with corn syrup. They have good fiber from the oats and plenty of protein from the nut butter, making them a solid choice for healthy breakfast bars or quick fuel. Just watch the mix-ins—if you go buck wild with chocolate chips, well, then you’ve made a dessert bar, and that’s okay too sometimes!
Estimated Nutrition for These Homemade Granola Bars
I want to be upfront about the nutrition facts for these homemade granola bars. Because these rely so much on what you toss in—are you using salted peanuts or plain pumpkin seeds? Are you sweetening with honey or maple syrup?—the numbers are always going to shift slightly. What I’m giving you here is the baseline estimate based on the recipe itself, without heavy additions like extra candy chips, but they are fantastic for providing sustained energy for lunches or quick afternoon fuel.
Think of this as the blueprint for your wholesome grab and go snack. If you really want to dial in your macros, you’ll need to calculate based on your specific mix-ins, but this gives you a great idea of what’s inside every single bar. For more ideas on boosting your energy sustainably, take a serious look at the fantastic recipes compiled here, like my protein French toast!
Here are the general estimates for one bar:
- Serving Size: 1 bar
- Calories: 220
- Fat: 10g (with 2g Saturated Fat)
- Carbohydrates: 32g
- Fiber: 3g
- Protein: 7g
- Sugar: 10g
- Cholesterol: 0mg
- Sodium: 110mg
Keep in mind, this table doesn’t account for any extra goodies you add! If you load them up with dark chocolate chunks or extra dried fruit, those numbers will climb, especially the sugar and fat counts. That’s the trade-off for making delicious, customized homemade granola bars instead of buying something bland off the shelf!
Share Your Perfect Homemade Snack Bars
Well, that’s the whole symphony! We’ve mixed, pressed, chilled, and cut the absolute best homemade granola bars you’ll ever taste that don’t require turning on an oven. Now that they are cooling in the fridge, or if you sneak-tasted one already (I won’t tell!), I would absolutely love to hear what you think!
This whole philosophy is about finding harmony in the kitchen, and your feedback helps me refine the flavor profiles for everyone else looking for that perfect snack. Did you stick strictly to the recipe, or did you go wild with the mix-ins? Did you try almonds instead of walnuts? Let me know in the comments below what worked wonderfully for you!
If you loved how easy these **homemade granola bars** were, please do me a huge favor and give this recipe a solid five stars right at the top of the page. More importantly, snap a picture of your creation! Tag me on social media so I can see your custom versions—it truly inspires me to keep developing these simple, flavorful ideas for our busy lives. If you ever need to reach out directly with a question about substitutions or anything else, you can always get in touch on my contact page. Happy snacking!
PrintThe Ultimate Chewy, No-Bake Homemade Granola Bars

Make chewy, naturally sweetened homemade granola bars that are easy to prepare and perfect for healthy snacking or breakfast on the go. These no-bake energy bars are customizable and better than store-bought options.
- Prep Time: 15 min
- Cook Time: 0 min
- Total Time: 2 hr 15 min
- Yield: 12 servings 1x
- Category: Snack
- Method: No Bake
- Cuisine: American
- Diet: Vegetarian
Ingredients
- 2 cups rolled oats
- 1 cup crispy rice cereal
- 1 cup mix-ins (nuts, seeds, chocolate chips)
- 1/2 cup creamy peanut butter (or other nut butter)
- 1/2 cup honey or maple syrup (natural sweetener)
- 1 teaspoon vanilla extract
- 1/4 teaspoon salt
Instructions
- Line an 8×8 inch baking pan with parchment paper, leaving an overhang on the sides for easy removal.
- In a large bowl, combine the rolled oats, crispy rice cereal, and your chosen mix-ins. Stir these dry ingredients together well.
- In a small saucepan over low heat, combine the peanut butter and honey (or maple syrup). Heat gently, stirring constantly, until the mixture is smooth and easily pourable. Do not let it boil.
- Remove the saucepan from the heat and stir in the vanilla extract and salt.
- Pour the warm, wet mixture over the dry ingredients in the large bowl. Use a sturdy spatula to mix everything until all the oats and cereal are evenly coated.
- Transfer the mixture to the prepared baking pan. Press the mixture down firmly and evenly into the pan using the back of the spatula or another piece of parchment paper. Pressing firmly is key for chewy snack bars.
- Refrigerate the pan for at least 2 hours, or until the bars are completely set.
- Use the parchment paper overhang to lift the block of granola bars out of the pan. Cut into 12 to 16 bars.
- Store your homemade granola bars in an airtight container in the refrigerator for up to one week.
Notes
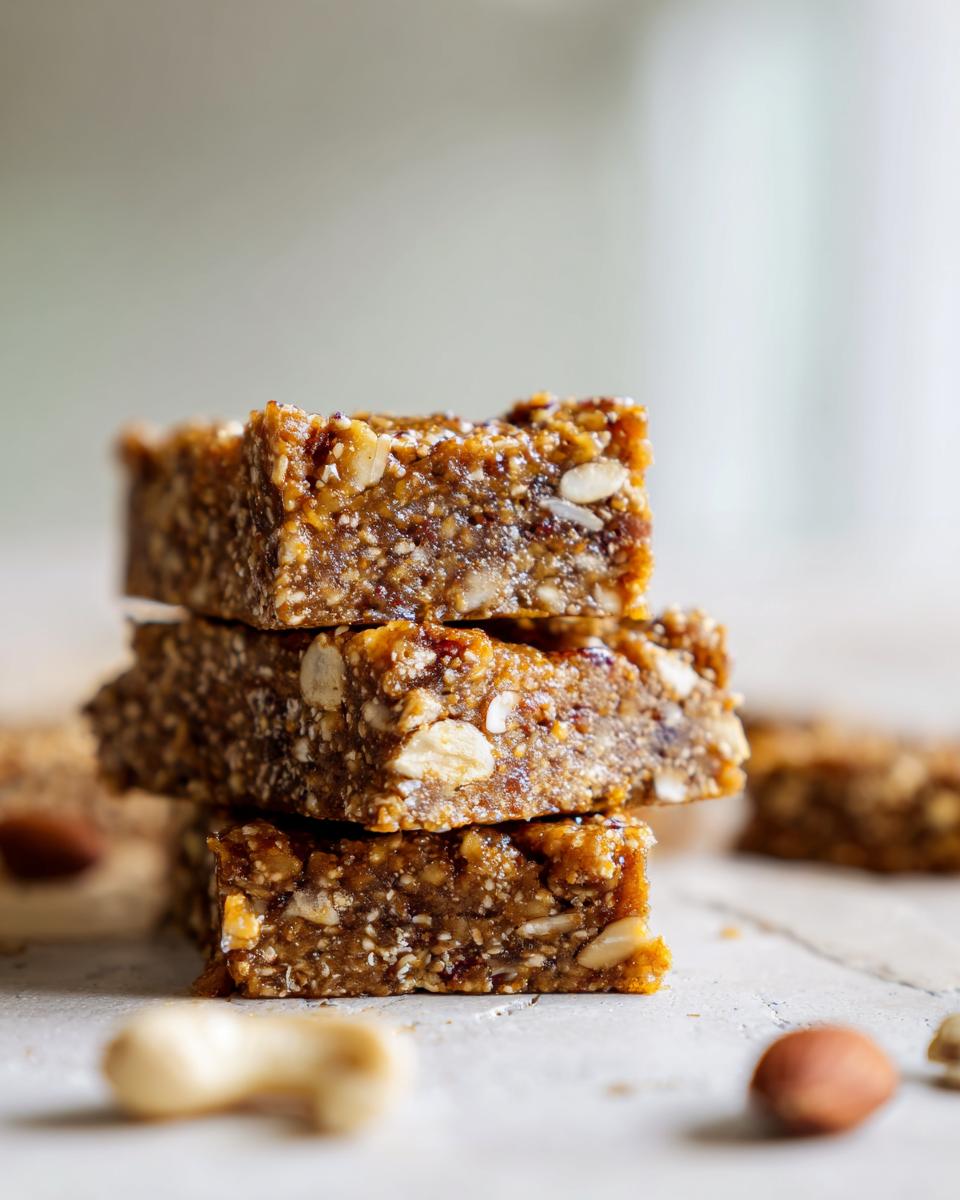
- For a five ingredient granola bars version, omit the salt and vanilla extract, focusing only on oats, cereal, mix-ins, nut butter, and sweetener.
- If you prefer a firmer bar, slightly increase the amount of nut butter or reduce the liquid sweetener by one tablespoon.
- These are excellent kid friendly granola bars; let children help mix the dry ingredients.
Nutrition
- Serving Size: 1 bar
- Calories: 220
- Sugar: 10
- Sodium: 110
- Fat: 10
- Saturated Fat: 2
- Unsaturated Fat: 8
- Trans Fat: 0
- Carbohydrates: 32
- Fiber: 3
- Protein: 7
- Cholesterol: 0