

If you are looking for that perfect, totally over-the-top indulgence for a relaxed weekend morning or maybe just a Tuesday when you deserve a little extra something, then stop scrolling! We are diving headfirst into the world of oreo cinnamon rolls, and trust me, this recipe is going to change your baking life.
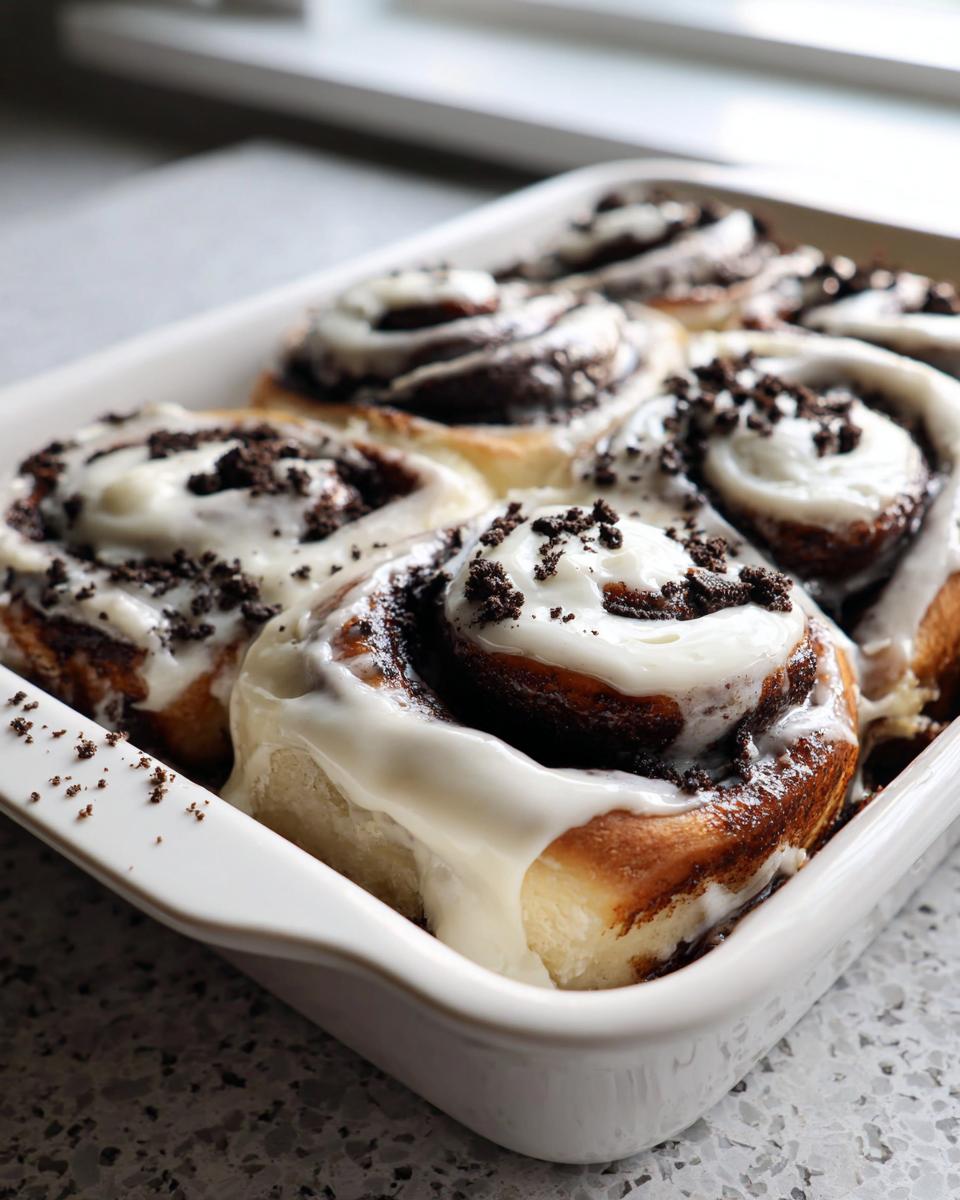
Forget dry, boring spirals. What we are making here is guaranteed gooey, homemade magic. I’m talking about a ridiculously soft, fluffy roll swirled with a chocolate-cinnamon-Oreo filling, all smothered in a tangy cream cheese frosting that just melts right in. Honestly, this is comfort food elevated!
Here at Delish Symphony, we stand by the idea that food should bring people together without causing stress in the kitchen. That’s why Michael (that’s me!) tests every single batch until it’s absolutely foolproof. We are aiming for maximum flavor harmony with the simplest, most reliable techniques. You’re going to love how easy it is to create these next-level cinnamon roll masterpieces, even if you’re new to yeast dough!
- Why This is the Best Oreo Cinnamon Rolls Recipe You Will Make
- Gathering Ingredients for Your Oreo Cinnamon Rolls
- Step-by-Step Instructions for Homemade Oreo Rolls
- Tips for Success Making Gooey Oreo Cinnamon Buns
- Serving Suggestions for Your Oreo Cinnamon Rolls
- Storage and Reheating Instructions for Oreo Cinnamon Rolls
- Frequently Asked Questions About Oreo Cinnamon Rolls
- Estimated Nutritional Information for Oreo Cinnamon Rolls
- Share Your Oreo Cinnamon Rolls Creations
Why This is the Best Oreo Cinnamon Rolls Recipe You Will Make
I know there are a million ‘easy’ recipes out there, but trust me—making these oreo cinnamon rolls from scratch makes all the difference. That homemade dough gives you the incredible foundation for truly soft fluffy cinnamon rolls that you just don’t get from the can. Wow, the texture is something else!
But the real showstopper is that filling. We aren’t just sprinkling Oreos on top; we are crushing them right into a rich, dark chocolate and cinnamon paste. That swirl is what makes these gooey oreo cinnamon buns so decadent. And of course, we top it all off with a bright, tangy cream cheese frosting that cuts through the richness perfectly. You’ll feel like a baking champion when these come out of the oven!
Mike here at Delish Symphony guarantees this process is reliable. We focus on achievable techniques so you get that stunning, pull-apart softness every single time. If you love cinnamon rolls with cream cheese, this is your next addiction.
Gathering Ingredients for Your Oreo Cinnamon Rolls
Okay, let’s talk supplies! To make these incredible oreo cinnamon rolls—the truly homemade version—you need three main piles of ingredients: one for the fluffy dough, one for that amazing dark filling, and one for the tangy topping. Don’t stress; you probably have most of this stuff already sitting in your pantry.
For the dough, we need yeast—make sure it’s active dry—and warm milk. I always check the milk temperature with my finger; it needs to feel pleasantly warm, around 110°F. We use granulated sugar, butter (melted for the dough!), an egg, the flour, and just a touch of salt. Keeps things simple but results in that fantastic texture!
Now for the fun stuff! The filling requires light brown sugar, cinnamon, unsweetened cocoa powder—use a good quality one, it really amps up the dark chocolate vibe for these chocolate cinnamon rolls with Oreos—softened butter, and the star: 1 cup of crushed Oreos (that’s about 12 cookies, give or take).
Finally, the frosting assembly needs cream cheese, butter (all softened for easy beating!), powdered sugar, vanilla, and milk or cream to get that perfect drizzly consistency. Remember, using high-quality ingredients means you get the best possible harmony of flavor, just how we like it here!
Ingredient Notes and Smart Substitutions for Oreo Cinnamon Rolls
I want to make sure you can bake these no matter what’s in your cupboard. If you skip the initial yeast proofing (step 1 in the method), you can use instant yeast instead, but you should mix it directly in with your dry ingredients then. Super easy swap!
Regarding the dark color we want? I highly recommend using dark cocoa powder instead of natural cocoa if you have it when making your filling. It gives you that deep, almost black color that really mimics the look of a classic Oreo cookie while baking. It totally leans into the whole spirit of baking with Oreos!
And listen, if tomorrow morning is rushing too much, that’s fine! If you grab refrigerated store-bought dough, just skip steps 1 through 3 entirely. You can still make our amazing brown sugar/Oreo filling and cream cheese frosting, and have an *easy* version ready to go. We welcome all levels of baking efforts here, truly!
If you need more general pantry staples, check out my list of essentials for easy, moist banana bread baking, as many ingredients overlap!
Step-by-Step Instructions for Homemade Oreo Rolls
Alright, buckle up! This is where the magic happens. Making these homemade Oreo rolls is really just about timing and patience, which is why I break it down so clearly. First things first—we wake up that yeast! Mix your warm milk, a pinch of sugar, and the yeast and let it get all foamy for about 5 to 10 minutes. If it doesn’t foam up, your milk was too hot or too cold, so you have to start that part over. Trust me, that foam is the sign you’re on the right track!
Next, we build the dough. Mix in the rest of your sugar, the melted butter, the egg, flour, and salt. Once it’s shaggy, get your hands in there. Knead it for about 5 to 7 minutes on a floured surface until it feels lovely and elastic. Pop it in a buttered bowl, cover it up, and let it hang out for an hour to an hour and a half until it’s big and happy, doubled in size. This is your first rise working its charm!
While that dough is resting, whisk together your filling ingredients: brown sugar, cinnamon, cocoa powder, soft butter, and that full cup of crushed Oreos. You want a nice, spreadable paste, so mix it up well. You are aiming for that gorgeous, dark swirl that will make these Next Level Cinnamon Rolls stand out! If you want to see how other bakers approach things, you can check out inspiration from others, like over at oreo cinnamon rolls ideas and inspiration.
When the dough is ready, gently punch it down. Roll it out into that big 12-by-18-inch rectangle—try to keep the edges even! Spread that incredible Oreo paste right over the top, leaving a little space on one long edge so the filling doesn’t squish out when you roll. Then, roll it up tight, starting from the edge opposite the border. Pinch that seam closed so it stays closed, and then slice it into 12 equal pieces. It takes a little practice to get them even, but the goal is that perfect spiral!
Tuck your rolls into your greased 9×13 pan, cover them again, and let them proof for another 30 to 45 minutes. They should look visibly puffy before they go near the oven. When they are baked at 375°F for about 20 to 25 minutes until they are golden brown, it’s time to get that frosting ready!
Speaking of which, while those babies are baking, mix up your frosting—more on that in a second. The crucial part? Frost those oreo cinnamon rolls the second they come out of the oven. The warmth helps the cream cheese glaze melt down into every crack, making them super gooey. Then, sprinkle on those final crushed Oreos! If you want more tips on making sure your rolls turn out amazing, check out this guide on easy breakfast recipes.
Achieving the Perfect Rise for Soft Fluffy Cinnamon Rolls
For the softest, fluffiest rolls, the rise times are non-negotiable, honestly. That first yeast activation (Step 1) is your green light; if it’s not bubbling, stop and check your milk temperature—it should be about 110°F. If your kitchen is chilly, yeast hates the cold! Try warming your oven slightly (just turn it on for one minute, then turn it OFF) and placing the covered bowl inside. It creates this perfect little warm cave for the dough to double in their second rise (Step 7). Remember, a slower rise usually means a better flavor, but for soft fluffy cinnamon rolls, consistent warmth is key so the dough puffs up nice and light!
Crafting the Cream Cheese Frosting for Oreo Rolls
When you get to Step 9 for the frosting, please, please make sure your cream cheese and butter are softened, not melted. If they are melty, your frosting will look soupy, not creamy, no matter how much powdered sugar you put in! Beat them together until they are genuinely smooth—we are creating a base for perfection here. If you want that beautiful melt-in effect, you have to get the frosting ready while the rolls are still piping hot from the oven. Slathering that tangy cream cheese over the steaming oreo cinnamon rolls causes it to cascade down the sides, creating that irresistible gooey factor we are aiming for!
Tips for Success Making Gooey Oreo Cinnamon Buns
I want every batch of these oreo cinnamon rolls you make to be spectacular! Since we are aiming for those famous gooey oreo cinnamon buns, a few little tricks can save you from disappointment, especially when it comes to keeping them moist and getting those perfect spirals.
The biggest fear with any homemade roll is dryness, right? The moisture comes from that beautiful filling we made, but you need to ensure the dough hasn’t been overworked. When you are kneading, stop just as soon as it becomes smooth—overmixing develops too much gluten, which sucks up moisture during baking. Stop when the dough feels slightly pillowy but still holds its shape.
Now, cutting the log needs precision. If you use a regular knife, you tend to squish the layers before the dough has officially set in the second rise, and that makes them bake together into a heavy block. My absolute favorite trick for clean cuts—especially when dealing with that soft, Oreo-infused dough—is to use unflavored dental floss! Just slide the floss underneath the log where you want to cut, cross the ends over the top, and gently pull. You get a beautiful, even slice every time. If you skip the floss, use a very long, sharp serrated knife, sawing gently rather than pressing down hard.
If you’re worried about the center being underdone (it happens, especially if your pan is deeper than mine!), here’s what I do: If the edges look perfect brown but the middle is still doughy after the 20-minute mark, throw a loose piece of aluminum foil over the top of the pan. This shields the edges from burning while allowing the heat to work harder on the center. You can check out some great advice on how to avoid baking mishaps over at this guide if you run into trouble!
Remember, these ingredients are rich, so we don’t want to treat them roughly. Think of it like making homemade granola, where you want everything intact but well-combined. A little care when cutting and cautious monitoring while baking will guarantee you get those incredibly soft, gooey results you are dreaming of!
Serving Suggestions for Your Oreo Cinnamon Rolls
Now that you’ve mastered these glorious, decadent oreo cinnamon rolls, the next step is presentation! Since these are definitely showstoppers, they shine when featured as the centerpiece of your weekend brunch baking ideas. You want the table to look as abundant and lovely as the rolls taste!
Because the rolls are so rich with chocolate and cream cheese frosting, you need something bright next to them. They pair spectacularly well with fresh fruit—think berries or sliced oranges—just to give everyone’s palate a little break!
For beverages, you absolutely need a strong counterpoint. A simple, piping hot black coffee is fantastic, but if you want something really special, why not try making my recipe for New Orleans Iced Coffee Creme Brulee? The slightly bitter coffee flavor mixes beautifully with the sweet Oreo filling. If you’re serving a crowd, a light, tart punch keeps things festive without competing with the dessert.
Honestly, presentation is half the fun. I like serving them right on the baking dish if I’m keeping them warm, or laying them out cut-side up on a rustic wooden board with a little extra dusting of powdered sugar on the board itself. They look incredible, and they disappear even faster!
Storage and Reheating Instructions for Oreo Cinnamon Rolls
These oreo cinnamon rolls are best eaten the minute they come out of the oven, covered in warm, melting frosting, but let’s be real—who ever manages to finish the whole batch in one sitting? They are just too indulgent! Good news: they store really well, which means you can enjoy that soft, fluffy texture again tomorrow!
The way you store them depends entirely on whether you frosted them yet. If you’re planning to save some for later, I actually recommend leaving them unfrosted when you put them away. Why? Because the cream cheese frosting can sometimes get a little wrinkly or odd when refrigerated for more than a day. If they are unfrosted, just wrap the whole pan tightly with plastic wrap or transfer the rolls into an airtight container. They stay good on the counter for about two days, or you can stick them in the fridge for up to five days.
If you already frosted them (because come on, who could wait?), they still do well in an airtight container on the counter for a day. After that, they really need to go into the fridge. The good thing is that super sweet cream cheese frosting acts like a little shield, keeping the rolls themselves from drying out too much.
Okay, the big question: reheating! You have to bring the softness back. Microwaving is fast, but only use it for single rolls. Wrap one roll loosely in a damp paper towel—yes, damp!—and microwave it for about 15 to 20 seconds. That moisture helps steam the dough back to fluffiness without making it chewy.
If you are reheating them frosted, be careful on time. If you stick the whole pan in the microwave for too long, that frosting turns into soup! For the whole batch, use the oven. Pop the rolls (still in their baking dish) into a 300°F oven for about 10 to 12 minutes. This warms them evenly without melting the frosting into oblivion. Sometimes I’ll even add the frosting *after* reheating if they’ve been in the fridge for days, just so I can get that initial warm, gooey melt when I spread it on fresh. It’s almost like baking them again! If you’re looking for other make-ahead ideas, you might find my tips on putting together easy lasagna with ricotta helpful for planning those big meals!
Frequently Asked Questions About Oreo Cinnamon Rolls
Can I use pre-made refrigerated dough for these Oreo Cinnamon Rolls?
You totally can! Life gets busy, and sometimes you need a shortcut, right? If you use store-bought refrigerated dough—Pillsbury works fine—you skip Steps 1 through 3 completely. Just unroll the sheet, spread on our glorious homemade filling (that’s the key component!), roll it up, cut it, and let it rise for that second proof (Step 7). It’s a brilliant way to make these easy Oreo Cinnamon Rolls when you are short on time! You won’t get that same deep, fluffy texture as the fully homemade dough, but they will still be delicious.
What kind of Oreos work best, and do I need to crush the cream filling?
This is a fun one! For the best color contrast and flavor pop, I always use the standard, classic Oreo. When you crush them for the filling, don’t worry about getting them perfectly fine; we want some texture in there! The cream filling should absolutely stay in. It melts into the brown sugar and cocoa, adding necessary moisture and fat, which makes these rolls richer. Using them is what gives you those true cookies and cream cinnamon rolls flavor profile. If you are making these for a truly dark chocolate experience, look for the Oreo Double Stuf or even use the dark chocolate specialty Oreos if you find them!
How can I make these into ultimate ‘Dessert Cinnamon Rolls’ or something richer?
Oh, I love turning these into pure dessert territory! If you want to take these Dessert Cinnamon Rolls over the top, it’s super simple. While you are spreading your Oreo filling in Step 5, sprinkle in about half a cup of semi-sweet chocolate chips right on top of the cookies and filling mixture. That gives you warm pockets of melted chocolate inside every bite! Also, you could easily switch out the vanilla extract in the frosting for a touch of almond extract, or even mix in a teaspoon of instant espresso powder to enhance the chocolate notes. It’s all about dialing in your favorite flavor harmony!
Why do my Homemade Oreo Rolls sometimes stick to the pan?
That happens to everyone, usually because the sugar in the filling caramelizes a little too much against the pan surface. Make sure you grease your 9×13 dish really well before putting the rolls in for the second rise (Step 7). Use softened butter, don’t just spray it lightly. If you are worried, place a piece of parchment paper along the bottom of the pan before buttering and flouring it—that’s the ultimate failsafe for foolproof removal. We want easy cleanup after making something so indulgent, right? Check out my quick tips for easy weeknight dinner recipes for more simple kitchen hacks!
Estimated Nutritional Information for Oreo Cinnamon Rolls
Okay, these oreo cinnamon rolls are definitely coming from the indulgent side of the baking spectrum, so let’s talk numbers! Since we are talking about a weekend brunch treat or serious dessert, it’s helpful to see what we are working with. Remember, every component here—the rich dough, the chocolate-Oreo filling, and that thick cream cheese frosting—adds up!
This information is based on the recipe yielding 12 beautiful rolls. Just a friendly heads-up: these figures are estimates provided by my standard recipe calculator. The actual numbers can change a bit based on the exact brands of Oreos, butter, or flour you scoop out of your pantry. We’re aiming for flavor harmony, not medical certification here!
- Calories: Approximately 450 per roll
- Total Fat: About 22g
- Saturated Fat: Roughly 13g (That beautiful butter content!)
- Total Carbohydrates: Around 60g
- Sugar: Expect about 45g (Hey, it’s frosting and cookies!)
- Protein: Around 6g
See? They are rich, balanced, and perfectly suited for when you absolutely deserve a treat. Enjoying something this delicious should never feel like a calculation, but seeing those numbers confirms why they taste so incredibly satisfying!
Share Your Oreo Cinnamon Rolls Creations
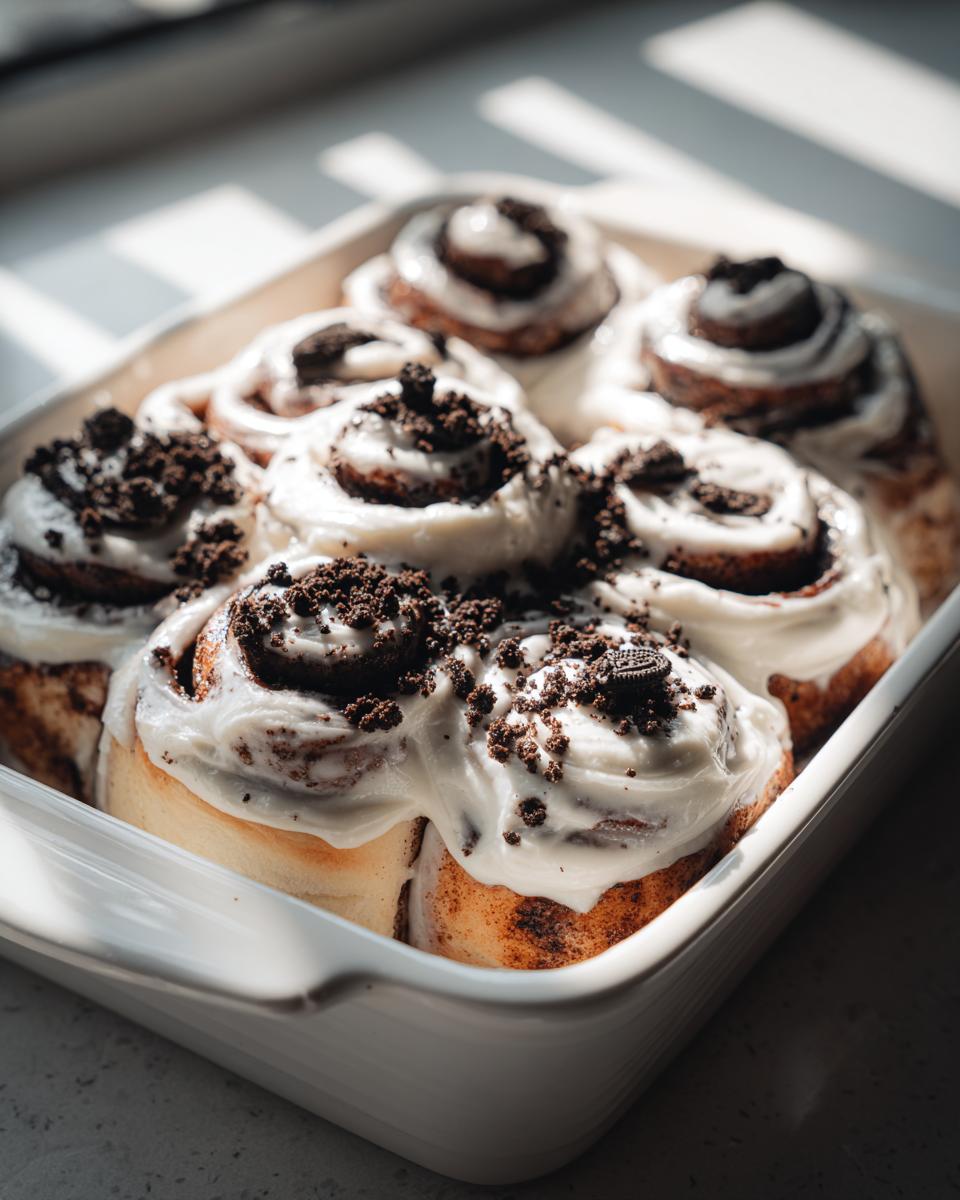
And there you have it! You’ve made the most incredible, gooey, chocolatey, dream-come-true oreo cinnamon rolls. Seriously, take a minute to just admire that pan of perfection before you tear into them!
This is the moment where the magic of Delish Symphony really comes to life: sharing the creation. We believe a great meal, even a decadent breakfast pastry like this, is about bringing people together. So, please, I need to know how yours turned out!
When you finish baking, head right back here and leave a rating for the recipe. Tell me in the comments section—did you go heavy on the frosting? Were you able to get those perfect clean cuts with the dental floss trick, or did you have a rookie mistake moment like I did the first time? Don’t be shy; every little detail helps other bakers who are inspired to try these!
And if you took any pictures, I absolutely insist you share them! Snap a photo of your cookies and cream cinnamon rolls fresh out of the oven and tag us on social media. Seeing your creations is seriously the best part of my job. It proves that simple, quality effort really does result in a flavorful harmony worth sharing around the table.
If you have any final questions or just want to swap stories about your baking adventures, you can always reach out to us over on the contact page. For more inspiration on next-level baking, peek at what other home cooks are doing over at The Fresh Cooky’s recipe. Happy baking, everyone!
PrintGooey Homemade Oreo Cinnamon Rolls with Cream Cheese Frosting

Make soft, fluffy homemade cinnamon rolls swirled with crushed Oreos and a rich chocolate-cinnamon filling. Top these indulgent cookies and cream buns with a tangy cream cheese glaze for a perfect brunch or dessert treat.
- Prep Time: 45 min
- Cook Time: 25 min
- Total Time: 145 min
- Yield: 12 servings 1x
- Category: Dessert
- Method: Baking
- Cuisine: American
- Diet: Vegetarian
Ingredients
- 1 package active dry yeast
- 1 cup warm milk (about 110°F)
- 1/4 cup granulated sugar plus 1 teaspoon for yeast
- 1/2 cup unsalted butter, melted, plus more for greasing
- 1 large egg
- 3 1/2 cups all-purpose flour, plus more for dusting
- 1 teaspoon salt
- 1/2 cup packed light brown sugar (for filling)
- 2 tablespoons ground cinnamon (for filling)
- 1/4 cup unsweetened cocoa powder (for filling)
- 1/2 cup (1 stick) unsalted butter, softened (for filling)
- 1 cup crushed Oreo cookies (about 12 cookies)
- 1/2 cup (4 ounces) cream cheese, softened (for frosting)
- 1/4 cup unsalted butter, softened (for frosting)
- 2 cups powdered sugar (for frosting)
- 1 teaspoon vanilla extract (for frosting)
- 2 tablespoons milk or cream (for frosting)
- 1/4 cup crushed Oreo cookies (for topping)
Instructions
- Activate the yeast: In a large bowl, combine the warm milk, 1 teaspoon sugar, and yeast. Let stand for 5 to 10 minutes until foamy.
- Make the dough: Add the 1/4 cup granulated sugar, 1/2 cup melted butter, egg, flour, and salt to the yeast mixture. Mix until a shaggy dough forms, then knead on a lightly floured surface for 5 to 7 minutes until smooth and elastic.
- First rise: Place the dough in a lightly buttered bowl, turning to coat. Cover the bowl and let the dough rise in a warm place for 1 to 1.5 hours, or until doubled in size.
- Prepare the filling: While the dough rises, mix the brown sugar, cinnamon, cocoa powder, softened butter, and 1 cup of crushed Oreos in a small bowl until combined into a thick paste.
- Shape the rolls: Punch down the risen dough. On a lightly floured surface, roll the dough into a large rectangle, about 12×18 inches. Spread the Oreo filling evenly over the dough, leaving a small border on one long edge.
- Roll and cut: Tightly roll the dough up starting from the long edge opposite the border. Pinch the seam closed. Cut the log into 12 equal rolls.
- Second rise: Place the rolls in a greased 9×13 inch baking dish. Cover and let rise again in a warm place for 30 to 45 minutes until puffy.
- Bake: Preheat your oven to 375°F (190°C). Bake the rolls for 20 to 25 minutes, or until golden brown.
- Make the frosting: While the rolls bake, beat the softened cream cheese and 1/4 cup softened butter until smooth. Gradually beat in the powdered sugar, vanilla extract, and milk until the frosting is creamy.
- Frost and serve: Remove the rolls from the oven and immediately spread the cream cheese frosting over the warm rolls. Sprinkle with the remaining crushed Oreos. Serve warm.
Notes
- For extra gooey rolls, let the dough proof in a slightly warmer spot during the second rise.
- If you are short on time, you can substitute store-bought refrigerated cinnamon roll dough, but skip steps 1 through 3.
- Use dark cocoa powder for a deeper chocolate flavor that mimics the Oreo cookie color.
Nutrition
- Serving Size: 1 roll
- Calories: 450
- Sugar: 45g
- Sodium: 350mg
- Fat: 22g
- Saturated Fat: 13g
- Unsaturated Fat: 9g
- Trans Fat: 0.5g
- Carbohydrates: 60g
- Fiber: 2g
- Protein: 6g
- Cholesterol: 55mg