
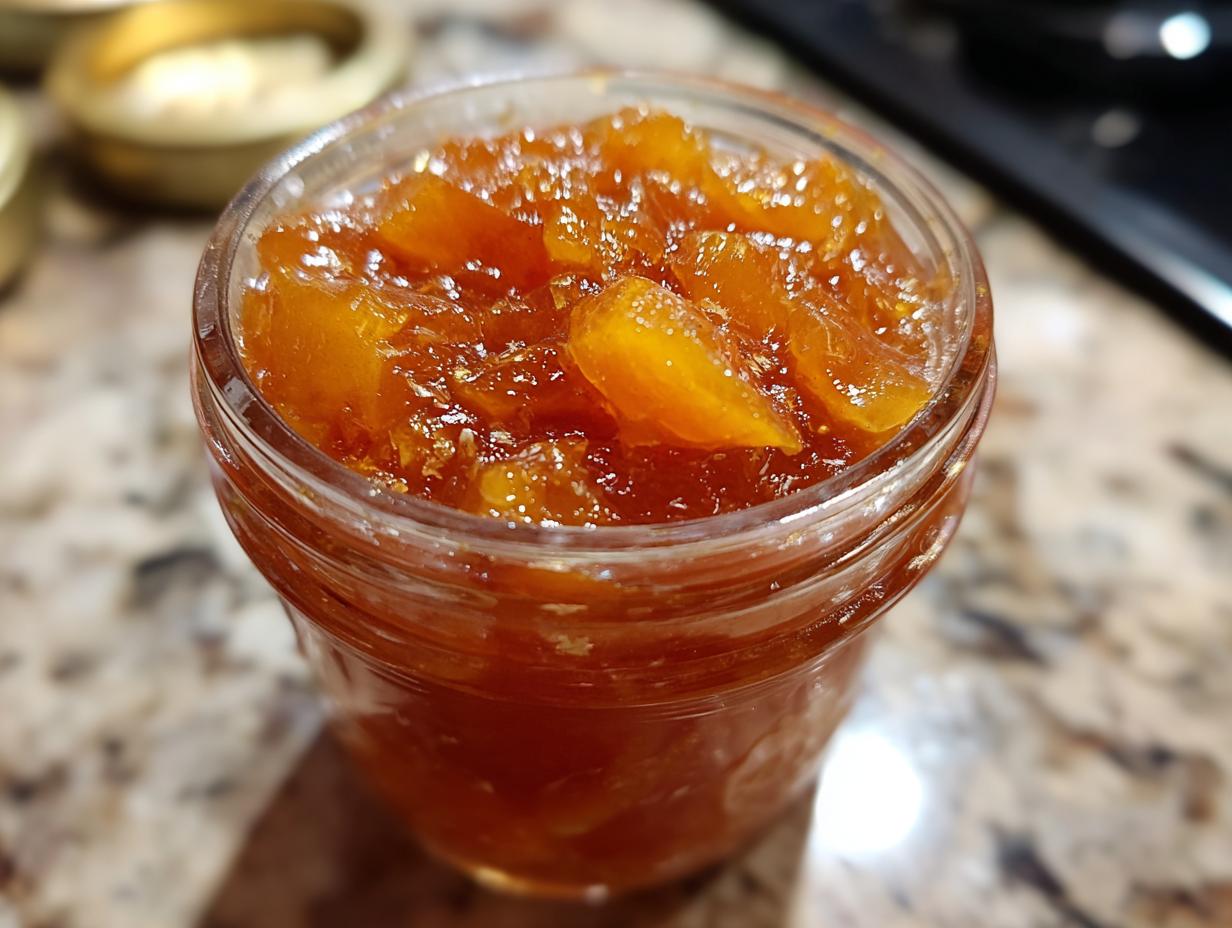
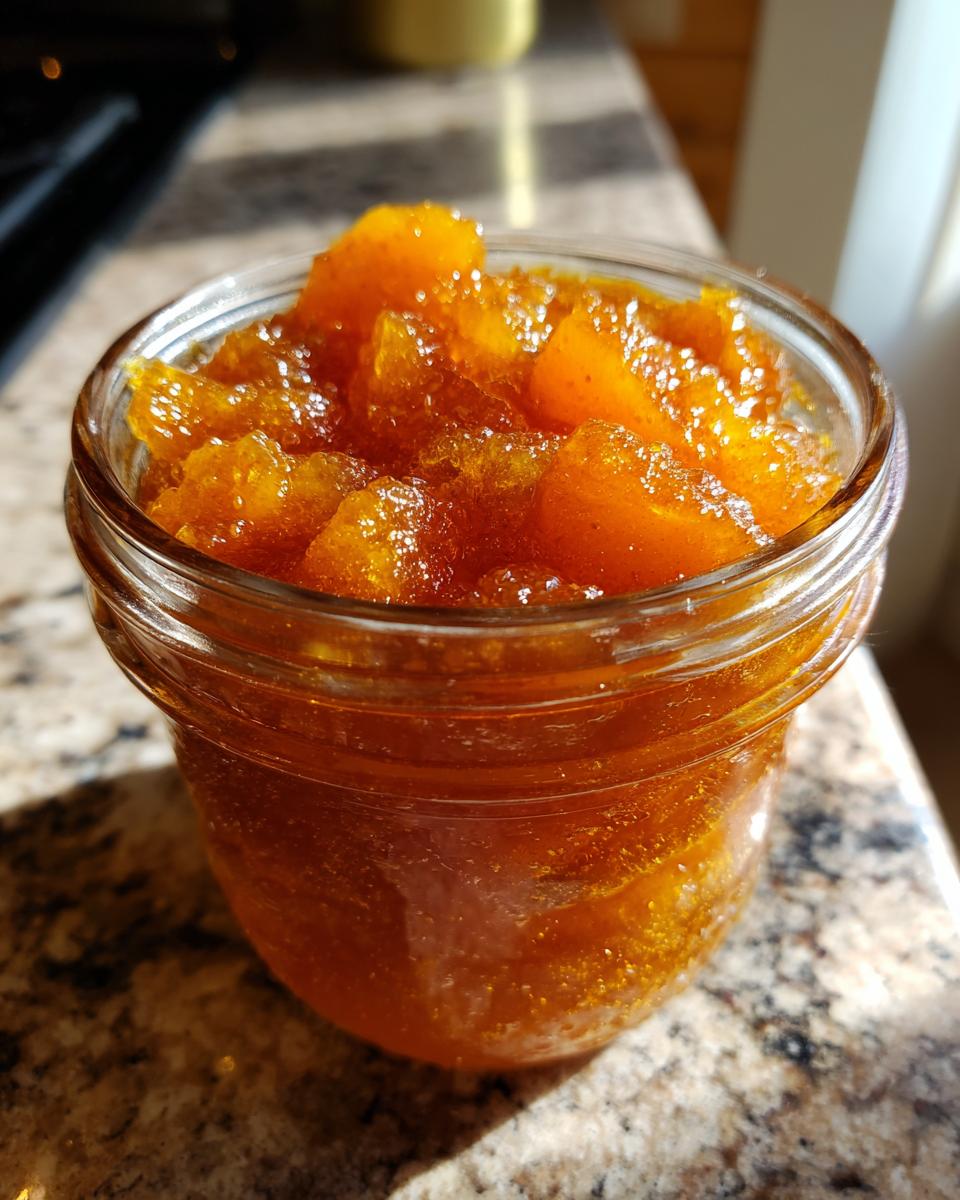
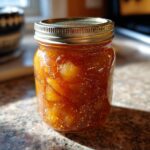
Oh, the sheer joy of canning! There’s just something incredibly satisfying about taking a bounty of ripe fruit and transforming it into jars of deliciousness that can last us through the winter months. And when it comes to late-season harvests, I absolutely adore making pear preserves. This recipe is exactly what you expect from an old-fashioned preserve – chunky, bursting with natural pear flavor, and made using a simple water-bath canning method that I know you can totally master. My goal here at Delish Symphony is to share recipes that are not only delicious but also totally doable for any home cook, and this one is no exception!
- Why You'll Love This Old-Fashioned Pear Preserves Recipe
- Ingredients for Chunky Pear Preserves
- Essential Equipment for Pear Preserves
- How to Make Old-Fashioned Pear Preserves: Step-by-Step
- Tips for Perfect Pear Preserves
- Serving Suggestions for Your Pear Preserves
- Storing and Reheating Pear Preserves
- Nutritional Information for Pear Preserves
- Share Your Pear Preserves Creations!
Why You’ll Love This Old-Fashioned Pear Preserves Recipe
Trust me, you’re going to adore making this! Here’s why:
- It’s surprisingly easy to whip up, even if you’re new to canning.
- You get that wonderfully chunky texture that just screams homemade goodness.
- The flavor is pure, natural pear – no weird stuff, just fruit!
- It’s perfect for water-bath canning, meaning you’ll have tasty jars ready for gifting or your own pantry stash.
Ingredients for Chunky Pear Preserves
For this lovely old-fashioned pear preserve, you won’t need much! I always grab ripe but still firm pears – they hold their shape so much better. You’ll need:
- 4 cups chopped ripe pears (about 2.5 lbs total)
- 1/4 cup fresh lemon juice (this is super important for safety and helps with the set!)
- 3 cups granulated sugar
- 1/4 cup water
Using fresh lemon juice isn’t just for flavor; it adds the necessary acidity to make sure your preserves are safe to can in a water bath. Trust me on this!
Essential Equipment for Pear Preserves
Alright, before we dive into the fun part of mashing and simmering, let’s make sure you’ve got your ducks in a row equipment-wise. Having the right tools makes all the difference and frankly, makes canning so much less stressful! You’ll want a nice, large heavy-bottomed pot – that’s key to prevent scorching. Of course, you’ll need your water bath canner with its rack. And don’t forget enough canning jars, fresh lids, and bands. A candy thermometer is a must-have for getting that perfect set, plus a good ladle and a non-metallic spatula for filling those jars.

How to Make Old-Fashioned Pear Preserves: Step-by-Step
Alright, let’s get these beautiful pears into jars! Making these pear preserves is a process, but it’s totally manageable and super rewarding. Follow these steps closely, and you’ll have delicious, safe, and shelf-stable jars of goodness in no time. It’s all about the details, especially when you’re canning!
Preparing Jars and Canner for Pear Preserves
First things first, we need to get everything ready for canning. We’re going to prepare our water bath canner, jars, lids, and bands. Wash all your jars, lids, and bands really well with hot, soapy water, then rinse them. Keep the jars hot – I usually pop them in the dishwasher on a hot cycle or fill them with hot water while we work. For the lids, just pop them in a small saucepan with some water and heat them gently on the stove; no need to boil them, just keep them warm.
Cooking the Pear Preserves Mixture
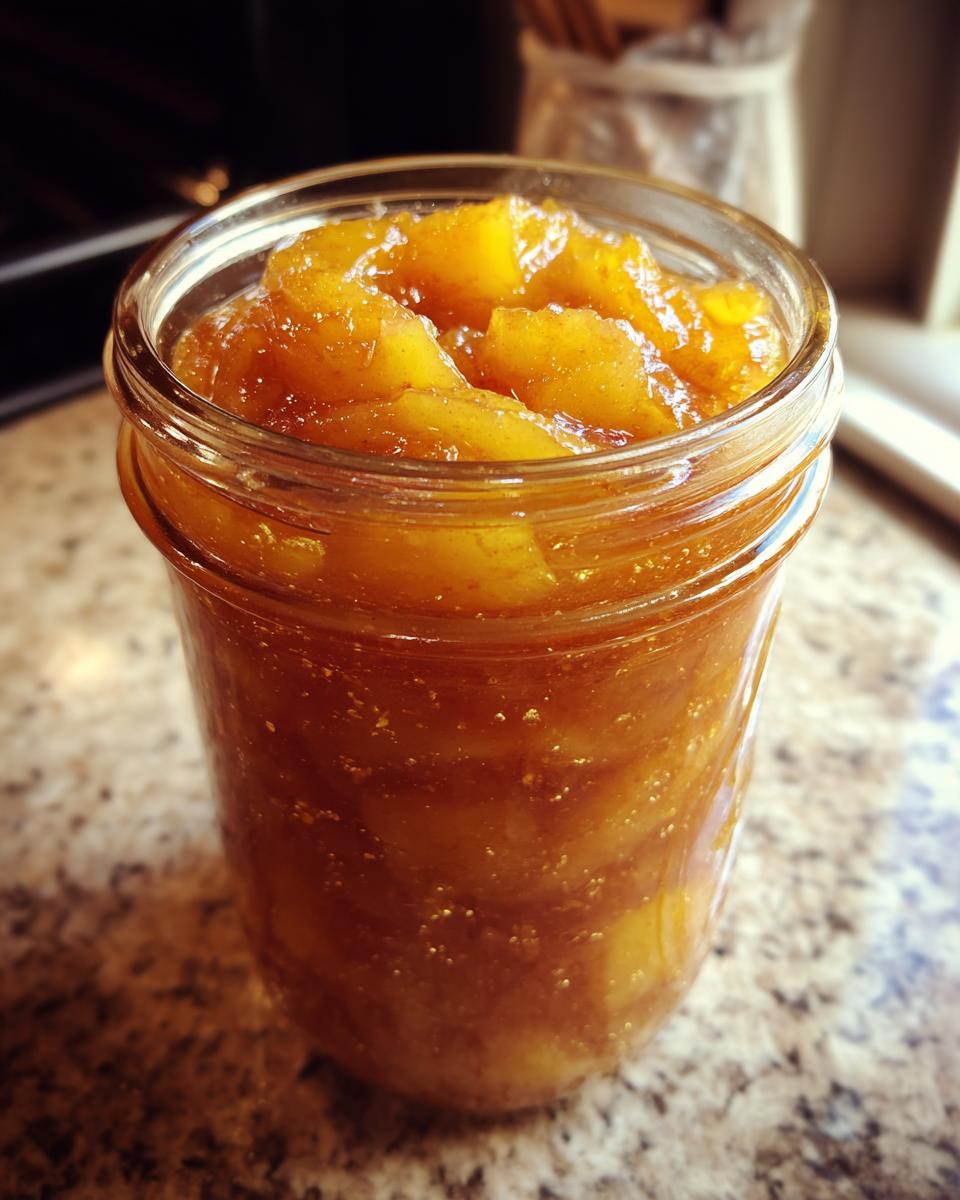
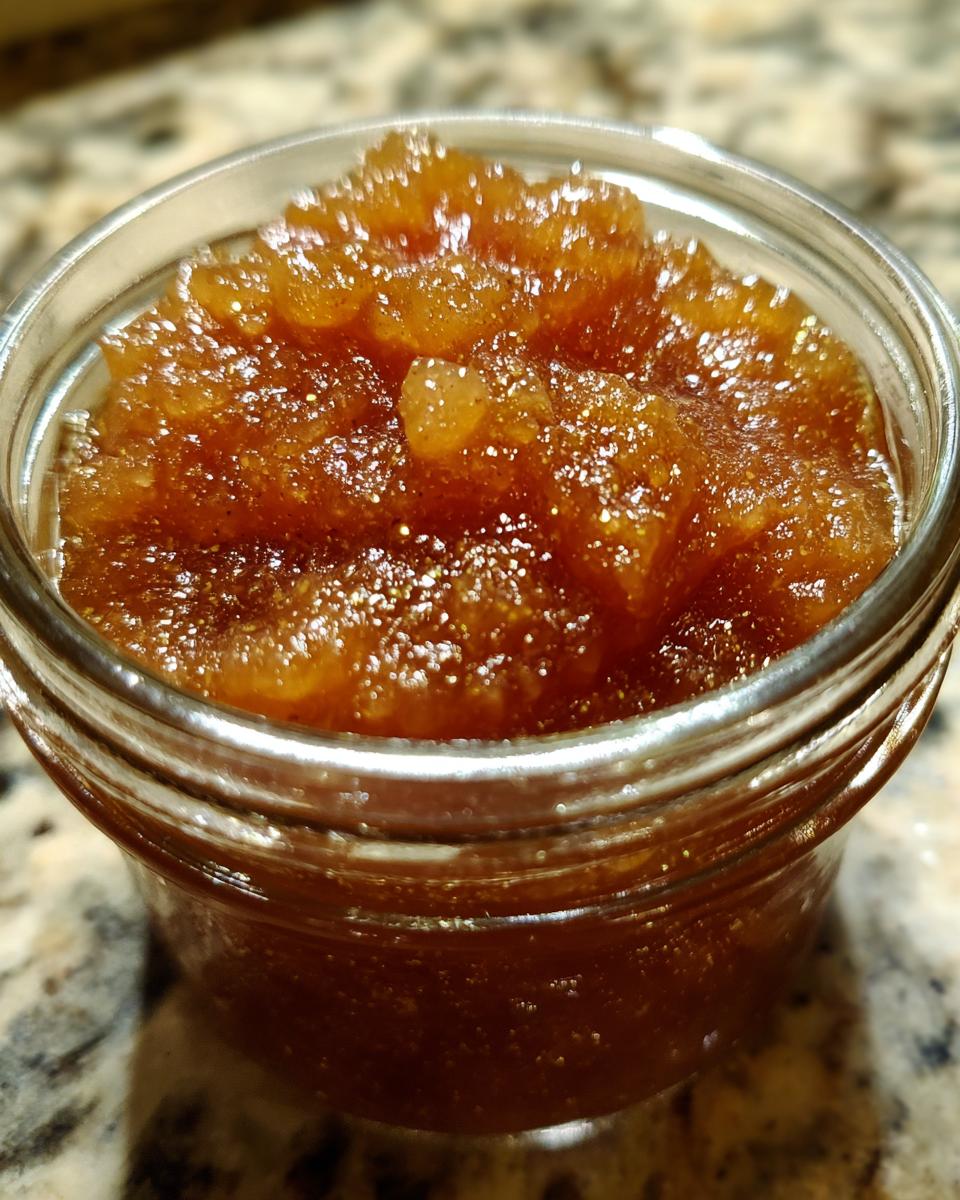
Now for the fun part! Take your chopped pears and put them in that big, heavy-bottomed pot. Stir in the lemon juice really well to coat all those fruity bits. Then, add in your sugar and the water. Give it all a good stir to combine everything. Bring this gorgeous mixture to a rolling boil over high heat, stirring constantly so nothing sticks. Once it’s boiling, reduce the heat to medium. You’ll want to cook it, stirring pretty often, until those preserves get nice and thick and chunky. Aim for a temperature of 220°F (104°C) on your candy thermometer – this usually takes about 30-45 minutes. While it’s cooking, skim off any foam that rises to the surface; it just makes for prettier preserves!
Testing for the Perfect Set
How do you know when it’s thick enough? My grandma taught me the ‘wrinkle test,’ and it’s foolproof! Spoon a small amount of the hot preserves onto a chilled plate (I keep a few in the freezer just for this). Let it sit for just a minute or two, then gently push it with your finger. If the surface wrinkles up, congratulations, it’s ready!
Water Bath Canning Your Pear Preserves
Okay, time to get these into jars! Carefully ladle the hot pear preserves into your hot jars. It’s super important to leave about a 1/2-inch headspace – that’s the space between the top of the preserves and the rim of the jar. Use a non-metallic spatula (like a plastic one) to gently release any air bubbles trapped in the jar. Then, wipe the rims of the jars really clean with a damp cloth; this ensures a good seal. Center your lids on the jars and screw on the bands until they’re just fingertip tight – not too tight! Now, carefully place these filled jars into your prepared water bath canner. Make sure they’re covered by at least an inch of water. Bring it all to a rolling boil again, and then start your processing time: 10 minutes for half-pint or pint jars. Remember to adjust for altitude if you’re at a higher elevation!
Cooling and Checking Seals
Once the processing time is up, turn off the heat, remove the canner lid, and let those jars sit in the hot water for another 5 minutes. This helps prevent siphoning. Carefully lift the jars out of the canner using your jar lifter and place them upright on a towel-lined counter to cool completely. Don’t retighten the bands! You’ll hear a satisfying ‘ping!’ as they seal. Check for seals after 12 to 24 hours. If a lid hasn’t popped down, just refrigerate that jar and use it up soon!
Tips for Perfect Pear Preserves
Making these pear preserves is all about a few key details. First off, make sure those pears are ripe but still a bit firm. Overripe pears will turn mushy, and while that’s okay for applesauce, we want some beautiful chunks here! Don’t be tempted to cut back too much on the sugar, because it’s not just for sweetness; it’s a crucial part of the preservation process. I remember one time I tried to be *extra* healthy and reduced the sugar a bit too much on a batch of peach preserves, and well… let’s just say they didn’t seal properly. Lesson learned!
Serving Suggestions for Your Pear Preserves
Now that you have jars of gorgeous pear preserves, what do you do with them? Oh, the possibilities! Slather them on warm, fluffy biscuits for a perfect breakfast treat. They’re absolutely divine on a cheese board, pairing beautifully with sharp cheddars or creamy bries. Don’t forget a dollop on top of your morning yogurt or oatmeal for a touch of sweetness. And for something truly special, try warming them up and glazing roasted pork or chicken – it’s a game-changer!
Storing and Reheating Pear Preserves
Proper storage is key to keeping your delicious pear preserves safe and tasty! Sealed jars should be kept in a cool, dark place, like your pantry or cellar, for up to a year. Once opened, or if a jar didn’t seal properly, pop it into the refrigerator. Those should be used within about 3 weeks. Simple as that!
Nutritional Information for Pear Preserves
Okay, so we all know that preserves are a treat, and this pear goodness is no different! Here’s a general idea of what you’re looking at per serving (about 2 tablespoons). Keep in mind these are estimates, and your exact numbers might change a bit based on the pears you use and, well, life!
- Calories: Around 60
- Sugar: About 15g (mostly from those lovely pears and added sugar!)
- Sodium: 0mg (yep, none!)
- Fat: 0g
- Saturated Fat: 0g
- Unsaturated Fat: 0g
- Trans Fat: 0g
- Carbohydrates: Around 16g
- Fiber: About 1g
- Protein: 0g
- Cholesterol: 0mg
Share Your Pear Preserves Creations!
Now that you’ve made a batch (or two!) of these delicious pear preserves, I’d absolutely love to hear all about it! Did they turn out perfectly? What did you serve them with? Leave a comment below and let me know your experience, or even better, share a photo on social media and tag us so I can see! You can also reach out directly through our contact page. Happy canning, everyone!
PrintOld-Fashioned Pear Preserves
Create chunky, old-fashioned pear preserves using a water-bath canning method. This recipe focuses on natural fruit flavor with clear steps for safe canning.
- Prep Time: 30 min
- Cook Time: 45 min
- Total Time: 75 min
- Yield: Approximately 4 half-pint jars 1x
- Category: Preserves
- Method: Water Bath Canning
- Cuisine: American
- Diet: Vegetarian
Ingredients
- 4 cups chopped ripe pears (about 2.5 lbs)
- 1/4 cup lemon juice
- 3 cups granulated sugar
- 1/4 cup water
Instructions
- Prepare your water bath canner, jars, lids, and bands. Wash jars, lids, and bands in hot soapy water; rinse and keep jars hot. Place lids in a small saucepan with water and heat gently.
- Wash, peel, core, and chop pears into 1/2-inch pieces.
- In a large, heavy-bottomed pot, combine chopped pears and lemon juice. Stir to coat.
- Add sugar and water to the pot. Stir well.
- Bring the mixture to a boil over high heat, stirring constantly.
- Reduce heat to medium and cook, stirring frequently, until the preserves reach a thick, chunky consistency and the temperature reaches 220°F (104°C) on a candy thermometer. This may take 30-45 minutes. Skim off any foam.
- Test for set: Spoon a small amount of preserves onto a chilled plate. Let it sit for a minute, then push it with your finger. If it wrinkles, it is ready.
- Carefully ladle the hot preserves into hot jars, leaving 1/2-inch headspace. Remove air bubbles with a non-metallic spatula. Wipe jar rims clean.
- Center lids on jars and screw on bands until fingertip tight.
- Place jars in the prepared water bath canner, ensuring they are covered by at least 1 inch of water.
- Bring water to a rolling boil, then start the processing time: 10 minutes for half-pint or pint jars. Adjust for altitude if necessary.
- Turn off heat, remove canner lid, and let jars sit in the canner for 5 minutes.
- Carefully remove jars from the canner and place them upright on a towel-lined counter to cool completely. Do not retighten bands.
- Check seals after 12-24 hours. If a lid has not sealed, refrigerate the jar and use the preserves within 3 weeks.
Notes
- Use ripe but firm pears for the best texture.
- For a smoother preserve, you can lightly mash some of the pear pieces.
- Adjust sugar slightly based on pear sweetness, but do not reduce it significantly as sugar acts as a preservative.
- Ensure your jars are properly sterilized to prevent spoilage.
- Headspace is crucial for a good seal.
Nutrition
- Serving Size: 2 tablespoons
- Calories: 60
- Sugar: 15g
- Sodium: 0mg
- Fat: 0g
- Saturated Fat: 0g
- Unsaturated Fat: 0g
- Trans Fat: 0g
- Carbohydrates: 16g
- Fiber: 1g
- Protein: 0g
- Cholesterol: 0mg