
Oh my gosh, if you are looking for that one dessert that just *stops* people in their tracks, I’ve found it! Forget complex layer cakes; we are talking about the ultimate fusion treat: **red velvet cheesecake brownies**. I know, I know, it sounds intense, but trust me, this recipe is surprisingly easy, which is exactly what I aim for here at Delish Symphony. I wanted to develop something showstopping that still fits into a busy life. After testing this combination over and over in my own kitchen, I can promise you a perfect flavor harmony—rich, fudgy chocolate notes battling beautifully with that bright, tangy cream cheese swirl. You are going to save this one immediately! If you love this kind of indulgence, check out all my delicious dessert recipes for more sweet inspiration.
- Why You Will Make These Red Velvet Cheesecake Brownies Often
- Essential Ingredients for Perfect Red Velvet Cheesecake Brownies
- Step-by-Step Guide to Making Red Velvet Cheesecake Brownies
- Expert Tips for Perfect Red Velvet Cheesecake Brownies
- Storage and Reheating Instructions for Your Red Velvet Dessert Idea
- Serving Suggestions for These Showstopper Dessert Squares
- Frequently Asked Questions About Red Velvet Cheesecake Brownies
- Estimated Nutritional Data for Red Velvet Cheesecake Brownies
- Share Your Homemade Red Velvet Treats
Why You Will Make These Red Velvet Cheesecake Brownies Often
I’ve baked hundreds of things in my kitchen over the years, but these **red velvet cheesecake brownies** are in the top three for sheer wow factor versus effort. Seriously, they fly off the plate! They hit every single craving you could possibly have in one square. You need these in your life for holiday trays, Valentine’s Day baking, or just when you need a serious chocolate fix.
Here’s the quick rundown on why I’m obsessed and why you will be too:
- They are incredibly decadent—truly fudgy, just the way a good brownie should be.
- The active mixing time is surprisingly short, making these an easy weeknight bake when you need a treat.
- They look like you spent hours on them, even though the marbling technique is super simple.
- The red color is vibrant and just shouts ‘celebration’!
- They freeze beautifully, which is great for holiday prep.
The Perfect Fusion of Flavors
This is what I call the ultimate brownie fusion! You aren’t just getting a brownie; you’re getting a layered experience. Imagine biting through that deep, slightly cocoa-y, fudgy red velvet base, and BAM! You hit that bright, sweet-and-tangy cream cheese layer. It cuts through the richness perfectly. It’s never too heavy because that cheesecake component keeps everything balanced. It’s the perfect contrast.
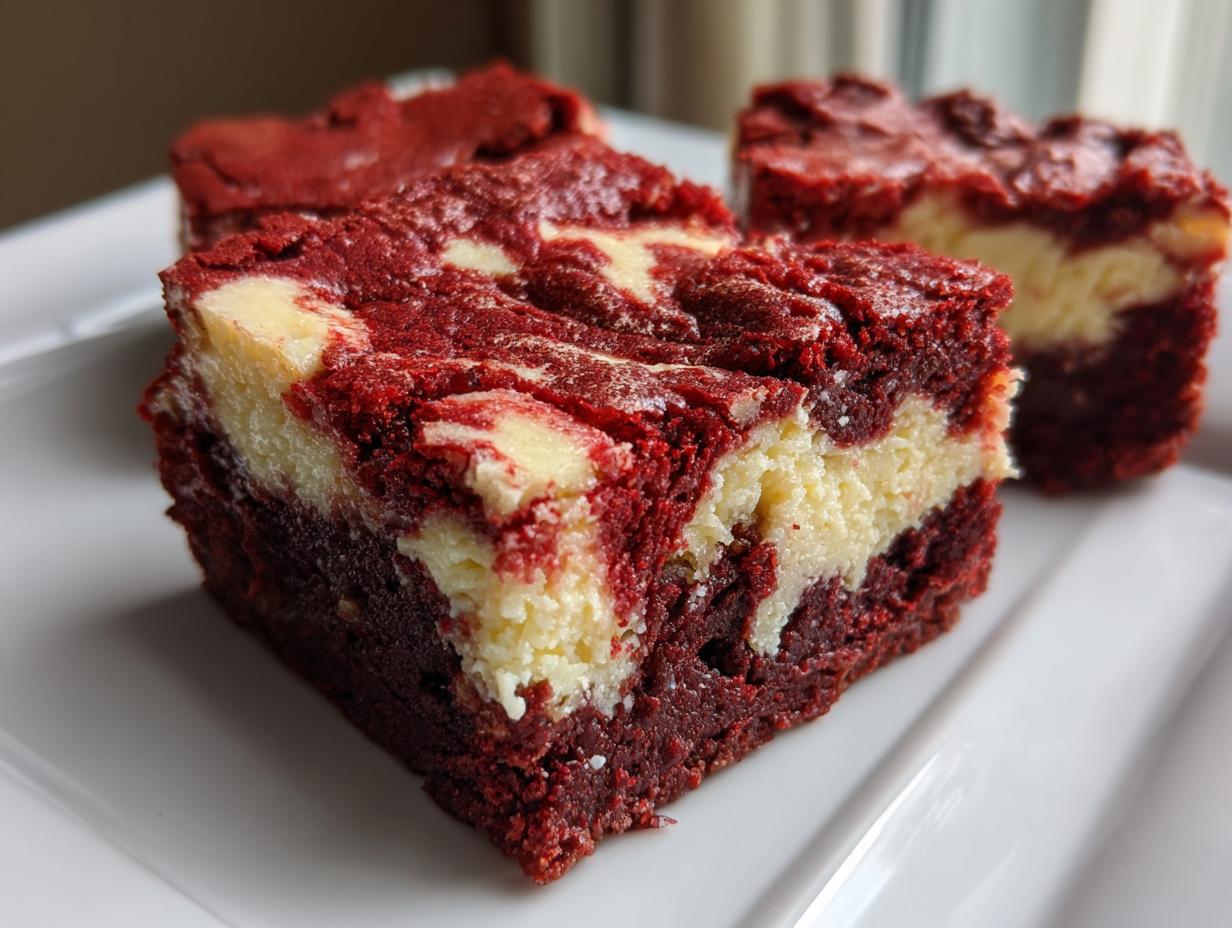
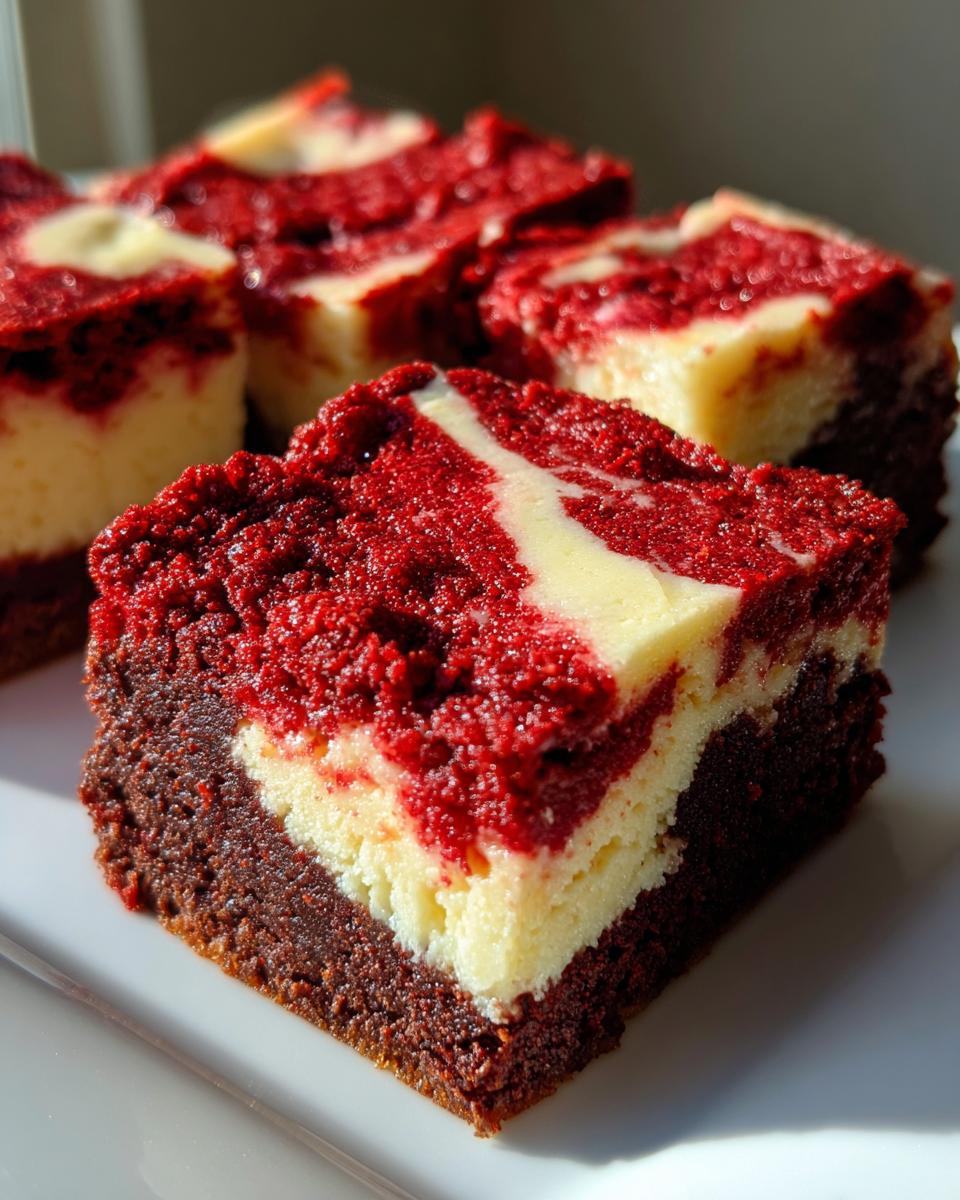
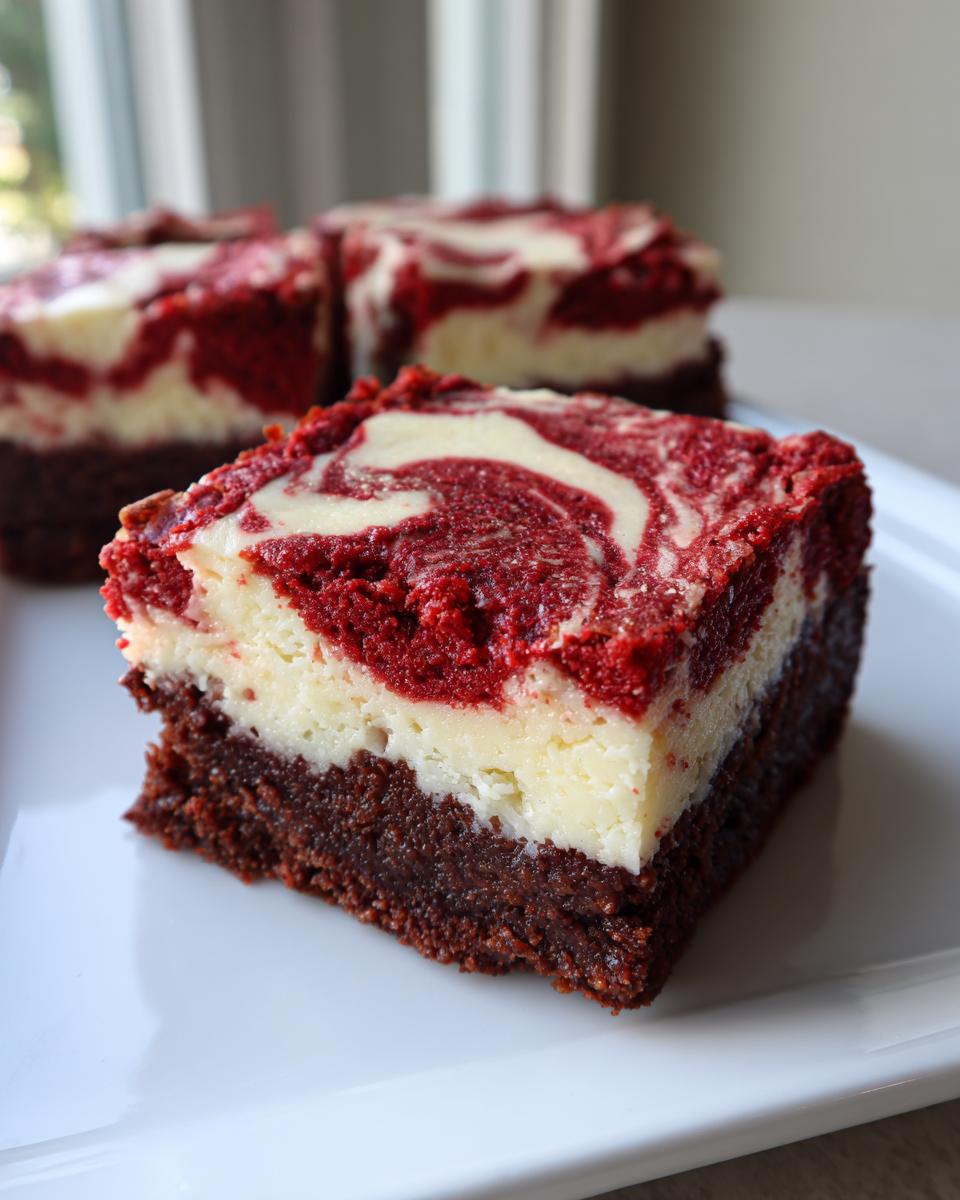
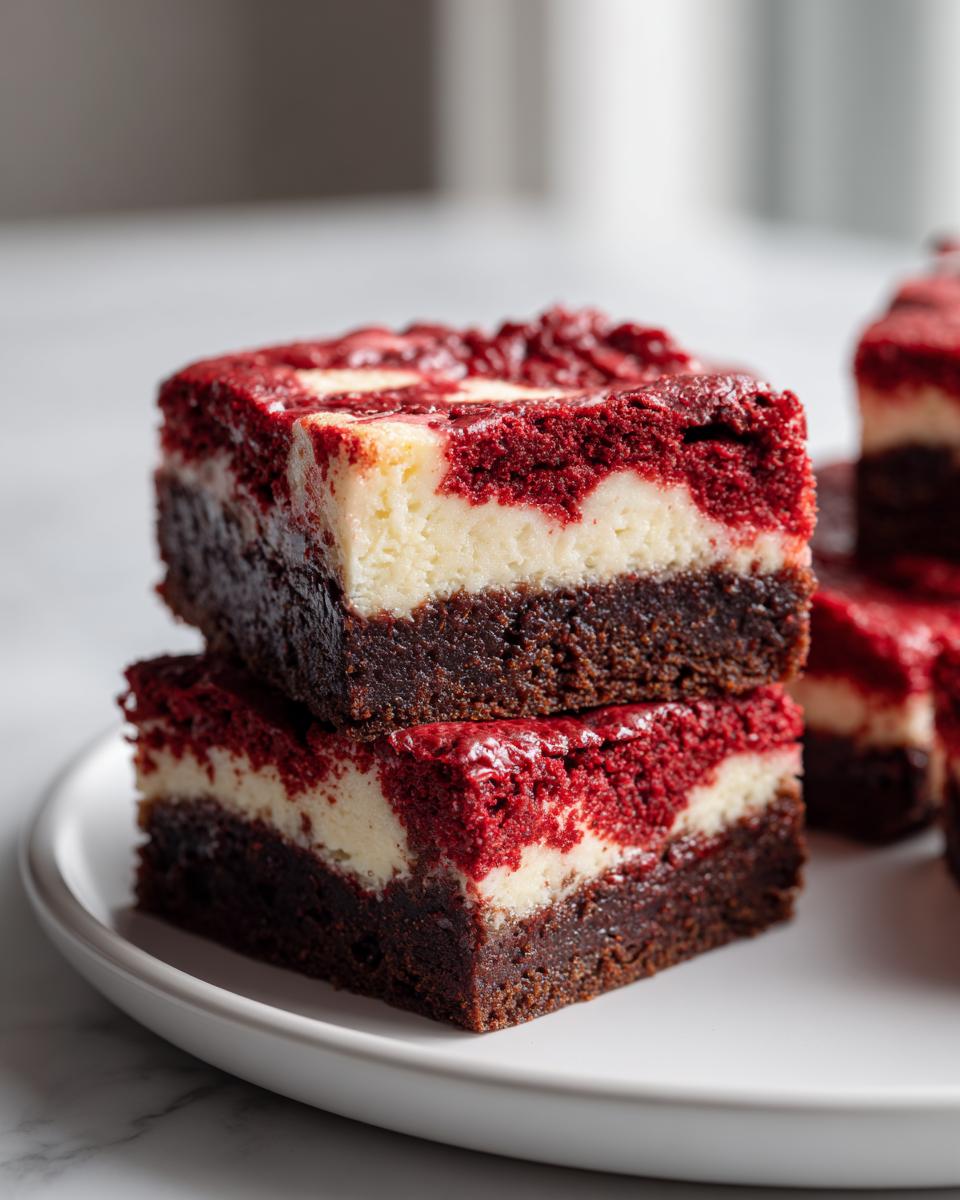
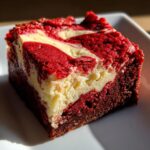
Visually Impressive Marbled Brownies
You know those desserts that look amazing in pictures? These are it. Because we swirl the two batters together, you end up with these gorgeous, organic patterns. They instantly become your go-to for any party because they look so professional. Even with just a slight movement of a knife, you create these stunning **Marbled Brownies** that guests will rave about. I promise, the swirling part is the most fun!
Essential Ingredients for Perfect Red Velvet Cheesecake Brownies
Okay, listen up, because using the right ingredients is non-negotiable if we want these to taste like the absolute best **red velvet cheesecake brownies** they can be. Don’t worry; everything here is easy to find at any regular grocery store. We need to keep things efficient, right? The biggest thing to remember, especially with the color, is quality matters, but simplicity rules the day. These straightforward measurements give us that perfect texture blend between fudgy and creamy.
For the Fudgy Red Velvet Brownie Base
This is where we lock in that deep chocolate flavor that makes red velvet amazing, even though it has cocoa powder! Making sure the butter is melted guarantees we get that super fudgy texture, not cakey, which is what we want for the brownie part of these **red velvet cheesecake brownies**.
- 1 cup unsalted butter, melted
- 1 3/4 cups granulated sugar
- 2 large eggs
- 1 teaspoon vanilla extract
- 1 teaspoon white vinegar
- 1 teaspoon red food coloring (or gel paste)
- 1 1/4 cups all-purpose flour
- 1/2 cup unsweetened cocoa powder
- 1/2 teaspoon salt
Quick note from my kitchen: If you can swing it, grab the gel paste food coloring. Liquid coloring can sometimes thin out your batter too much, and we want this base thick for that fudgy bite!
For the Tangy Cheesecake Swirl Layer
This light, tangy layer is what balances out the richness of the chocolate base. The most important tip here? Make absolutely sure your cream cheese is room temperature! If it’s cold, you’ll end up with little white lumps in your beautiful swirl, and nobody wants that in their **Tangy Cheesecake Layer**.
- 8 ounces cream cheese, softened
- 1/4 cup granulated sugar (for cheesecake layer)
- 1 large egg (for cheesecake layer)
- 1/2 teaspoon vanilla extract (for cheesecake layer)
When you beat this mixture, go slow until it’s completely luxurious and smooth. That’s the secret to a perfect **Cream Cheese Swirl Brownies** finish!
Step-by-Step Guide to Making Red Velvet Cheesecake Brownies
Alright, now for the fun part! Baking these **red velvet cheesecake brownies** is really more about layering and swirling than complicated techniques. I’ve broken it down so you can’t possibly mess it up. Follow these steps exactly, and you’ll have that perfect dessert that people swear must have come from a high-end bakery. Trust me, I’ve tested every single one of these steps in my own kitchen to make sure your results are foolproof!
Preparation and Cheesecake Batter Assembly
First things first, crank that oven up to 350°F (175°C). You absolutely must line your 9×9 pan with parchment paper, leaving those generous overhang tabs hanging over the sides—these are your handles later! I learned that the hard way once. While that warms up, mix up the cheesecake layer. Just beat the softened cream cheese, its sugar, egg, and vanilla until it’s completely smooth. No lumps allowed! Set that aside; it needs to be ready to meet its fudgy partner later.
Mixing the Red Velvet Brownie Batter
This is where the magic color comes in! Whisk your melted butter and the main sugar together first. Then, add those eggs, vanilla, vinegar (that little bit helps bring out the red flavor, fun, right?), and all that beautiful red coloring. Once that’s uniform, gently fold in your dry ingredients—the flour, cocoa powder, and salt. Here is the absolute key for achieving **Fudgy Red Velvet Dessert**: mix only until you *just* see the flour disappear. Seriously, stop mixing! Overmixing these **red velvet cheesecake brownies** turns them dry and cakey, and we are aiming for fudgy, so be gentle.
Layering and Creating the Marbled Brownies Effect
Time to build! Spread about half of that rich red velvet batter into your prepared pan. Next, dollop the cheesecake mixture right over the top of that first layer—try to space it out somewhat evenly across the surface. Then, spoon the rest of the red velvet batter over the cream cheese dollops. Now for the swirling! Grab a thin knife or even a skewer and gently run it through the layers—think gentle figure-eights. You want stripes and ribbons, not a uniform pink mess. We want those distinct **Marbled Brownies**!
Baking and Cooling for Clean Slices
Pop it in the oven for 30 to 35 minutes. You’re looking for moist crumbs on your toothpick right near the center, not wet batter goo. Once they are done, pull them out and let them cool completely on the rack. If you try to cut them hot, they will just turn into a sticky disaster. For those gorgeous, neat squares that look just like the pictures? Slide that whole pan into the fridge for at least an hour after they cool down a bit. That solid chill sets the **Cheesecake Brownie Recipe** perfectly for slicing!
I always recommend checking out other great baking guides, like those found when you look at recipes from Cheff Recipes, but this swirl technique is ours! Feel free to explore some easy gourmet brownies while they bake.
Expert Tips for Perfect Red Velvet Cheesecake Brownies
Coming from my years of testing recipes—and yes, having a few kitchen oopsies along the way—I’ve picked up a couple of non-negotiables for making these **red velvet cheesecake brownies** absolutely perfect every single time. Since you’re looking for that showstopping elegance combined with homemade taste, these little tweaks really do make a huge difference in the final product. Even simple things like what kind of coloring you use can totally change the outcome of the texture, which we can’t have!
Achieving Intense Red Color in Red Velvet Cheesecake Brownies
If you’ve ever made Red Velvet before, you know the color struggle is real! If you use the regular liquid food coloring you grab at the supermarket, you often have to dump in so much just to get that signature deep red hue. The problem? All that extra liquid messes with the fat-to-flour ratio we worked so hard to nail down for that fudgy texture. My big secret for these **red velvet cheesecake brownies** is to skip the liquid and go straight for the gel paste coloring. You need way less gel to get a deeper, more vibrant red, and it keeps your brownie batter nice and thick. It’s a little more of an upfront purchase, but when you see that color, you’ll ditch the liquid forever!
Techniques for the Best Cream Cheese Swirl Brownies
This is where most people accidentally turn their masterpiece into a uniform pink blob! Remember how we layered the cheesecake on top of the first layer of red batter? That’s intentional. When you swirl, you need to be incredibly gentle. Think of it like tracing or feathering the layers together—you are not trying to fully incorporate them.
If you take a knife and start vigorously mixing the two layers, you lose that beautiful contrast. You end up with one shade of slightly-off red instead of the dramatic ribbons we are aiming for. For truly stunning **Cream Cheese Swirl Brownies**, use a skewer or the tip of a butter knife, make just three or four long, slow passes through the batter total, and then call it done! It looks better, and you keep that wonderful textural surprise throughout.

If you want to see how I apply some of these strict techniques to even simpler bakes, you should check out my tips on making easy, moist banana bread. Serious home cooks know the rules apply everywhere! For more inspiration on making impressive desserts that nail the look, check out what the folks over at Savor Queen are doing with their swirl techniques.
Storage and Reheating Instructions for Your Red Velvet Dessert Idea
I always tell people that the hardest part of baking is waiting for them to cool, but the next hardest part is trying not to eat them all in one sitting! Since these amazing **red velvet cheesecake brownies** have that luscious, fresh cream cheese swirl, how you store them really matters. We want them to stay tasting as perfect as the day you baked them, right?
My number one rule for storing anything with cheesecake in it—whether it’s a full pie or just a swirl in a brownie—is keeping them airtight and chilled. Because of that dairy content, leaving them on the counter for too long just isn’t safe or pretty. The texture suffers, too!
Here’s my foolproof method:
- Make sure those brownies are completely cooled down first, ideally having been chilled for at least an hour as we discussed.
- Line your airtight container with a small piece of parchment paper. This keeps the bottoms from sticking to the plastic if they get really cold and firm.
- Place the squares in a single layer if you can manage it. If you must stack them, put another sheet of parchment or wax paper between the layers. No direct contact!
- Seal that container tight and pop it straight into the fridge. They keep wonderfully for about 5 to 6 days this way. They stay nicely fudgy!
If you are making a huge batch for a holiday party, you can absolutely freeze them! Wrap the cooled, cut squares tightly in plastic wrap—like individual presents—and then tuck those wrapped squares into a big freezer bag. They are great for about two months. When you want to eat one? Just pull it out and let it thaw on the counter for maybe 30 minutes or even eat it cold straight from the fridge. They are delicious either way, which makes these such a great **Red Velvet Dessert Idea** for holiday planning!
Serving Suggestions for These Showstopper Dessert Squares
Finding the right partner for these rich **red velvet cheesecake brownies** makes them go from excellent to unforgettable! Since these squares are already pretty decadent—we’ve got fudgy red velvet and creamy cheesecake all in one bite—you don’t need much else. We want toppings or drinks that enhance the richness or cut through it just a little bit so you can enjoy another square!
For holidays like Valentine’s Day or Christmas, presentation is everything. I find simple touches really elevate these **Showstopper Dessert Squares**:
- A Dusting of Powdered Sugar: Seriously underrated! It looks snowy and elegant, especially when paired with the deep red color. It’s also so easy, and it doesn’t compete Flavor-wise.
- A Dollop of Whipped Cream: Homemade whipped cream is best, maybe laced with just a tiny hint of vanilla. The lightness of the cream balances the density of the brownie perfectly.
- Fresh Berries: A few fresh raspberries placed right next to the square on the plate add a tart pop and an amazing color contrast. It really makes the red velvet shine!
When it comes to pairing drinks, you need something bold to stand up to that chocolate and tang, or something cool to refresh the palate. If you are serving these after dinner, I highly recommend pairing these intense chocolate swirls with something incredibly smooth.
If you happen to be looking for a next-level coffee pairing, you absolutely need to try making my recipe for New Orleans Iced Coffee Creme Brulee. The deep, slightly chicory flavor of that coffee cuts right through the sweetness of the cheesecake layer beautifully. It’s an absolute dream pairing for these **red velvet cheesecake brownies**.
Remember, these are already a complete dessert experience, so keep the sides simple and let that beautiful swirl do all the talking!
Frequently Asked Questions About Red Velvet Cheesecake Brownies
I always get asked a ton of questions when I bring these beauties out! It’s a rich, hybrid dessert, so it makes sense that people want to know how to nail the texture and look. I’ve pulled together the most common things I hear about my **red velvet cheesecake brownies** so you can bake with total confidence. Don’t worry if you’re tweaking things; I get it! But for the very first batch, stick close to the plan to get that perfect fusion.
Can I make these red velvet cheesecake brownies without cocoa powder?
Oh, that’s where you run into trouble! I totally understand wanting to adjust things, but no, you really shouldn’t skip the cocoa powder here. Red velvet gets its flavor depth from a touch of cocoa mixed with that vinegar and buttermilk tang—though we use milk here! Without the cocoa powder, you would end up with a very dense, strangely flavored red cake batter, not the rich, fudgy base you need for these **Fudgy Red Velvet Dessert** squares. The cocoa is crucial for achieving that classic brownie bottom structure!
What is the best way to get clean cuts when slicing?
This is the million-dollar question for any layered or swirled bake! You want those beautiful, sharp lines, right? I cannot stress this enough: patience is your best tool here. First, let them cool completely on the rack, which takes about an hour. But the real secret to clean slices for this **Cheesecake Brownie Recipe** is a chill session. Once cool, wrap them up and put them in the fridge for at least an hour, maybe two. Use a long, sharp knife, and wipe the blade clean between every single cut. That cold, firm texture ensures you get the cleanest squares possible. You’ll be amazed how much better the cuts look when they are cold!
Can I use Greek yogurt instead of cream cheese for the swirl?
Listen, I love Greek yogurt in my breakfast, but please don’t try to substitute it for the cream cheese in this layer. The whole appeal of these squares is that signature, dense, tangy snap that only actual cream cheese provides in a baked good. Greek yogurt is way too thin and watery once it heats up. It would likely soak right into the brownie layer or just bubble weirdly. If you want that perfect **Cream Cheese Swirl Brownies** effect, you have to stick to the softened block of cream cheese. It’s worth keeping it classic for this particular treat!
If you’re looking for smarter ways to manage your kitchen time so you can fit in baking desserts like this, check out my guide on weeknight dinner recipes that help keep things streamlined during the week. For an awesome perspective on why these amazing hybrid recipes work so well, take a look at this article from Daily Dish Haven.
Estimated Nutritional Data for Red Velvet Cheesecake Brownies
I always like to give folks a heads-up on what’s in these delicious bites. Since these **red velvet cheesecake brownies** are incredibly rich—we’ve got butter, sugar, and cream cheese happily mingling in every square—the numbers look exactly how you’d expect! Remember, these are just estimates, based on the ingredients list provided and using standard grocery brands. If you’re whipping up a batch for the family, I always say, everything in moderation, right? Enjoy the deliciousness first!
Here is the approximate nutritional breakdown for one serving square:
- Serving Size: 1 square
- Calories: 310
- Sugar: 30g
- Sodium: 180mg
- Fat: 19g
- Saturated Fat: 11g
- Trans Fat: 0.5g
- Carbohydrates: 32g
- Fiber: 1g
- Protein: 4g
- Cholesterol: 65mg
You’ll notice the fat and sugar content is right up there, which is what gives you that fudgy texture and the amazing **Decadent Chocolate Swirls** we talked about! When I make these, especially around Valentine’s Day or Christmas, I call them ‘momentary indulgences.’ They are absolutely worth every single calorie because they taste like pure celebration. Just plan to go for an extra long walk the next day!
Share Your Homemade Red Velvet Treats
Well, that’s it! You’re officially equipped to bake what I think is one of the most stunning and satisfying desserts out there—these **red velvet cheesecake brownies**! Now the fun part begins: eating them and, even better, showing them off!
I put my heart into making sure this recipe works beautifully at home, so I truly can’t wait to see what you create. Did you serve them up for a big family dinner? Did you manage to save any for yourself around Valentine’s Day? Are you proud of your perfect swirls? Let me know!
Please take a moment to leave a rating below! Your feedback helps other home cooks know that this simple but special recipe is a winner. And if you took a picture—please tag me! I absolutely love seeing your finished **Homemade Red Velvet Treats** popping up in my feed. You can always reach out to me directly if you have questions or just want to share your baking triumphs. Send all your lovely photos or questions over to my contact page. Happy baking, everyone!
PrintDecadent Red Velvet Cheesecake Brownies with Cream Cheese Swirl
Bake rich, fudgy red velvet brownies swirled with a tangy, creamy cheesecake layer. This recipe creates a showstopping marbled dessert that is simple to make.
- Prep Time: 20 min
- Cook Time: 35 min
- Total Time: 55 min
- Yield: 16 servings 1x
- Category: Dessert
- Method: Baking
- Cuisine: American
- Diet: Vegetarian
Ingredients
- 1 cup unsalted butter, melted
- 1 3/4 cups granulated sugar
- 2 large eggs
- 1 teaspoon vanilla extract
- 1 teaspoon white vinegar
- 1 teaspoon red food coloring (or gel paste)
- 1 1/4 cups all-purpose flour
- 1/2 cup unsweetened cocoa powder
- 1/2 teaspoon salt
- 8 ounces cream cheese, softened
- 1/4 cup granulated sugar (for cheesecake layer)
- 1 large egg (for cheesecake layer)
- 1/2 teaspoon vanilla extract (for cheesecake layer)
Instructions
- Preheat your oven to 350°F (175°C). Line a 9×9 inch baking pan with parchment paper, leaving an overhang for easy removal.
- Prepare the cheesecake batter: In a medium bowl, beat the softened cream cheese, 1/4 cup sugar, 1 egg, and 1/2 teaspoon vanilla until smooth. Set aside.
- Prepare the red velvet brownie batter: In a large bowl, whisk together the melted butter and 1 3/4 cups sugar until combined.
- Whisk in the 2 eggs, 1 teaspoon vanilla, white vinegar, and red food coloring until the mixture is uniform in color.
- In a separate bowl, whisk together the flour, cocoa powder, and salt.
- Gradually add the dry ingredients to the wet ingredients, mixing just until combined. Do not overmix.
- Spread half of the red velvet batter into the prepared pan.
- Dollop the cheesecake mixture evenly over the red velvet layer.
- Spoon the remaining red velvet batter over the cheesecake layer.
- Use a knife or skewer to gently swirl the layers together to create a marbled effect.
- Bake for 30 to 35 minutes, or until a toothpick inserted near the center comes out with moist crumbs attached, not wet batter.
- Let the brownies cool completely in the pan on a wire rack before lifting out using the parchment overhang.
- Cut into squares and serve.
Notes
- For the best marbling effect, use a light hand when swirling the batters.
- Use gel food coloring for a deeper, more intense red color without thinning the batter.
- Chill the brownies for at least one hour before slicing for cleaner cuts.
Nutrition
- Serving Size: 1 square
- Calories: 310
- Sugar: 30
- Sodium: 180
- Fat: 19
- Saturated Fat: 11
- Unsaturated Fat: 8
- Trans Fat: 0.5
- Carbohydrates: 32
- Fiber: 1
- Protein: 4
- Cholesterol: 65