

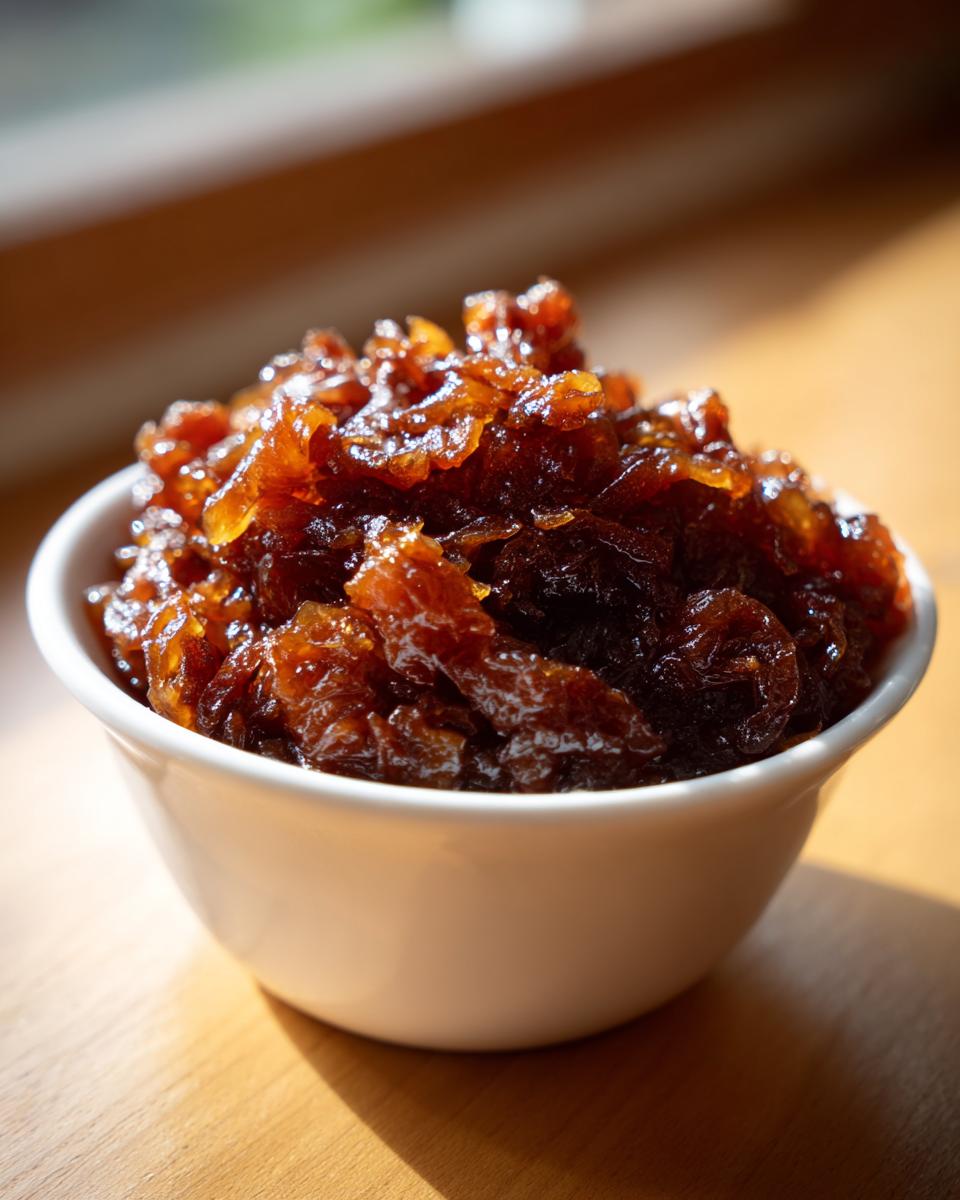
There’s a certain kind of magic that happens when you take something sharp and teary—the humble onion—and cook it down until it’s utterly transformed. It becomes sweet, deeply savory, and almost jammy. That transformation is what good cooking is all about, and honestly, it’s one of my favorite kitchen tricks. We’re diving deep today into how to create truly spectacular caramelized onions. Forget those pale, slightly wilted excuses you sometimes see; I’m sharing my home-tested technique for achieving that rich, mahogany color and unbelievable depth of flavor. Trust me, once you master this slow-cooking rhythm, you’ll want to put these sweet gems on everything. Need a quick weeknight boost? Mastering this technique is easier than you think, and it will instantly upgrade all your weeknight dinner recipes.

- Why You Will Master Making Caramelized Onions
- Ingredients for the Perfect Caramelized Onions Recipe
- The Best Way to Caramelize Onions: Slow Cooking Technique
- Tips for Quick Caramelized Onions When Time is Short
- Using Your Sweet Onions Recipe in Popular Dishes
- Storage and Make-Ahead Tips for Caramelized Onions
- Frequently Asked Questions About Caramelized Onions
- Nutritional Estimate for Caramelized Onions
- Share Your Perfect Caramelized Onions Creation
Why You Will Master Making Caramelized Onions
I know what you’re thinking: this takes forever! But I promise you, the payoff is huge, and the actual work is minimal. Once you see the results, you’ll know why professionals rely on perfectly caramelized onions. This method is designed for the home cook.
- You only need three basic ingredients to start.
- The process is mostly hands-off—it’s just low heat and stirring occasionally.
- The payoff is a flavor upgrade for almost any savory dish you can imagine.
Ingredients for the Perfect Caramelized Onions Recipe
We keep this super simple because the onions do most of the heavy lifting! You don’t need a ton of fancy stuff for amazing caramelized onions. You’ll want to grab:
- 3 large yellow onions, thinly sliced (uniform slicing matters, folks!)
- 2 tablespoons unsalted butter
- 1 tablespoon good olive oil
- 1 teaspoon salt
- 1/2 teaspoon sugar (this is optional, only if you’re in a rush!)
The Best Way to Caramelize Onions: Slow Cooking Technique
This is where the magic—and the patience—comes in. If you want that deep, glorious sweetness that separates restaurant-quality food from home cooking, you have to commit to the low heat. Making truly fantastic caramelized onions is a testament to letting nature take its course. We are looking at a minimum of 45 minutes, maybe stretching up to 75 minutes, depending on your stove quirks. But don’t fret! Most of that time is just chilling out and reading a magazine. We need to protect that wonderful fond developing on the bottom of the pan, too. Speaking of flavor bombs, check out how to use these in your French Onion Beef Over Rice—it needs these onions! If you need a deep dive into technique, I always reference ideas from chefs who have mastered this, like the great tips over at Running to the Kitchen.
Preparation and Initial Softening for Caramelized Onions
First things first: slice those onions as evenly as you possibly can. Trust me on this; thin, uniform slices mean they soften at the same rate. Pop them into a big, heavy-bottomed skillet—this helps distribute the heat evenly. Get your butter and oil melted first, then toss in the onions and the salt. This initial phase, which takes about 15 minutes, is just about getting the moisture out. We want soft, translucent disks before we even dream about browning. This is the baseline for perfect caramelized onions.
Developing Deep Flavor: The Long Simmer
Once they start looking sleepy, drop that heat down to low. This is the low-and-slow phase. For the next 30 to 45 minutes, you only need to stir them every five minutes or so. If you notice the bottom of your pan is getting really dry and stuff is sticking too intensely—that’s called fond, and it’s pure gold—add just a tablespoon of water or maybe a splash of broth. Swirl that around to lift those lovely brown bits off the bottom and incorporate them back into the onions. That steamy lift helps speed up the breakdown process without scorching your progress. We are patiently waiting for that deep brown hue to show up!
Tips for Quick Caramelized Onions When Time is Short
Okay, I get it. Sometimes you are staring down a busy night, and you need that deep onion flavor now, not in an hour. We can cheat a little, but you have to be vigilant! If you need quick caramelized onions, you have to turn the heat up slightly to medium, but here’s the secret: you must babysit them closely. I suggest adding a tiny splash of water or broth every ten minutes.
This steam injection helps soften the onions faster than pure fat can. Keep everything moving constantly! This isn’t the slow simmer; this is active cooking. It cuts the time down significantly, though you might not get that *absolute* deepest mahogany color. Still, it’s a huge flavor upgrade for things like my creamy garlic aioli. For more thoughts on speeding things up without sacrificing too much flavor, check out the tips at Beyond the Bayou Blog.
Using Your Sweet Onions Recipe in Popular Dishes
Now that you have a huge jar of these rich, sweet onions, the real fun begins! Don’t let them just sit around, though they keep beautifully. The real joy of mastering your sweet onions recipe is realizing they instantly elevate almost anything you put them on. I mean, who needs boring food when you have instant savory sweetness on demand?
Gourmet Onion Side Dish and Topping Ideas
These are fantastic hot, right out of the pan, served simply alongside a perfectly grilled steak. But honestly, I use them most often as a serious burger topping idea. Forget ketchup mustard—just pile these on! They also make a fantastic sandwich upgrade, especially on a roast beef or smoky ham sandwich. They add that gourmet touch we talked about without any extra work.

Incorporating Caramelized Onions into Comfort Food Pasta Dishes
Lately, everyone is obsessed with those viral pasta recipes, right? Creamy, cheesy pasta dishes are the ultimate comfort, and guess what makes them transcendental? You guessed it—caramelized onions! Adding a generous spoonful into your sauce base melts right in, adding this deep, almost savory-sweet undertone that white onions just can’t touch. They blend perfectly into my creamy lemon pasta, but they are absolutely essential for anything inspired by French onion soup flavor profiles. Pair them with a sharp cheese dip—like my Jalapeño Popper Dip—or even a rich Gruyere dip like the one found over at Pure Flavor Recipes, and you’ve got an appetizer everyone will ask about!
Storage and Make-Ahead Tips for Caramelized Onions
One of the great things about making a big batch of caramelized onions is that they are a perfect make-ahead staple. Since they take so long, I always double the recipe! Once they are completely cooled—and I mean completely cool, no warm pockets allowed—you can store them in an airtight container in the fridge for up to a week. They taste even better the next day, which is handy.
If you want them to last longer, freezing is the way to go. I portion mine into small freezer bags or ice cube trays, flatten them out, and pop them in the deep freeze for up to three months. A little flavor packet ready to go for the next batch of pasta or the best burger topping you’ve ever had!
Frequently Asked Questions About Caramelized Onions
When you spend an hour coaxing deep flavor out of veggies, you’re bound to have questions! I always find that the little concerns pop up right when you’re about to start the process. Let’s clear up any last-minute worries about making your perfect batch of caramelized onions.
What is the difference between sautéed and caramelized onions?
This is huge! Sautéing is quick cooking. You use medium-high heat to brown the outside fast. You end up with onions that are soft but still have a little bite, and the flavor is still mostly onion-y. Caramelizing, though? That’s a marathon, not a sprint! We use very low heat over a long time to allow the natural sugars inside the onion cells to break down completely. That slow breakdown is what gives you that incredible, complex sweetness and the deep brown color we are chasing.
Can I use sweet onions recipe variations like Vidalia or Walla Walla?
Oh, absolutely! If you have access to beautiful, naturally sweet onions like Vidalia or Walla Walla, they work wonderfully in this sweet onions recipe. Because they start out with higher sugar content, they often give you that deep golden color just a little bit faster than standard yellow onions. I usually skip adding that optional half-teaspoon of sugar if I’m using a sweet variety—they just don’t need the extra nudge toward browning!
How do I prevent my caramelized onions from burning?
Burning happens when the heat is too high for too long, or if the pan gets completely dry. Remember what I always say: low heat is your best friend here. If you see dark black bits forming instead of rich brown bits, turn that burner down immediately! Also, if the bottom of your pan looks totally stripped of moisture, add a tablespoon of water or broth and scrape it up. That moisture acts like a steam bath, preventing scorching and keeping the flavor uniform. It’s all about temperature control and stirring often!
Nutritional Estimate for Caramelized Onions
Since we’re adding butter and oil, these onions aren’t just flavor bombs; they carry some richness too. Keep in mind that these values are estimates based directly on the recipe above using the specified amounts of fat and excluding any optional sugar we might add later. Honestly, the small amount of fat is totally worth the flavor payoff for this gourmet onion side dish!
- Serving Size: 1/4 cup
- Calories: 85
- Fat: 5g (2g Saturated Fat)
- Carbohydrates: 11g (2g Fiber)
- Protein: 1g
- Sugar: 10g
- Sodium: 390mg
This is a truly satisfying component to any meal. Remember, these estimates are based on making two batches as written and then dividing that total yield into four servings. Always factor in what you add later, like that rich Gruyere you might put in a dip!
Share Your Perfect Caramelized Onions Creation
Well, that’s it! You’ve graduated from simple onions to a foundational flavor powerhouse. Now you have the skill to make the best savory-sweet addition to pretty much anything you cook. I genuinely hope you find yourself making big batches of caramelized onions regularly.
I live to hear how these little techniques work for you in your kitchen! If you tried this slow-cooking method and loved how tender they turned out, please drop a rating for the recipe below. Seriously, your feedback helps others—like me—know we’re hitting that perfect harmony. Let me know in the comments if you used them for a creamy dip or piled them high on a burger! If you want to know more about the philosophy behind why I develop recipes this way, you can always check out the Delish Symphony story. Go on, get cooking, and let’s make something wonderful together!
PrintThe Ultimate Guide: How to Caramelize Onions for Deep Flavor
Learn the best way to caramelize onions slowly to draw out their natural sugars, creating a sweet, rich, and tender topping perfect for dips, burgers, and pasta dishes.
- Prep Time: 10 min
- Cook Time: 60 min
- Total Time: 70 min
- Yield: About 1.5 cups 1x
- Category: Side Dish
- Method: Stovetop Slow Cooking
- Cuisine: American
- Diet: Vegetarian
Ingredients
- 3 large yellow onions, thinly sliced
- 2 tablespoons unsalted butter
- 1 tablespoon olive oil
- 1 teaspoon salt
- 1/2 teaspoon sugar (optional, for faster browning)
Instructions
- Slice the onions thinly and uniformly. Uniformity helps them cook evenly.
- Place a large, heavy-bottomed skillet over medium-low heat. Add the butter and olive oil.
- Once the butter melts, add the sliced onions and the salt. Stir to coat them completely in the fat.
- Cook the onions slowly, stirring every 5 to 10 minutes. This initial stage should take about 15 minutes until the onions soften and become translucent.
- Reduce the heat to low. Continue cooking, stirring every 5 minutes. The goal is slow cooking to develop sweetness, not quick burning. If the pan seems too dry, add one tablespoon of water or broth to scrape up any brown bits (fond) from the bottom.
- After 30 to 45 minutes, the onions will begin to turn golden brown. If you are using sugar, add it now.
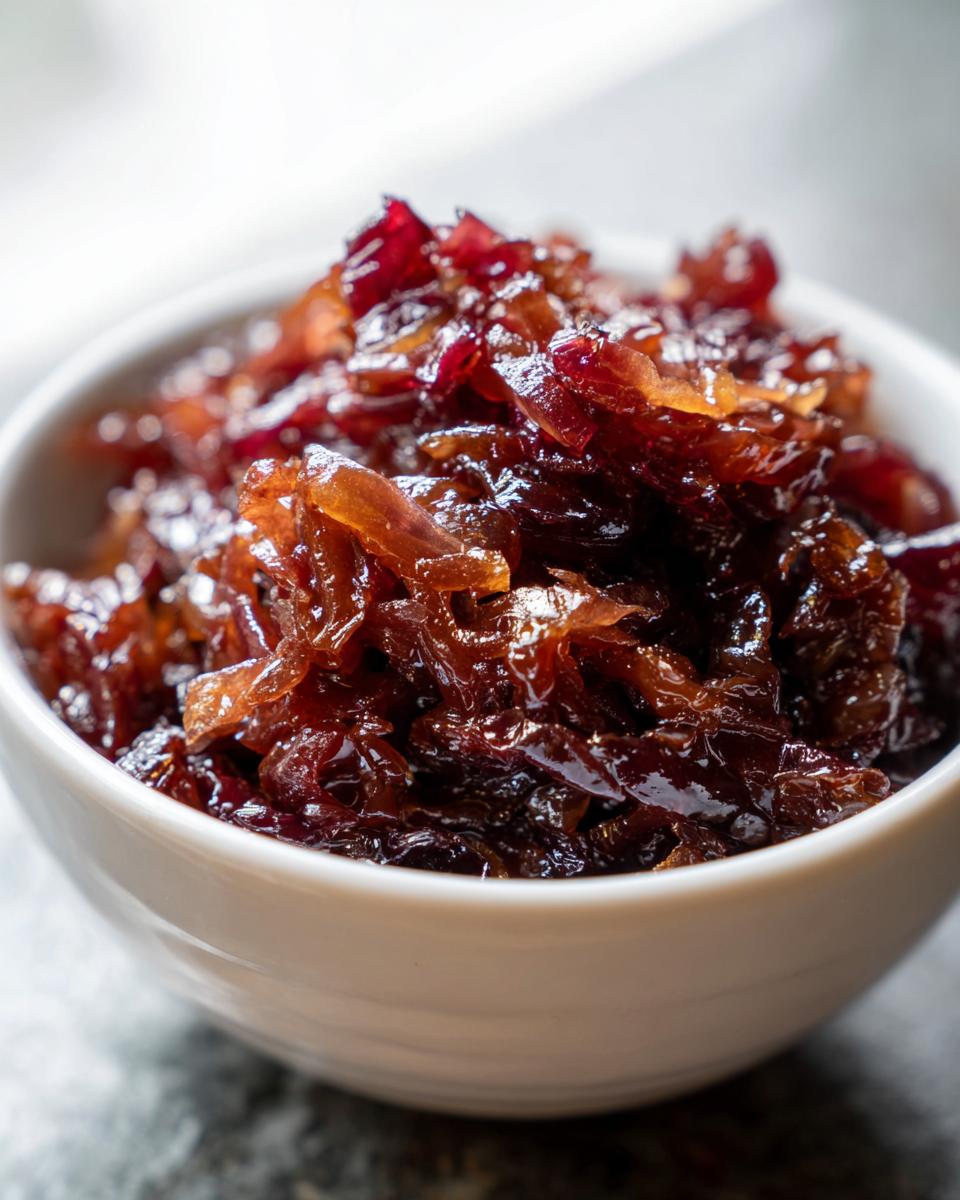
- Continue cooking, stirring more frequently as they darken, for another 15 to 30 minutes, until the onions reach a deep, rich, mahogany brown color and are very soft and jammy. Total cooking time is usually 45 to 75 minutes depending on the heat level you maintain.
- Remove from heat and use immediately as a gourmet onion side dish or topping idea.
Notes
- For a faster method, use medium heat and add a splash of water or broth every 10 minutes to prevent sticking and encourage steaming, which speeds up softening.
- These caramelized onions freeze well. Cool them completely, place them in an airtight container, and freeze for up to three months.
- Use these sweet onions as a sandwich upgrade or a burger topping idea.
Nutrition
- Serving Size: 1/4 cup
- Calories: 85
- Sugar: 10
- Sodium: 390
- Fat: 5
- Saturated Fat: 2
- Unsaturated Fat: 3
- Trans Fat: 0
- Carbohydrates: 11
- Fiber: 2
- Protein: 1
- Cholesterol: 6