
The holidays approach, and suddenly every home cook feels the pressure. You’ve got the turkey seasoned just right, the gravy is simmering, but the centerpiece—the absolute showstopper—needs to be perfect. For me, that centerpiece has always been the stuffing. If it’s dry, the whole symphony crashes! That’s why, when I moved away from debugging complex code in my old IT job to focus purely on making food that works for real life, this recipe was the first one I perfected.
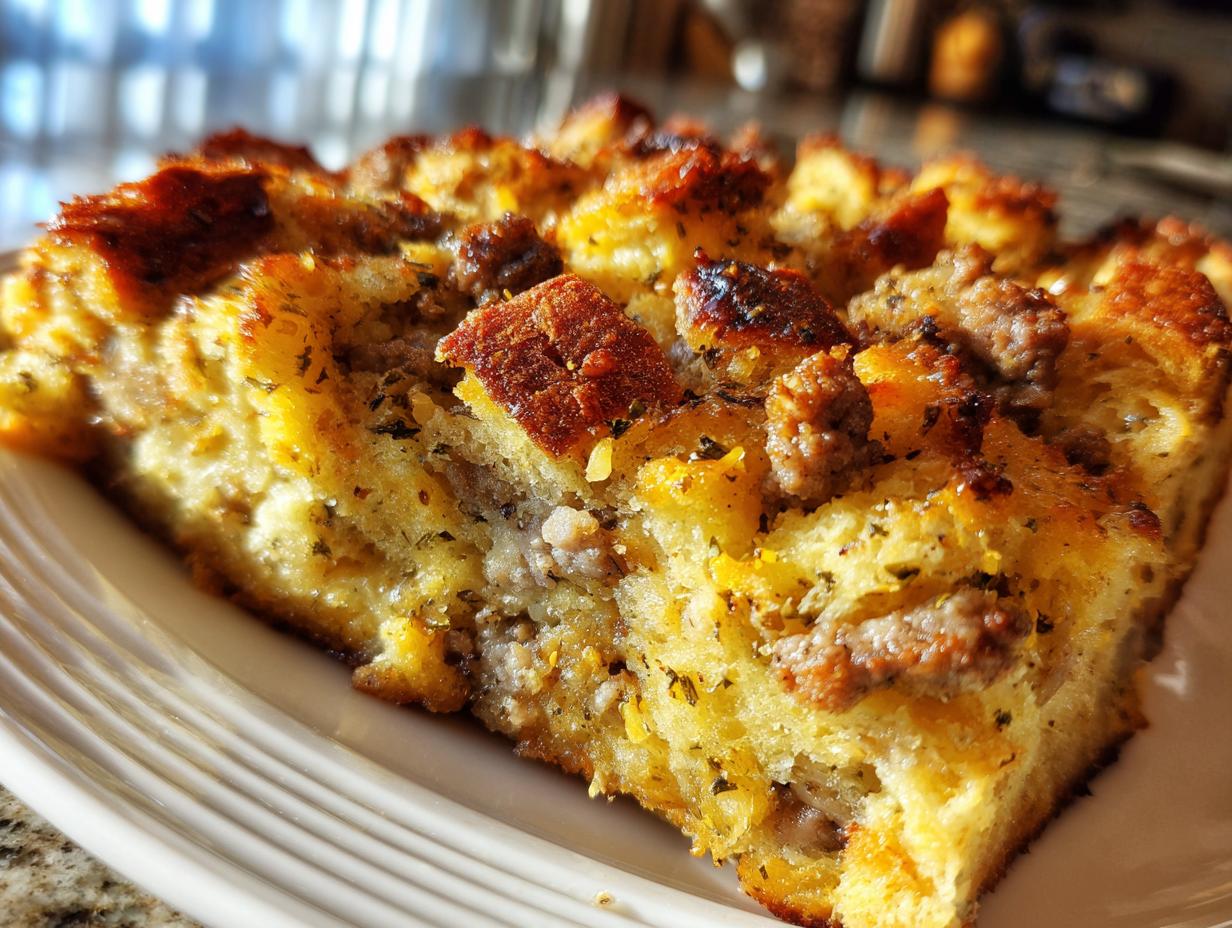
I’m Michael Carter, and I promise you, you don’t need complicated techniques to achieve that ultimate texture: deeply moist and savory on the inside, and beautifully golden and crispy on top. Forget those dusty boxes! What you need is structure and flavor. This **Classic Homemade Sausage Stuffing Recipe** is the result of years of testing in my own kitchen to ensure it’s foolproof, allowing you to enjoy the process instead of worrying about the result. It’s hearty, it’s flavorful, and it sings on the holiday table.
- Why This Homemade Stuffing Recipe is the Best Holiday Side Dish
- Ingredients for Classic Homemade Stuffing Recipe
- Easy Stuffing Directions for Foolproof Holiday Sides
- Tips for Success with Traditional Bread Stuffing
- Serving Suggestions for This Savory Herb Stuffing
- Storage and Reheating Instructions for Leftover Stuffing
- Frequently Asked Questions About Classic Thanksgiving Stuffing
- Estimated Nutritional Data for This Stuffing
- Share Your Symphony: Rate This Recipe
Why This Homemade Stuffing Recipe is the Best Holiday Side Dish
Listen, I spent years dealing with overly logical systems in my old career, and I’ll tell you a hard truth: boxed stuffing is a logical failure. It’s usually grainy, tastes like salty cardboard, and dries out faster than you can say ‘Happy Thanksgiving.’ We are aiming higher. This recipe is designed specifically so you can rely on it as the **Best Holiday Side Dish** year after year. If you’re looking for something reliable that works right alongside your weeknight dinners but tastes like a million bucks, this is it.
By incorporating savory bulk pork sausage, we skip the need for endless seasoning adjustments—the sausage brings salt, fat, and deep pork flavor right into the mix. Add that to the blend of fresh sage, thyme, and rosemary, and you get a complex, aromatic profile that simply can’t be replicated by dried flakes in a pouch. When you taste it, you’ll understand why we skip all the shortcuts.
Achieving Perfect Texture: Moist and Crispy Stuffing
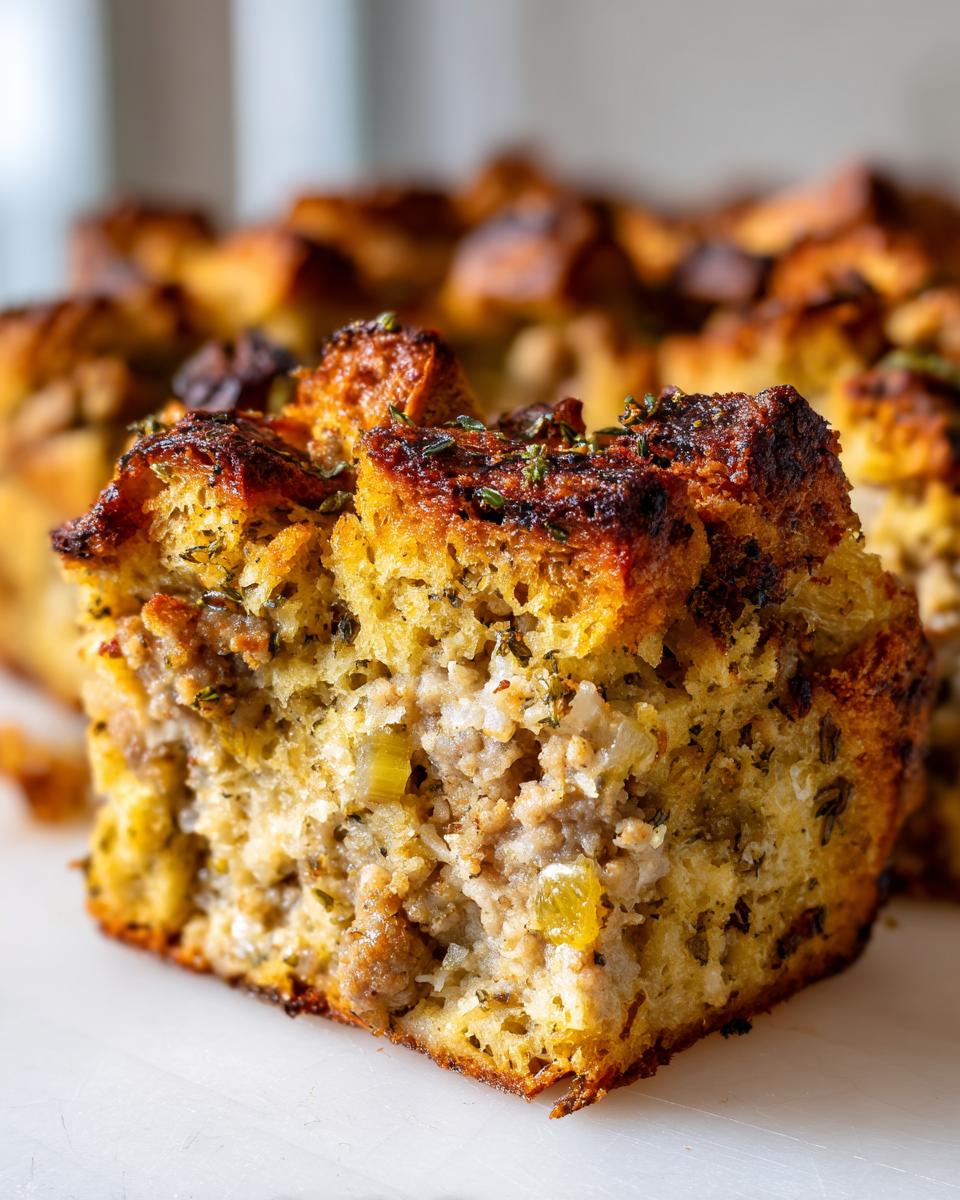
The secret to that magic contrast—the **Moist and Crispy Stuffing** we all crave—lies in two simple things Mike checks every time. First: the liquid ratio. The two eggs we beat in act as a binder, holding onto the two cups of broth just long enough to steam the center while the top layer browns perfectly in the oven. Second, the pan matters! Baking in a standard 9×13 dish gives you maximum surface area for that crunchy top layer. My one non-negotiable tip? Always use bread that’s at least a day old. Fresh bread just absorbs too much liquid too fast and turns mushy. Day-old cubes hold their shape beautifully!
Ingredients for Classic Homemade Stuffing Recipe
Alright, let’s get down to brass tacks. You can’t make a symphony without the right instruments, right? This list is straightforward because I don’t want you hunting specialty grocery stores. Everything here should be easy to grab on your regular run. Remember, good ingredients make the process simple later on. If you’re looking for a great savory dish once the holidays are over, you can check out my easy breakfast recipes, but for now, focus on this.
Here’s exactly what you need for this show-stopping batch of **Homemade Stuffing Recipe** that easily feeds eight hungry people:
- 1 pound bulk pork sausage (Go for a mild or sweet variety, unless you really love heat!)
- 1 large yellow onion, chopped
- 2 celery stalks, chopped
- 1/2 cup (1 stick) unsalted butter (Don’t even look at the margarine tub, trust me on the butter!)
- 1 tablespoon fresh sage, chopped (this is crucial for that authentic holiday smell)
- 1 tablespoon fresh thyme leaves
- 1 teaspoon fresh rosemary, chopped
- 1 teaspoon salt
- 1/2 teaspoon black pepper
- 1 (14-ounce) bag dried bread cubes (Again, day-old is best, but this measurement works great with the bagged kind if you cube it up yourself.)
- 2 large eggs, lightly beaten
- 2 cups chicken broth, low sodium (I always use low sodium so I can control the salt level myself.)
Easy Stuffing Directions for Foolproof Holiday Sides
This is where the magic truly happens, friends! If you follow these **Easy Stuffing Directions**, I guarantee you’ll never want to touch a box again. We’re moving through this logically, step-by-step, so we build flavor complexity without adding complexity to your cooking time. First things first: get that oven preheated to 350 degrees F, and grease up your 9×13 dish—unless you’re making those fun stuffing balls we discuss later! Don’t skip that greasing, or you’ll be cursing me when you try to lift out that beautiful golden crust!
We start with the flavor base: the sausage. Brown that meat up nicely in a large skillet, breaking it apart like you’re crumbling earth in the garden. Drain off that extra grease—we want flavor, but we don’t want an oil slick! Set the sausage aside for a moment. That skillet is still warm and full of savory flavor, which is exactly what we want next.
Sautéing Aromatics and Blooming the Herbs
Now, melt that stick of butter right in that warm skillet. Toss in your chopped onion and celery. You need to let these cook until they are nice and soft—think of it like coaxing them out of their shells. That usually takes about 5 to 7 minutes. We aren’t looking for caramelization here, just tenderness so they melt right into the final product. Once they are soft, bring in the big guns: your fresh sage, thyme, and rosemary. Here’s a quick Mike tip for E-E-A-T: only cook the herbs for about 1 minute. If you cook them longer, they burn, and burnt herbs taste bitter. We want to *bloom* them—just long enough so the whole kitchen smells like Thanksgiving morning. Then, you toss in your salt and pepper. That’s it for the stove work.
Combining Wet and Dry Components
Time to mix! Grab your biggest bowl. You’re combining all those beautiful dried bread cubes—the foundation of our **Traditional Bread Stuffing**—with that cooked sausage you put aside earlier. Pour that warm, herby, buttery vegetable mix right over the bread and toss it gently. I mean gentle! We want every cube kissed by the butter, but we absolutely do not want to smash them down. If you compact the bread now, you’re headed straight for a dense, heavy block later. Resist the urge to overmix!
In a separate, smaller bowl, whisk those two eggs vigorously with the 2 cups of low-sodium chicken broth. Whisking them separately ensures the yolks are fully incorporated before they hit the bread, which helps the whole mixture bind evenly later. Pour this wet mix over the bread and sausage mixture. Again, toss it lightly until everything looks evenly moistened. It should feel fluffy, not soggy. Transfer that light mixture into your prepared 9×13 dish and smooth it out a bit. It bakes for about 35 to 45 minutes until that top layer turns that gorgeous, deep golden color. Do not forget the final, critical step: let the **stuffing** rest for 10 minutes when it comes out! That quick rest lets the juices settle perfectly before serving.
If you’re looking for quick appetizer versions, I’ve got tips on turning this into stuffing balls later on, but for now, enjoy this classic casserole experience!
Tips for Success with Traditional Bread Stuffing
Okay, we’ve got the core recipe down, but honestly, the real success with holiday cooking often comes down to smart timing and small adjustments. I’ve streamlined my own workflow over the years, moving away from constant kitchen worrying and toward efficient prep. This **Traditional Bread Stuffing** recipe is a workhorse, but knowing these tricks for making ahead or changing the shape makes it truly essential for any busy cook. I use techniques like these so I can spend more time actually enjoying my guests, rather than being chained to the stove. If you need a quick dipping sauce connection for something else later, check out my creamy garlic dip—it’s amazing!
Make Ahead Stuffing Tips for Busy Cooks
This is the tip that saved my bacon during my third Thanksgiving rush when I was still trying to juggle a full-time IT schedule. You can absolutely assemble this whole **stuffing** mixture ahead of time! Just complete all the steps right up to mixing in the broth and eggs (Step 6). Cover the dish tightly with plastic wrap and stash it in the fridge for up to 24 hours.
Here’s the catch, though, and pay close attention: When you pull it out later on Thanksgiving morning or the night before you bake it, it will look really firm and dry. Don’t panic and dump in a ton more liquid! First, let the dish sit on the counter for about 30 minutes so it can start to come toward room temperature. Then, add an extra 1/4 cup of broth—that should be enough to rehydrate things a tiny bit without flooding the bread. Slide it into the oven at 350 degrees F as directed. Planning ahead like this is one of my favorite **Make Ahead Stuffing Tips**!
Turning This Stuffing into Stuffing Balls Appetizer
If you’re having a grazing table or just want a fun little bite that travels well, transforming this recipe into **Stuffing Balls Appetizer** is such a smart move. Once you have that fully mixed, moist stuffing mixture ready (after Step 6), stop right there. You don’t need the 9×13 dish for this version.
Instead, take about a tablespoon of the mixture at a time and roll it firmly between your palms to form little balls. They should be a manageable 1.5 inches wide. Place these sausage stuffing balls onto a parchment-lined baking sheet—this prevents sticking, which is crucial when you’re rolling them tight. Since they are smaller and completely exposed, they cook faster and get crispier on all sides. Pop them into a slightly hotter oven, 375 degrees F, and bake them for just 20 to 25 minutes. They’ll be golden, crispy perfection, and ready to serve as amazing individual bites!
Serving Suggestions for This Savory Herb Stuffing
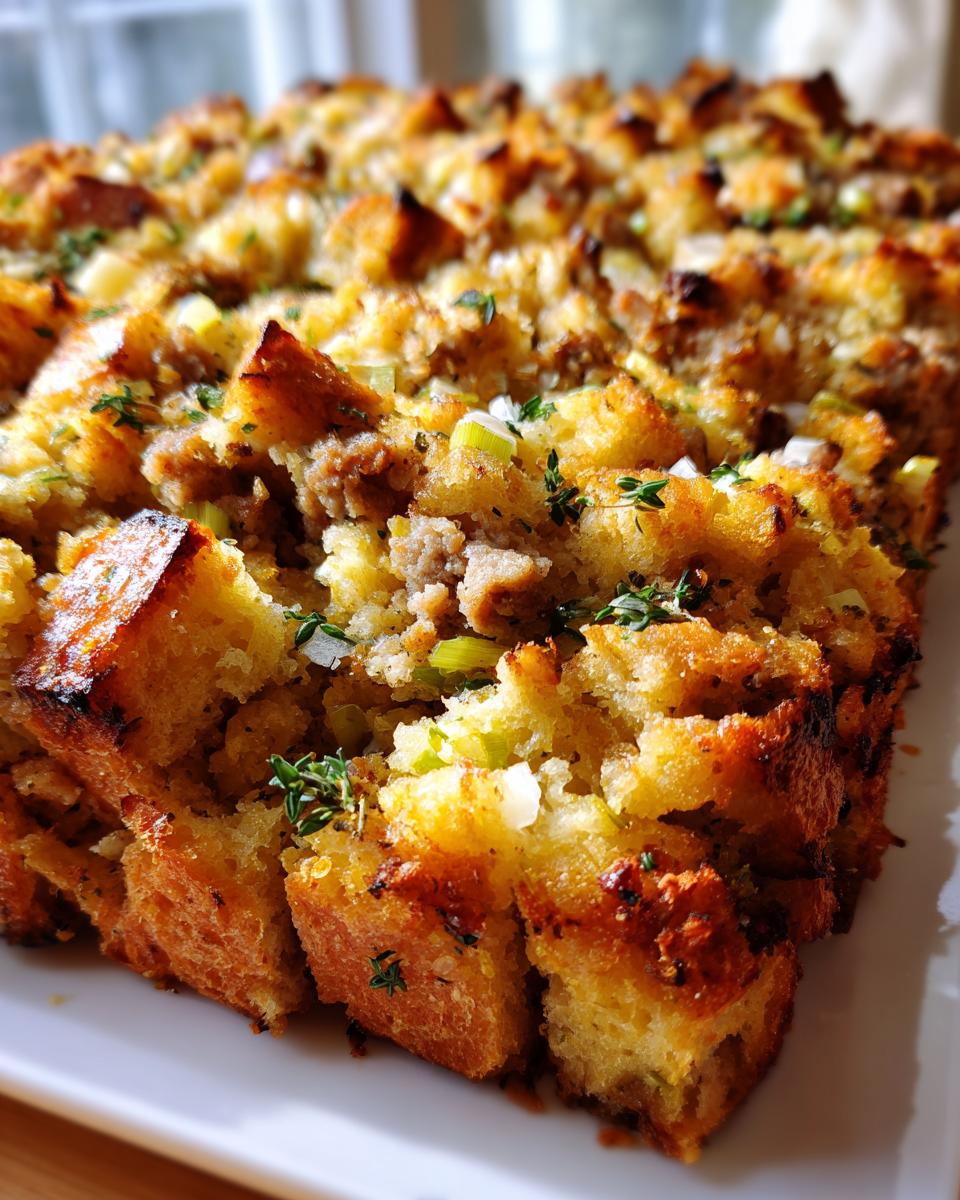
Honestly, this **Savory Herb Stuffing** isn’t just a side dish; it’s an ego boost for the entire meal! Because we cooked the sausage right into the base and used those robust herbs like sage and rosemary, this **stuffing** holds its own next to almost anything. It’s completely earned its spot as a top-tier **Turkey Side Dish Recipe**.
Of course, if you’ve got a perfectly roasted turkey ready to go, there’s no substitute for tradition. The butter and savory meat flavors in this dish complement the mild flavor of poultry beautifully. But I also love shaking things up a bit when I’m not serving turkey. This stuffing is unbelievably good alongside baked ham—the sweetness of the ham contrasts perfectly with the savory herbs.
If you’re looking for a weeknight application for this flavor profile, I often whip up a big batch of my one-pot lemon chicken orzo during the off-season. I’ll take a scoop of this stuffing mixture, mix it right into the orzo before the liquid goes in, and it gives the whole dish an unbelievable savory depth without the roasting time. See? It’s versatile! Don’t let this recipe live on the shelf just for Thanksgiving. It’s just too good!
Storage and Reheating Instructions for Leftover Stuffing
The best outcome of making an amazing **stuffing** recipe like this is having leftovers! I rarely make a small batch because, honestly, eating this the day after Thanksgiving is almost better than the main event. But we need to treat these leftovers right, or you’ll lose that desirable crisp top we worked so hard to achieve.
First, let’s talk storage safety. If you have leftovers, get them cooled quickly. Don’t let that big dish sit on the counter for hours while you wrap gifts or watch football—that’s just asking for trouble. Once the dish cools down enough that you can handle it, cover it tightly with plastic wrap or transfer the stuffing to an airtight container. This **Homemade Stuffing Recipe** will keep safely in the refrigerator for about three to four days. Any longer than that, and you should probably freeze it; it keeps beautifully frozen for about two months!
Now, how do we bring back that glorious texture? This is Michael’s rule: Never, ever reheat a large portion of stuffing in the microwave. The microwave is great for warming up soup, but it will steam your beautiful stuffing into dense, wet mush. You’ll lose every bit of crispness.
The oven is your best friend here. When you want to reheat, grab the amount you need and spread it out on a baking sheet. Scatter just a tablespoon or two of chicken broth or even water over the top. Yes, it sounds counterintuitive since we want crispiness, but this steam helps rehydrate the interior without soaking the top crust! Pop it into a 350-degree oven for about 15 minutes. If you want the top extra crispy again, blast it under the broiler for the last two minutes, but stand right there and watch it—those herbs can go from golden to black pretty fast!
If you only have a small single serving, the microwave is acceptable, but here’s the trick to avoid the soggy texture: Put the portion in a microwave-safe bowl, cover it loosely with a damp paper towel, and heat it in 30-second bursts. The steam from the towel keeps the interior hydrated, and since the portion is small, it heats through fast enough that it doesn’t turn completely saturated. It might not hit that perfect oven crisp, but it beats sad, cold leftovers!
Frequently Asked Questions About Classic Thanksgiving Stuffing
Whenever I post this recipe online, people have great questions about how to tweak it for their own kitchen or dietary needs. That’s the beauty of good home cooking—it’s a conversation! I’ve pulled together some of the most common things I hear to make sure your experience making this savory side is perfect. If you need a delicious dessert to round out the meal after this amazing stuffing, take a look at my classic apple crisp recipe. It’s simple comfort food!
Can I use cornbread instead of regular bread for this stuffing?
Yes, you absolutely can, and it gives you a wonderful, rustic texture! However, you have to know that cornbread is much denser and absorbs liquid differently than standard white or sourdough bread cubes. If you decide to venture into **Cornbread Stuffing Variations**, don’t swap cups for cups straight away. Cornbread is heavier, so you might end up with something a little too cakey if you use the exact same amount of broth.
My general advice for a half-and-half mix is to start with 75% of the regular bread amount and substitute in 25% lightly toasted cornbread crumbs. Even better, if you are using all cornbread, I’d suggest reducing the initial total broth added by about 1/2 cup and then adding the remaining liquid liquid (eggs and broth) in smaller increments when mixing, just until it feels right. You want it moist, not swimming!
What is the difference between stuffing and dressing?
This is an old debate that gets everyone going around the holidays! Technically, there is zero difference in the ingredients used for the casserole mix itself. The difference is purely geographical and based on where you cook it. If you bake the seasoned bread mixture inside the cavity of the turkey or chicken, it is called **stuffing**. If you bake that exact same mixture in a separate casserole dish (like the 9×13 dish we use here), it is called **dressing**.
I always recommend making dressing, which is what we are doing here, for two big reasons: consistency and safety. Stuffing baked inside the bird is notoriously hard to cook fully—it needs to hit 165 degrees F in the center, which often means overcooking the bird itself just to get the bread done. Plus, dressing gets that delicious crispy crust on top, which, as we know, is the best part of the whole **Thanksgiving Stuffing** experience!
Why does my finished stuffing taste too salty?
That is almost always down to the sausage or the broth, my friend. Many bulk pork sausages come heavily seasoned, and that salt concentrates quickly when baked. If you use regular, full-sodium chicken broth on top of that, you end up with a result that bites back! For next time, the fix is simple: always opt for low-sodium broth, which allows you to control the seasoning when you add the salt and pepper in Step 4. If it tastes a little bland before it goes into the oven, that’s how it’s supposed to be—it will concentrate the flavor as it bakes and the moisture evaporates.
Estimated Nutritional Data for This Stuffing
Now, I know many of you watch what you eat, even during the holidays. I know how important it is to have a clear picture of what you’re serving up. Since this **Homemade Stuffing Recipe** includes savory sausage and butter, it definitely leans toward comforting richness, but it still packs a good amount of protein!
Remember, since I am developing these practical recipes in my own kitchen and not sending them off to a certified lab, these numbers are my own estimates based on the ingredient averages I use. If you substitute a leaner sausage or use less butter, your numbers will shift! Think of this as a very helpful guideline, not a strict contract.
Based on the ingredient list provided, here is what you can generally expect for one standard serving (about 1 cup) of this Classic Homemade Sausage Stuffing:
- Serving Size: 1 cup
- Calories: 380
- Total Fat: 22g (Hopefully, most of that is the good kind!)
- Saturated Fat: 8g
- Trans Fat: 0g
- Cholesterol: 65mg
- Sodium: 550mg (This is why I push for low-sodium broth!)
- Carbohydrates: 35g
- Fiber: 2g
- Sugar: 2g (Mostly naturally occurring from the vegetables.)
- Protein: 12g
I always encourage my readers to focus on the overall balance. This savory side dish is satisfying; the protein from the sausage helps keep you full, and the complex carbs from the bread provide energy for all that holiday cheer. Enjoy it without guilt, knowing you made it fresh and clean from scratch!
Share Your Symphony: Rate This Recipe
Well, we’ve reached the final measure of our holiday symphony! Now that you’ve mastered this savory, incredibly moist **stuffing** recipe—perhaps you even added that little kick with the sausage or shaped them into those handy stuffing balls—I truly want to know how it turned out on your table.
Cooking here at Delish Symphony is all about collaboration. I spend hours making sure the notes in my kitchen harmonize perfectly, but the real test comes when you recreate this magic in yours. Did you manage to get that perfect crispy crust? Did the fresh sage really fill your kitchen with that incredible aroma?
Please, take a moment and let me know! Use the star rating system below (Five stars means it stole the entire show, right?). And if you have a second, leave a comment detailing your experience. Tell me if you tried any fun variations—maybe you added cranberries or substituted the sausage for something else! I read every single comment, and your feedback helps me keep developing recipes that are genuinely foolproof for home cooks like us.
And if you snapped a photo of that glistening, golden casserole dish sitting proudly next to the turkey, I would absolutely love to see it! Tag me on social media so I can share your success story. Seeing your results, knowing this recipe brought comfort and flavor to your family celebration, honestly means the world to me. Thank you for trusting me with your holiday table. If you’re ready for something sweet after all that savory goodness, be sure to check out my delicious dessert recipes for a perfect finale!
PrintClassic Homemade Sausage Stuffing Recipe for a Moist and Crispy Holiday Side

Follow this foolproof recipe for classic homemade stuffing featuring savory sausage and fresh herbs. You will achieve a perfectly moist interior and a golden, crispy top, making this the best holiday side dish for your table.
- Prep Time: 20 min
- Cook Time: 45 min
- Total Time: 65 min
- Yield: 8 servings 1x
- Category: Side Dish
- Method: Baking
- Cuisine: American
- Diet: Vegetarian
Ingredients
- 1 pound bulk pork sausage
- 1 large yellow onion, chopped
- 2 celery stalks, chopped
- 1/2 cup (1 stick) unsalted butter
- 1 tablespoon fresh sage, chopped
- 1 tablespoon fresh thyme leaves
- 1 teaspoon fresh rosemary, chopped
- 1 teaspoon salt
- 1/2 teaspoon black pepper
- 1 (14-ounce) bag dried bread cubes (use day-old bread for best results)
- 2 large eggs, lightly beaten
- 2 cups chicken broth, low sodium
Instructions
- Preheat your oven to 350 degrees F. Lightly grease a 9×13 inch baking dish.
- In a large skillet over medium heat, cook the sausage, breaking it up with a spoon, until it is fully browned. Drain off excess grease and set the sausage aside.
- In the same skillet, melt the butter over medium heat. Add the chopped onion and celery. Cook until the vegetables soften, about 5 to 7 minutes.
- Add the fresh sage, thyme, rosemary, salt, and pepper to the skillet. Cook for 1 minute until the herbs are fragrant.
- In a very large bowl, combine the dried bread cubes and the cooked sausage. Pour the butter and vegetable mixture over the bread and toss gently to coat everything evenly.
- In a separate small bowl, whisk together the beaten eggs and the chicken broth. Pour this liquid mixture over the bread mixture. Toss gently until the bread is evenly moistened. Do not overmix; you want the stuffing to remain light.
- Transfer the stuffing mixture to the prepared baking dish. Spread it into an even layer.
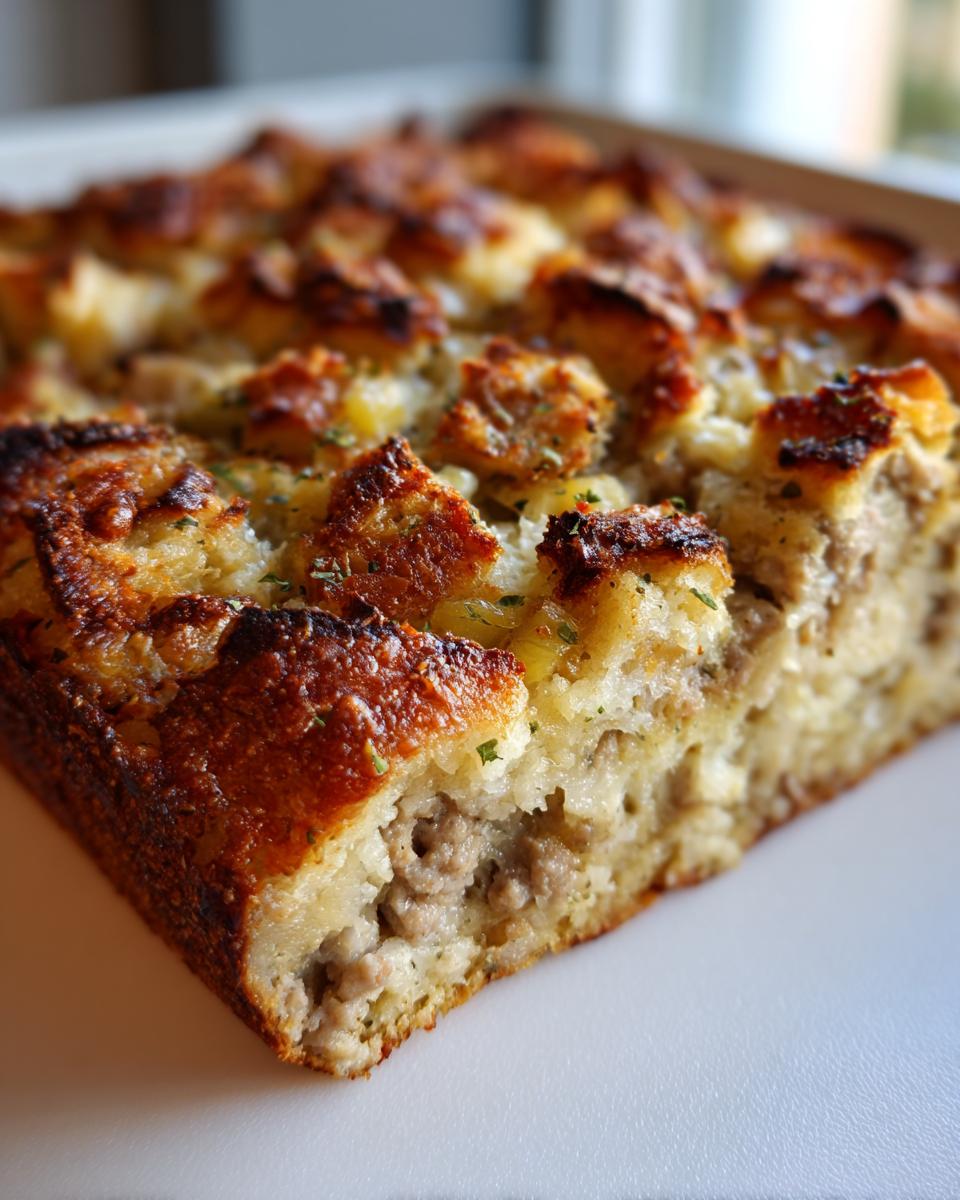
- Bake for 35 to 45 minutes, or until the top is golden brown and crispy and the center is heated through.
- Let the stuffing rest for 10 minutes before you serve it.
Notes
- For make-ahead stuffing: Prepare the mixture completely (up to step 6) but do not bake. Cover the dish tightly and refrigerate for up to 24 hours. When ready to bake, let it sit at room temperature for 30 minutes, then add 1/4 cup more broth if it looks dry, and bake as directed.
- To make stuffing balls: After mixing (step 6), form the mixture into small balls (about 1.5 inches wide). Place them on a baking sheet lined with parchment paper. Bake at 375 degrees F for 20 to 25 minutes until golden brown.
- If you prefer a richer flavor, substitute half of the chicken broth with turkey broth.
Nutrition
- Serving Size: 1 cup
- Calories: 380
- Sugar: 2
- Sodium: 550
- Fat: 22
- Saturated Fat: 8
- Unsaturated Fat: 14
- Trans Fat: 0
- Carbohydrates: 35
- Fiber: 2
- Protein: 12
- Cholesterol: 65