
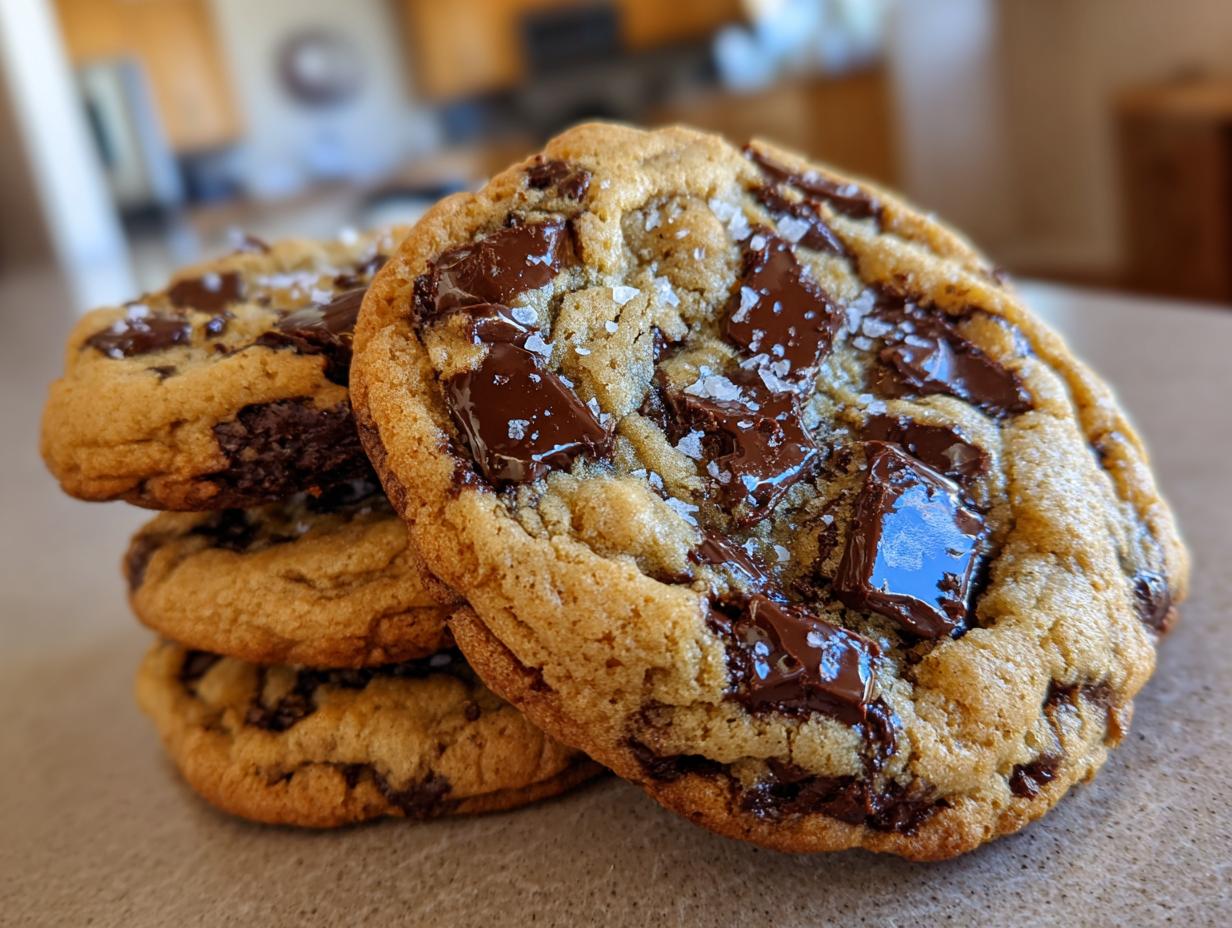
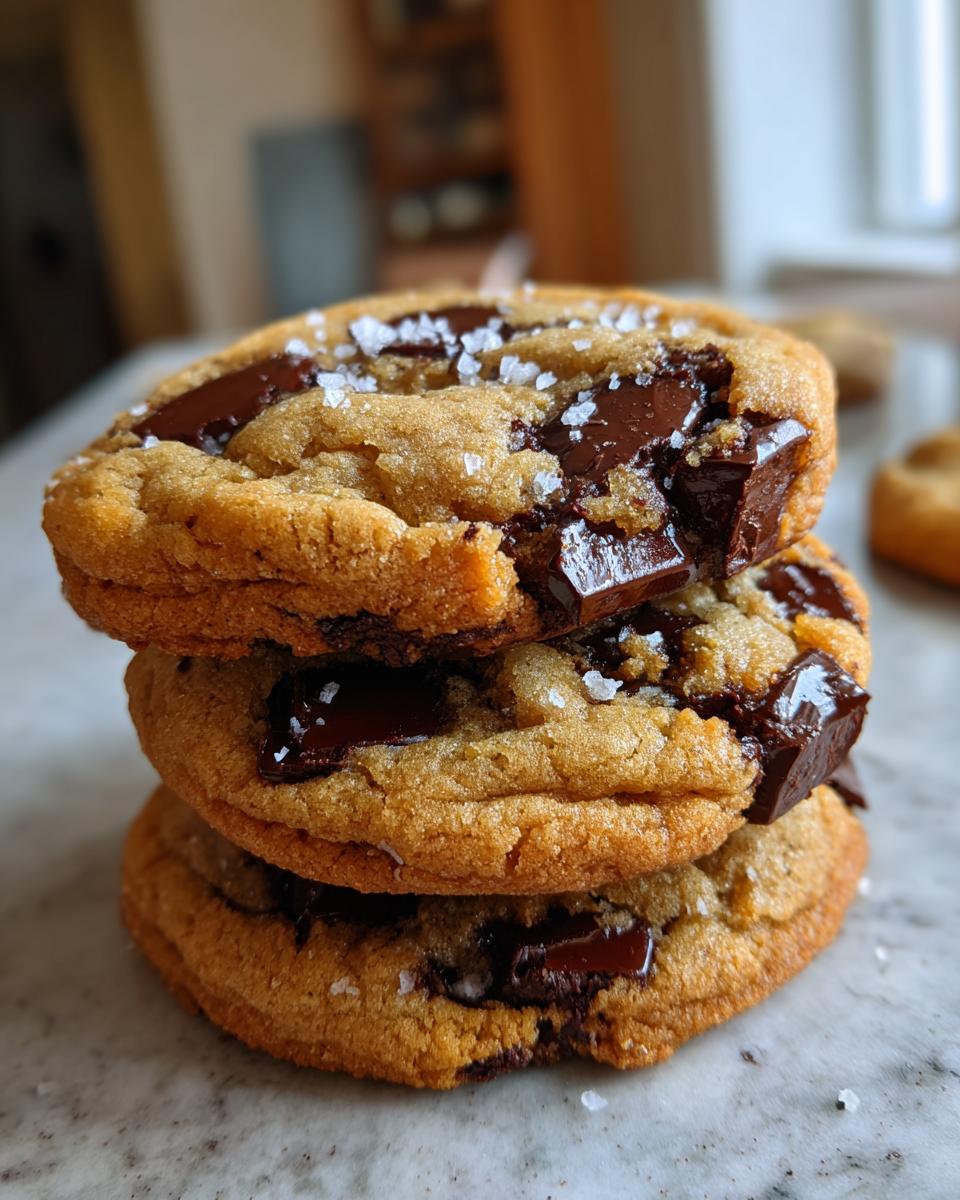
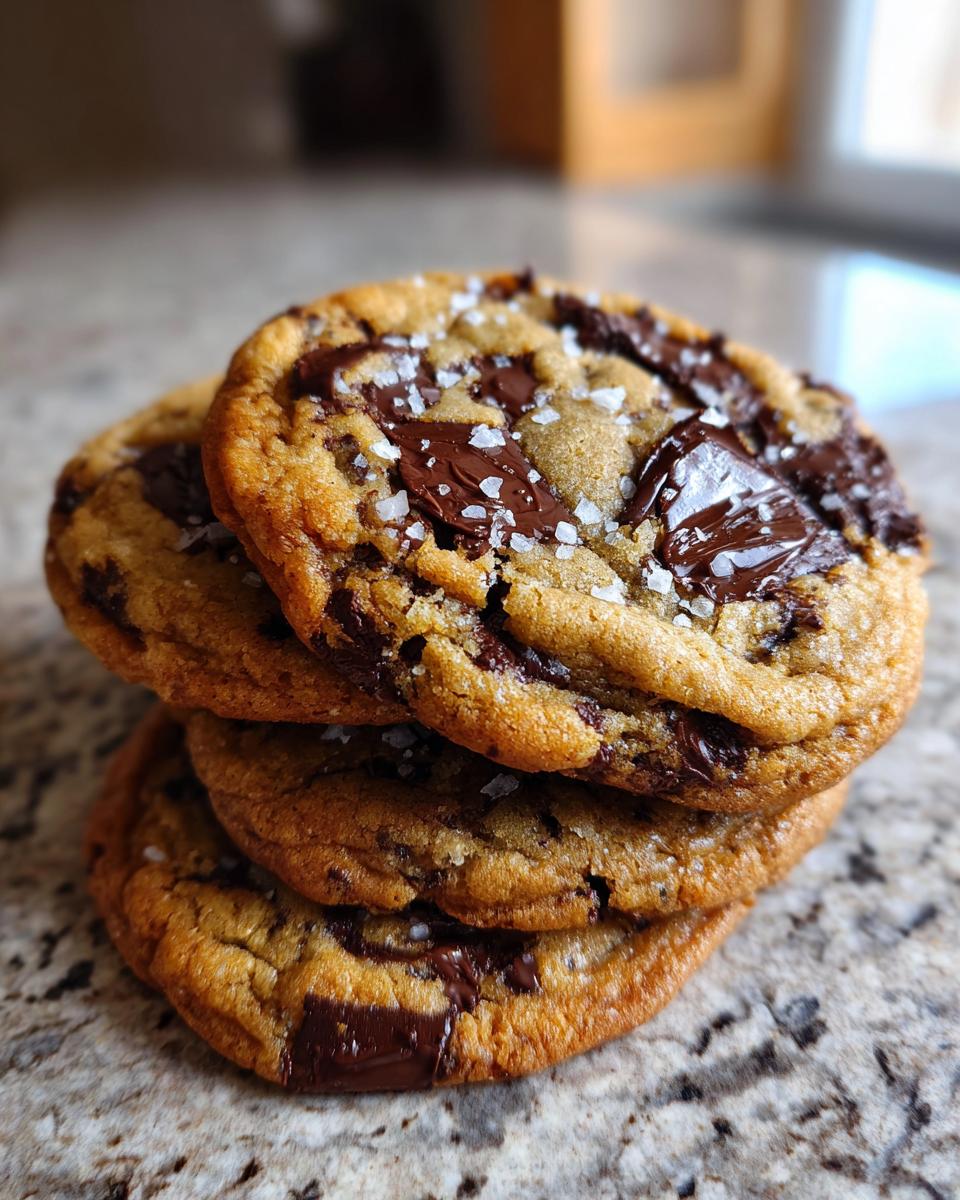
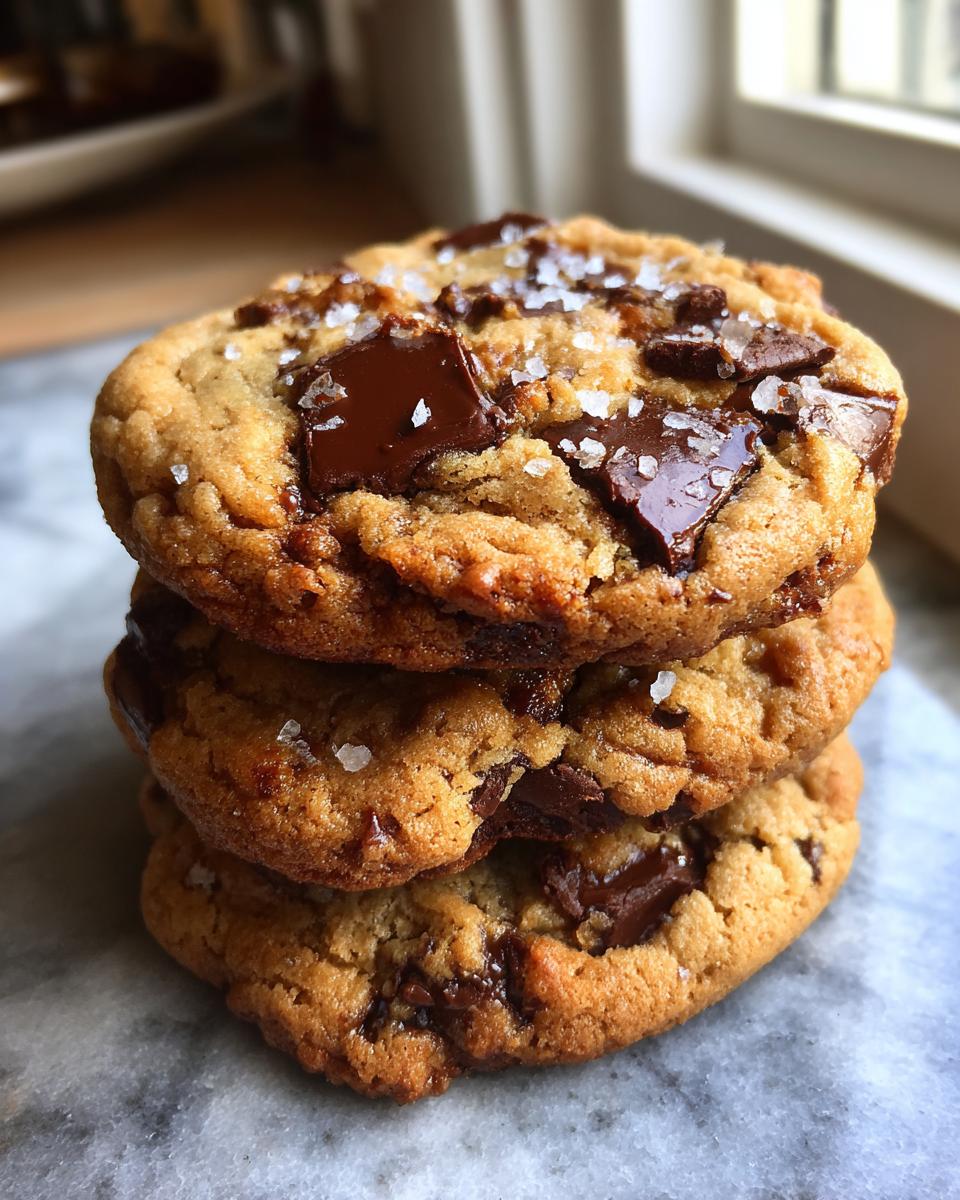
Look, we all love a classic chocolate chip cookie, right? It’s the ultimate comfort food, a staple of home baking. But sometimes, you just need to take that classic, dust it off, and give it a serious flavor upgrade. That’s exactly what happened when I started testing batches for what became the ultimate brown butter chocolate chip cookies. Forget everything you thought you knew about simple swaps; browning the butter changes the entire game, giving you these incredible, chewy centers kissed with deep, nutty, toffee notes. Here at Delish Symphony, my goal, as Michael Carter, is to bring you recipes that are foolproof and packed with flavor, and these cookies? They are proof that a little extra effort yields phenomenal results. If you’re looking for more foundational cookie love, check out my ultimate cookie recipe collection!
- Why You Need These Brown Butter Chocolate Chip Cookies in Your Life
- Gathering Ingredients for Ultimate Brown Butter Chocolate Chip Cookies
- Mastering How to Brown Butter for Cookies
- Step-by-Step Instructions for Perfect Brown Butter Chocolate Chip Cookies
- Tips for the Best Brown Butter Chocolate Chip Cookies Every Time
- Storage and Making Ahead for Brown Butter Chocolate Chip Cookies
- Frequently Asked Questions About These Cookies
- Estimated Nutritional Data for Brown Butter Chocolate Chip Cookies
- Share Your Brown Butter Chocolate Chip Cookies Experience
Why You Need These Brown Butter Chocolate Chip Cookies in Your Life
Honestly, sometimes I bake just for the smell, but these cookies are worth it for so much more than just the aroma! Browning the butter isn’t just a step; it’s a transformation. It takes regular cookies and shoots them straight into gourmet territory. If you are tired of flat, one-note cookies, you absolutely need this recipe for your rotation.
- That deep, rich, almost caramel scent while they bake is intoxicating.
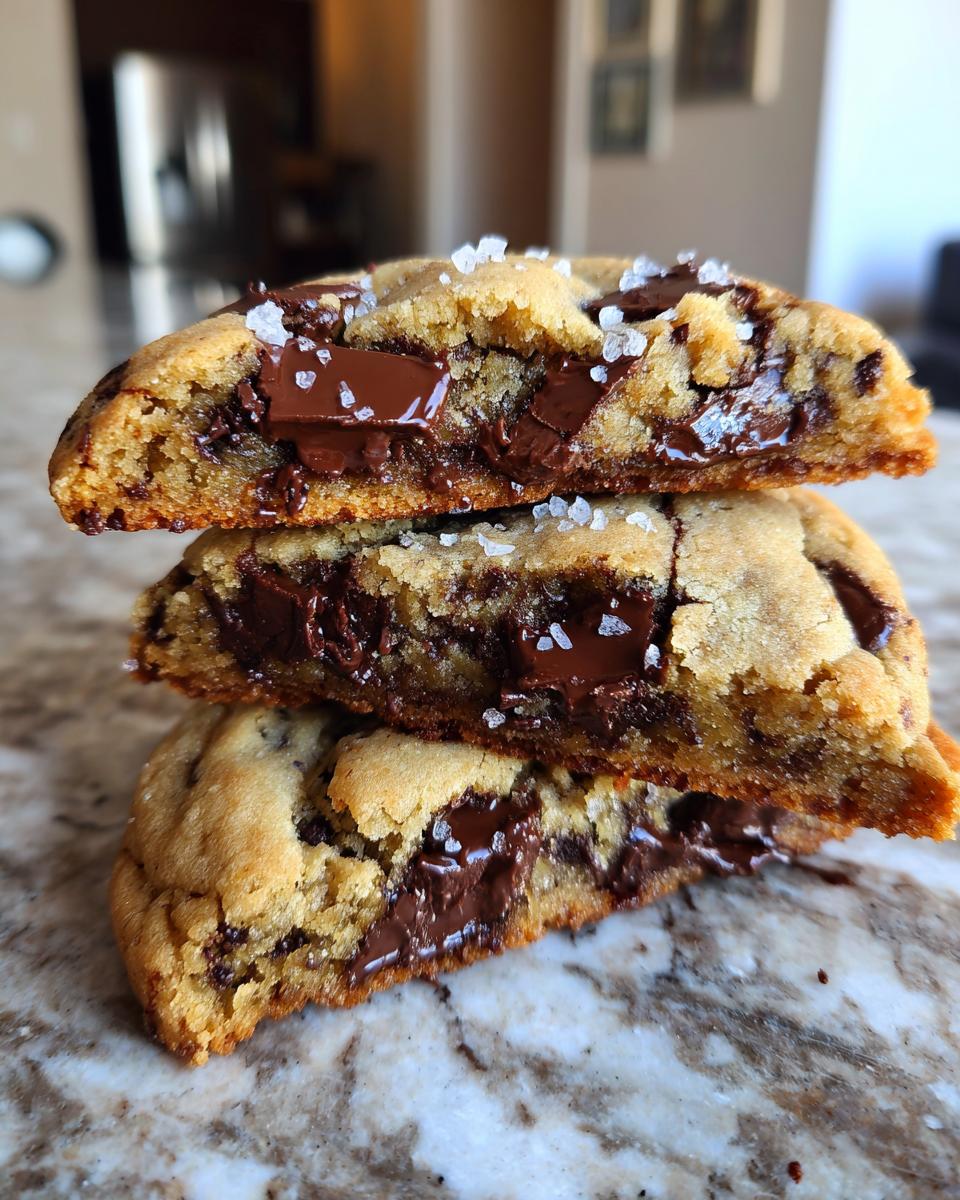
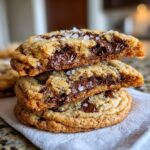
- They deliver that perfect contrast between a satisfyingly crisp edge and a truly soft interior.
- You get those incredible gooey chocolate cookies pockets that every baker dreams of!
Trust me when I say these elevate the whole experience. We’ve got some amazing flavor notes happening here, and I’ve linked to my guide on using classic homemade sausage stuffing recipe if you ever want to dive into other traditional flavors! But back to the sweets…
Texture Perfection: Crispy Edge Soft Center Cookies
This is non-negotiable for me. I don’t mess around with cookies that are crunchy all the way through or cakey puddles. We are aiming for that perfect moment where the edges have browned just enough—they snap satisfyingly—but the center melts in your mouth. It’s all about timing, and with this recipe, getting those crispy edge soft center cookies is easier than you think.
The Nutty Flavor Secret of Brown Butter Chocolate Chip Cookies
So why go through the trouble of browning the butter? Because the flavor is unbelievably rich. As the milk solids toast at the bottom of the pan, they release this deep, hazelnut-like essence. It reminds me so much of dipping into a fresh batch of toffee flavored cookies. That nutty complexity is really what makes these brown butter chocolate chip cookies so addictive and memorable.
Gathering Ingredients for Ultimate Brown Butter Chocolate Chip Cookies
Okay, now that we know we’re making something truly special—the best homemade dessert—we have to treat our ingredients with respect. For these brown butter chocolate chip cookies, the quality really shows through because we are stripping flavor down to the essentials. There aren’t too many things hiding the taste, so every single item needs to be top-notch. This list isn’t super long, which I love, because it lets the brown butter really shine.
When you look at the list below, make sure you grab high-quality chocolate. I usually use a mix of chips and chunks, but I’ll talk more about that in a minute! For now, let’s get organized so when that butter cools down, we’re ready to roll.
- 1 cup (226g) unsalted butter (This will become our star!)
- 1 cup (200g) packed light brown sugar (Pack it in there—molasses equals chew!)
- 1/2 cup (100g) granulated sugar
- 2 large eggs, room temperature (This is crucial, don’t skip the temp!)
- 1 tablespoon pure vanilla extract
- 2 1/4 cups (270g) all-purpose flour
- 1 teaspoon baking soda
- 1 teaspoon kosher salt (For structure and balance in the dough)
- 1 1/2 cups (255g) semi-sweet chocolate chips or chunks
- Flaky sea salt, for sprinkling (Don’t use table salt here!)
If you’re looking for other simple flavor bombs, you must check out my recipe for easy 5-ingredient almond joy cookies—sometimes less is truly more!
Ingredient Notes and Substitutions
I realize not everyone keeps their pantry organized exactly like mine, so let me explain why these specific details matter. It helps build that trust, you know? A good recipe should work even if your kitchen setup is a little different!
- Eggs at Room Temperature: If your eggs are cold straight from the fridge, they can seize up that beautifully creamed butter mixture we worked so hard on. Warm eggs incorporate smoothly, creating a uniform, emulsified base. Just place them in a bowl of warm water for five minutes if you forget to set them out.
- Chips vs. Chunks: Chips are designed to hold their shape, which is great, but chunks melt differently. I insist on using about half and half. The chunks give you those amazing pools of melted chocolate, and the chips keep some definition. If you only have chips, that’s fine, but aim for high quality!
- The Sea Salt Finish: We use kosher salt *inside* the dough to control the texture and internal seasoning, but the flaky sea salt on top after baking? That’s for pure drama and flavor contrast. That pop of saltiness against the sweet, nutty cookie is just magic on your tongue.
Mastering How to Brown Butter for Cookies
Alright, listen up, because this step is what separates a good cookie from the absolute best brown butter chocolate chip cookies you will ever eat. Browning butter sounds fancy, but it’s just controlled scorching, and honestly, it is wildly easy once you watch it happen a couple of times. Grab a light-colored saucepan—you need to see those milk solids turn brown! Put your butter in over medium heat and just wait. Seriously, walk away for a second to put your spice jars away, but keep an eye on it.
First, it melts, then it gets foamy and dances around. Don’t worry, that’s normal! Then, the noise starts to quiet down, and you’ll see tiny brown specks forming at the bottom. That smell? It switches from creamy to rich, nutty, and like deep toffee—that’s your cue! Swirl the pan gently until those bits are a gorgeous dark brown, but pull it off the heat FAST before they turn black. That’s the difference between nutty flavor and burnt disappointment!
Immediately pour that golden liquid into a heatproof bowl. You have to stop the cooking process, or it keeps going and burns. Let it cool on the counter for about 15 minutes. You want it slightly warm to the touch, not scorching hot, before you mix it with the sugars. This cooling period is essential for making sure we don’t accidentally scramble our beautiful eggs later on. Mastering how to brown butter for cookies this way is just the beginning of your baking upgrade!
If you want another deep dive into technique—though a little different—you should totally check out my guide on caramelized onions guide: technique and secrets. It’s all about managing heat and time!
Step-by-Step Instructions for Perfect Brown Butter Chocolate Chip Cookies
Okay, we’re at the fun part—bringing it all together! You’ve got your nutty, cooled brown butter ready to go, and we need to be methodical here to make sure these brown butter chocolate chip cookies turn out exactly how we want them: chewy, not cakey. Remember when I talked about efficiency? This is where the logic of baking comes in handy. We mix in stages so the dough stays perfectly balanced.
Grab your ingredients and your mixer, or just your strong arm and a good spatula. We’re moving into the assembly line phase now—let’s get these baked!
Mixing the Wet and Dry Components
First things first: take that cooled brown butter and whisk it vigorously with both the brown sugar and the granulated sugar—we want them to get cozy and incorporated really well. Now that it’s combined, beat in the eggs one by one. Make sure that first egg is totally mixed in before you drop the second one in. A little vanilla splash seals the wet team.
In a separate bowl, you already whisked your flour, baking soda, and salt, right? Good. Now, here’s the critical part: add the dry ingredients to the wet mixture gradually. I mean *gradually*. Use low speed if you have a mixer, or fold gently by hand. Stop mixing the second you see the last bit of dry flour streak disappear. If you keep going, you’re activating gluten, and that leads straight to tough, cakey cookies, which is the exact opposite of what we want for our ultimate cookie recipe!
The Essential Chill Time for Brown Butter Chocolate Chip Cookies
I know, I know. You want cookies *now*. But please, listen to me on this one step. You absolutely have to chill the dough. I mean it. Cover that bowl of dough—which now has your chocolate chips folded in—and stick it in the fridge for a minimum of two hours. I usually aim for four hours, but overnight is even better if you can swing it.
Why the wait? Simple science! Chilling does two big things for these brown butter chocolate chip cookies. One, it allows that delicious nutty flavor from the butter to really deepen and permeate everything, giving you that incredible toffee flavored cookies profile consistently. Two, and this is huge for texture: it firms up the fat. If the fat is too soft when it hits the 375°F heat, the cookies spread into thin, flat pancakes. Cold fat means controlled spreading, which gives you those thick, gloriously chewy chocolate chip cookies with set edges. If you want more tips on achieving maximum chewiness, don’t miss my chewy chocolate chip cookies recipe guide!
Baking and Finishing Touches
When you’re ready, preheat your oven to 375°F (190°C). Line your baking sheets with parchment paper; it makes cleanup a breeze and ensures a perfect bottom crust. Scoop out rounded tablespoons—I use a medium cookie scoop—and leave about two inches between them because they will relax a bit in the oven.
Bake them for 10 to 13 minutes. You are looking for the edges to look set and golden brown, but if you peek at the center, it should still look a little soft, maybe even slightly puffy or underbaked. Pull them out right then! The carry-over heat will finish cooking the center while keeping it gooey. Immediately after they come out, grab that flaky sea salt and sprinkle a tiny pinch right across the top of each warm cookie. It melts right in and looks so professional!
Tips for the Best Brown Butter Chocolate Chip Cookies Every Time
Even with the recipe perfectly written down, sometimes those last little details are what truly separate a great cookie from a truly legendary one. Since these brown butter chocolate chip cookies rely so much on texture and flavor precision—thanks to that browned butter—we need to cover a few extra baking tips for cookies. I gathered these hard-won lessons from testing batch after batch until I got that perfect chewiness and those dreamy, gooey chocolate cookies.
If you haven’t already committed these little things to memory, bookmark this section! These tips help ensure every batch of brown butter chocolate chip cookies is better than the last.
Here’s what I do every single time I bake these:
- Temperature Management is Key: Remember what I said about room temperature eggs? It’s vital. But equally important is that cooled brown butter! If the butter is too hot when you add the sugars, it melts them totally, and you lose the aeration you need for that chewy texture. If it’s too cold and starting to re-solidify, you’ll get lumps. Aim for just warm enough that it’s liquid and smooth.
- Don’t Over-Scoop or Flatten: I recommend using a medium cookie scoop (about 1.5 tablespoons). When you place the dough balls on the sheet, leave them as mounds. Do not press them down flat! We want that height to encourage those crispy edges while the center stays thick and wonderfully soft.
- The Chocolate Melt Trick: If you want maximum gooey goodness, try mixing in your chocolate chips/chunks, and then reserve about a quarter cup of the best quality chocolate you bought. Once you pull your cookies out of the oven (while they are still screaming hot!), dot those reserved pieces right on top of each cookie. A little sprinkle of sea salt over the top of the melted bits? Perfection. That’s how you guarantee those beautiful pools of melted, gooey chocolate cookies goodness!
For more foundational advice that applies across the board, I actually put together a whole guide just on my favorite techniques over at my baking tips for cookies page. It’s full of simple tricks that save time and boost flavor for all your baking adventures!
Storage and Making Ahead for Brown Butter Chocolate Chip Cookies
So, you’ve made the most amazing batch of brown butter chocolate chip cookies—congratulations! Now, the important question: how do you keep them perfect until you can’t resist them anymore? Or maybe you’re smart and you made a double batch of dough? I always do, because who has time to make these gourmet cookies every single day?
These aren’t just standard cookies; they have all that rich, nutty brown butter flavor, and we want to protect that! Whether you’re storing the finished product or saving the dough for later baking, I’ve got you covered so you can enjoy that perfectly chewy chocolate chip cookies texture later on.
First, let’s talk about the baked ones. If they actually last longer than a day (which is rare in my house!), make sure they’re fully cooled before storing. Put them in an airtight container at room temperature. I’ve found these stay great for about three to four days, but honestly, they are best on day one or two when the edges are still holding that perfect crispness.
Storing the Dough for Future Baking
This is where my method really shines, since we mandated chilling the dough earlier! You can absolutely keep that flavorful dough locked away until you need a cookie fix. Once you’ve scooped your dough balls—remember, don’t flatten them—place them tightly packed onto a lined baking sheet. Cover that whole sheet really well with plastic wrap, making sure it touches the dough balls to prevent any weird freezer burn smells from getting in.
They can hang out in the refrigerator for up to three days. This resting period is great because the flavors continue to meld, meaning your *next* batch of brown butter chocolate chip cookies might actually taste even better than the first! You can skip the tempering process if you’re just chilling them in the fridge; let them come to room temperature for about 30 minutes on the counter, then proceed with baking just as the recipe says.
If you are going the freezer route—which I highly recommend for long-term readiness—you can freeze that dough for up to three months. Once the balls are frozen solid (about an hour or two), transfer them to a big, heavy-duty freezer bag. When you bake from frozen, just add 2 to 4 extra minutes to the baking time. You still get that beautiful, chewy result without waiting for the thaw!
If you need more general tips on keeping things fresh, check out my guide to easy homemade salad dressing recipes—it goes into great detail about storage longevity for different preparations!
Frequently Asked Questions About These Cookies
I get so many questions when people try this recipe for the first time, and I totally get it—browning butter feels like a big leap! But don’t stress; these questions pop up because we are aiming for next-level flavor here, not just any old batch of chips and flour. Dealing with these details is what separates the good batches from the truly spectacular ones. If you have more specific questions about timing or substitutions, feel free to drop them in the comments below! For general make-ahead advice, I’ve got some great info in my post about easy creamy dill dip recipe that touches on similar storage principles.
Can I skip browning the butter in this recipe?
Oh, you certainly *can* skip it. If you’re really in a rush, just melt regular unsalted butter and then let it cool before mixing. Your cookies will still be fantastic—chewy, chocolatey, all that good stuff. But let me be blunt: you’re missing the entire point of this recipe! The reason we go through the minimal effort of browning the butter is to unlock that rich, deep toffee essence. If you skip that step, you’ll just have excellent standard chocolate chip cookies, not the signature brown butter chocolate chip cookies we’re aiming for. It really is worth the extra five minutes!
How do I make sure my cookies stay chewy?
This is my favorite topic because texture is everything! You have to attack chewiness from two angles: preparation and baking technique. First, remember that mandatory chill time we talked about? That’s huge. Dough that’s cold spreads less, resulting in a thicker cookie, which scientifically keeps the center softer for longer. Second, you must remember my instruction about pulling them out slightly early. Seriously, if they look perfectly baked, they are already overdone for that melt-in-your-mouth middle. Aim for centers that look just a little bit raw when you remove them from the oven. That residual heat finishes the job, guaranteeing those amazing, soft, chewy chocolate chip cookies every single time.
Estimated Nutritional Data for Brown Butter Chocolate Chip Cookies
Alright, let’s talk specifics for a second, because I know some of you are tracking things, and others just want to know how “badly” they are treating themselves! Since these brown butter chocolate chip cookies use butter—lots of it—they are definitely an indulgence. But hey, aren’t the best things in life? Remember, all of this information is just an estimate based on the recipe proportions and standard ingredient entries I used.
The type of chocolate you choose, or if you use a different brand of flour, it can absolutely shift these numbers. So, view this as a helpful guideline rather than a precise nutritional label. That said, here’s the breakdown for one cookie, assuming you get about two dozen servings:
- Serving Size: 1 cookie
- Calories: 220
- Sugar: 18g (That rich brown sugar is doing some work here!)
- Fat: 13g (Hello, glorious brown butter!)
- Saturated Fat: 8g
- Trans Fat: 0g (We keep that trash out of our kitchens!)
- Carbohydrates: 25g
- Protein: 3g
- Sodium: 150mg
- Cholesterol: 45mg
Look, it’s butter and sugar, but when you get that complex, nutty flavor from the browned butter, it just tastes like money well spent, right? Make sure you enjoy these glorious, chewy wonders responsibly!
Share Your Brown Butter Chocolate Chip Cookies Experience
Well, my friend, that’s it! You’ve successfully navigated the world of toasting milk solids and chilling dough to create what I truly believe is the absolute best batch of brown butter chocolate chip cookies you will ever make. Now comes the part that I love the most—hearing from you!
This community we’re building here at Delish Symphony is all about sharing the joy, a symphony of flavors played in home kitchens across the country. And nothing makes me happier than knowing these rich, nutty cookies made it from my test kitchen to yours. Did they deliver that perfect chewy center? Did the flaky sea salt provide that extra punch? I really want to know!
If you loved the flavor jump that the brown butter gave you—if you’re already planning your next batch—please drop a rating below the recipe card. Star ratings are super helpful because they let other home cooks know that this recipe is trustworthy and worth their time. Also, if you snapped a picture of those glorious, melty pools of chocolate, tag me on social media! I love seeing your creations.
If you want to check out another fantastic, decadent recipe that always impresses guests, you should definitely try out my recipe for chocolate mousse pie—it’s pure harmony! And if you want to see what others are saying about this exact cookie recipe, check out some of the rave reviews over at this compilation. Go on, share your success, and let’s celebrate making something wonderful together!
PrintUltimate Chewy Brown Butter Chocolate Chip Cookies with Flaky Sea Salt
Make the best homemade chocolate chip cookies with rich, nutty brown butter for a deep toffee flavor. These cookies have crispy edges and soft, chewy centers loaded with gooey chocolate.
- Prep Time: 20 min
- Cook Time: 15 min
- Total Time: 2 hours 35 min
- Yield: About 2 dozen cookies 1x
- Category: Dessert
- Method: Baking
- Cuisine: American
- Diet: Vegetarian
Ingredients
- 1 cup (226g) unsalted butter
- 1 cup (200g) packed light brown sugar
- 1/2 cup (100g) granulated sugar
- 2 large eggs, room temperature
- 1 tablespoon pure vanilla extract
- 2 1/4 cups (270g) all-purpose flour
- 1 teaspoon baking soda
- 1 teaspoon kosher salt
- 1 1/2 cups (255g) semi-sweet chocolate chips or chunks
- Flaky sea salt, for sprinkling
Instructions
- Place the butter in a light-colored saucepan over medium heat. Cook, swirling often, until the butter melts, foams, and then brown bits form at the bottom and the butter smells nutty. This takes about 5 to 8 minutes. Immediately pour the brown butter into a heatproof bowl to stop the cooking process. Let it cool for 15 minutes.
- In a large bowl, whisk together the cooled brown butter, brown sugar, and granulated sugar until fully combined.
- Beat in the eggs one at a time, mixing well after each addition. Stir in the vanilla extract.
- In a separate medium bowl, whisk together the flour, baking soda, and kosher salt.
- Gradually add the dry ingredients to the wet ingredients, mixing on low speed until just combined. Do not overmix.
- Fold in the chocolate chips or chunks.
- Cover the dough and chill in the refrigerator for at least 2 hours, or up to 3 days, for best flavor and texture.
- Preheat your oven to 375°F (190°C). Line baking sheets with parchment paper.
- Scoop rounded tablespoons of dough onto the prepared sheets, leaving about 2 inches between cookies.
- Bake for 10 to 13 minutes, or until the edges are golden brown and the centers look slightly underbaked.
- Immediately sprinkle the tops of the warm cookies with flaky sea salt.
- Let the cookies cool on the baking sheet for 5 minutes before transferring them to a wire rack to cool completely.
Notes
- Browning butter adds a toffee flavor; watch carefully to prevent burning.
- Chilling the dough develops the flavor and prevents the cookies from spreading too much during baking.
- Use high-quality chocolate chunks for the best gooey results.
Nutrition
- Serving Size: 1 cookie
- Calories: 220
- Sugar: 18g
- Sodium: 150mg
- Fat: 13g
- Saturated Fat: 8g
- Unsaturated Fat: 5g
- Trans Fat: 0g
- Carbohydrates: 25g
- Fiber: 1g
- Protein: 3g
- Cholesterol: 45mg