
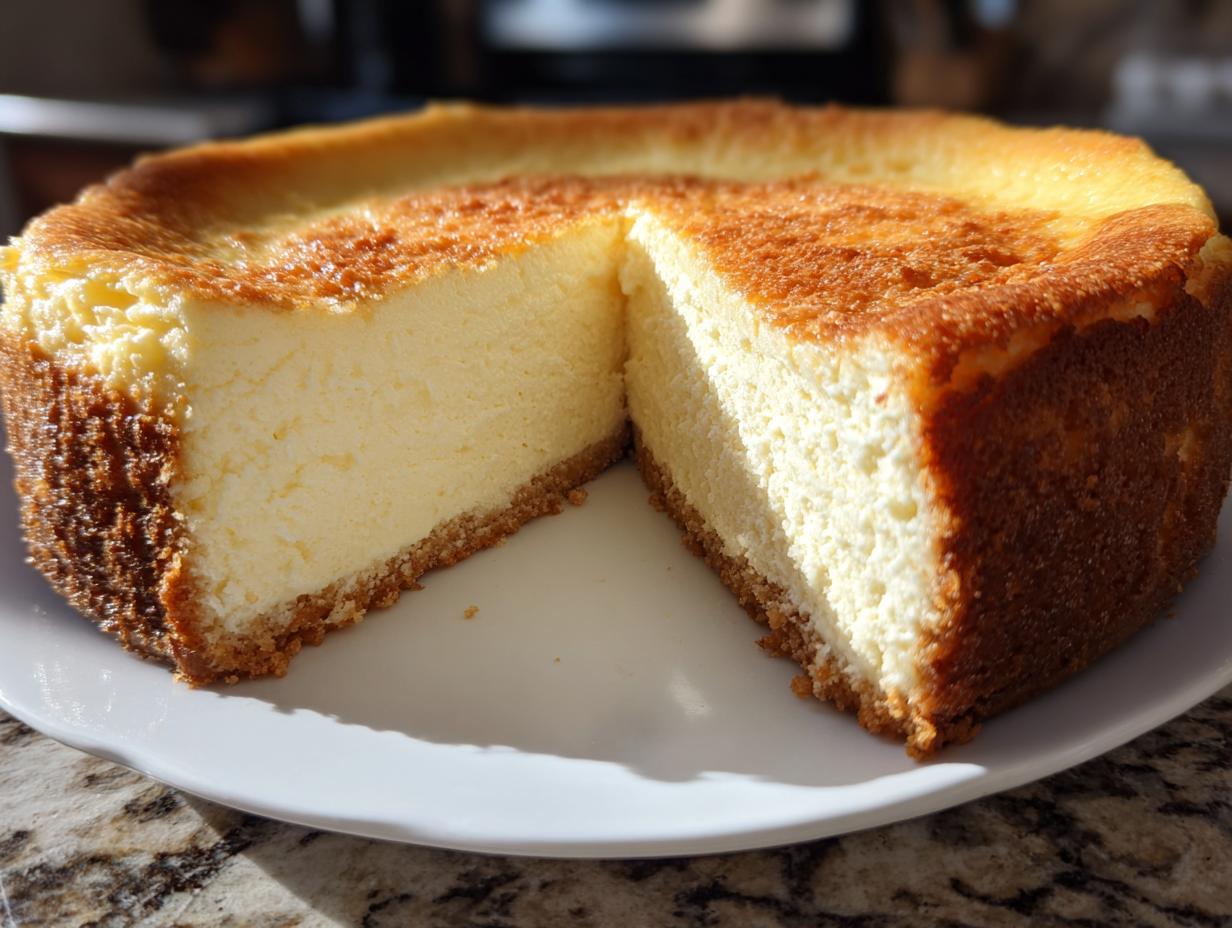
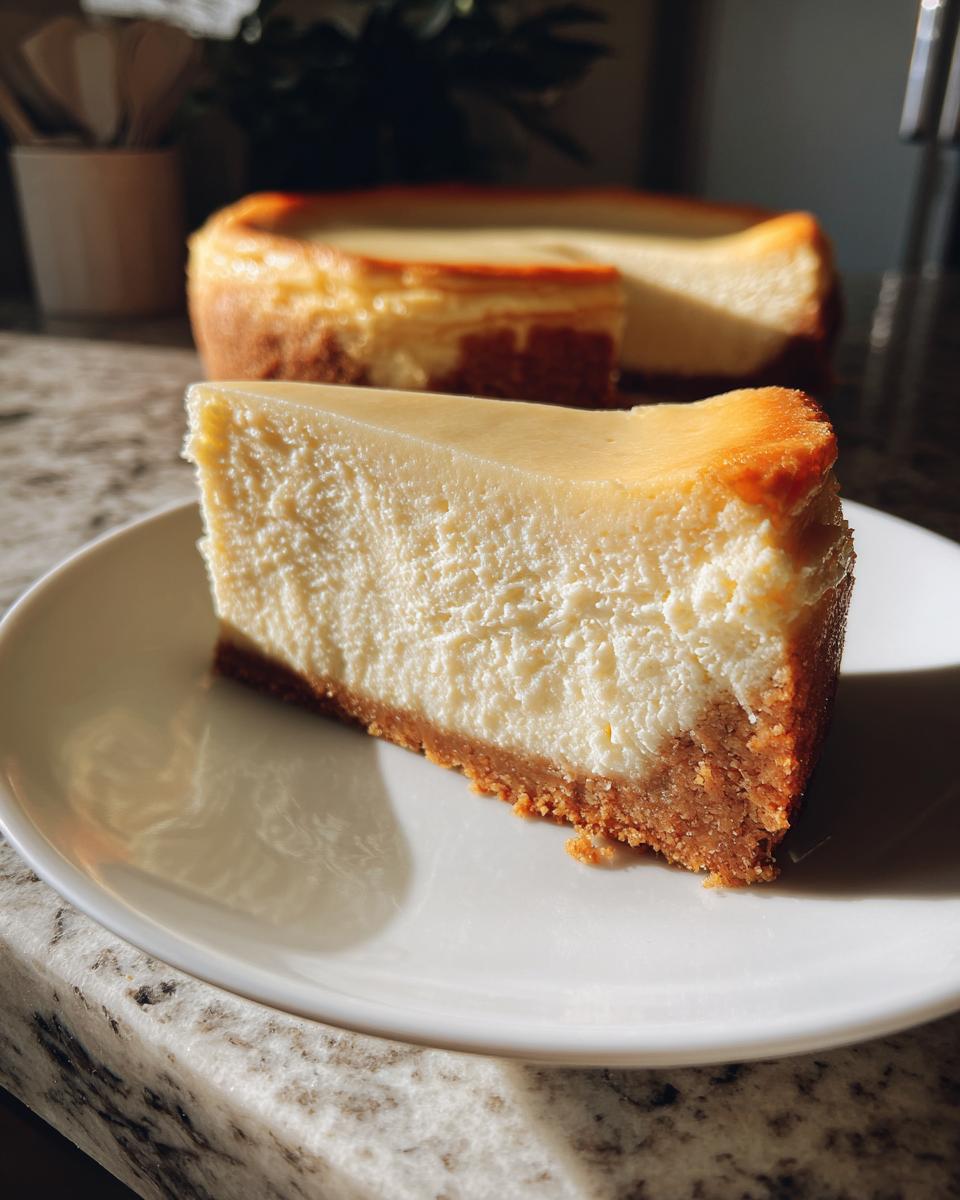
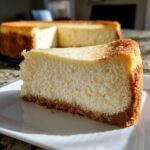
Making a truly perfect cheesecake feels like walking a tightrope, right? Everyone wants that impossibly rich, unbelievably creamy dessert for their party, but we all dread the inevitable spiderweb cracks showing up right when you pull it out of the oven. Well, folks, let me save you the stress. After years of tinkering in my own kitchen, I’ve finally landed on the ultimate cheesecake recipe that delivers that beautiful, velvety smooth texture every single time, even without fussing with a water bath. As Michael Carter here at Delish Symphony, I developed this foolproof method by focusing on ingredient temperature and slow, deliberate cooling. Trust me, this process turns this gorgeous, no-crack classic into the best dessert you’ll ever serve.
- Why This is the Ultimate Cheesecake Recipe for Beginners (EEAT Focus)
- Ingredients for the Perfect, Creamy Cheesecake Recipe
- Step-by-Step Instructions for Your Classic Graham Cracker Crust Cheesecake
- Tips for an Easy Cheesecake Without Water Bath
- Variations on the Classic Cheesecake Recipe
- Storage and Make Ahead Cheesecake Instructions
- Frequently Asked Questions About Your Creamy Cheesecake Dessert
- Nutritional Estimates for This Simple Cream Cheese Dessert
- Share Your Perfect Cheesecake Recipe Success
Why This is the Ultimate Cheesecake Recipe for Beginners (EEAT Focus)
If you look at other baking blogs, they often make cheesecake sound like a high-stakes science experiment. But I promise you, this is the cheesecake for beginners who want professional results! My goal when developing this classic recipe was simple: banish the cracks so you never feel the need for a fussy water bath again. We achieve this by respecting the ingredients—making sure everything is fully room temperature—and using a very specific, slow cooling process right in the turned-off oven. This gentle transition is the real secret to how to make cheesecake without cracks. You get that rich depth you expect from a great cheesecake recipe without any of the anxiety. If you’re looking for other easy inspiration after this masterpiece, check out my thoughts on easy breakfast recipes while you wait for this beauty to chill!
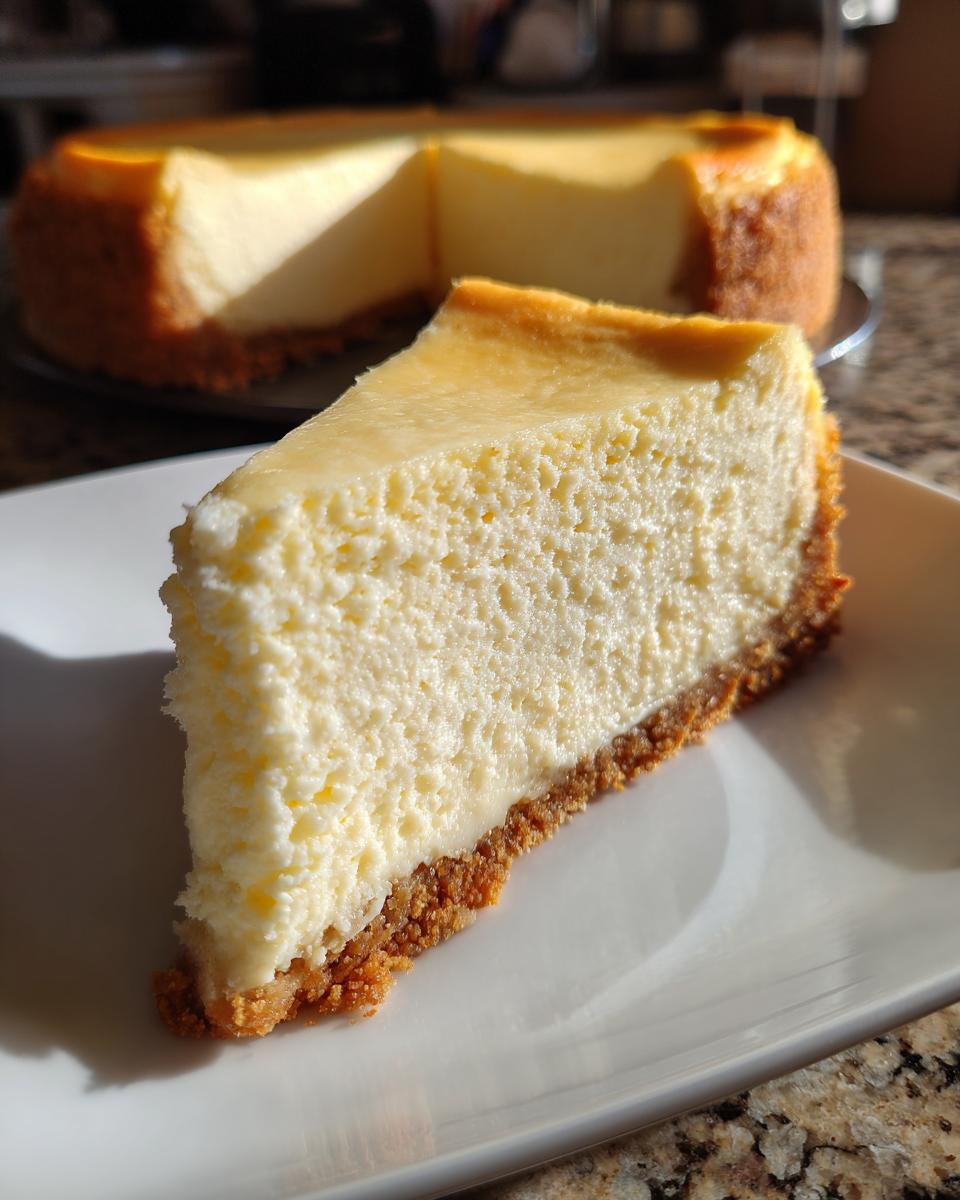
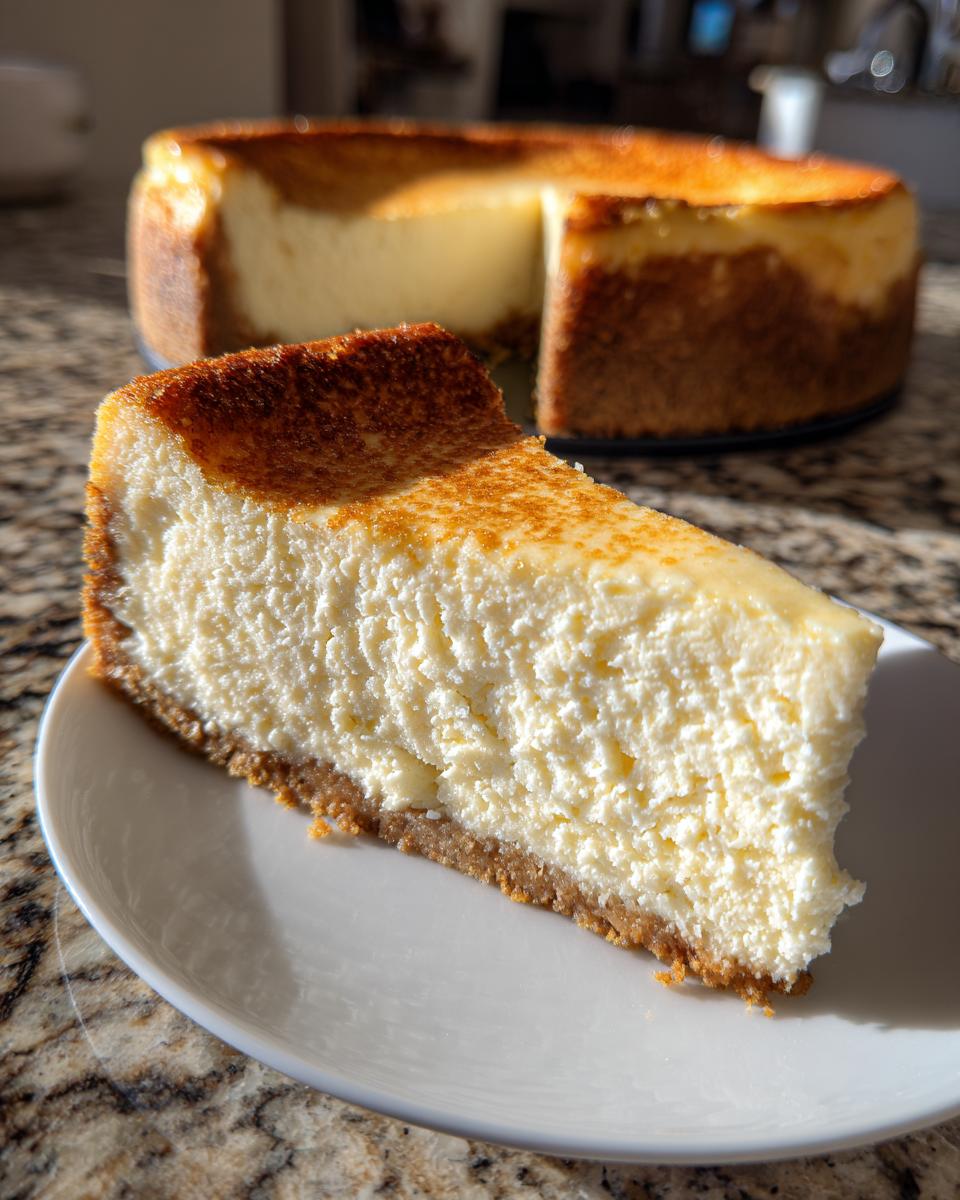
Achieving a Velvety Smooth Cheesecake Filling
The texture is everything, isn’t it? For that gorgeous, velvety smooth cheesecake filling, you absolutely must use the blocks of full-fat cream cheese—no light versions, please. When you mix it, use low speeds once you add the sugar and flour. Over-beating incorporates too much air, and air expands in the oven, which leads to sinking and cracking later on. Low and slow mixing keeps everything suspended perfectly.
Ingredients for the Perfect, Creamy Cheesecake Recipe
When we gather our supplies for this amazing dish, organization is key—just like in my old IT job! You’ll need a few simple things for the crust and the main filling component. For the base, we’re talking graham cracker crumbs, a bit of sugar, and melted butter. Once you move to the filling, make sure you have the four full-fat cream cheese blocks softened nicely, plus the right amount of sugar, flour, vanilla, salt, and crucially, four large eggs that have also come up to room temp. Gather these items, and you’re halfway to success! Before you start mixing, check out my guide on the classic chocolate chip cookies for other no-fail baking projects.
Step-by-Step Instructions for Your Classic Graham Cracker Crust Cheesecake
Alright, let’s get those hands moving! We are building up to the best cheesecake recipe, and it starts with a solid foundation. First things first: hit that oven to 350 degrees F. For the crust of your classic graham cracker crust cheesecake, just toss the crumbs, the quarter cup of sugar, and the melted butter together. Press that mixture down firmly into your 9-inch springform pan—use the bottom of a measuring cup to really pack it tight! Bake that base for 10 minutes, pull it out, and then lower the oven temp down to 325 degrees F. This slight pre-bake sets the crust so it doesn’t turn soggy later. While that cools a touch, you mix the filling—and remember, always on low speed!
Once the filling is mixed (we covered that careful process already!), pour it over your cooled crust. Then, slide it gently into that 325-degree oven for about 55 to 65 minutes. If you need a break from quick meals, this is a great moment to think about my full weeknight dinner recipes collection!
Baking and the Crucial Slow Cooling Process
Knowing when it’s done is where trust in the process comes in. You’re looking for the edges to be set, but if you gently nudge the pan, that very center two inches should still have a little shimmy, like soft gelatin. That’s the wobble we want! Now, here’s the magic trick to stop cracks: turn the oven completely OFF. Don’t open the door yet! Just prop it open about two inches wide using a wooden spoon handle. Let that cheesecake sit in the warm oven for a full hour. This super slow transition out of the heat is what locks in that silky texture and prevents surface cracking. It’s a simple step, but trust me, it makes all the difference!
Tips for an Easy Cheesecake Without Water Bath
I know what you’re thinking: “A classic baked cheesecake without a water bath? Is this guy serious?” Yes, I absolutely am serious! The whole point of Delish Symphony is making amazing food practical for your real, busy life. That’s why I love this technique for an easy cheesecake without water bath. We skip the messy, heavy pan-within-a-pan setup because we’re using temperature discipline, not trapped steam, to control the bake.
The slow cooling inside the turned-off oven is your substitute for all that fuss. But we have two other non-negotiables if you want that perfect top every time. First, everything—and I mean *everything*—needs to be at room temperature. I set my cream cheese and eggs out a full hour before I even think about touching the mixer. If your cream cheese is cold, you’ll beat it forever just trying to get rid of lumps, and that incorporates air!
Secondly, remember what I said about air being the enemy of a smooth top? When you add those four eggs, mix on the absolute lowest speed possible, just until you barely see the yolk disappear into the batter. Don’t be tempted to speed up the mixer just because it feels slow. Low speed equals fewer air bubbles, which means a flat, beautiful surface on your fantastic cheesecake recipe. It’s about working smarter, not harder! When you’re done making this showstopper, you might need something light—check out my tips for simple snack recipes for later!
Variations on the Classic Cheesecake Recipe
This core cheesecake recipe is beautiful on its own, truly, but part of the joy in home baking is making something your own, right? Once you nail the basic technique, you can start experimenting before your next big holiday gathering. If you really want that deep, slightly tart flavor that lets you know you’re eating a serious slice of dessert heaven, try making a pure New York Style Cheesecake. The way you do that is super easy: just add about a quarter cup of full-fat sour cream into the filling mixture along with your eggs. It adds a lovely, dense complexity.
If you’re looking for something lighter or perfect for summer, think about adding swirls! Strawberry swirl is obviously divine; it contrasts the richness so well. You can find some amazing ideas for that specific flavor profile over at Cheff Recipes if you want detailed guidance on swirling in fruit puree. For Christmas or Thanksgiving, don’t be afraid to add a teaspoon of ground cinnamon or a touch of pumpkin puree right into the batter—it turns this into a fantastic holiday cheesecake recipe. If you love warmer spices, I also have a great recipe for easy pumpkin bars that hit a similar flavor note!
Creating Miniature Cheesecake Bites
Want the same amazing flavor but in portions that disappear instantly at a party? Make miniature cheesecake bites! Just pour the batter into prepared muffin tins instead of the big springform pan. You’ll need to shave off about 5 to 10 minutes off the baking time, but watch them closely!
Storage and Make Ahead Cheesecake Instructions
The hardest part of making this incredible cheesecake recipe is waiting for it to chill, but I can’t stress this enough: don’t skip the refrigeration time! We’re making a decadent, make ahead cheesecake here, and it needs time to fully set up its structure. The instructions say a minimum of six hours, but honestly, if you can let it sit in the fridge overnight, that’s when the real magic happens.
When it’s cold, the texture firms up perfectly, giving you that solid, creamy bite that makes this a genuinely wonderful contribution to any spread. If you’re planning a big meal, this is the perfect dessert because you can bake it the day before and just pull it out when everything else is done. Cover the chilled cheesecake loosely with plastic wrap—make sure the wrap isn’t touching the top surface if you’ve added any topping! Stored properly in the fridge, it stays fantastic for 3 to 4 days. It’s truly one of the best holiday cheesecake recipes because it saves you so much stress on the actual event day. For more great tips on timing your baking, take a look at my general guide on make ahead cheesecake planning!
Frequently Asked Questions About Your Creamy Cheesecake Dessert
I know you might still have a question or two swirling around after making something this spectacular. It’s totally normal! Baking is an adventure, and I want you to feel totally confident next time you tackle this classic. Here are some of the things folks ask me most often about achieving that perfect, crack-free slice. If you’re looking for more ways to satisfy that sweet tooth later on, check out my general tag for delicious dessert recipes!
Can I use low-fat cream cheese in this cheesecake recipe?
No, you really can’t if you want the best result. Listen, full-fat cream cheese is the only way to guarantee that truly luxurious, creamy cheesecake dessert texture we are aiming for. Anything lower in fat throws off the structure completely and you end up with something dense and sad!
What is the best way to serve this rich desserts recipe?
This is truly one of the most satisfying rich desserts recipes, and it shines on its own. But honestly, a scattering of fresh raspberries or blueberries is just heaven against the tang. A light drizzle of warm caramel sauce is also a showstopper for parties!
Nutritional Estimates for This Simple Cream Cheese Dessert
I always keep an eye on the labels, but when you’re baking something truly indulgent like this, we know sweetness is part of the deal! Here are the estimated nutritional breakdowns for one slice of our classic dessert. Remember, these figures are based on the ingredients listed in the recipe, so the final count might shift a tiny bit depending on the exact brands you use. But for a rich, satisfying slice, it’s good to know where you stand calorie-wise!
- Serving Size: 1 slice
- Calories: 450
- Fat: 30g
- Carbohydrates: 40g
- Protein: 8g
- Sugar: 35g
Share Your Perfect Cheesecake Recipe Success
Now look at you! You’ve done the work, you respected the slow cooling, and you’ve produced the most fantastic, creamy, crack-free cheesecake around. Seriously, take a moment and pat yourself on the back. This is the kind of baking success that makes all the fun of cooking worthwhile, and I want to hear all about it!
Did this method make achieving that perfect set easy for you regarding the texture? Please let me know in the comments below how your batch turned out. If you found this to be the best homemade cheesecake recipe you’ve tried yet, give it a star rating so others who are nervous about baking can feel confident trying it!
And if you snapped a picture of that beautiful, flat top—maybe with some fresh berries sprinkled on top—please tag me on social media so I can see your masterpiece! Or, if you have any questions as you’re planning your next bake, don’t hesitate to reach out via my contact page. Happy baking, everyone!
PrintPerfect, Creamy, Crack-Free Classic Cheesecake Recipe
Follow this simple recipe to create a rich, velvety smooth cheesecake with a classic graham cracker crust. This method helps you achieve a perfect, crack-free top without needing a water bath, making it ideal for beginners and special occasions.
- Prep Time: 20 min
- Cook Time: 65 min
- Total Time: 7 hours 25 min
- Yield: 12 servings 1x
- Category: Dessert
- Method: Baking
- Cuisine: American
- Diet: Vegetarian
Ingredients
- 1 1/2 cups graham cracker crumbs
- 1/4 cup granulated sugar (for crust)
- 6 tablespoons unsalted butter, melted
- 4 (8 ounce) packages full-fat cream cheese, softened to room temperature
- 1 1/2 cups granulated sugar (for filling)
- 1/4 cup all-purpose flour
- 1 teaspoon vanilla extract
- 1/4 teaspoon salt
- 4 large eggs, room temperature
Instructions
- Prepare the crust: Preheat your oven to 350 degrees F. Mix graham cracker crumbs, 1/4 cup sugar, and melted butter. Press the mixture firmly into the bottom of a 9-inch springform pan. Bake for 10 minutes. Remove and let cool slightly. Reduce oven temperature to 325 degrees F.
- Make the filling: In a large bowl, beat the softened cream cheese with an electric mixer until completely smooth. Scrape down the sides of the bowl.
- Add 1 1/2 cups sugar, flour, vanilla extract, and salt to the cream cheese mixture. Beat on low speed until just combined and smooth. Do not overmix.
- Add the eggs one at a time, beating only until each egg is incorporated. Mix on the lowest speed possible to prevent incorporating excess air, which causes cracks.
- Pour the filling over the cooled crust in the springform pan.
- Bake for 55 to 65 minutes. The edges should look set, but the center 2 inches should still have a slight wobble when gently nudged.
- Turn off the oven. Prop the oven door open about 2 inches using a wooden spoon. Let the cheesecake cool inside the oven for 1 hour. This slow cooling prevents cracking.
- Remove the cheesecake from the oven. Run a thin knife around the edge of the pan to loosen it from the sides. Let it cool completely on a wire rack at room temperature.
- Chill the cheesecake in the refrigerator for at least 6 hours, or preferably overnight, before serving.
Notes
- Room temperature ingredients are crucial for a smooth, lump-free filling. Allow cream cheese and eggs to sit out for at least one hour before starting.
- To prevent cracks, mix the batter on low speed and stop mixing as soon as the last egg is incorporated.
- If you prefer a New York Style cheesecake, use full-fat cream cheese and consider adding 1/4 cup sour cream to the filling mixture.
Nutrition
- Serving Size: 1 slice
- Calories: 450
- Sugar: 35g
- Sodium: 250mg
- Fat: 30g
- Saturated Fat: 18g
- Unsaturated Fat: 12g
- Trans Fat: 0.5g
- Carbohydrates: 40g
- Fiber: 1g
- Protein: 8g
- Cholesterol: 120mg