
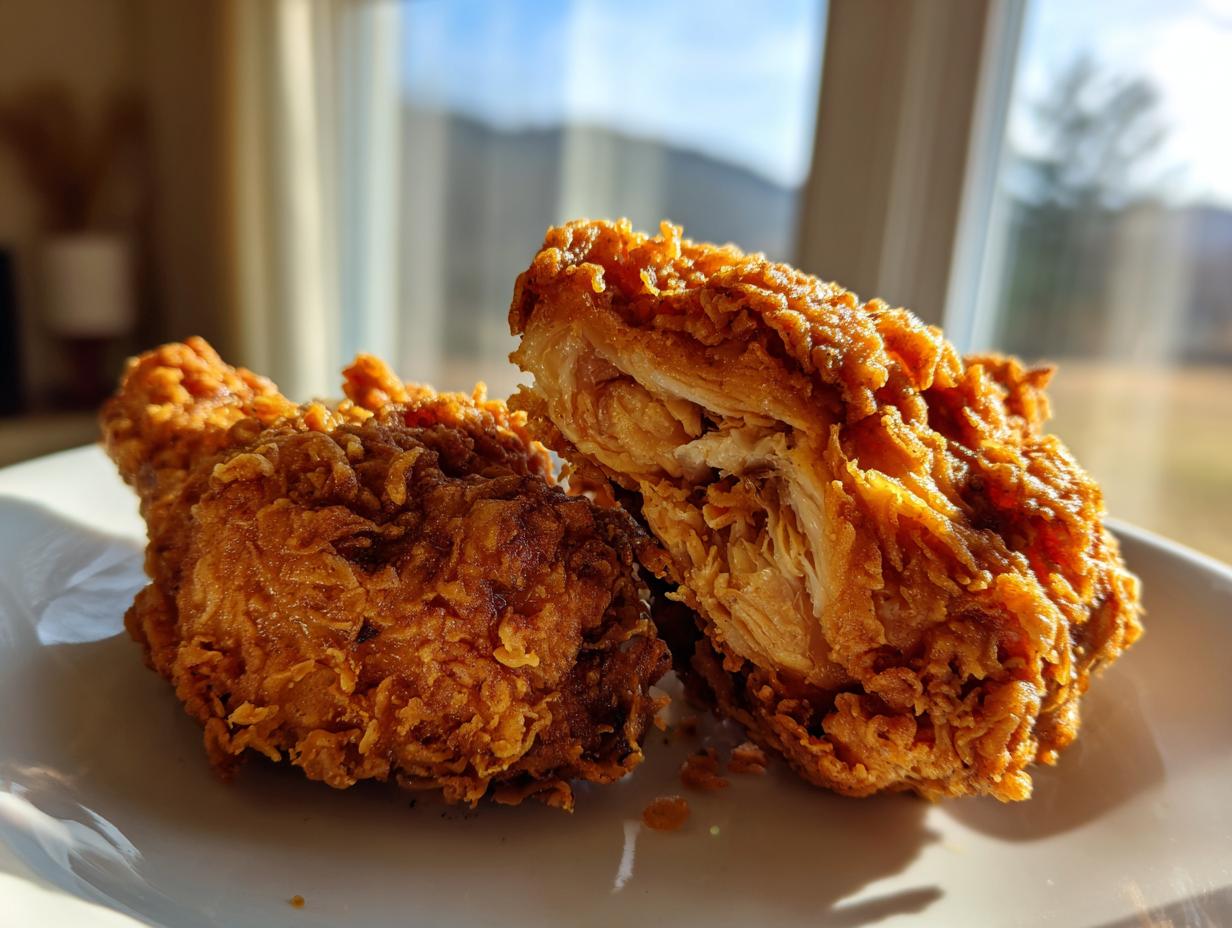
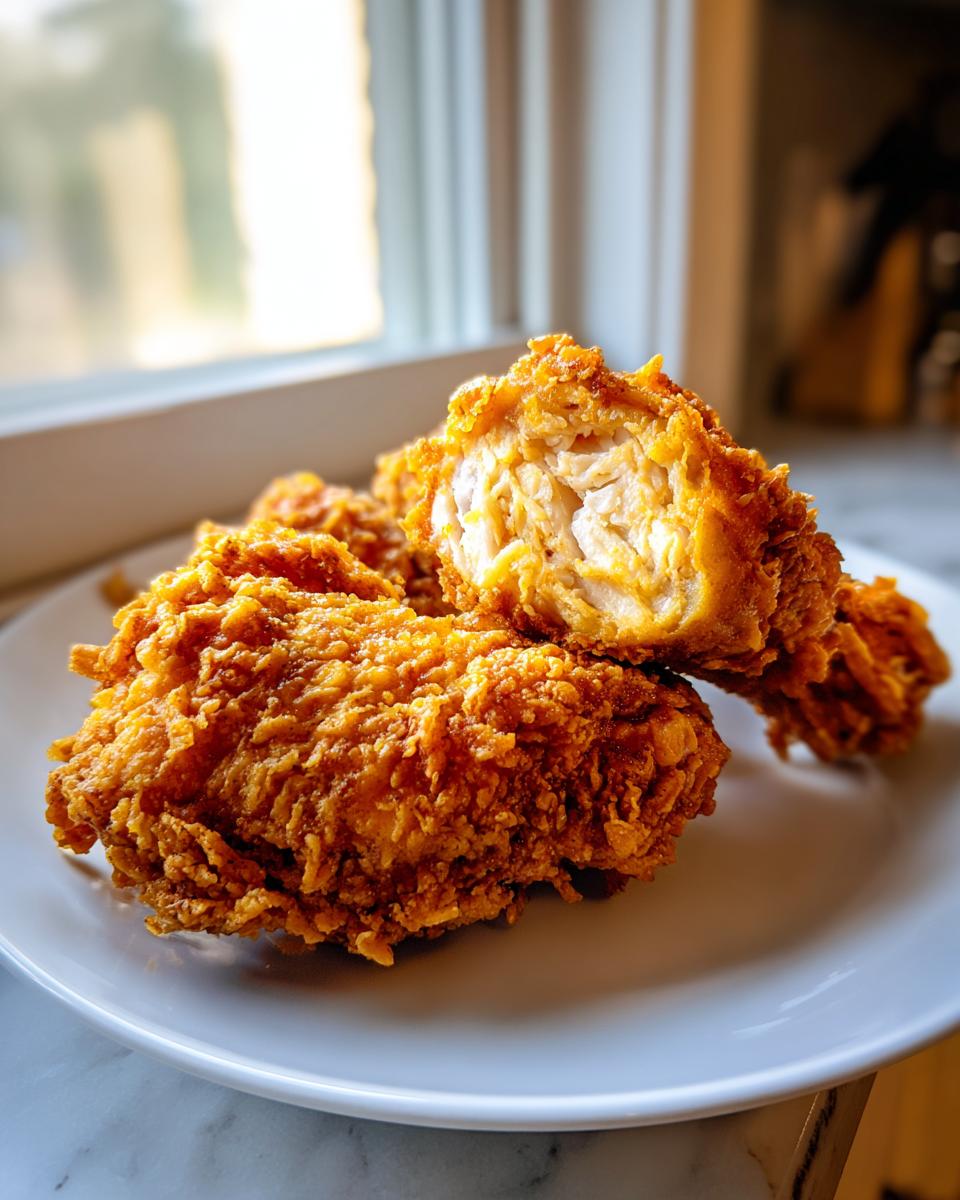
Oh, that sound! That glorious, sharp crackle when you bite through that perfectly golden crust? Nothing beats authentic Southern fried chicken, right? I’m not going to lie; perfecting this classic comfort food took me ages in my own kitchen. But trust me, after testing batch after batch—really seeing what works—I finally cracked the code on the ultimate Crispy Fried Chicken Recipe that never, ever sacrifices juiciness inside. This is the result of Michael Carter’s dedication to bringing foolproof, flavor-packed meals to life. Get ready, because this recipe for homemade fried chicken is about to become your new family favorite.
- Why This Southern Fried Chicken Recipe Delivers Maximum Crunch and Juiciness
- Essential Ingredients for Classic Fried Chicken
- How To Make Perfect Fried Chicken: Step-by-Step Instructions
- Tips for the Best Fried Chicken At Home
- Making This Southern Fried Chicken Recipe Your Own
- Serving Suggestions for Your Classic Fried Chicken Dinner
- Storage and Reheating Instructions for Leftover Fried Chicken
- Frequently Asked Questions About Homemade Fried Chicken
- Share Your Crispy Fried Chicken Experience
Why This Southern Fried Chicken Recipe Delivers Maximum Crunch and Juiciness
If you’ve ever had a piece of fried chicken that was dry or had a coating that immediately fell off in the oil, you know the pain! That’s why we nail the prep work first. This isn’t just stirring flour; it’s building armor for the meat while tenderizing it from the inside out. This approach guarantees you a world-class Crispy Fried Chicken Recipe every single time.
The Buttermilk Marinade Secret for Juicy Fried Chicken
Forget just a quick dip—we need time! The buttermilk isn’t just for flavor; it’s an acid bath. That gentle acid works magic on the muscle fibers, breaking them down just enough to keep the meat tender and incredibly moist while it cooks. You absolutely must give the chicken at least four hours in the fridge, but seriously, overnight is where the magic happens.
Building the Crunchy Chicken Coating for Perfect Fried Chicken
This is where we beat those thin, sad coatings! The secret weapon in our dredge is cornstarch, which gives you that craggy, crunchey shell that just won’t quit. After you dredge it once, I have you dip it back into the wet mixture for a super quick second coat and back into the flour. You have to press that flour on hard—don’t be shy! That pressing helps create those awesome little crags that fry up into the best part of the chicken.
Essential Ingredients for Classic Fried Chicken
When we talk about making the Best Fried Chicken At Home, it all comes down to using the right players in the right spots. I’ve got everything listed out below, broken down by what job it does—wet stuff, dry stuff, and the oil that brings it all together. Remember, we are sticking to accessible ingredients here; no need for specialty stores for this masterpiece!
For the Buttermilk Soak and Seasoning
This is the foundation, so don’t skimp on soaking time! You need 2 cups of good buttermilk to hug those chicken pieces, along with 1 tablespoon of your favorite hot sauce—that adds a tiny bit of depth you can’t quite name later on. For seasoning the wet side, make sure you mix in 1 teaspoon each of salt, black pepper, and paprika, plus 1/2 teaspoon of garlic powder. This initial seasoning gets deep into the meat while it rests.
For the Crispy Fried Chicken Recipe
The dry dredge is where we build that incredible crunch we all crave. Get yourself 2 cups of all-purpose flour, but here’s the trick: add 1/2 cup of cornstarch. That starch is critical for that golden, crunchy texture. Then, we season it up again with 1 tablespoon each of salt and black pepper, and another tablespoon of paprika. If you like heat—and I often do when serving this as a Comfort Food Dinner Idea—toss in about 1 teaspoon of cayenne pepper for that little kick!
How To Make Perfect Fried Chicken: Step-by-Step Instructions
Okay, you’ve got your beautifully seasoned, buttermilk-soaked chicken, and you have your mountain of seasoned flour ready to go. This isn’t the time to rush! The final steps—from coating to going into that hot fat—are what separate an okay piece of chicken from the Best Fried Chicken At Home. We need to be methodical here to make sure that crust sticks tight and everything cooks evenly.
Marinating and Preparing the Chicken for Frying
First! Take the chicken out of the fridge after it has soaked for at least four hours—seriously, if you can manage overnight, do it. You need to take the pieces out of the buttermilk letting the excess drip off, but don’t wipe them down! That wet surface is what grabs the flour. Dredge it thick, press it in hard, and then—this is important—put the coated pieces on a wire rack and let them rest for about 20 minutes. I know, waiting again! This rest period is crucial because it allows the coating to hydrate and basically cement itself onto the chicken, stopping it from sloughing off when it hits the heat.
Oil Temperature and Frying Technique for Golden Brown Chicken
Grab your thermometer! I cannot stress this enough—the temperature is everything for that perfect crunch. You want your oil, whether it’s vegetable or peanut, heated up to 325 degrees Fahrenheit, but aim to keep it stable between 300 and 325°F while cooking. Drop the chicken in carefully, and please, for the love of crispy skin, don’t overcrowd the skillet! Overcrowding drops the temperature fast, and sad, soggy chicken is the result. Fry for about 6 to 8 minutes per side until it’s that deep, mouthwatering golden brown color. If you’re cooking big breasts, you might want to carefully move them to a 350-degree oven after they look perfect on the outside so they cook all the way through—that’s my little trick for guaranteed doneness.
If you happen to be whipping up something creamy to go alongside, this is also when you might want to make my garlic aioli!
Tips for the Best Fried Chicken At Home
You’ve managed the whole process—the soaking, the crust building, and the initial fry—and now you’re so close to biting into that perfect piece of fried chicken! But the battle isn’t totally won yet. A few tiny details, things I learned the hard way after making tons of disappointing batches, are what turn good homemade chicken into the stuff of legends. These are the final checks that ensure your coating stays crunchy and your meat is cooked perfectly.
Maintaining Oil Temperature for Consistent Fried Chicken
This is the most important tip, seriously! Unless you’ve got a deep fryer that magically adjusts itself, you need to watch that thermometer like a hawk as you work through your batches. Every time you drop in those cold pieces of chicken, the oil temperature is going to dip. If it dips too low—say, below 300 degrees—your coating is going to soak up grease instead of crisping up, and you end up with that oily, heavy texture nobody wants.
So, after you pull a batch out, turn the heat up a little bit, let it climb back up to that sweet spot between 300 and 325°F, and then drop the next batch in. Even if you’re making sides, like my crispy garlic skillet potatoes, you need to pause your side action while you manage the oil. Consistency there is key for that beautiful, even Golden Brown Chicken crust.
Also, remember the wire rack we used to let the chicken rest before frying? Keep using that rack when you pull the finished pieces out! Don’t put them on paper towels alone right away. The rack lets the air circulate underneath so the steam doesn’t get trapped against the bottom crust, making it soggy while it rests. A couple of paper towels underneath the rack is fine for catching drips, but give that air a chance to work!
Making This Southern Fried Chicken Recipe Your Own
While I swear by this classic method for the Best Fried Chicken At Home, I know everyone likes to put their own little spin on things! That’s the fun of cooking—it should taste exactly how *you* want to eat it. This recipe is so sturdy thanks to that buttermilk bath and cornstarch, it happily accepts new flavor profiles without collapsing into a sad, flabby coating.
If you’re chasing that Restaurant Style Fried Chicken vibe, you can definitely tweak the spices in your dredge mix. For instance, if you love spice, amp up the cayenne, or maybe try adding smoked paprika instead of regular for a deeper, richer color and flavor. Think about those fast-food secrets, they’re usually just a few extra spices in the flour blend!
And hey, if you’ve got a package of chicken tenders or maybe even thin-cut pork chops lying around and you’re craving something similar to a Chicken Fried Steak Style Chicken experience, this coating works beautifully there too! Just make sure those cuts are thin so they cook through quickly, and keep that oil temperature exactly where it needs to be!
If you’re looking for other ways to mix up your poultry game after conquering this classic, check out my recipe for Chipotle Chicken Noodles—it’s a totally different flavor world but hits that comfort food mark just as hard!
Serving Suggestions for Your Classic Fried Chicken Dinner
So you’ve done it! You’ve made the Best Fried Chicken At Home—it’s golden, it’s crunchy, and your kitchen smells like pure heaven. Now, what do you serve with something this spectacular? This isn’t a dish that stands alone; it demands the right supporting cast to complete the experience. We are talking peak Comfort Food Dinner Ideas here, so forget about light salads!
When I make a batch of this Southern Fried Chicken, I always focus on textures and flavors that cut through the richness of the fried coating. You need something cool, something creamy, and something green that you can load up with vinegar or lemon juice to balance everything out. Don’t forget to save room, because this meal is hearty!
The Essential Creamy Side Dish
You simply cannot have great fried chicken without something rich and creamy to balance that crunch. For me, that means mashed potatoes, done right. I always go for my garlic parmesan mashed potatoes recipe when I pull the last batch of chicken out of the oil. The garlic adds just enough sharpness against the savory coating, and they are like a fluffy cloud to soak up any flavorful drippings.
Another great option if you want to skip the starch is a truly cold, tangy coleslaw. Make sure the dressing is vinegar-based rather than mayonnaise-heavy if you want that bright, acidic pop to cleanse your palate between bites of that Crunchy Chicken Coating.
Green Veggies to Bring Balance
I know, I know, you hate the idea of green vegetables next to fried chicken, but hear me out! We need acid and freshness so you don’t feel like you need a nap immediately after one piece. A simple side of steamed green beans tossed with a little bacon fat and a heavy squeeze of fresh lemon juice works wonders.
Alternatively, skip the lemon and make a simple quick-pickle. Thinly sliced cucumbers or pickled onions offer that necessary sharpness. This helps stop the meal from feeling too heavy overall, making it easier to convince everyone to go back for a second piece!
Making it the Ultimate Family Dinner
If you’re serving this for a true family gathering, you need bread! Warm biscuits are a given, especially if you use the extra buttermilk to brush over them right before baking. Don’t forget the honey or jam, because dipping that piece of Juicy Fried Chicken into a bit of sweet jelly is just heaven. This combination—crispy bird, creamy potatoes, tangy slaw, and warm bread—is what makes this whole process worth it. It’s truly the pinnacle of American Fried Chicken comfort food.
Storage and Reheating Instructions for Leftover Fried Chicken
Oh, the mythical leftover piece of fried chicken! It’s a treasure, but you have to treat it right, or all that hard work on the Crunchy Chicken Coating goes right out the window. If you try to cover it tightly like you would with soup, you are basically steaming that beautiful crust, and it gets sad and soggy way too fast. That’s a culinary crime, and we won’t stand for it!
When you’re putting the leftovers away after your Comfort Food Dinner Ideas night, the best thing you can do is let the chicken cool down slightly on that wire rack first. Once it’s just room temperature, the trick is to store it loosely covered in the fridge. I usually grab a big container and just lay a paper towel over the top, or use the lid but leave it slightly ajar. This lets a little air move around so condensation—the enemy of crispiness—doesn’t pool on the crust.
Now, let’s talk about reheating, because this step is make-or-break for your leftover Southern Fried Chicken. Do yourself a huge favor and skip the microwave entirely. It heats the meat fine, sure, but it totally ruins the texture of that coating. It just steams it soft.
Instead, preheat your oven to about 375 degrees Fahrenheit. Place the chicken pieces directly on a clean wire rack, and slide that rack onto a baking sheet. Putting the chicken right on the rack allows the heat to circulate all around it—top and bottom—which helps revitalize that crust. Cook it for maybe 10 to 15 minutes, depending on the size of the piece. You want to see the crust looking dry and firm again, and the meat inside should be piping hot. This way, you get almost that fresh-from-the-pan texture again!
If you manage to keep any of this Juicy Fried Chicken leftovers around past a day or two, these steps are even more important. Trust me, taking the extra five minutes to use the oven instead of the microwave is what keeps this recipe earning its title as the Best Fried Chicken At Home, even on day two!
Frequently Asked Questions About Homemade Fried Chicken
I know that when you set out to make something like this truly Classic Fried Chicken, questions always pop up. We want that perfect marriage of crispy outside and totally tender inside, and sometimes a little clarification on technique helps seal the deal. Here are some of the things I get asked most often about achieving the Best Fried Chicken At Home.
Can I use chicken breasts instead of bone-in pieces for this fried chicken recipe?
Yes, you absolutely can! Chicken breasts are great, especially for an Easy Fried Chicken Recipe because they cook faster. However, they are much leaner than thighs or drumsticks, so you have to be even more careful with your heat so they don’t dry out. If you use breasts, I highly recommend cutting them into cutlets or strips first. If you keep them whole, just know they will likely cook through in closer to 4 or 5 minutes per side. Watch that temperature so you don’t burn the crust!
What is the best oil to use for the crispiest fried chicken?
For me, the oil choice is dictated by smoke point and flavor. You need something that can handle mid-300-degree heat without breaking down too fast. That’s why this recipe calls for 4 cups of vegetable oil or peanut oil. Peanut oil has a fantastic, slightly nutty flavor that really complements the savory spices in the dredge, but vegetable oil works beautifully and is often more budget-friendly when you are frying a large batch for a Family Favorite Chicken Recipe. Just make sure whatever you choose has a high smoke point!
How do I prevent the coating from falling off my fried chicken?
This is usually a two-part issue, but we addressed both steps in the main instructions! First, you must press that seasoned flour mixture onto the chicken hard when you dredge it. Use your hands and really pack it on; this creates the base layer that sticks. But the absolute most important step is letting the chicken rest, coated, for that full 20 minutes after you finish dredging. When the chicken sits there, soaking up the excess moisture from the buttermilk still clinging to it, that flour paste essentially turns into glue before it hits the hot oil. Don’t skip the rest, and you’ll have a secure, Crunchy Chicken Coating!
If you’re looking for an awesome side dish to serve alongside your perfectly crisp bird, you should definitely peek at my recipe for easy moist banana bread—it’s totally unexpected but amazing when paired with savory meals!
Share Your Crispy Fried Chicken Experience
Alright, deep breath! You just made the batch of fried chicken that dreams are made of. We went shoulder-to-shoulder through the buttermilk marinade, battled the oil temperature monsters, and now you’ve got that perfect, shatteringly crisp Southern Fried Chicken sitting on your cooling rack. I worked so hard developing this recipe because I truly believe that making a Family Favorite Chicken Recipe like this should be a joyful, repeatable, success story!
Now comes the best part—the sharing! I’m dying to know how it turned out for you. Did that cornstarch work its magic and give you that incredible Crunchy Chicken Coating? Did your family devour the whole plate before you could grab a second piece?
Please, please, please let me know! Head down to the comments section below and leave a rating for the recipe. Honestly, seeing your successes—or even hearing about any little snags you ran into so I can help troubleshoot next time—makes all those hours I spent testing ratios in my kitchen worth it. If you snapped a picture of your beautiful Golden Brown Chicken, tag me on social media so I can see your masterpiece! If you need to send me a quick note about substitutions or ideas, my direct contact link should help you find me, too: Reach out to Delish Symphony.
Happy cooking, my friend. Enjoy every single crunchy bite!
PrintClassic Crispy Southern Fried Chicken
Make incredibly juicy, tender fried chicken at home with a golden, crunchy coating using this classic Southern recipe featuring a buttermilk soak and a seasoned flour dredge.
- Prep Time: 30 min
- Cook Time: 25 min
- Total Time: 4 hr 55 min
- Yield: 4 servings 1x
- Category: Dinner
- Method: Deep Frying
- Cuisine: American
- Diet: None
Ingredients
- 3 lbs bone-in, skin-on chicken pieces (thighs, drumsticks, breasts)
- 2 cups buttermilk
- 1 tablespoon hot sauce
- 1 teaspoon salt
- 1 teaspoon black pepper
- 1 teaspoon paprika
- 1/2 teaspoon garlic powder
- 2 cups all-purpose flour
- 1/2 cup cornstarch
- 1 tablespoon salt
- 1 tablespoon black pepper
- 1 tablespoon paprika
- 1 teaspoon cayenne pepper (optional, for heat)
- 4 cups vegetable oil or peanut oil, for frying
Instructions
- Place the chicken pieces in a large bowl. Pour the buttermilk and hot sauce over the chicken. Stir to coat completely. Cover the bowl and refrigerate for at least 4 hours, or preferably overnight.
- In a separate shallow dish, whisk together the flour, cornstarch, 1 tablespoon salt, 1 tablespoon black pepper, 1 tablespoon paprika, and cayenne pepper if using. This is your dredge mix.
- Remove the chicken from the buttermilk, letting excess drip off, but do not wipe it dry. Dredge each piece thoroughly in the flour mixture, pressing the flour onto the chicken to create a thick coating. For extra crunch, dip the floured chicken back into the remaining buttermilk for a second, quick dip, then return it to the flour mixture, pressing again to build a thick crust.
- Place the coated chicken pieces on a wire rack set over a baking sheet. Let the chicken rest at room temperature for 20 minutes before frying. This helps the coating adhere.
- Pour the oil into a large, heavy-bottomed skillet or Dutch oven until it reaches about 1.5 inches deep. Heat the oil over medium-high heat until it reaches 325 degrees Fahrenheit. Use a thermometer to monitor the temperature.
- Carefully place 3 to 4 pieces of chicken into the hot oil, ensuring you do not overcrowd the pan. Overcrowding drops the oil temperature and results in soggy chicken.
- Fry the chicken for about 6 to 8 minutes per side, turning carefully with tongs, until deep golden brown and cooked through. Smaller pieces (wings, drumsticks) cook faster than larger pieces (breasts).
- Use a meat thermometer to check that the internal temperature reaches 165 degrees Fahrenheit.
- Remove the cooked chicken from the oil and place it on a clean wire rack set over paper towels to drain excess oil. Let the chicken rest for a few minutes before serving.
- Repeat the process with the remaining chicken, adjusting the heat as necessary to maintain the oil temperature between 300 and 325 degrees Fahrenheit.
Notes
- For the best results, maintain your oil temperature between 300°F and 325°F while frying.
- The cornstarch in the dredge is key to achieving a guaranteed crunchy coating.
- If you are cooking larger pieces, you may need to finish them in a 350 degree Fahrenheit oven after frying to ensure they cook completely without burning the crust.
Nutrition
- Serving Size: 1 piece
- Calories: 450
- Sugar: 2
- Sodium: 650
- Fat: 28
- Saturated Fat: 8
- Unsaturated Fat: 20
- Trans Fat: 0
- Carbohydrates: 15
- Fiber: 0
- Protein: 32
- Cholesterol: 110