
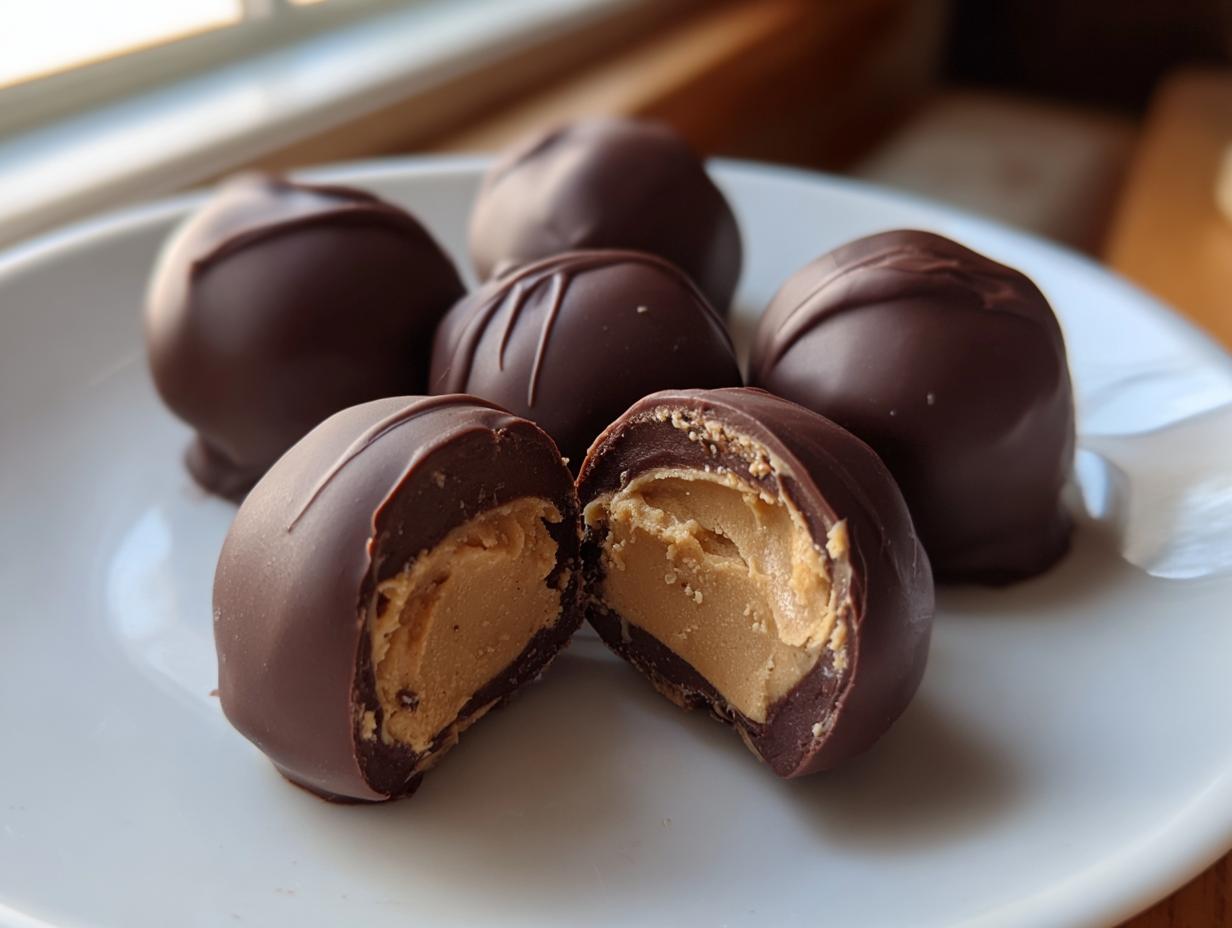
When the holidays roll around, or honestly, any time I need a quick, satisfying fix, nothing beats a batch of chocolate-covered peanut butter balls. We’re talking fast, we’re talking no oven required—the easiest, most satisfying chocolate peanut butter candy you’ll ever whip up, I promise. I remember making these constantly back when I was trying to balance my IT job with keeping my family fed with good food; these were my secret weapon for last-minute party contributions. I talk more about why we started this whole food journey over at our About page, but the core lesson was always this: simplicity wins. These aren’t just any candies; these classic peanut butter balls are pure nostalgia in a bite, a perfect harmony of creamy filling and rich chocolate shell. Trust me, you need this recipe in your rotation.
- Why You Will Love These Easy Peanut Butter Balls
- Ingredients for Classic Chocolate Coated Peanut Butter Balls
- Expert Tips for Perfect Peanut Butter Balls
- Step-by-Step Instructions for No Bake Peanut Butter Balls
- Popular Variations for Peanut Butter Balls
- Storage and Making Ahead for Holiday Candy Recipes
- Frequently Asked Questions About Peanut Butter Balls
- Estimated Nutritional Data for Peanut Butter Balls
- Share Your Homemade Peanut Butter Balls
Why You Will Love These Easy Peanut Butter Balls
I know you’re busy. We all are! That’s why these chocolate peanut butter treats fly off the counter faster than I can make them. If you’re looking for a dessert that screams homemade without actually keeping you chained to the oven, this is it. You get that rich, salty-sweet satisfaction with almost zero effort.
- Absolutely No Baking Required: Toss the oven mitts! These come together completely on the stovetop and in the fridge. It’s magic, I tell you!
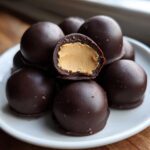
- Party & Holiday Ready: They look fancy, especially when you leave that little peanut butter peek-a-boo spot showing. People always assume they took hours, but nobody needs to know they took twenty minutes of prep. Perfect for filling up those holiday platters or bringing as a quick dessert when friends drop by.
- The Perfect Textural Balance: You get that dense, melt-in-your-mouth creamy center contrasted with that satisfying snap of hardened chocolate. It’s the best kind of decadent.
- Freezer Friendly: Need snacks ready weeks ahead? You got it. These store like a dream, which is why I always double the batch when I make them. If you need more quick ideas that use pantry staples, check out my roundup of simple snack recipes.
Ingredients for Classic Chocolate Coated Peanut Butter Balls
Okay, this is where we talk about the heavy hitters. The beauty of these chocolate peanut butter candy recipes is that they rely on stuff you probably already have just hanging out in the pantry. Seriously, most of this is just three main players, plus the chocolate shell to seal the deal. Don’t skimp on the butter quality here; since there’s no baking to mask anything, every ingredient shines through.
For this recipe, you absolutely need to make sure your butter is softened—and I mean really soft, like where your finger sinks right in without a fight. That’s crucial for getting that super smooth filling.
Here’s the rundown of what you need. Grab a sturdy bowl because things get thick!
- 1 cup creamy peanut butter – Use creamy! Crunchy messes up our beautiful smooth texture here.
- 1/2 cup (1 stick) unsalted butter, softened – Remember, softened, not melted. This is how we get that creamy peanut butter fudge balls base.
- 3 cups powdered sugar – Yes, a whole three cups. This sugar is doing the heavy lifting for structure.
- 1 teaspoon vanilla extract – Just a splash for depth, don’t skip it!
- 12 ounces semi-sweet chocolate chips – My go-to for that classic pairing, but use whatever chocolate you prefer for dipping!
- 1 tablespoon shortening or coconut oil (for melting chocolate) – This isn’t optional if you want that dreamy, thin coating that looks professional.
Expert Tips for Perfect Peanut Butter Balls
Listen, the recipe steps are simple, but the few little things my family does separate a good batch from absolute perfection. When you’re aiming for that ultimate creamy peanut butter bites experience, details matter, especially when it comes to temperature and texture before we introduce the chocolate. If you get these three things right, you’re set for hosting the best holiday candy display!
I’ve seen people rush the chilling step, and honestly, the whole thing turns into a gooey mess. Don’t do it! A thirty-minute chill isn’t just a suggestion; it’s critical for success. You want those centers firm enough to hold their shape when they hit the hot chocolate. You can find more ways I streamline my kitchen for efficiency over at my section on weeknight dinner recipes.
Achieving the Ideal Peanut Butter Ball Consistency
When you’re mixing everything in the bowl, you’re looking for something that’s stiff enough to roll but still soft. If yours seems too wet, meaning it’s greasy or won’t hold a ball shape when you test it, add powdered sugar one tablespoon at a time. Don’t dump it all in! Conversely, if the mixture is crumbling apart when you try to roll it, it’s too dry. Fix that by adding just a tiny bit more softened butter or even a teaspoon of regular milk. It’s all about balance between the fat and the sugar.
Techniques for Dipping Peanut Butter Balls in Chocolate
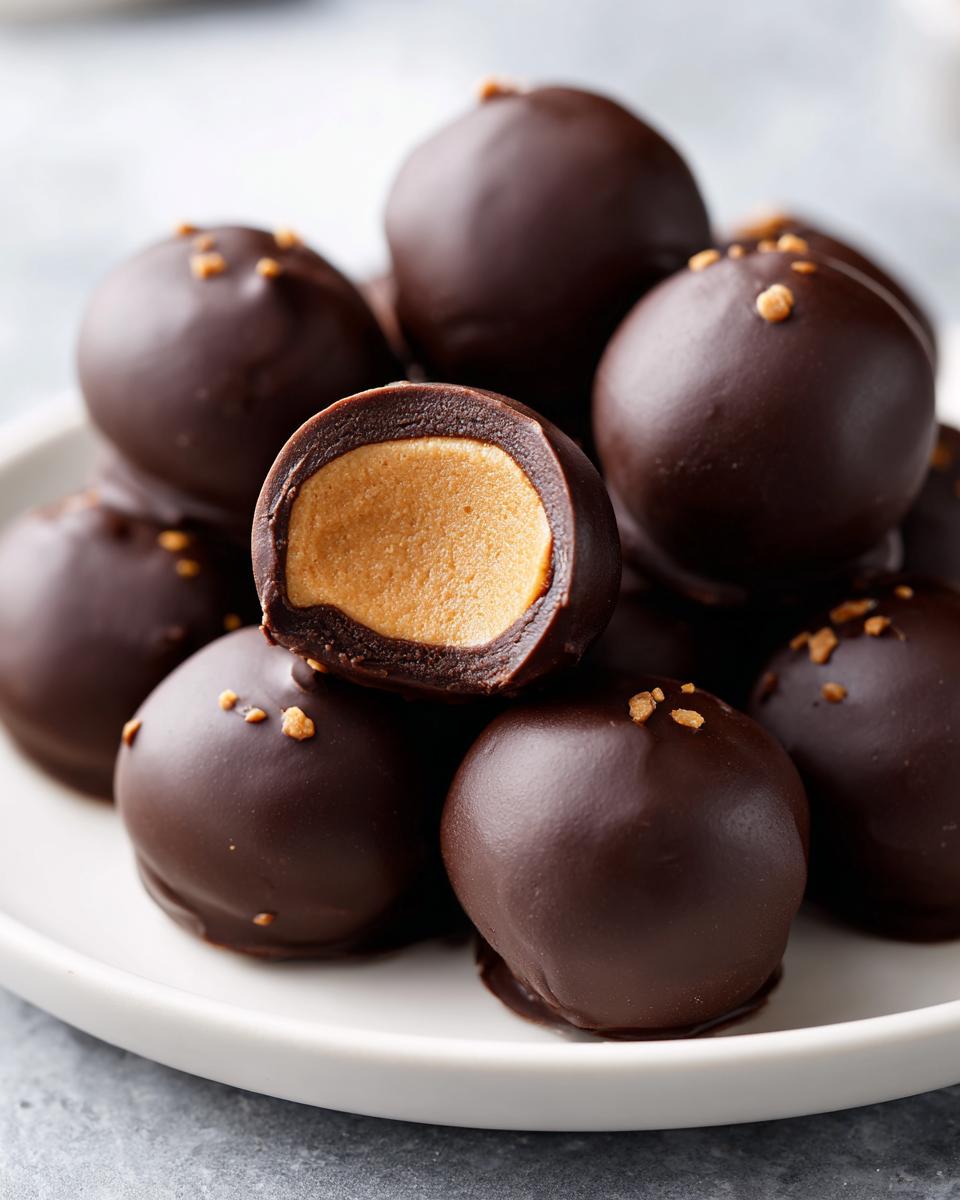
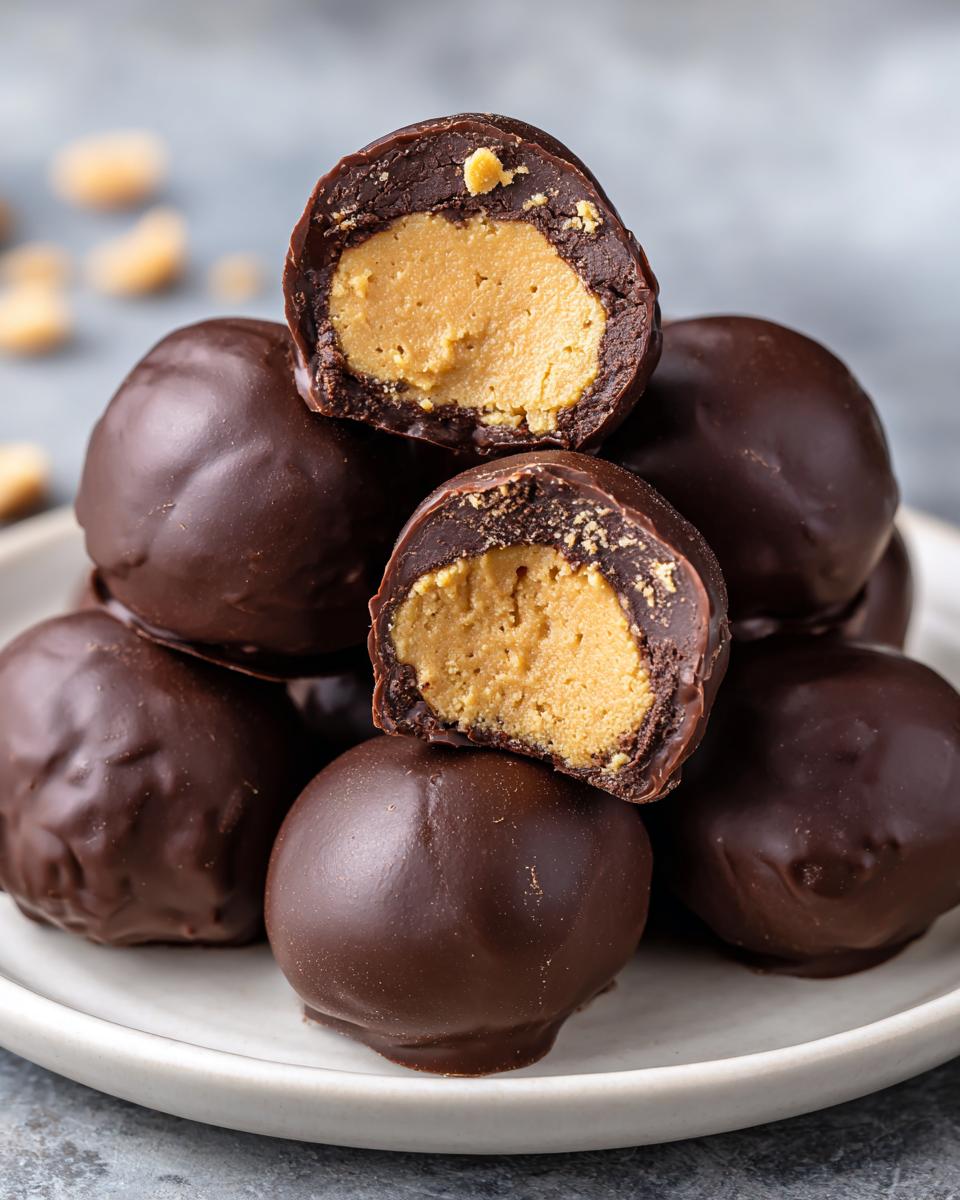
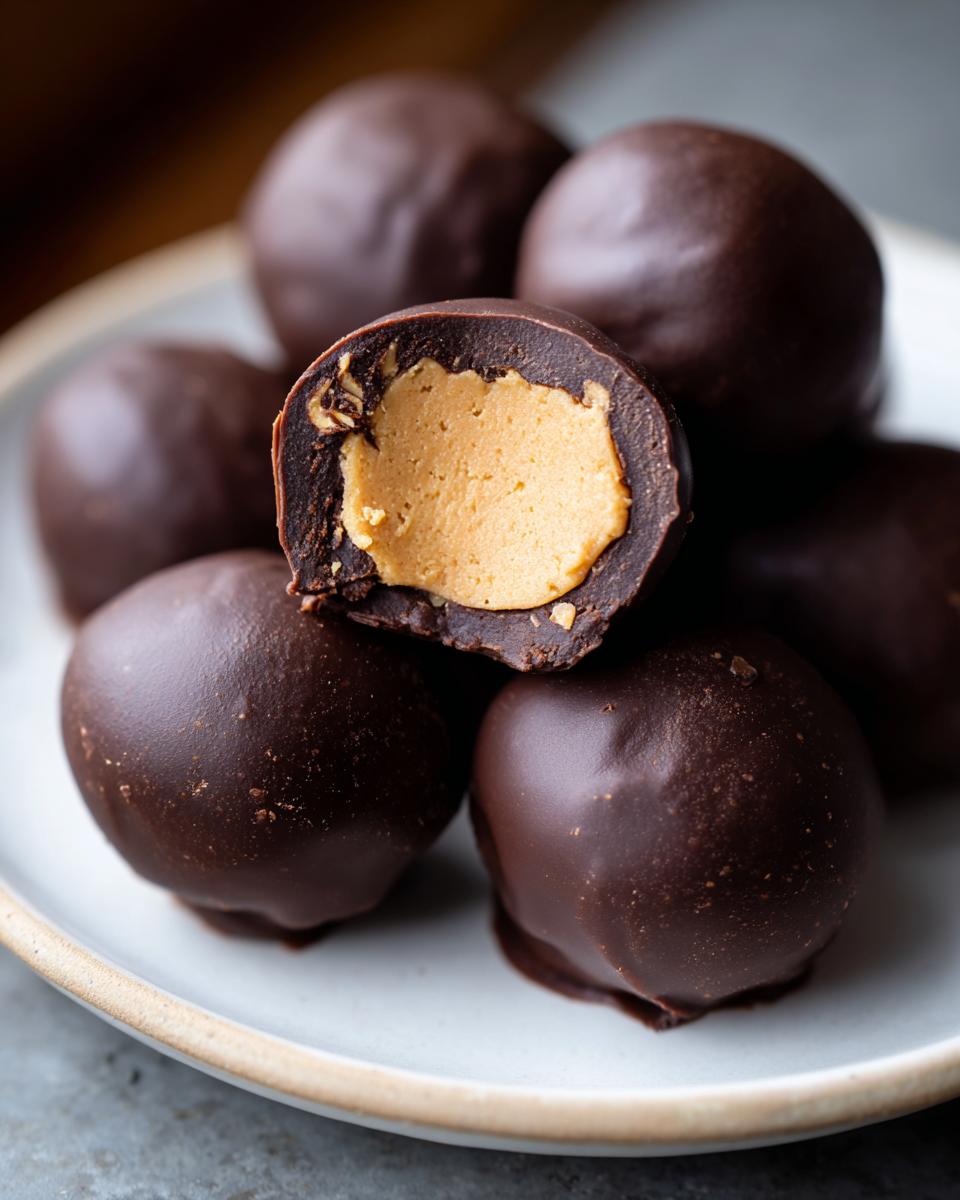
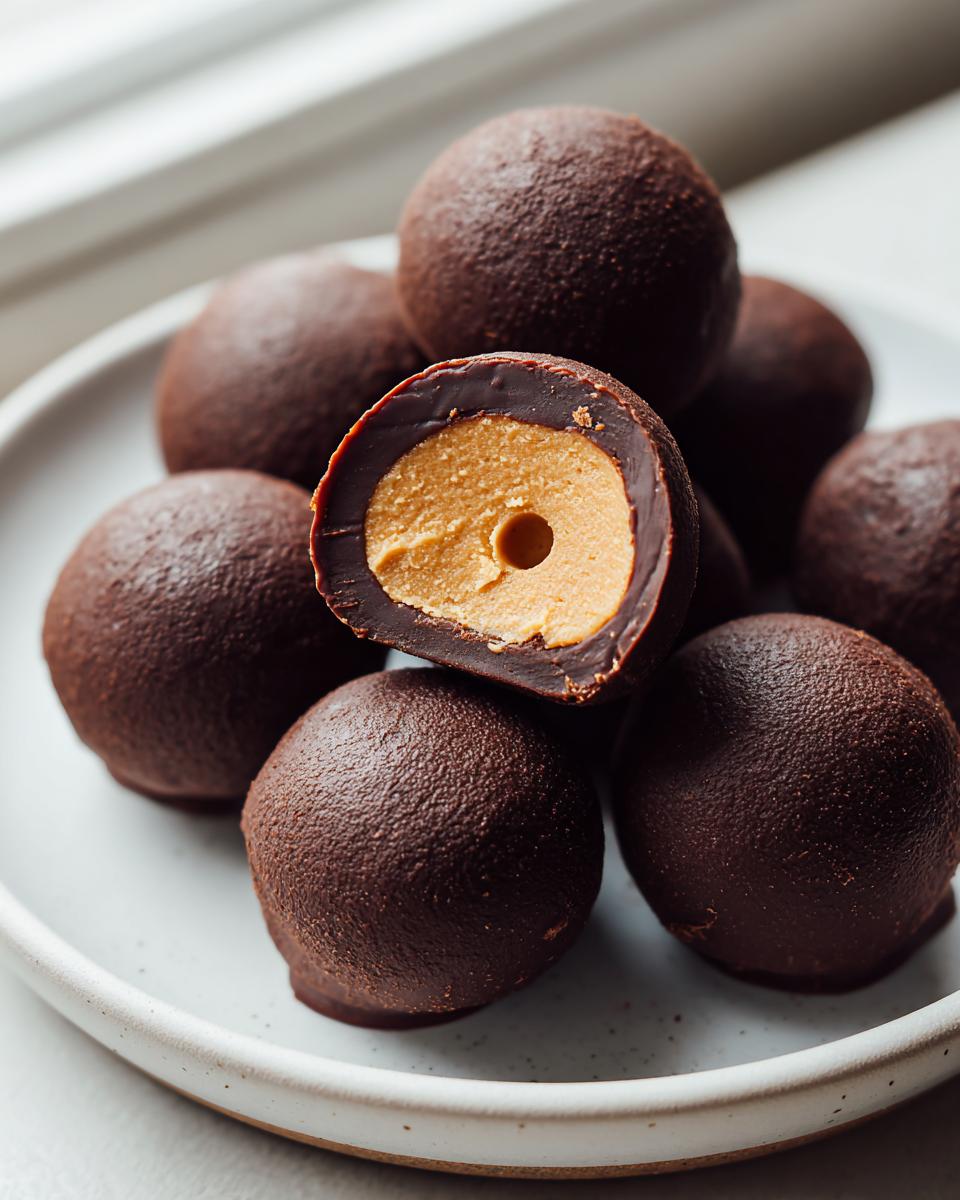
This is the make-or-break moment for beautiful chocolate coated peanut butter balls. Your centers need to be rock solid from the fridge! If they aren’t chilled, they’ll immediately start melting into the warm chocolate, and your balls will disintegrate when you try to lift them. Remember that tablespoon of shortening or coconut oil you added to the chocolate? That’s the secret sauce! It thins the chocolate just enough so you get a lovely, thin shell instead of a big, thick blob. Dip them quickly, let the excess drip off, and then place them down, making sure to leave that classic circle exposed. It’s the signature of a perfect buckeye ball!
Step-by-Step Instructions for No Bake Peanut Butter Balls
Okay, time to get our hands dirty! Since these are no bake peanut butter balls, our main action is chilling, not baking, but the mixing part needs focus. Don’t worry about preheating an oven—just make sure you have a couple of baking sheets lined with parchment paper ready to go. We need that surface clean and waiting because once the filling is mixed, we need to get those balls chilled fast so the chocolate dipping goes smoothly later.
I find that when I’m making a huge batch for a party, using a small cookie scoop helps me get really uniform balls. They look nicer, and they dip into the chocolate so much more evenly. It’s worth the extra effort to make sure every little bite is the same size!
We’re aiming for about 30 minutes of chilling time before we even start melting that chocolate. If you’ve got other things to do—maybe grab ingredients for one of my easy breakfast recipes—this is the perfect time to multitask while the filling firms up. For more inspiration on simple holiday chocolate treats, check out this classic recipe I love too: Peanut Butter Balls for Christmas.
Mixing the Creamy Peanut Butter Filling
First things first: grab that big bowl! We want everything combined until it’s totally homogenous—no streaks of butter or pockets of undissolved sugar allowed. I usually start by creaming the peanut butter and the softened butter together until they’re happy roommates. Then, slowly start adding in that powdered sugar and the vanilla a cup at a time. Don’t rush this; use your mixer on low or just a sturdy spoon to work it all together until you have a stiff dough. Once it’s mixed, use your hands now to roll them into those little one-inch spheres. Get them all rolled and onto that lined sheet before popping them into the fridge to tighten up for at least half an hour. Firm is the goal here!
Melting Chocolate and Coating Your Peanut Butter Balls
Once those centers are chilled firm, it’s chocolate time! We melt the chocolate chips and the shortening in the microwave. This is the key: microwave in short bursts—30 seconds is perfect—and stir thoroughly after every single one. If you try to melt it all at once, you’ll get seized, thick chocolate, and that’s a tragedy for any candy maker. Once it’s smooth and shiny, take your chilled peanut butter balls, hold them with two forks or a toothpick, and dip them in. Gently rotate to cover most of the surface, but you must leave a tiny bit of the filling showing at the top! That little peak is what makes them look so professional. Set them back on the parchment paper right away, and just let that beautiful chocolate harden up for you.
Popular Variations for Peanut Butter Balls
Okay, so the classic recipe is fantastic, but sometimes you just crave a little extra texture or maybe you have some leftover candy sitting around! I totally get it. The core recipe for these chocolate coated peanut butter balls is so wonderfully flexible. Think of the peanut butter dough as a perfect, creamy base waiting for you to customize it. I always keep a few options in mind when I’m making a big holiday batch because everyone has a favorite texture!
The best part? All these add-ins go in at the same time during the initial mixing stage. Mix them right in with the peanut butter, butter, sugar, and vanilla. They bulk up the filling a little bit, so you might get one or two extra balls out of the batch, but they still chill and dip exactly the same way. If you love exploring different types of sweet snacks, you should really look through my other delicious dessert recipes!
Adding Crunch: Rice Krispies or Graham Crackers to Peanut Butter Balls
If you like a little chew or crispness, these additions are your best friends. For Rice Krispies, I usually toss in about half a cup. It makes the interior filling feel a little lighter and gives you that great snap when you bite down. Just make sure your crispy rice cereal is fresh so it doesn’t taste stale! If you’re using graham crackers, crush them fine—we’re going for texture, not big chunks! About half a cup works perfectly here, too. This instantly turns your creamy peanut butter bites into something slightly different, but they absolutely still qualify as amazing no bake peanut butter balls. When you’re ready to get really wild and incorporate other candies, you have to check out this recipe for Butterfinger Balls—it’s incredible for texture!
Storage and Making Ahead for Holiday Candy Recipes
One of the biggest reasons I push people toward making these chocolate peanut butter balls when they start their holiday baking is that they are practically built for making ahead! Seriously, these are the ultimate sanity-saver when your kitchen is slammed leading up to Christmas or a big party.
The great news is that once these treats are completely set—meaning the chocolate shell is hard—they store beautifully. You want to use an airtight container, and this is important: keep them tucked away in the refrigerator. If you leave them out on the counter, especially in a warm house, that beautiful chocolate coating can get soft or even start to sweat, and nobody wants messy candy!
Stored properly in the fridge, these last easily for a full week, which means you can make them the weekend before any big event. That’s one massive item checked off your list for your Christmas jam recipe prep, or whatever else you’re tackling! Since they are served cold, they are always perfectly firm and ready to go. Don’t forget to check out how others handle similar treats; this idea for Christmas peanut butter balls is another great one if you’re looking for festive inspiration for your other holiday candy recipes.
If you need to keep them even longer, they freeze like a dream! Just make sure they are fully set, place them in a freezer-safe container with some parchment paper layered between the rows so they don’t stick together, and they’ll be good for a couple of months. Thaw them in the fridge overnight, and they taste just as fresh as the day you dipped them!
Frequently Asked Questions About Peanut Butter Balls
I get so many questions every year once the holidays hit about these treats—and honestly, that just tells me how popular they are! It’s smart to ask! When you have a recipe this simple—a true quick dessert for a party—you want to make sure you nail the little details so they turn out perfect every time. Here are the common things people wonder about when making these easy peanut butter dessert classics.
Can I use crunchy peanut butter in these peanut butter balls?
You technically *can*, but I wouldn’t recommend it if you’re going for that classic, smooth, melt-in-your-mouth experience. The standard recipe relies on creamy peanut butter because that’s what gives us that beautiful, uniform texture in the filling. If you use crunchy, you’re going to get flecks of nut pieces throughout the center, which changes the whole mouthfeel. Also, crunchy peanut butter tends to have slightly less oil than creamy, which *can* sometimes make rolling a little rougher, though if you like that extra texture, go for it! Just know it won’t be exactly like the classic buckeye balls recipe.
What is the best chocolate to use for coating these no bake peanut butter balls?
For me, there is no debate: semi-sweet is the winner. Why? Because the peanut butter filling is already quite sweet thanks to all that powdered sugar. The slight bitterness of the semi-sweet chocolate cuts through that richness perfectly, creating that amazing sweet-and-salty harmony we’re after. Milk chocolate is definitely an option if you have super sweet fans in your house, but be warned—the entire candy can get very sweet very fast. Since we are using shortening in the melted chocolate, we are taking a shortcut that eliminates the need for actual tempering, which keeps things super simple for us busy home cooks! That little bit of oil ensures the chocolate flows nicely and gives a great sheen when it sets up hard.
Can I freeze homemade peanut butter balls?
Yes, absolutely! This is one of my favorite kitchen hacks for year-round snacking or getting a huge jump start on your quick desserts for parties menu. Once the chocolate coating is completely firm, place the peanut butter balls in a single layer in a freezer-safe container. If you’re stacking them, you must place wax paper or parchment paper between the layers so they don’t fuse into one giant chocolate brick. They can stay in the freezer for up to three months! When you want to eat them, just move them straight from the freezer into the refrigerator for about an hour or two to thaw gently. They taste just as fresh as the day you made them because they are completely sealed in chocolate!
Estimated Nutritional Data for Peanut Butter Balls
Now, let’s talk fuel! I always feel a little guilty when I’m sneaking one of these creamy peanut butter bites, but hey, everything in moderation, right? Because these are total homemade goodness, these numbers are definitely an estimate based on the ingredients we used—creamy peanut butter, butter, sugar, and semi-sweet chocolate. This isn’t lab-tested data, you know? It’s just the best guess I have for you based on the standard recipe components.
These values are calculated assuming the recipe yields 24 perfect little energy bites. If you happen to make them bigger or smaller than my one-inch standard, the numbers will shift!
- Serving Size: 1 ball
- Calories: 180
- Sugar: 18g
- Sodium: 75mg
- Fat: 12g
- Saturated Fat: 5g
- Unsaturated Fat: 7g
- Trans Fat: 0g
- Carbohydrates: 17g
- Fiber: 1g
- Protein: 4g
- Cholesterol: 15mg
See? Not too bad for a little slice of chocolate heaven! They are definitely richer than a standard granola bar, but they are way worth it when you need a quick chocolate fix. Enjoy them guilt-free, knowing you made them yourself with quality ingredients!
Share Your Homemade Peanut Butter Balls
Whew! That’s it! You’ve officially conquered the easiest, creamiest, most chocolatey treat on the block. I am so happy you took the time to make these amazing peanut butter balls. Now that you’ve finished, I really, really want to know what you thought!
Baking is always better when it’s shared, so please take a moment and let me know! If you loved them—and I know you did—hit those little stars below and leave a rating. That feedback is so important to me as I keep developing recipes and making sure my instructions are crystal clear for everyone.
Did you stick to the classic look, or did you get adventurous with the mix-ins? If you took a beautiful picture of your chocolate peanut butter candy, please snap it and share it with me over on social media! Seeing your creations honestly makes my day and helps other home cooks feel confident trying out these simple recipes. You can always reach out directly through my contact page if you have super specific questions too. Happy sharing, friends!
PrintEasy No-Bake Chocolate Covered Peanut Butter Balls
Make these simple, no-bake peanut butter balls, similar to buckeyes, coated in rich chocolate. This recipe is quick and perfect for parties or holiday treats.
- Prep Time: 20 min
- Cook Time: 5 min
- Total Time: 25 min
- Yield: About 24 balls 1x
- Category: Dessert
- Method: No-Bake
- Cuisine: American
- Diet: Vegetarian
Ingredients
- 1 cup creamy peanut butter
- 1/2 cup (1 stick) unsalted butter, softened
- 3 cups powdered sugar
- 1 teaspoon vanilla extract
- 12 ounces semi-sweet chocolate chips
- 1 tablespoon shortening or coconut oil (for melting chocolate)
Instructions
- In a large bowl, combine the peanut butter, softened butter, powdered sugar, and vanilla extract. Mix with a spoon or electric mixer until the mixture is smooth and well combined.
- Roll the peanut butter mixture into small balls, about 1 inch in diameter. Place them on a baking sheet lined with parchment paper.
- Chill the peanut butter balls in the refrigerator for at least 30 minutes until firm. This prevents them from falling apart when dipping.
- In a microwave-safe bowl, combine the chocolate chips and shortening (or coconut oil). Microwave in 30-second intervals, stirring well after each interval, until the chocolate is completely smooth.
- Dip each chilled peanut butter ball into the melted chocolate, leaving a small circle of the peanut butter filling exposed at the top (like a buckeye).
- Return the dipped balls to the parchment-lined baking sheet.
- Allow the chocolate to set completely at room temperature, or place them in the refrigerator for faster setting.
Notes
- For variations, you can mix 1/2 cup of crushed graham crackers, Rice Krispies, or finely crushed Butterfinger candy into the peanut butter mixture before rolling.
- Store the finished peanut butter balls in an airtight container in the refrigerator for up to one week.
- If you prefer a thinner chocolate coating, add a little more shortening to the melted chocolate.
Nutrition
- Serving Size: 1 ball
- Calories: 180
- Sugar: 18
- Sodium: 75
- Fat: 12
- Saturated Fat: 5
- Unsaturated Fat: 7
- Trans Fat: 0
- Carbohydrates: 17
- Fiber: 1
- Protein: 4
- Cholesterol: 15