

There’s a certain magic that happens when you pull a piece of piping hot, puffy, buttery naan bread from an oven—it tastes miles better than anything packaged, right? But you probably think you need a scorching hot tandoor oven to master that texture. That’s simply not true! I’m Michael Carter from Delish Symphony, and my goal is always to simplify the complicated. Today, we are diving into the **best naan bread** recipe that gives you that fantastic, restaurant quality results using nothing more than a hot skillet on your stovetop. Trust me, this surprisingly easy process delivers that soft, fluffy, buttery naan bread you’ve been craving, perfect for scooping up your favorite curries.
- Why This Easy Skillet Naan Bread Recipe Works So Well
- Ingredients for Your Homemade Naan Bread Recipe
- How to Prepare Quick Naan Bread Using a Skillet
- Tips for Success Making Authentic Naan at Home
- Serving Suggestions for Your Naan for Curry
- Storage and Reheating Instructions for Naan Bread
- Frequently Asked Questions About Making Naan Bread
- Estimated Nutrition for This Homemade Naan Recipe
- Share Your Naan Bread Creations
Why This Easy Skillet Naan Bread Recipe Works So Well
When I first started experimenting with homemade flatbreads, I was shocked at how much better they tasted than anything I could buy pre-made. This recipe is a winner because it hits every mark you could possibly want in a homemade loaf.
Here’s what makes this **Skillet Naan Bread** truly special for your weeknight table:
- It nails that pillowy, **Soft Fluffy Naan Bread** texture that melts in your mouth.
- You can forget about finding a specialty oven; your everyday stovetop is all you need.
- That signature browned and blistered look? We get that easily!
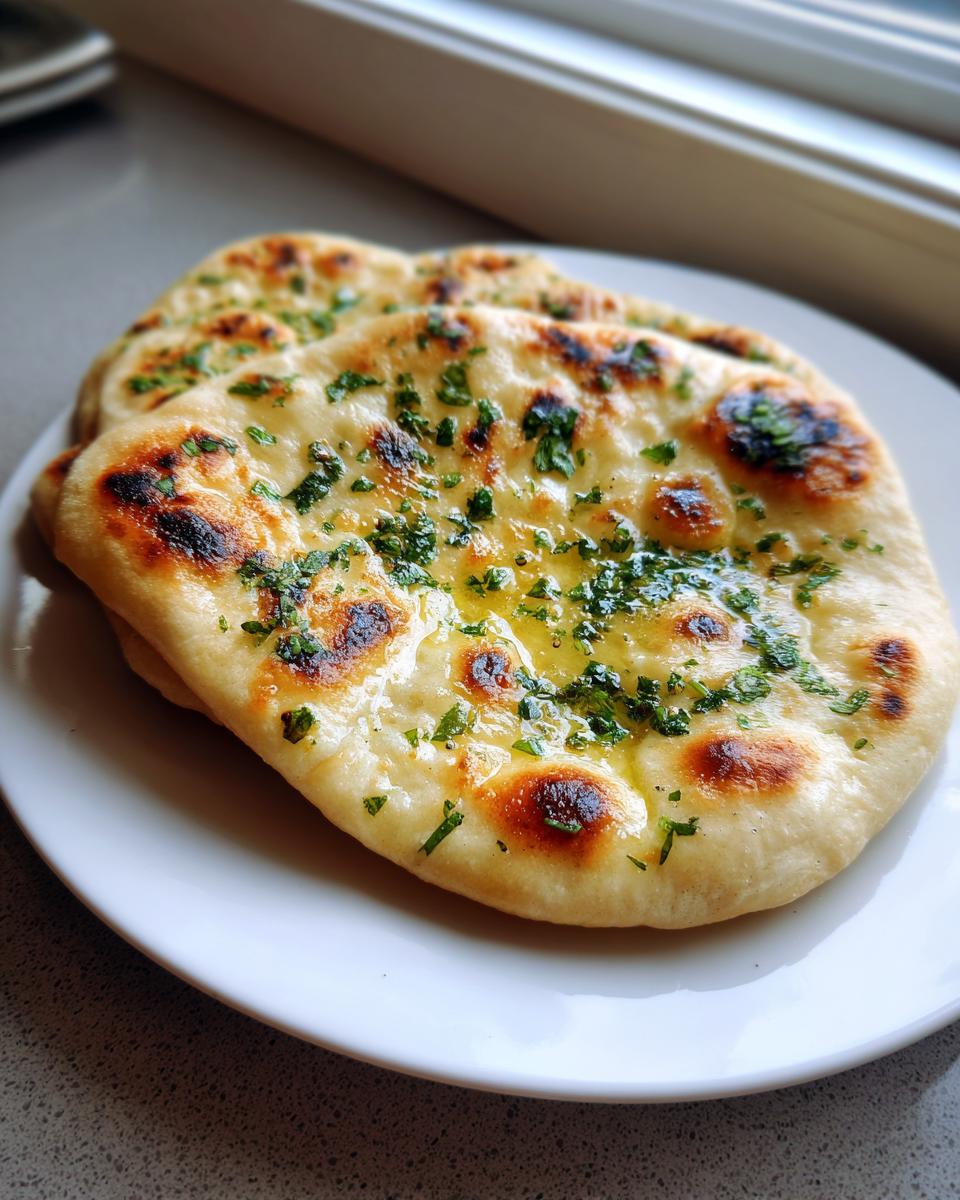
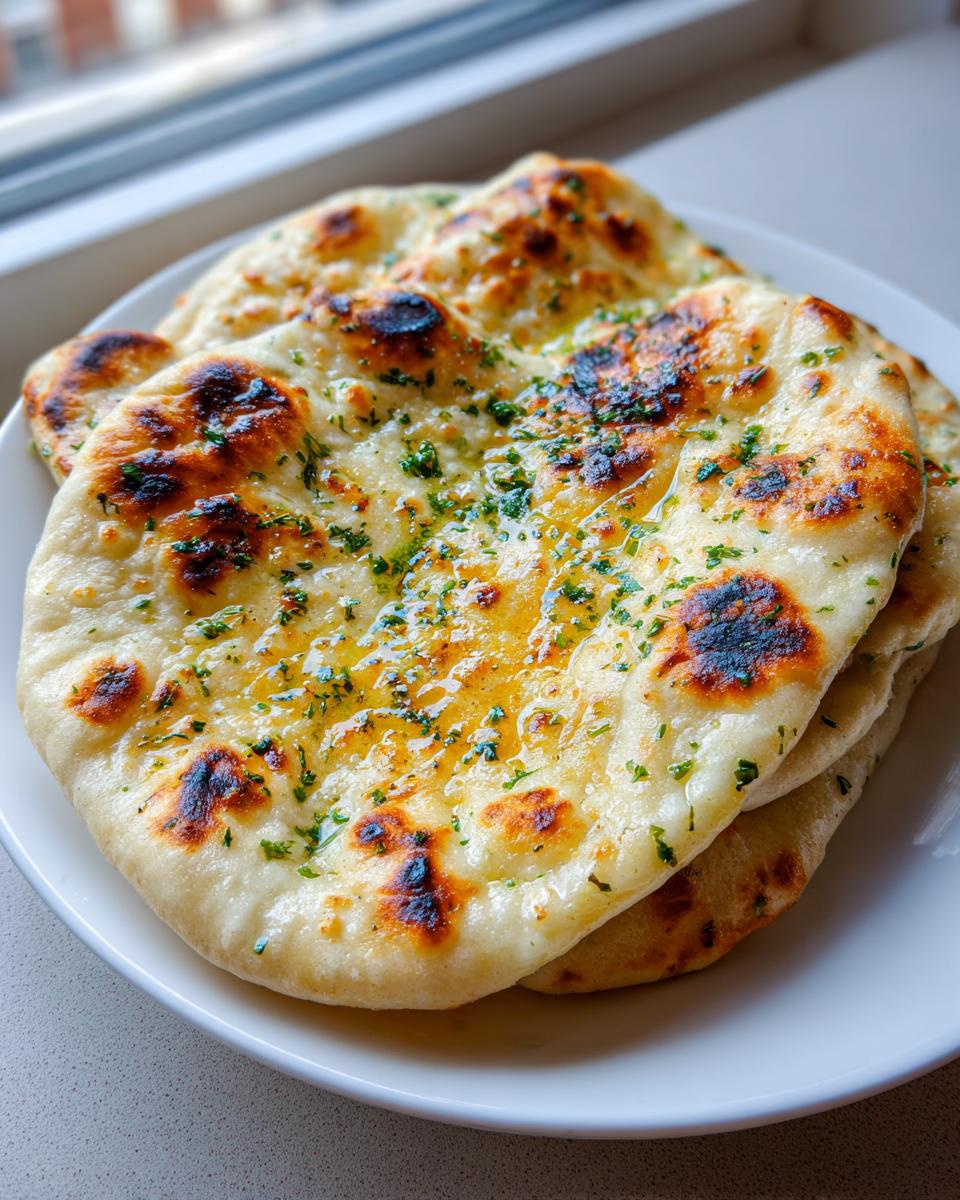
- The final brush of melted garlic butter makes this simply irresistible—it’s the definition of **Buttery Naan**.
Achieving That Perfect Soft Fluffy Naan Bread Texture
The secret to achieving that desired soft and airy result lies in two key ingredients we add to the dough: the yeast and the yogurt or milk. The yeast gives the dough that beautiful lift and internal lightness we look for. The yogurt, or even just milk, adds fat and acidity, which tenderizes the gluten strands. That means a softer, chewier final product!
My one big tip here, and this is vital for elasticity: knead it until your arm gets tired, maybe about 5 to 7 minutes. When you punch the dough down after it rests, you should feel it resisting just a little bit. That resistance is the structure that holds the air bubbles when the bread hits the heat.
The Secret to No Tandoor Bread: Skillet Cooking
We don’t need traditional clay ovens to get those gorgeous dark spots and maximum puff! A cast-iron skillet or a heavy-bottomed pan works wonders because it retains intense, consistent heat. When you place the thin dough onto that screaming-hot, dry surface, the steam trapped inside the dough instantly expands—*poof*—you get that gorgeous oven-spring.
This method is the core of why this is such an **Easy Flatbread Recipe**. It’s fast, predictable, and it creates the perfectly blistered surface that makes restaurant naan so addictive.

Ingredients for Your Homemade Naan Bread Recipe
Having the right components laid out before you start is the harmony I always look for in the kitchen. For this **Homemade Naan Bread Recipe**, we are working with simple pantry staples, but the combination is what really sings. We need active dry yeast to get that rise, flour, a little sugar to feed the yeast, salt for flavor, and crucially, some plain yogurt or milk for that signature tenderness.
Make sure your water is warm—not hot—just right for waking up the yeast! And don’t forget the olive oil; we use a bit in the dough and a bit to keep things from sticking in the bowl.
Garlic Butter for Buttery Naan
Now, this next part is non-negotiable if you want that amazing takeaway flavor. Once the naan comes off the heat, it gets immediately brushed with a simple but potent mixture. You need melted butter, which delivers that rich, **Buttery Naan** finish, mixed with fresh ingredients.
You are going to mix together:
- Melted butter (the more, the better, I say!)
- Two cloves of garlic, minced super fine.
- Just a touch more olive oil to thin it slightly.
This topping is what takes your simple flatbread and elevates it straight to your favorite Indian restaurant menu!
How to Prepare Quick Naan Bread Using a Skillet
This is where the true kitchen harmony happens! You’ve mixed your dough, and now you need to treat that yeast kindly so it rewards you with wonderfully **Quick Naan Bread**. The whole process moves pretty fast once the dough is done rising, so have your skillet ready to go before you even start shaping.
Dough Activation and First Rise for Naan Bread
First things first: we wake up that yeast. You want your water to be warm to the touch—if it’s too hot, you’ll kill the yeast, and then you’re only making chewy bread, not soft naan! Mix the yeast with the sugar and warm water. Let it hang out for about 5 to 10 minutes. When you see that light, foamy layer on top, you know the yeast is happy and ready to work its magic on your flour. Once everything is mixed into a shaggy ball, transfer it to an oiled bowl, cover it up snugly, and tuck it away in a warm spot.
Patience here is key for that fluffy texture. Let the dough double in size; this should take about an hour to 90 minutes, depending on how warm your kitchen is. Don’t rush it! A good rise means light bread.
Shaping and Cooking the Naan Bread on the Stovetop
When the dough is ready, punch it down gently and divide it into eight equal little sections. You aren’t making perfect circles here; traditional naan is usually shaped into a beautiful oval or teardrop. Roll each piece out until it’s thin—aim for about 1/8 of an inch thick. Not too thin, or it won’t puff!
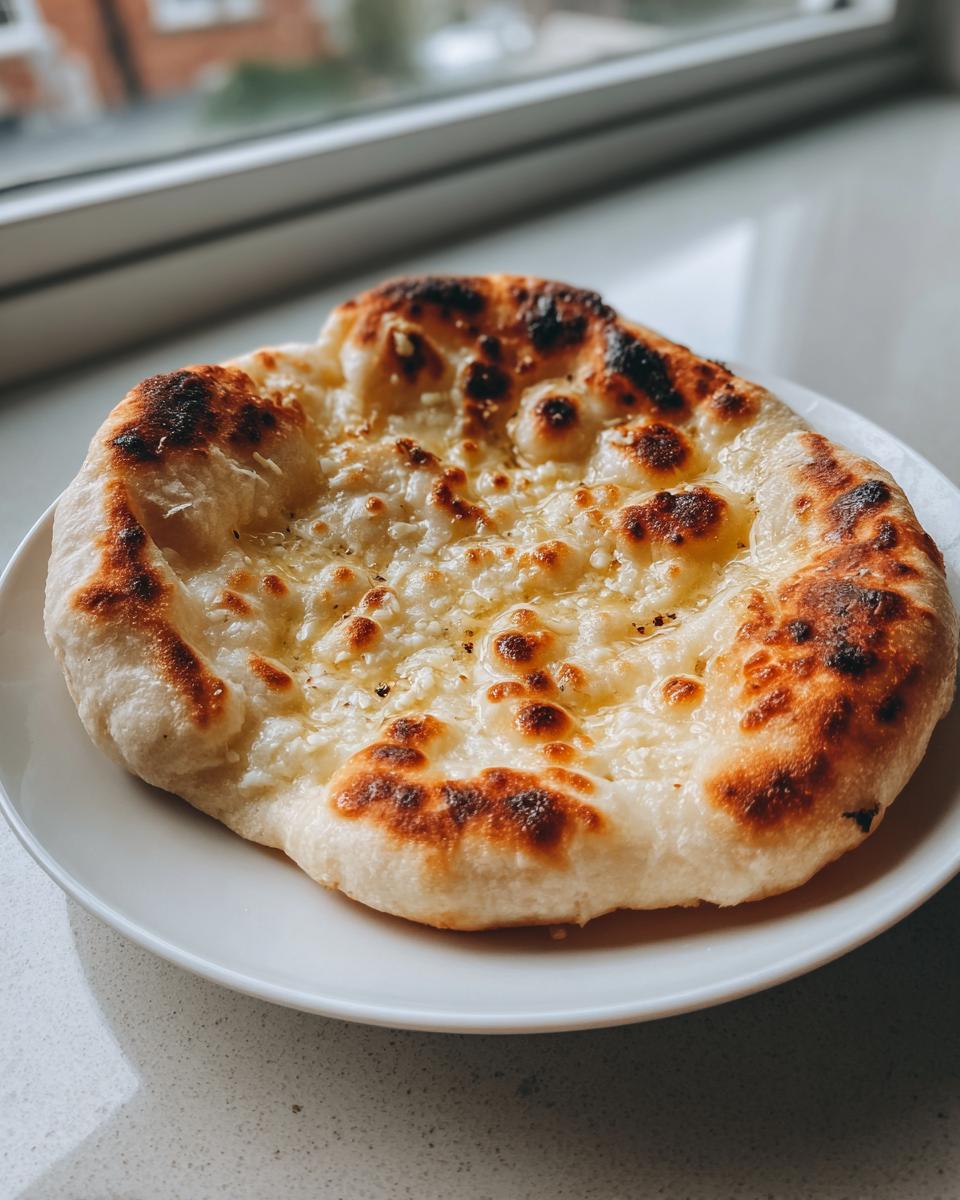
Here is my crucial skillet tip: Get your cast iron pan ripping hot over medium-high heat *before* you put any bread in. Do not add oil to the pan at this stage! Lay your dough onto the dry, screaming-hot surface. After about 1 to 2 minutes, you’ll see big bubbles forming. Flip it over! Cook that second side for just one minute longer until you see those lovely, dark, slightly charred spots—that’s the restaurant look we want.
Applying the Garlic Butter Finish
The second that naan comes off the skillet, throw it onto a platter and immediately brush it generously with your prepared garlic butter mixture. It needs to be brushed right away so the warm bread soaks up all that rich, golden flavor. If you wait even five minutes, the surface hardens, and the butter just sits on top, which is a tragedy!
After you butter the first one, place a clean kitchen towel over the stack of cooked naan. This traps the steam and keeps every single piece wonderfully soft and pliable while you finish the rest of the batch. It’s a little trick that makes a huge difference!
If you want to stick with baking instead of the skillet, check out my tip for getting crispy potatoes—you can use a similar high-heat baking sheet method for your naan at 450°F for about 5 to 7 minutes.
Tips for Success Making Authentic Naan at Home
I know we nailed the skillet method, but getting that soft, pillowy texture consistently is what truly makes you feel like you’ve mastered **Authentic Naan at Home**. I’ve gathered a few tricks over the years that I rely on every time I make a batch.
If you want naan that stays soft and pliable—not stiff—right off the griddle, you absolutely must cover the cooked bread. As soon as I pull a piece off the heat, I brush it with the garlic butter and immediately lay it under a clean, folded kitchen towel. This traps the steam and keeps every piece wonderfully tender while you finish shaping and cooking the rest of the dough.
Also, if your oven is better behaved than your stovetop sometimes, don’t forget you can bake them! Just preheat a baking sheet to 450°F (232°C) and bake the dough pieces for about 5 to 7 minutes. It gives you a slightly different puff, but it’s still fantastic for serving with something rich, like my creamy garlic aioli dip!
Serving Suggestions for Your Naan for Curry
Okay, you’ve just pulled the best, softest, most buttery naan bread off the skillet. Now what? This bread is ridiculously versatile, but let’s be honest, its main job is pairing perfectly with rich, saucy cuisine. This **Naan for Curry** transforms dinner immediately!
You absolutely must have it ready when serving any heavy curry—it’s the perfect vehicle to soak up every last drop of sauce. Think of your favorite Tikka Masala or Dal Makhani; you need that fluffy texture to scoop it up!
But don’t stop there! These teardrop beauties are fantastic dipped into homemade hummus or drizzled with a little fresh pesto. Honestly, if you have leftovers (which is rare!), heating them up quickly and rolling them around leftover chicken is a fantastic quick wrap. Or, if it’s a chilly night, use that warm bread to dip into something cozy like my Potato Leek Soup. It’s just pure comfort food synergy!
Storage and Reheating Instructions for Naan Bread
I’ve got good news: homemade naan bread is genuinely delicious the next day, but you have to store it correctly! The enemy of soft, chewy naan is air exposure, which makes it stiff and dry. If you have leftovers—and I mean *if*, because usually, they disappear fast—seal them up tightly immediately after they’ve cooled down a tiny bit.
I recommend placing the stack of naan inside a large zip-top bag or wrapping them securely in a couple of layers of aluminum foil. Stored this way on the counter, they stay wonderfully soft for about two days. I wouldn’t push it past that; this dough is fresh, so it doesn’t have the preservatives store-bought stuff has.
Bringing Back That Fresh-From-the-Skillet Flavor
When you’re ready to reheat that beautiful **Naan Bread**, you need high, dry heat again to wake up those soft pockets. Microwaving is a big no-no for me; it makes flatbreads rubbery later on. We want to mimic the original cooking process!
Reheating is super fast, which is great when you’re serving this alongside a simmering curry. Get your heavy skillet or a dry baking sheet scorching hot again—medium-high is perfect. Lay the bread right onto the dry, preheated surface for just 30 to 45 seconds per side. You are just warming it through and bringing back that initial puff and tenderness that was trapped under the towel earlier.
If you like that garlicky flavor but didn’t save any butter mixture, don’t worry! Just melt a teaspoon of butter, brush it quickly over the warmed naan on the skillet, and you’re done. One quick warm-up and you’re back to enjoying bread that tastes like it just came off the heat this very second. It feels like a magic trick, honestly!
Frequently Asked Questions About Making Naan Bread
I know baking bread can sometimes feel a little daunting, so let’s tackle a couple of the questions I get most often about this **Naan Bread** recipe. Getting these little technical details right makes all the difference between good bread and that amazing, soft bread you dream about!
Can I make this Yeast Naan Recipe without yeast?
You absolutely *can* try to skip the yeast for a truly fast version, but I have to be honest: you’ll lose that signature airy, pillowy texture that makes this bread special. Yeast dough needs time to build those air pockets during the rise. If you are truly in a rush, you could try using a baking powder/baking soda combination in place of the yeast and cut the rise time way down, but it will yield something closer to a quick flatbread than a traditional, chewy naan. For the fluffiest results, stick with the yeast in this **Yeast Naan Recipe**.
How thick should the Easy Flatbread Recipe dough be?
This is a great technical question! When you are rolling out your ovals, aim for about 1/8 of an inch thick. If you roll them thinner than that, they might cook too fast and end up more cracker-like rather than soft and puffy. If they are too thick—say, maybe 1/4 of an inch—they can get doughy in the center because the heat from the skillet can’t penetrate quickly enough to cook the middle before the outside burns. Aiming for that thinness ensures a perfect puff on the stovetop.
If you’re looking for more inspiration on making fast, delicious meals without a lot of fuss during the week, you can always check out my collection of weeknight dinner recipes!
Estimated Nutrition for This Homemade Naan Recipe
Now, I always tell people that when we cook from scratch like this, we’re prioritizing flavor and fun over tracking every single macro—that’s our Delish Symphony philosophy! We focus on building a flavorful life, not just counting numbers. However, because you might be planning out your dinner spread, I’ve run the numbers based on our specific ingredient list for this **Homemade Naan Recipe**.
These estimations are based on dividing the whole recipe into 8 equal servings, so keep that in mind when you divide them up. Remember, these are estimates, but they give you a good baseline for enjoying this delicious, buttery flatbread alongside your favorite curry!
For one piece of this soft naan (estimated):
- Calories: Around 220
- Total Fat: About 6 grams
- Carbohydrates: Roughly 37 grams
- Protein: Approximately 6 grams
See? Not bad at all for homemade, garlicky, buttery bread! It’s certainly a better choice than reaching for that stiff, store-bought stuff. Enjoy every bite, knowing exactly what went into making it perfect for your table.
Share Your Naan Bread Creations
I genuinely hope you loved making this **Naan Bread** as much as I love sharing it with you. Here at Delish Symphony, we are all about simplifying the art of cooking to build that amazing, flavorful life, and nothing says that better than successfully pulling off restaurant-quality bread right in your own kitchen!
This recipe relies on just a few core ingredients, but the final outcome—that soft, buttery, delicious loaf—is huge. So, once you’ve tucked into that warm bread with your favorite curry or dip, I would absolutely love to hear about it!
If this recipe hit the right notes for you and brought some harmony to your dinner table, please consider leaving a quick rating right down in the comments. Five stars means the world because it tells me this practical technique is working for you, too.
And hey, if you ran into a little snag—maybe your dough was sticky or you had a question about the skillet temperature—don’t hesitate to ask! I read every comment, and I’m here to help troubleshoot so we can ensure every batch is a symphony of flavor. If you need to reach out directly with a longer question, you can always use my contact page too. Happy cooking, and let’s keep that delicious music playing in your kitchen!
PrintEasy Skillet Garlic Naan Bread: Soft, Buttery, and Restaurant Quality

You can make soft, fluffy, buttery naan bread at home without a tandoor. This simple recipe uses a skillet to achieve restaurant-quality results perfect for serving with your favorite curries.
- Prep Time: 20 min
- Cook Time: 15 min
- Total Time: 1 hour 35 min
- Yield: 8 servings 1x
- Category: Side Dish
- Method: Skillet Cooking
- Cuisine: Indian
- Diet: Vegetarian
Ingredients
- 1 teaspoon active dry yeast
- 1 teaspoon sugar
- 1 cup warm water (about 105-115°F)
- 3 cups all-purpose flour, plus more for dusting
- 1 teaspoon salt
- 2 tablespoons plain yogurt or milk
- 2 tablespoons olive oil, plus more for brushing
- 2 cloves garlic, minced
- 2 tablespoons melted butter, for brushing
Instructions
- Activate the yeast: In a small bowl, mix the warm water, sugar, and yeast. Let it stand for 5 to 10 minutes until foamy.
- Combine dry ingredients: In a large bowl, whisk together the flour and salt.
- Mix the dough: Pour the yeast mixture, yogurt, and 2 tablespoons of olive oil into the flour mixture. Mix until a shaggy dough forms.
- Knead: Turn the dough out onto a lightly floured surface and knead for 5 to 7 minutes until it becomes smooth and elastic.
- First rise: Place the dough in a lightly oiled bowl, turning to coat. Cover the bowl with plastic wrap or a damp cloth and let it rise in a warm place for 1 to 1.5 hours, or until doubled in size.
- Shape the naan: Punch down the risen dough and divide it into 8 equal pieces. Roll each piece into an oval or teardrop shape, about 1/8 inch thick.
- Prepare garlic butter: In a small bowl, mix the melted butter, minced garlic, and 1 tablespoon of olive oil.
- Cook the naan: Heat a heavy-bottomed skillet or cast-iron pan over medium-high heat until very hot. Do not add oil to the pan.
- Cook on the skillet: Place one piece of rolled dough onto the hot, dry skillet. Cook for 1 to 2 minutes until bubbles form on the surface and the bottom has brown spots.
- Flip and finish: Flip the naan and cook the other side for about 1 minute until lightly charred spots appear.
- Brush with butter: Immediately transfer the cooked naan to a plate and brush generously with the garlic butter mixture. Repeat with the remaining dough pieces.
Notes
- For extra soft naan, cover the cooked bread with a clean kitchen towel while you cook the remaining pieces.
- If you prefer a milder garlic flavor, let the minced garlic steep in the melted butter for 10 minutes before brushing.
- You can bake these instead of using a skillet: place them on a preheated baking sheet at 450°F (232°C) for 5-7 minutes.
Nutrition
- Serving Size: 1 piece
- Calories: 220
- Sugar: 1
- Sodium: 350
- Fat: 6
- Saturated Fat: 3
- Unsaturated Fat: 3
- Trans Fat: 0
- Carbohydrates: 37
- Fiber: 1
- Protein: 6
- Cholesterol: 10