

Oh, the magic of a warm, freshly baked bread, especially when it’s going to be slathered in garlicky goodness and dunked into your favorite curry! Seriously, there’s nothing quite like homemade garlic naan bread to make your weeknight dinner feel extra special. Forget those store-bought versions; this recipe is all about getting that wonderfully soft, fluffy texture right in your own kitchen, and the best part? You make it all on the stovetop! It’s one of those recipes that just brings everyone together around the table, a little slice of harmony I picked up from my own kitchen adventures, much like our philosophy here at Delish Symphony. You know, Michael Carter, the guy behind all this, is all about making delicious food accessible, and this naan is the perfect example of that – simple, satisfying, and full of flavor! You can read a bit more about our story here.
- Why You'll Love This Easy Garlic Naan Bread Recipe
- Gather Your Ingredients for Homemade Garlic Naan
- Step-by-Step Guide to Making Stovetop Naan
- Tips for Perfect Garlic Naan Bread Every Time
- Serving Your Garlic Naan Bread
- Storing and Reheating Your Soft Naan Bread
- Frequently Asked Questions about Garlic Naan Bread
- Estimated Nutritional Information
Why You’ll Love This Easy Garlic Naan Bread Recipe
This garlic naan bread recipe is a total winner for so many reasons:
- Super Speedy: You can whip it up in under 2 hours, including rise time!
- Seriously Easy: No fancy equipment needed, just your hands and a skillet.
- Perfectly Soft & Fluffy: Get that melt-in-your-mouth texture every single time.
- Killer Flavor: That garlicky, buttery goodness? Unbeatable!
- The Ultimate Curry Companion: It’s the BEST side for soaking up all that delicious sauce.
Gather Your Ingredients for Homemade Garlic Naan
Alright, let’s talk about what you’ll need for this amazing homemade garlic naan. The best part? You probably have most of this stuff in your pantry right now! We’re keeping it super simple, just like Mike likes it, so no need to run all over town. We’ve got warm water to wake up our yeast, a little sugar to help it along, all-purpose flour for that perfect base, salt for flavor, and baking powder for a little extra lift. Then we’ve got the magic makers: plain yogurt for that super soft texture and melted butter for richness. And of course, the star of the show – fresh garlic for that punchy flavor, plus some optional cilantro to make it extra special. Easy peasy!
Step-by-Step Guide to Making Stovetop Naan
Alright, my friends, let’s get down to business and make some incredible garlic naan bread! This is where the real magic happens. It might seem a little involved, but trust me, it’s super straightforward and totally worth it. We’re going to break it down step-by-step so you end up with the softest, fluffiest naan ever.
Activating the Yeast for Your Yeast Naan
First things first, we need to get our yeast ready to party! Grab a small bowl and pour in your warm water – think bathwater warm, not hot-hot. Sprinkle in the sugar and then the active dry yeast. Give it a gentle stir, and then just let it sit for about 5 to 10 minutes. You’ll know it’s working when it gets all foamy and bubbly on top. If it doesn’t foam up, your yeast might be a bit tired, so you’ll need to start over with fresh yeast!
Mixing the Dough for Soft Naan Bread
Now, in a nice big bowl, whisk together your all-purpose flour, salt, and baking powder. This just gets everything evenly distributed. Then, pour in that foamy yeast mixture, along with the plain yogurt and the melted butter. Start mixing it all together with a spoon or your hands until it looks like a shaggy, messy dough. Don’t worry about it being perfect yet; that’s what kneading is for!
Kneading and Rising Your Garlic Naan Dough
Turn that shaggy dough out onto your lightly floured counter. This is where the work begins! Knead the dough for about 5 to 7 minutes. You want to push, fold, and turn it until it becomes smooth, soft, and elastic. It should feel wonderfully pliable. Once it’s nice and smooth, pop it into a lightly oiled bowl, cover it with a clean kitchen towel or plastic wrap, and let it rise in a cozy, warm spot for about 1 to 1.5 hours. You want it to double in size – it’s like watching a delicious little miracle!
Shaping and Cooking Your Stovetop Naan
Okay, your dough has risen beautifully! Gently punch it down to release the air. Now, divide that bouncy dough into 6 to 8 equal pieces. On your floured surface, roll out each piece into that classic oval or teardrop naan shape. Don’t make them too thick, or they won’t cook through properly. Heat up your cast-iron skillet or griddle over medium-high heat – make sure it’s good and hot! Carefully place a piece of dough onto the hot skillet. Cook it for about 1 to 2 minutes per side. You’ll see it start to puff up and get little golden-brown spots. That’s exactly what we want for perfect stovetop naan!
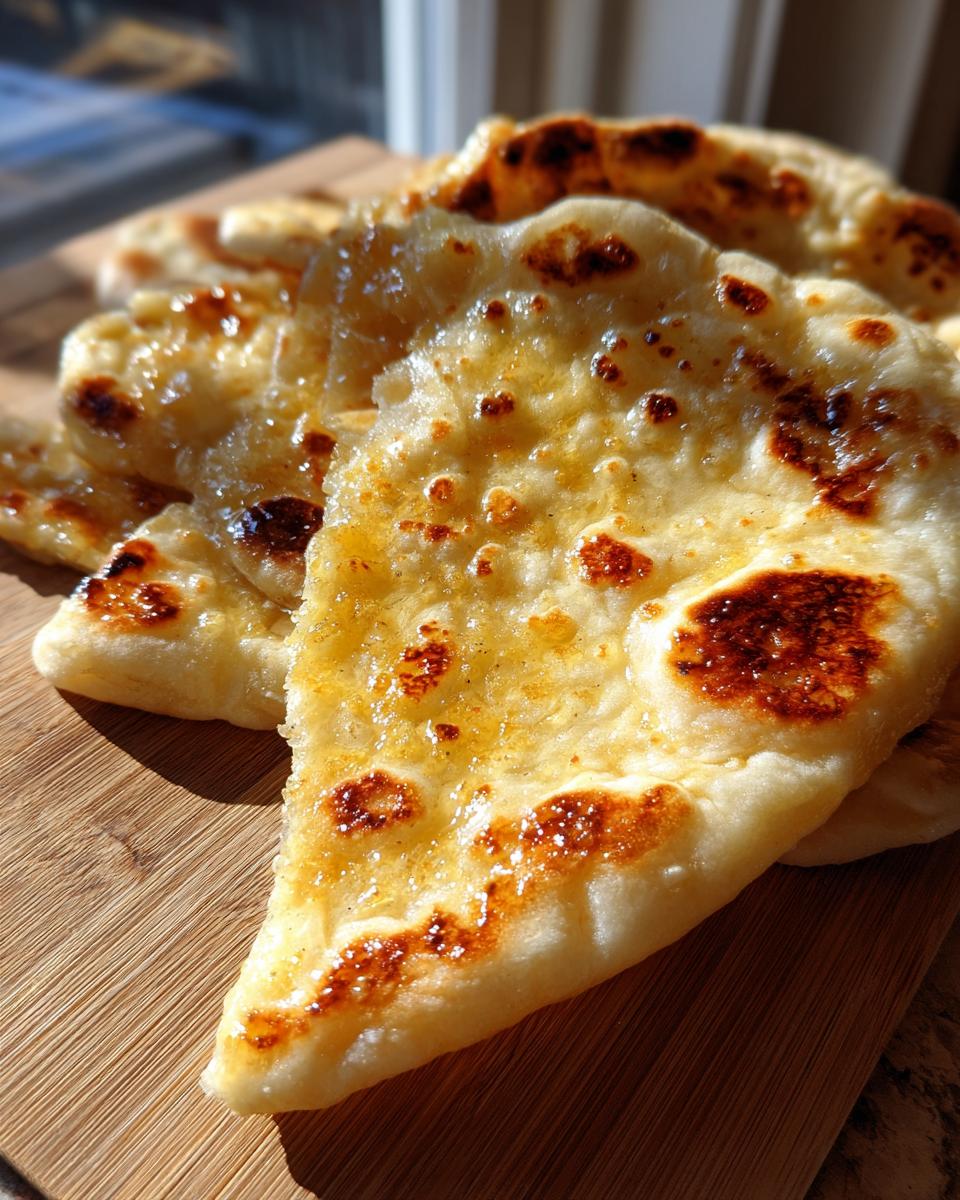
Preparing and Applying the Garlic Butter
While your naan is doing its thing on the skillet, quickly whip up that glorious garlic butter. Just mix your melted butter with that minced garlic and chopped cilantro, if you’re using it. As soon as a piece of naan is cooked and puffed, brush it generously with that amazing garlic butter mixture. The heat from the naan will help all those flavors soak right in. It’s pure heaven, I tell you!

Tips for Perfect Garlic Naan Bread Every Time
Alright, let’s make absolutely sure your garlic naan bread turns out like a dream! We’ve all been there, right? One minute it’s perfect, the next… not so much. But don’t you worry, I’ve got a few tricks up my sleeve that Mike taught me, and they’ll guarantee you get that wonderfully soft naan every single time.
Ingredient Notes and Substitutions for Homemade Naan
So, about those ingredients: the warm water for the yeast is key – too cold and it won’t activate, too hot and you’ll kill it! Think cozy bathwater temps. And that plain yogurt? Oh, it’s pure magic for keeping your homemade naan super soft and tender. If you happen to be out of yogurt, don’t panic! A good quality milk, like whole milk, can totally take its place. Just make sure your water, yeast, and sugar are mixed well to get that lovely foam going.
Achieving the Perfect Puff on Your Indian Bread
The secret to that gorgeous puff on your Indian bread? Heat, my friends, and a not-too-thick dough! Make sure your cast-iron skillet is screaming hot before that dough even thinks about touching it. Seriously, give it a good few minutes to heat up properly over medium-high heat. Also, don’t roll your dough too thin. A little bit of thickness helps trap the steam inside, creating that beautiful bubble. Watch it closely, it cooks super fast!

Serving Your Garlic Naan Bread
Now that you’ve got this beautiful, warm garlic naan bread fresh off the skillet, what do you do with it? Well, obviously, you’re going to dunk it into your favorite curry! It’s the absolute perfect side for curry, soaking up every last bit of sauce. But don’t stop there! It’s also amazing with lentil dal, grilled meats, or even just a dollop of raita. Honestly, it’s so good, you might find yourself eating it all on its own!

Storing and Reheating Your Soft Naan Bread
So, you’ve made this amazing batch of soft naan bread and maybe, just maybe, you have a few pieces left over (a rare occasion, I know!). To keep that lovely softness, let the naan cool completely first. Then, wrap them snugly in plastic wrap or place them in an airtight container. They’ll stay good at room temperature for a day or two. If you need to store them longer, pop them in the fridge, but they might get a little firmer. Reheating is super easy – just give them a quick toast in a dry skillet over low heat for a minute or two, or pop them in the toaster oven for a few seconds. They’ll be warm and soft again in no time!
Frequently Asked Questions about Garlic Naan Bread
Got a few burning questions about making this delicious homemade garlic naan? I totally get it! It’s always good to know a few extra tips and tricks. Here are some of the most common things people ask:
Can I make this easy naan recipe without yeast?
You know, traditional naan often uses yeast to get that lovely soft texture and nice rise. While you *can* make a quick, unleavened flatbread without yeast, it won’t quite have that characteristic fluffy chewiness you get from this recipe. The yeast really makes all the difference for that soft, pillowy consistency we’re after!
How do I get my garlic naan bread to puff up?
Ah, the puff! That’s the fun part! The biggest secret is a super hot skillet – think medium-high heat and let that pan get nice and toasty before you add the dough. Make sure your dough isn’t rolled too thick, either. When the hot skillet hits the dough, the moisture inside turns to steam and creates that awesome puff. Keep an eye on it; it happens fast!
Can I freeze the naan dough for later?
You bet! This yeast naan dough freezes like a dream. Once you’ve made the dough and it’s risen (or even before you let it rise fully), portion it out, wrap each portion tightly in plastic wrap, and then pop them into a freezer bag. When you’re ready to bake, just thaw the dough overnight in the fridge, or for a few hours on the counter, and then proceed with shaping and cooking!
What’s the best way to reheat leftover garlic butter naan?
To bring that lovely softness back, I like to gently warm it up in a dry skillet over low heat for just a minute or two per side. You can also wrap it in a damp paper towel and microwave it for about 10-15 seconds, but be careful not to overdo it, or it can get a bit gummy. A quick zap in a toaster oven works too!
Estimated Nutritional Information
Just a heads-up, like any good home cook, these numbers are approximate! Based on the ingredients in this easy naan recipe, one piece of this delicious garlic naan bread typically has about 180 calories. You’re looking at around 5g of fat, 30g of carbs, and 5g of protein. These are just estimates, of course, and can change a little depending on how generous you are with the butter and garlic!
PrintEasy Garlic Naan Bread

Make soft, fluffy garlic naan at home with this simple stovetop recipe, perfect as a side for your favorite curry.
- Prep Time: 20 min
- Cook Time: 15 min
- Total Time: 1 hour 35 min
- Yield: 6-8 servings 1x
- Category: Side Dish
- Method: Stovetop
- Cuisine: Indian
- Diet: Vegetarian
Ingredients
- 1 cup warm water
- 1 teaspoon active dry yeast
- 1 teaspoon sugar
- 2 ½ cups all-purpose flour, plus more for dusting
- 1 teaspoon salt
- ½ teaspoon baking powder
- 2 tablespoons plain yogurt
- 2 tablespoons melted butter, plus more for brushing
- 2 cloves garlic, minced
- Fresh cilantro, chopped (optional)
Instructions
- In a small bowl, combine warm water, yeast, and sugar. Let stand for 5-10 minutes until foamy.
- In a large bowl, whisk together flour, salt, and baking powder.
- Add the yeast mixture, yogurt, and melted butter to the dry ingredients. Mix until a shaggy dough forms.
- Turn the dough out onto a lightly floured surface and knead for 5-7 minutes until smooth and elastic.
- Place the dough in a lightly oiled bowl, cover, and let rise in a warm place for 1-1.5 hours, or until doubled in size.
- Punch down the dough and divide it into 6-8 equal portions.
- On a lightly floured surface, roll each portion into a thin oval or teardrop shape.
- Heat a cast-iron skillet or griddle over medium-high heat.
- Cook each naan for 1-2 minutes per side, until puffed and lightly browned in spots. You may see some bubbles form.
- While the naan is cooking, mix melted butter with minced garlic and chopped cilantro (if using).
- Brush the cooked naan with the garlic butter mixture.
- Serve immediately.
Notes
- For extra flavor, you can add a pinch of nigella seeds to the dough.
- If you don’t have yogurt, you can substitute with milk.
- Ensure your skillet is hot before adding the naan for the best puff.
Nutrition
- Serving Size: 1 naan
- Calories: 180
- Sugar: 2g
- Sodium: 350mg
- Fat: 5g
- Saturated Fat: 2g
- Unsaturated Fat: 3g
- Trans Fat: 0g
- Carbohydrates: 30g
- Fiber: 1g
- Protein: 5g
- Cholesterol: 10mg