

You ever get that specific, undeniable craving for those perfect, bite-sized pieces of crispy chicken? You know the ones—the fast-food favorites that taste amazing but leave you feeling a little guilty later. Well, I’m Michael Carter, and that’s exactly where I was when I decided we needed a better solution here at Delish Symphony. That’s why I spent weeks testing and tweaking until I landed on this ultimate **homemade chicken nuggets** recipe. These aren’t some sad, dry chicken pieces, trust me. The goal was simple: restaurant-quality crispy and juicy nuggets that you can confidently make in your oven or air fryer. This is the perfect fast, reliable, and delicious **quick chicken dinner** for busy families, designed by someone who values efficiency just as much as flavor. For more foolproof family fare, check out my guide to amazing weeknight dinner recipes.
- Why This Baked Homemade Chicken Nuggets Recipe is Your New Weeknight Hero
- Gathering Ingredients for Easy Chicken Nuggets
- Step-by-Step Instructions for Homemade Chicken Nuggets Recipe
- Mastering Air Fryer Chicken Nuggets Variations
- Making Copycat Chicken Nuggets and Ground Options
- Tips for Perfect Homemade Nuggets Every Time
- Serving Suggestions for Chicken Nuggets for Kids
- Storage and Reheating Instructions for Homemade Chicken Nuggets
- Frequently Asked Questions About Homemade Chicken Nuggets Recipe
- Nutritional Estimates for Your Homemade Chicken Nuggets
- Share Your Symphony: Rate This Homemade Chicken Nuggets Recipe
Why This Baked Homemade Chicken Nuggets Recipe is Your New Weeknight Hero
Look, I get it. Weeknights are crazy, and sometimes you just need a win. This recipe for **homemade chicken nuggets** is designed specifically to deliver maximum flavor payoff with minimal effort. It’s all about hitting those key attributes everyone wants:
- It gives you truly **Crispy Chicken Nuggets** without the heavy oil mess you expect from frying.
- It fits perfectly into your healthy goals, making them genuinely **Healthy Chicken Nuggets**.
- We’re talking about a full meal ready in about 30 minutes!
Achieving Maximum Crunch Without Deep Frying
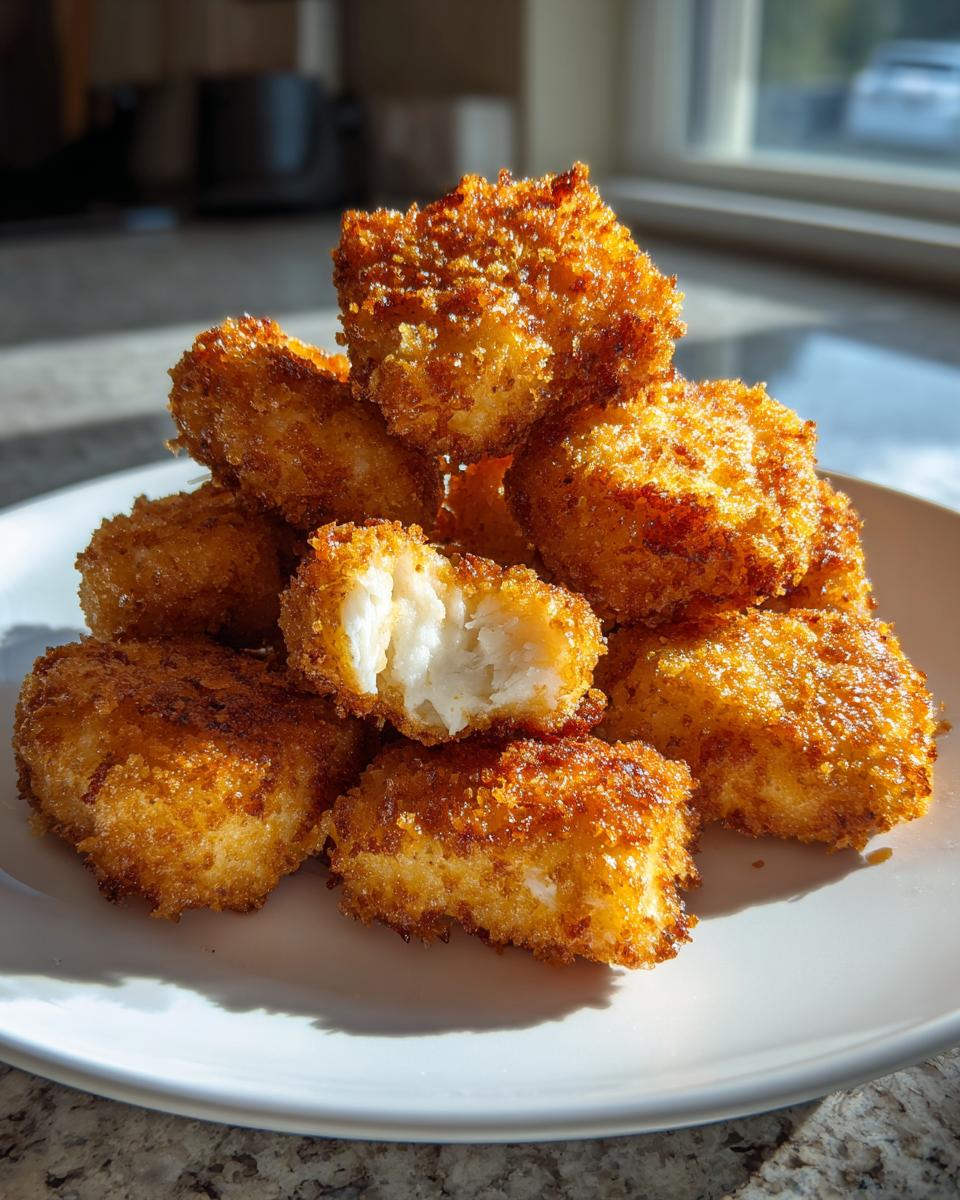
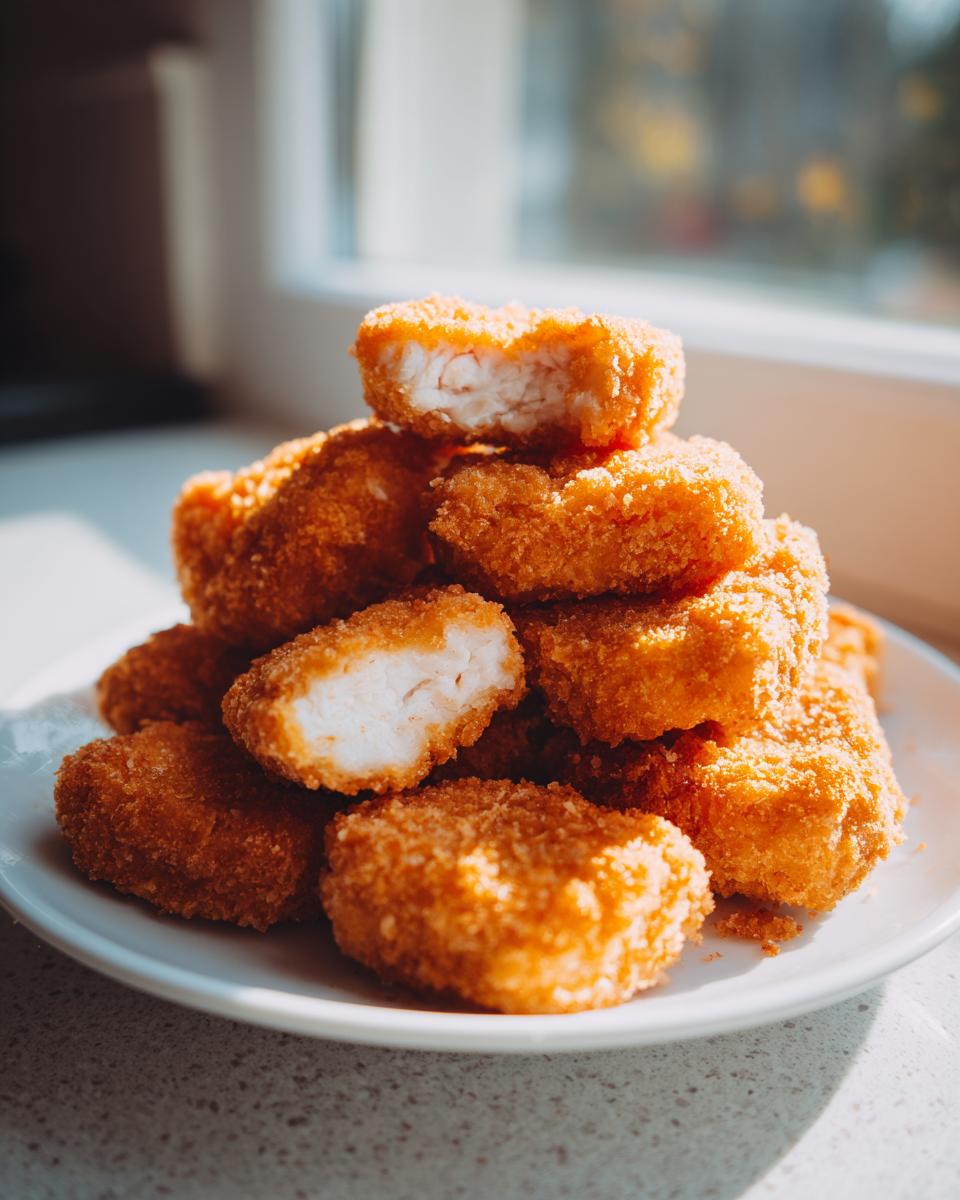
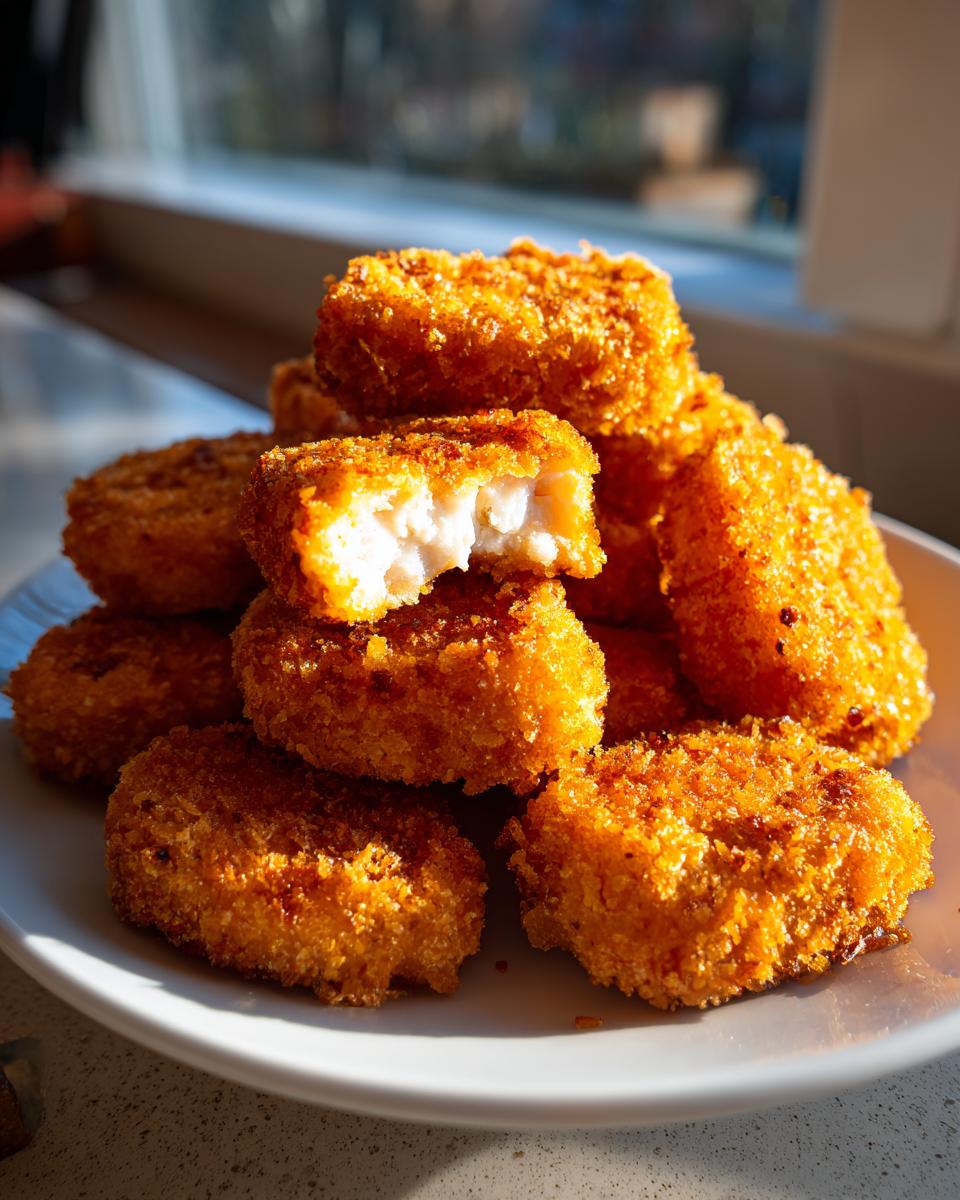
The secret weapon here is Panko breadcrumbs. Seriously, ditch the regular crumbs; Panko creates those beautiful, jagged edges that catch the heat perfectly. We need to give those breadcrumbs something to grab onto, right? That’s where a generous coat of cooking spray comes in. I spray them right before they go into the oven. It sounds small, but that mist of oil is what transforms them from pale and soft to golden brown and wonderfully crunchy.
Juicy Chicken Nuggets Homemade Guarantee
The biggest fear with baked chicken is dryness, and nobody wants that! To make sure you get those amazing **Juicy Chicken Nuggets Homemade**, the key is consistency. Cut your chicken breast into perfect, even 1-inch pieces. Uniform size means uniform cooking. Then, when you bread them, take your time to press that coating on firmly. That crust acts like a little seal, trapping all the natural juices inside while the outside crisps up beautifully. It works every time!
Gathering Ingredients for Easy Chicken Nuggets
When we talk about Delish Symphony, we’re talking about ingredients you can actually find. No scavenger hunts required here! We want this **Homemade Chicken Nuggets Recipe** to fit right into your busy life. For this bake, you need just a handful of straightforward items to create something truly special. We’re focusing on chicken breast, a simple flour dredge, eggs, and crucially, Panko breadcrumbs. This blend is designed to be accessible and effective for an **Easy Chicken Nuggets** night!
Ingredient Notes and Substitution Guidance
A quick note from my test kitchen on a couple of these players. You absolutely have to use Panko breadcrumbs if you want that incredible crunch when baking; regular breadcrumbs just don’t crisp up the same way in the oven. Also, if you have an extra 30 minutes before you start breading, try marinating your chicken pieces in half a cup of buttermilk first. It tenderizes the meat wonderfully and adds another layer of flavor complexity that you taste later.
Other than that, stick to the list provided. Overcomplicating the seasoning is where people lose that **Juicy Chicken Nuggets Homemade** texture because they start fussing too much instead of focusing on the breading technique!
Step-by-Step Instructions for Homemade Chicken Nuggets Recipe
Okay, this is where the symphony really comes together! Making these **homemade chicken nuggets** is methodical, but it moves lightning fast once you get into the rhythm. First things first: get your oven preheated to 400°F (200°C). Line a baking sheet and give it a good coat of cooking spray—we want zero sticking! The real trick to keeping things speedy is setting up your breading station correctly before you even start dipping.
Setting Up the Breading Station for Perfect Homemade Chicken Nuggets
You need three shallow dishes ready to go. In dish one, we mix up our flour with all that great seasoning—salt, paprika, garlic powder, the works. Dish two is just for your beaten eggs, nice and simple. Dish three, the grand finale, holds those lovely Panko breadcrumbs. When you dip a chicken piece, you must dredge it fully in the flour first, then shake off every single extra bit! Seriously, dust it off! If you don’t, the coating gets clumpy and sad-looking. Then it goes into the egg, and finally, you press it hard into the Panko to get that thick crust.
Baking for Golden, Crispy Chicken Nuggets
Once they are all lined up on your tray—make sure they aren’t touching, they like their space—give the tops another good misting with cooking spray. This is the critical step that gives you those golden, ultra-**Crispy Chicken Nuggets** right out of the oven. Bake them for about 12 to 15 minutes total. You must flip them halfway through cooking! We’re looking for things to be golden brown and, most importantly, cooked through to an internal temperature of 165°F. Once they hit that mark, pull them out!
When you’re ready for the perfect sauce to go alongside these, you absolutely must check out my recipe for creamy garlic aioli. It takes dipping to a whole new level!
Mastering Air Fryer Chicken Nuggets Variations
I know I pitched the oven method because it’s great for large batches, but let’s be real, the air fryer is the king of weeknight cleanup! If you’re looking for incredible texture with even less hands-on time, switching to the air fryer for these **homemade chicken nuggets** is smart cooking. You get that fantastic crunch everyone loves, but way faster and with less cleanup.
The great news is that the prep work—that wonderful breading station we just set up—stays exactly the same. You’re still dredging them in flour, egg, and Panko breadcrumbs to lock in all the flavor. The only real shift is the cooking environment, and honestly, that makes things simpler. I’ve tested this ratio specifically to make sure you don’t end up with dry little hockey pucks.
For the perfect **Air Fryer Chicken Nuggets**, you’re going to set your machine to 380°F (about 195°C). That temperature is high enough to get the crust going instantly but gentle enough that the inside stays juicy. You’ll cook these for about 10 to 12 minutes total. Just like the oven, you have to shake that basket or flip them about halfway through the cooking time. That ensures both sides get that beautiful, golden-brown finish.

If you love using your air fryer for other family favorites, you should absolutely check out my guide on air frying wings. It uses similar principles regarding temperature staging, so you’ll already be ahead of the game! Check out my air fryer chicken wings recipe for more tips on getting crispy skin every time.
Making Copycat Chicken Nuggets and Ground Options
One of the best things about making your **homemade chicken nuggets** from scratch is that you have the freedom to customize them exactly how you like them. I know a lot of people come to this recipe searching specifically for **Copycat Chicken Nuggets**, right? Everyone has that one fast-food order they just can’t quit! While our primary recipe sticks to whole chicken breast pieces for that familiar shape, you can absolutely pivot toward those flavors.
For instance, if you’re dreaming of that slightly tangy taste of a certain famous sandwich chain, flavor experts often point to marinating the chicken beforehand—sometimes even using a little pickle juice! It adds moisture and breaks down the proteins just a tiny bit, resulting in that signature texture you’re craving. You’d still bread and bake them using my method above, but that pre-soak adds a huge flavor boost.
We also get questions about using ground chicken. Using ground chicken is a fantastic way to adjust the texture if you prefer something softer, closer to what you find in the bulkier, highly processed nuggets. If you go that route, you’ll want to mix your seasoning right into the ground meat before forming them into nugget shapes. It’s a different experience, certainly less “bite” than the whole-piece method, but still super satisfying and a wonderful option for different textures at the dinner table.
If you want to try a known variation on the copycat theme, I recently saw a version that looked fantastic that focuses on an intense flavor marinade. You can check out the details on that specific copycat recipe if you want to go down that road, but remember, for the recipe here, we are aiming for that perfect baked Panko crunch on clean pieces of whole chicken!
Tips for Perfect Homemade Nuggets Every Time
So, you’ve seen the recipe, but getting them out of the oven looking just like the picture takes a little finesse. I’ve been there—the sad, patchy coating, the nuggets that stick to the pan. Listen, making **homemade nuggets** should be fun, not frustrating. These tips are what I use in my kitchen every time to guarantee you get the **Best Homemade Nuggets** possible, especially when you’re aiming for that baked crispiness.
First off, let’s talk chicken uniformity again. If you cut some pieces large and some tiny, the small ones turn into shoe leather while the big ones are still raw inside. I always recommend using a nice sharp knife and taking the extra two minutes to trim all your 1.5 pounds of chicken breast into pieces that are roughly a one-inch cube. Think bite-sized perfection. This simple step is a massive contributor to getting that perfect, juicy interior we talked about.
Next up: that breading adherence. This is where people fail the hardest! If you don’t shake that excess flour off after the first dip, the flour acts like a slick layer between the chicken and the egg, and then the Panko just falls off in the oven. Shake, shake, shake that flour off! When you press the piece into the Panko in that third dish, use your palm and really firm it in there. You want the breadcrumbs to look like they are basically glued to the chicken. A firm, even pressure is key!
One other thing that makes these nuggets better than any takeout? Seasoning the flour blend aggressively. You might think the Panko has enough flavor, but trust me, the flour coating is where most of the savory punch comes from. Don’t skimp on that paprika or garlic powder in the first dish. It seasons the chicken right where it needs it most. If you’re looking for other fantastic weeknight ways to use chicken that are just as easy, you have to try my garlic chicken and rice recipe; it’s another weeknight superstar!
Serving Suggestions for Chicken Nuggets for Kids
Okay, we have achieved the perfect, crispy, baked **homemade chicken nuggets**—now what do we serve them with? Because while these are amazing as a hearty snack, they really come alive as part of a full family meal. When I’m making these for my own family, especially when cooking for the younger crowd, the sides need to be fast and foolproof. You’ve already nailed the main event with this **Easy Chicken Nuggets** recipe, so let’s keep the rest simple!
The absolute, non-negotiable requirement for **Chicken Nuggets for Kids** is a great dipping sauce. Forget the sad little packets you get on the side! We are elevating this experience. Ketchup is fine, sure, but you can do so much better without adding complexity. My go-to is mixing a touch of barbecue sauce with a dollop of plain Greek yogurt—it gives you that creamy texture kids love but cuts the sugar a bit. Or, if you’re feeling adventurous, my recipe for homemade guacamole makes a shockingly good green dip for nuggets, which also sneaks in some healthy fats!
For the sides, think balanced but quick. You want something colorful to make the plate look appealing. Steamed broccoli or quick oven-roasted carrot sticks are always winners because they roast right alongside the nuggets or get done in five minutes on the stove. If you’re going ultra-quick, crunchy apple slices always pair surprisingly well with the savory, slightly sweet coating of the nuggets. The key is keeping the sides light so the juicy chicken stays the star of the show!
Storage and Reheating Instructions for Homemade Chicken Nuggets
Success! You made a massive, amazing batch of **homemade chicken nuggets**! Now, the true test of any great recipe is how it holds up as leftovers, right? Nobody wants soggy nuggets the next day. If you didn’t manage to eat every single one (which, honestly, is rare in my house), storing them correctly is crucial if you want that crispiness to come back to life.
Don’t you dare seal them in an airtight container while they are still warm. That traps steam, and steam is the mortal enemy of crunch. Let the nuggets cool down completely on a wire rack first. Once they’re totally cool, then you can transfer them to an airtight container. I usually place a paper towel between the layers, just in case, and pop them in the fridge for up to three days. They freeze beautifully too, sealed tight in a freezer bag for up to three months!
The Secret to Reheating Baked Nuggets
I need to be super clear here: put the microwave away. The microwave heats the moisture inside the nugget, turning that beautiful, hard-earned crust instantly soft and gummy. That’s a tragedy! For the best results, especially if you want them to taste almost freshly made, you need dry heat.
Your oven is your best friend here. Preheat it to about 375°F (190°C). Spread the cooled nuggets on a baking sheet—again, don’t let them touch! Bake them for about 8 to 10 minutes. They’ll crisp right back up beautifully. If you are only reheating maybe five or six, the air fryer is even faster and yields a slightly better texture because the heat circulates so intensely. Just pop them in at 375°F for 4 to 6 minutes. Give it a try; you won’t believe how great these leftovers taste!
Frequently Asked Questions About Homemade Chicken Nuggets Recipe
I get asked the same few questions all the time when people jump into making their *own* **homemade chicken nuggets recipe**. It’s the transition from relying on the freezer bag to a true from-scratch meal, and that always brings up smart concerns! I want to preemptively answer the things I hear most often so you can jump straight into getting that crispy, juicy result we designed this recipe for.
Can I prepare the coating ahead of time for these Easy Chicken Nuggets?
That’s a great question for anyone trying to meal prep! If you are having a busy day, you *can* totally cut up your chicken and set up your breading station ahead of time. But when it comes to the actual coating—the flour, egg, and Panko—I strongly advise against coating the nuggets until you are ready to bake them or air fry them right away. The breading mixture adheres best when the chicken is fresh. If you coat them too far in advance, the moisture from the chicken starts to interact with the flour and then the egg washes out, meaning you end up with those sad, gummy spots on your **Easy Chicken Nuggets** instead of the beautiful crunch we want. Do the breading right before you need that tray in the oven!
What is the best way to freeze Baked Chicken Nuggets Recipe leftovers?
This is how you set yourself up for another **Quick Chicken Dinner** success later in the week! If you have baked leftovers, you need to cool them down completely first—remember our rule about not trapping steam? Once they are totally cool, lay them in a single layer on a parchment-lined baking sheet. Put that sheet right into the freezer for about an hour until the nuggets are hard little frozen blocks. Once they are solid, you can transfer them all into a freezer-safe bag. This step prevents them from sticking together in one giant clump!
When you’re ready to eat them weeks later, just pull out what you need and reheat them using the oven or air fryer method we already covered. They reheat so much better when they were frozen *after* baking the first time!
If you’re looking for more ideas on simple meals you can prep or freeze ahead of time, I’ve compiled a bunch of my favorite strategies over in my guide to easy breakfast recipes—though the freezing logic translates perfectly to dinner items too!
Can I use ground chicken instead of breast chunks?
Yes, you absolutely can! That change will give you a texture more similar to what you find in heavily processed fast-food patties—very uniform and maybe softer. If you go with **Ground Chicken Nuggets**, just mix your spices directly into the ground chicken, form them into your desired shapes, and then proceed with the three-step breading process as written. Just remember that because ground meat can sometimes cook a bit faster, keep an eye on the internal temperature; 165°F is your goal for safety!
What if I want to fry these instead of baking?
If you’re craving that deep-fried golden goodness, this recipe has the perfect coating base for it! You’ll need about two inches of neutral oil (like canola or vegetable oil) heated to 350°F (175°C) in a heavy-bottomed pot. Fry the breaded nuggets in small batches so you don’t drop the oil temperature too much. They cook super fast, usually about 3 to 4 minutes total, until they float and are deep golden brown. Because they absorb more oil this way, they won’t technically be as light as our baked version, but they will certainly be rich and delicious!
Nutritional Estimates for Your Homemade Chicken Nuggets
Okay, since we are making **homemade chicken nuggets** from scratch using lean breast meat and baking them instead of deep frying, these are genuinely a much more nutritious option than what you grab on the fly. That said, I always want to give you guys a snapshot of what you’re looking at calorically when you use the baked recipe as written. Remember, this is the snapshot for the baked version we detailed above, not the fried or ground chicken alternatives.
I’ve broken down the numbers below, based on a serving size of about five nuggets. Keep in mind that science is never perfect in the kitchen, as my measuring spoons aren’t calibrated to government standards, ha! These figures are close estimates based on the listed ingredients for our baked method.
- Serving Size: 5 Nuggets
- Calories: Around 280
- Protein: A whopping high-fiber 33 grams – great for keeping everyone full!
- Total Fat: About 8 grams (That’s pretty low for a breaded item!)
- Carbohydrates: 18 grams
- Sugar: Only 1 gram (All natural from the spices, mostly!)
Now, listen carefully to the fine print here, people, because this matters for accuracy. These numbers assume you used the flour, egg, and Panko coating, and that you gave them a good spray of cooking oil before baking at 400°F. If you decide to use that buttermilk soak I mentioned, or if you go the air fryer route, the numbers will shift slightly. And if you decide to turn these into **Copycat Chicken Nuggets** that require a dip in hot oil? Well, your fat and calorie counts are going to jump up significantly! These figures are the reward for choosing the healthier path with our main **Baked Chicken Nuggets Recipe**.
Share Your Symphony: Rate This Homemade Chicken Nuggets Recipe
Well, that’s it! We’ve walked through the breading station, we’ve talked oven temperature, we’ve even covered the air fryer secrets for getting these **homemade chicken nuggets** absolutely perfect. Now comes the fun part—the feedback! Cooking is a shared experience here at Delish Symphony, and your input helps other home cooks know exactly what works best in their kitchens.
I really, really want to know how these turned out for you. Did you stick with the classic bake? Or did you take them into the air fryer for that extra speed boost? Please take a moment to drop a star rating for this **Homemade Chicken Nuggets Recipe** right underneath this section. It helps me know what’s hitting the mark and what might need a little tweaking in future versions!
More importantly, leave a comment below! Tell me what you served them with. Did your **Chicken Nuggets for Kids** get dipped in ranch, honey mustard, or something totally unexpected? If you experimented with spices or tried a different dipping sauce, sharing those little details truly helps build our cooking community.
Every time you share your experience, you are helping someone else feel confident enough to try cooking a meal from scratch instead of reaching for the frozen bag. If you run into any snags or have questions that I didn’t cover in the FAQs, please reach out via my contact page.
Thank you so much for cooking with me today. I hope these nuggets bring a little harmony and deliciousness to your next **Quick Chicken Dinner**!
PrintThe Ultimate Crispy Baked Homemade Chicken Nuggets

Create restaurant-quality, crispy, and juicy homemade chicken nuggets right in your oven. This easy recipe is perfect for a quick weeknight dinner the whole family enjoys.
- Prep Time: 15 min
- Cook Time: 15 min
- Total Time: 30 min
- Yield: 4 servings 1x
- Category: Dinner
- Method: Baking
- Cuisine: American
- Diet: Low Fat
Ingredients
- 1.5 lbs boneless, skinless chicken breast, cut into 1-inch pieces
- 1 cup all-purpose flour
- 1 teaspoon salt
- 1/2 teaspoon black pepper
- 1/2 teaspoon paprika
- 1/4 teaspoon garlic powder
- 2 large eggs, lightly beaten
- 1.5 cups Panko breadcrumbs
- Cooking spray
Instructions
- Preheat your oven to 400°F (200°C). Line a baking sheet with parchment paper and lightly coat it with cooking spray.
- Set up a standard breading station with three shallow dishes.
- In the first dish, combine the flour, salt, pepper, paprika, and garlic powder. Mix well.
- In the second dish, place the beaten eggs.
- In the third dish, place the Panko breadcrumbs.
- Take one piece of chicken and dredge it thoroughly in the flour mixture, shaking off any excess.
- Dip the floured chicken piece into the egg mixture, allowing excess to drip off.
- Press the chicken firmly into the Panko breadcrumbs to coat all sides evenly.
- Place the coated chicken nugget onto the prepared baking sheet. Repeat with all remaining chicken pieces, ensuring they do not touch.
- Spray the tops of the nuggets generously with cooking spray to promote browning and crispiness.
- Bake for 12 to 15 minutes, flipping the nuggets halfway through the cooking time.
- Continue baking until the nuggets are golden brown and the internal temperature reaches 165°F (74°C).
- Serve immediately with your favorite dipping sauces for a quick chicken dinner.
Notes
- For extra flavor, you can marinate the chicken pieces in 1/2 cup of buttermilk for 30 minutes before starting the breading process.
- To achieve maximum crispiness in the oven, use Panko breadcrumbs, as they create a lighter, crunchier crust than regular breadcrumbs.
- If you prefer an air fryer, cook the nuggets at 380°F (195°C) for 10 to 12 minutes, shaking the basket halfway through.
Nutrition
- Serving Size: 5 nuggets
- Calories: 280
- Sugar: 1
- Sodium: 350
- Fat: 8
- Saturated Fat: 1.5
- Unsaturated Fat: 6.5
- Trans Fat: 0
- Carbohydrates: 18
- Fiber: 1
- Protein: 33
- Cholesterol: 95