
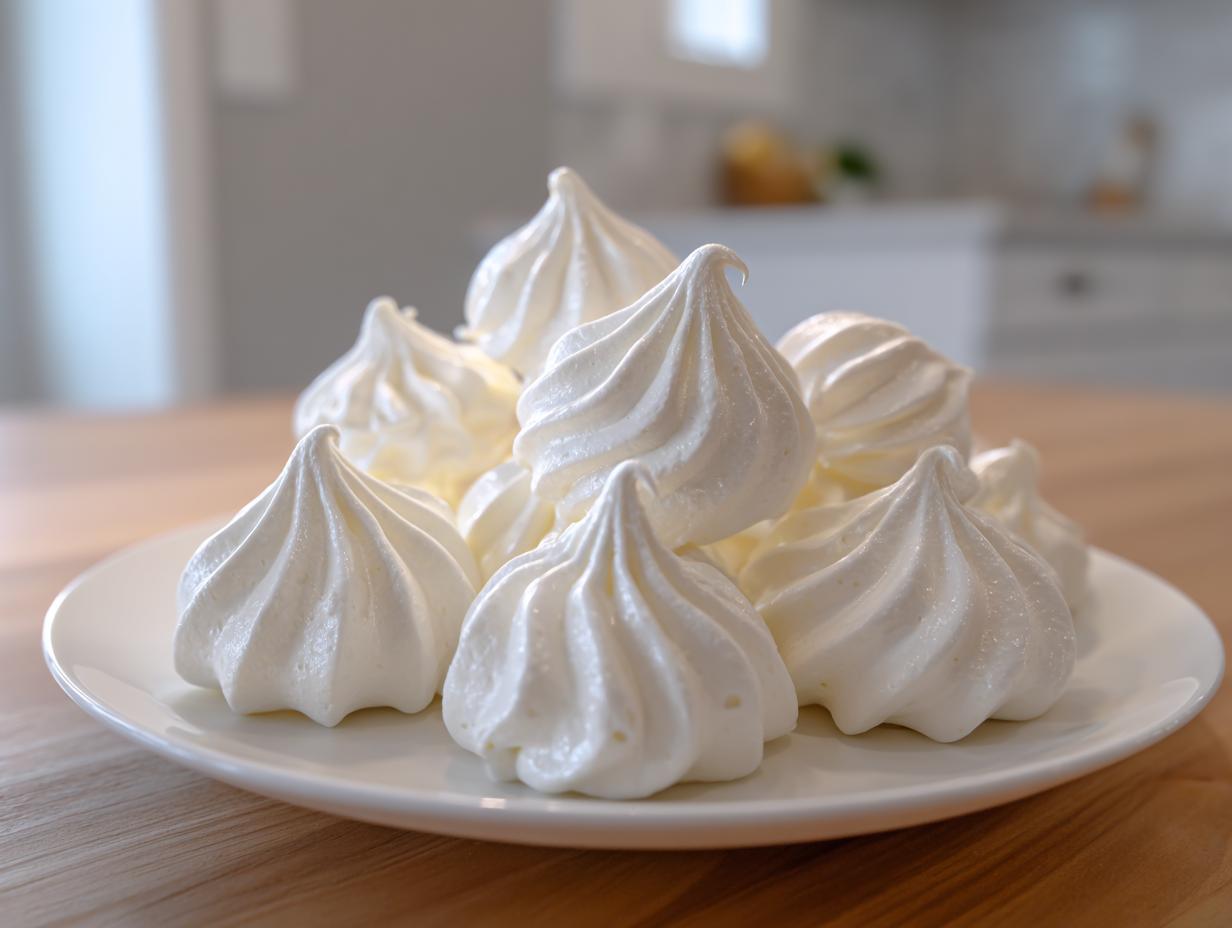
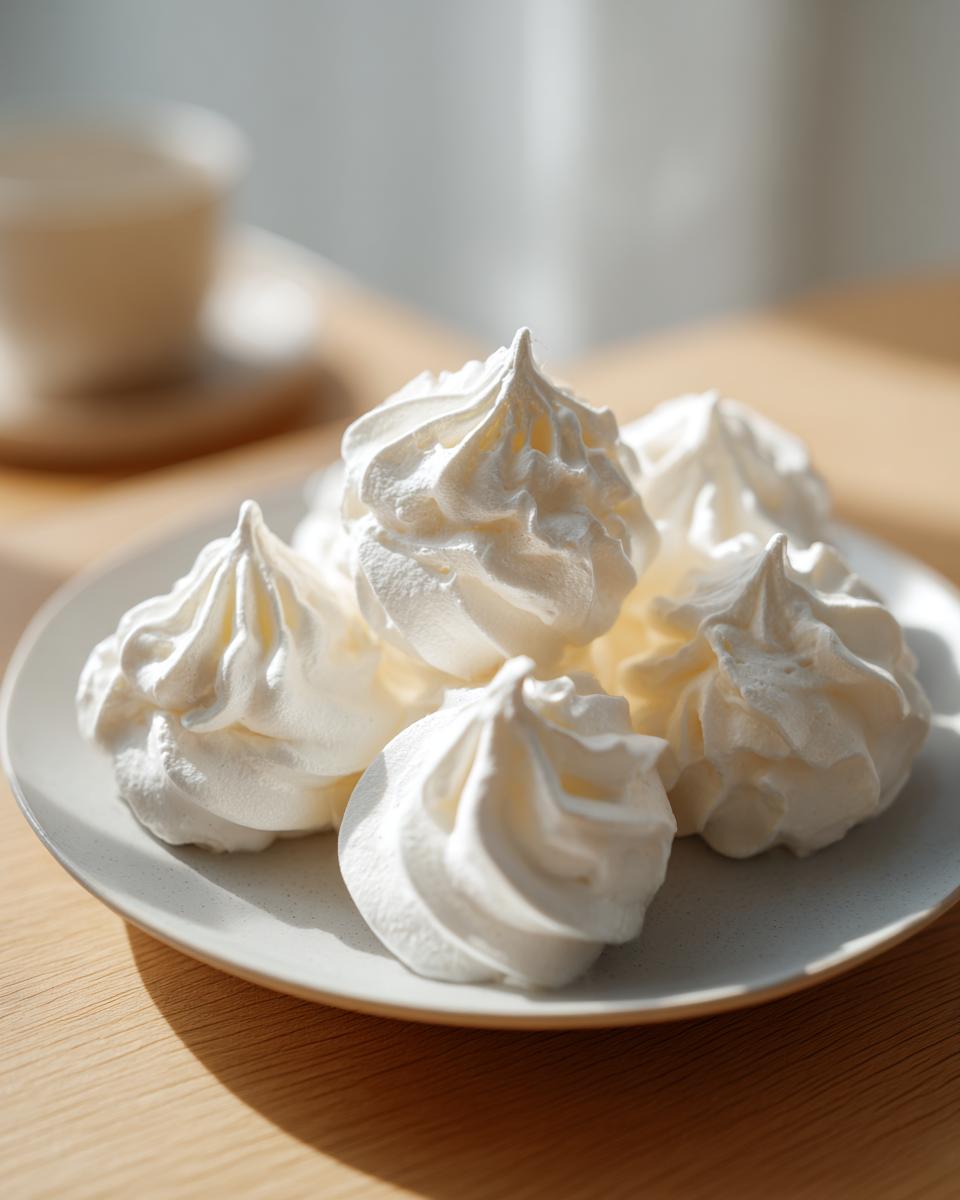
There’s a quiet kind of magic that happens when you take just egg whites and sugar and turn them into something ethereal. If you’re seeking that perfect, triumphant little dessert that proves simplicity is the ultimate sophistication, look no further. I’m Michael Carter, and here at Delish Symphony, we love finding that pure harmony in food, and nothing sings that clear note better than a batch of classic meringue cookies. Forget fussy pastry skills; this **Easy Meringue Cookie Recipe** is designed to be robust and reliable. These treats come out light, airy, and unbelievably crisp—the kind that truly are **Melt in Your Mouth Cookies**. If you want to know more about our flavor philosophy, check out our About page. Let’s get that oven set low and create some stunning, delicate homemade cookies together.
- Why This Easy Meringue Cookie Recipe Delivers Crisp Meringue Desserts
- Gathering Ingredients for Your Meringue Cookies
- How to Make Perfect Meringues: Step-by-Step Instructions for Meringue Cookies
- Tips for Success When Making Delicate Homemade Cookies
- Meringue Variations for Holiday Meringue Cookies and Party Meringue Recipes
- Storing Your Crisp Meringue Desserts
- Frequently Asked Questions About Meringue Cookies
- Estimated Nutritional Data for Simple Egg White Desserts
- Share Your Perfect Meringue Cookies Experience
Why This Easy Meringue Cookie Recipe Delivers Crisp Meringue Desserts
The secret to achieving those beautiful, airy structures isn’t about fancy tricks; it’s about controlling the environment. This **Easy Meringue Cookie Recipe** is straightforward, but respecting a couple of basic rules is how we ensure they turn out perfectly crisp every single time. We aren’t aiming for soft peaks; we’re going all the way to stiff, glossy mounds that can hold their shape against gravity. That’s the foundation for amazing **Light and Airy Meringues** that shatter delicately when you bite into them. It truly is a beautiful harmony of just a few ingredients when you get the technique right.
The Science Behind Perfect Meringue Cookies
Before you even turn the mixer on, two things really matter. First, your egg whites must be at room temperature. Cold whites just don’t whip up as high or as fast, and we need that volume! Second, we use a tiny bit of cream of tartar. Think of it as scaffolding for your foam; it stabilizes those millions of tiny air bubbles we are creating so that the sugar fits perfectly between them. This chemical stability is what keeps your finished meringue cookies from weeping or collapsing later on.
Gathering Ingredients for Your Meringue Cookies
Alright, let’s talk about what you need for these amazing meringue cookies. The beauty of this dessert, true to the Delish Symphony philosophy, is that it relies on simple pantry staples—nothing fussy or hard to source. You only need five things! I’ve listed them out below, but please pay attention to the preparation notes, because for meringue, details matter more than complexity.
We must use four large egg whites, and yes, they must be at room temperature. Trust me on this; it makes achieving that high volume so much easier. Then we grab the granulated sugar, vanilla extract for sweetness and flavor, cream of tartar, and a pinch of salt. That’s it! These meringue cookies are naturally gluten-free, too, if that’s something you need to know. These basic ingredients, handled correctly, are the foundation for delicious, perfectly sweet meringues.
- 4 large egg whites, room temperature
- 1 cup granulated sugar
- 1 teaspoon vanilla extract
- 1/4 teaspoon cream of tartar
- Pinch of salt
How to Make Perfect Meringues: Step-by-Step Instructions for Meringue Cookies
Now we move into execution—this is where we put those **Light and Airy Meringues** in their place! Getting **How to Make Perfect Meringues** down is all about the rhythm of adding that sugar. You can’t rush it. Think of it like tempering chocolate; speed equals disaster, but patience brings harmony. If you want to read more about different meringue approaches, check out this article on French meringue techniques: how to make French meringue. I always grab my stand mixer for this part, but if you’re using a handheld, just make sure you’re ready for a little forearm workout!
We start by setting up our environment. Preheat your oven as low as it will possibly go—we’re talking 175F to 200F. That low heat is key to drying them out instead of actually baking them, which is why we get that gorgeous crispness. Line your baking sheets with parchment paper next; these little kisses lift right off when they’re done, which prevents any kitchen drama later on. Once the stage is set, we begin!
Whipping the Egg Whites to Stiff Peaks
The first rule of meringue club is that your bowl and whisk attachments must be spotless. Any trace of fat—oil, yolk, even a fingerprint—will stop your whites from whipping up right. Combine your room temperature egg whites with the cream of tartar and the pinch of salt. Beat these on medium speed until they turn opaque and form soft peaks, meaning the tips curl over when you lift the whisk. They should start looking billowy and soft, but we aren’t stopping there!
Piping and Baking Your Meringue Cookies Low and Slow
This is the critical stage for **meringue cookies**: adding the sugar. You must add the full cup of granulated sugar slowly, a tablespoon at a time, waiting about 30 seconds between each addition while the mixer runs on high. This gives the sugar time to dissolve completely into the egg white structure. Don’t quit until you have stiff, glossy peaks that stand straight up when you lift the beaters. My personal check? I rub a tiny bit between my thumb and forefinger—if it feels gritty at all, it means there’s undissolved sugar, so I keep beating! Once it feels totally smooth, whip in that vanilla extract. Use a piping bag fitted with a star tip—or just use two spoons to make rustic dollops, which I love for a more homemade look! Pipe them about an inch apart. Bake them for that crucial 1 to 1.5 hours until they look dry. Then, the real test of patience: turn the oven off, prop the door open slightly with a wooden spoon, and let them cool completely inside for at least an hour, maybe even the whole night. This prevents cracking and ensures those **Crisp Meringue Desserts** we’re aiming for. When you finish up, you should have a treat that reminds you of the simplicity we strive for in all our recipes, just like these wonderful weeknight dinner recipes.
Tips for Success When Making Delicate Homemade Cookies
These **Delicate Homemade Cookies** look fancy, but honestly, they are very forgiving if you know the main pitfalls. The biggest enemy of the meringue is moisture in the air—humidity makes them sticky and soft. If it’s raining outside or the air feels thick, you might struggle, even with the best **Meringue Cookie Baking Tips**. If you must bake on a dewy day, you have to add five or ten minutes to that low-and-slow baking time and let them hang out in the cooling oven even longer. Another crucial tip? When you add the vanilla or any extract, mix it in for just three seconds. Overmixing after you reach stiff peaks starts to break down that air structure, and suddenly your beautiful pipes look a little runny.
For shaping, unless you want those rustic dollops, make sure your star tip is generously sized. A tiny tip means you’ll be piping all day! And when you’re ready to transfer them, slide the parchment paper right onto the cool baking sheet before taking them into the oven. Remember that even small things make a huge difference in this delicate bake. If you want to see some other beautiful results, check out how they handle texture at Cooking Classy.
Meringue Variations for Holiday Meringue Cookies and Party Meringue Recipes
Once you nail the basic method for these meringue cookies, you realize they are a perfect canvas for creativity! That’s the joy of these Meringue Variations—it’s all in the finishing touches. You can easily pivot to make incredible **Holiday Meringue Cookies**. For instance, I often add a few drops of peppermint extract along with the vanilla for a minty Christmas treat. It mixes right in while you are adding the vanilla at the end.
If you are making **Party Meringue Recipes**, color is your best friend. Food coloring should be added right at the end when you incorporate the vanilla, again, just a drop or two. A drop of green can turn them into little trees, or a tiny touch of pink makes them elegant for an Easter dessert spread. Remember, a little goes a very long way with gel colors! If you need a fun, festive punch to serve alongside these treats, I have a great Cranberry Orange Punch recipe that pairs wonderfully. For visual inspiration on using color and shape for the holidays, you should definitely peek at what Emma is doing over at Emma’s Cake Studio.
Storing Your Crisp Meringue Desserts
You finally did the low-and-slow bake, and now they are perfectly crisp! Don’t mess it up now! The main objective when storing these **Crisp Meringue Desserts** is keeping humidity out of the picture. They will absorb moisture right out of the air if you leave them exposed, and then you are left with sticky, disappointing shells.
The absolute rule is an airtight container; I mean a true seal. You can layer them with parchment paper inside the container if you’re worried about them shifting, but keep the lid clamped shut tight. They should be totally cool before you seal them up. Store them at room temperature, not the fridge! The fridge is a humidity trap, and we absolutely don’t want that for our sweet meringue treats.
Frequently Asked Questions About Meringue Cookies
I know when you’re deep into making something as delicate as these, you get a few questions popping up in your head. That’s totally normal! Baking should feel intuitive, not confusing, so let’s clear up any last-minute uncertainties you might have about your **meringue cookies** before they hit the oven.
Can I make meringue cookies on a humid day?
This is the number one question for any baker dealing with egg whites! Honestly, if it’s pouring rain or crazy humid, you are fighting an uphill battle. Meringue is hydroscopic, meaning it loves to pull moisture from the air, which results in sticky, soft treats instead of the crisp ones we want. If you absolutely have to bake them when the air is damp, you have to commit to the low and slow method even more fiercely. It means leaving them cooling in the turned-off oven for longer—like ten or twelve hours—to ensure every last bit of surface moisture evaporates completely.
Are these Gluten Free Meringue Cookies?
Yes, friend, they absolutely are! Since this **Easy Meringue Cookie Recipe** relies only on egg whites, sugar, and vanilla, there is zero wheat, barley, or rye involved. That makes these **Gluten Free Meringue Cookies** a wonderful, light choice for anyone avoiding gluten. They are naturally a fantastic option for your cookie tray that everyone can enjoy without worry!
What is the best way to pipe these sweet meringue treats?
You have a few great options here, depending on how fancy you want to get! If you want those classic, defined swirls—what some folks call **Meringue Kisses Recipe**—you definitely need a piping bag fitted with a large star tip, like a Wilton 1M or 2D. If you aren’t quite there with your piping skills or just want a more rustic, homemade look (which I sometimes prefer!), you can just use two teaspoons. Scoop a spoonful of the meringue, then use the second spoon to gently push the mound off the first spoon onto the parchment. It creates a lovely, slightly messy dollop that bakes up just as delicious!
If you are looking for more simple, reliable recipes that fit your busy life, take a look at my go-to quick breakfast recipes for when you need something fast in the morning!
Estimated Nutritional Data for Simple Egg White Desserts
When we focus on simple ingredients, the nutritional profile tends to stay beautifully clean, which is what we love about these **Simple Egg White Desserts**. Remember, this data is an estimate based on the exact quantities used in the recipe above for meringue cookies. Since we aren’t using any fat or flour, it’s mostly sugar and protein, resulting in a very low-calorie, delightful treat! These numbers represent just one cookie.
- Serving Size: 1 cookie
- Calories: 45
- Sugar: 11g
- Fat: 0g
- Protein: 1g
Share Your Perfect Meringue Cookies Experience
And there you have it! We’ve taken just four egg whites and transformed them into these beautiful, delicate, and perfectly crisp meringue cookies. This is what I love about cooking—taking simple, straightforward ingredients and creating something that feels special enough for any holiday table or party spread. It’s proof that you don’t need a huge pantry or hours of fuss to achieve that “wow” factor.
I truly hope you loved this process as much as I do. If you made these and they came out light as air and melted perfectly in your mouth, please let me know how they turned out! Did you try piping them into fun shapes for Christmas, or did you keep them simple like I often do? Drop a comment below with your experience, and if you have a moment, hit that star rating button—it really helps others find these simple, flavorful recipes.
We love connecting with our readers, so if you snapped a picture of your gorgeous batch, share it with us! You can always reach out directly through our Contact page. Happy baking, and may your kitchen always be filled with the quiet music of simple, delicious success!
PrintClassic Light and Airy Meringue Cookies
Make these classic meringue cookies that are light, crisp, and melt in your mouth. This simple recipe uses basic ingredients for a perfectly sweet homemade treat.
- Prep Time: 15 min
- Cook Time: 90 min
- Total Time: 1 hour 45 min
- Yield: About 3 dozen 1x
- Category: Dessert
- Method: Baking
- Cuisine: American
- Diet: Gluten Free
Ingredients
- 4 large egg whites, room temperature
- 1 cup granulated sugar
- 1 teaspoon vanilla extract
- 1/4 teaspoon cream of tartar
- Pinch of salt
Instructions
- Preheat your oven to the lowest setting, usually between 175F and 200F (80C to 95C). Line two baking sheets with parchment paper.
- In a clean, grease-free bowl, combine the egg whites, cream of tartar, and salt. Beat with an electric mixer on medium speed until soft peaks form.
- Gradually add the granulated sugar, about one tablespoon at a time, while continuing to beat on high speed. Wait about 30 seconds between additions.
- Continue beating until the meringue is stiff, glossy, and holds firm peaks when you lift the beaters. Rub a small amount between your fingers; it should feel smooth, not gritty.
- Beat in the vanilla extract until just combined.
- Transfer the meringue to a piping bag fitted with a large star tip (or use two spoons for rustic dollops).
- Pipe small kisses or shapes onto the prepared baking sheets, leaving about one inch between each cookie.
- Bake low and slow for 1 to 1.5 hours, depending on your oven and cookie size, until the meringues are dry to the touch and lift easily from the parchment.
- Turn off the oven, prop the door open slightly, and let the meringue cookies cool completely inside the oven for at least one hour, or overnight, to prevent cracking.
Notes
- Use room temperature egg whites; they whip up higher and faster than cold ones.
- Make sure your mixing bowl and beaters are completely free of any grease or egg yolk residue.
- Baking low and slow dries the meringue out, creating that signature crisp texture.
- Store finished meringue cookies in an airtight container at room temperature.
Nutrition
- Serving Size: 1 cookie
- Calories: 45
- Sugar: 11
- Sodium: 5
- Fat: 0
- Saturated Fat: 0
- Unsaturated Fat: 0
- Trans Fat: 0
- Carbohydrates: 11
- Fiber: 0
- Protein: 1
- Cholesterol: 0