
Okay, let’s talk about how to rescue dinner when you are staring down a head of broccoli and thinking, “I just can’t do roasted florets again.” Trust me, switching things up makes all the difference! What I love about this approach—and what Michael really champions here at the Symphony—is taking familiar ingredients and finding that surprising harmony. The secret weapon that makes all the difference? A simple little whack! We’re talking about achieving maximum crispiness using my absolute favorite technique for smashed broccoli. It’s fast, it’s fun, and it completely transforms this veggie. If you need more simple ideas once you nail this one, check out my favorite weeknight dinner recipes!
- Why This Garlic Parmesan Smashed Broccoli is the Best Smashed Broccoli Recipe
- Ingredients for Your Crispy Smashed Broccoli
- How To Make Smashed Broccoli: Step-by-Step Oven Roasted Smashed Broccoli
- Tips for Success with Your Smashed Broccoli
- Variations for Your Garlic Parmesan Broccoli
- Serving Suggestions for this Easy Broccoli Side Dish
- Storage and Reheating Instructions for Leftover Smashed Broccoli
- Frequently Asked Questions about Smashed Broccoli
- Estimated Nutritional Data for Smashed Broccoli
- Share Your Smashed Broccoli Creations
Why This Garlic Parmesan Smashed Broccoli is the Best Smashed Broccoli Recipe
If you ask me, this method takes broccoli from being a healthy obligation to being the first thing people reach for on the plate. Why? Because smashing the florets flat drastically increases the surface area touching the hot pan! It’s just simple physics, really, but it makes all the difference in achieving that incredible crunch. This isn’t just another Flavorful Vegetable Recipe; it’s a game-changer that brings efficiency and maximum flavor, just like we talk about here at Delish Symphony.
Achieving Perfect Texture: Crispy Smashed Broccoli
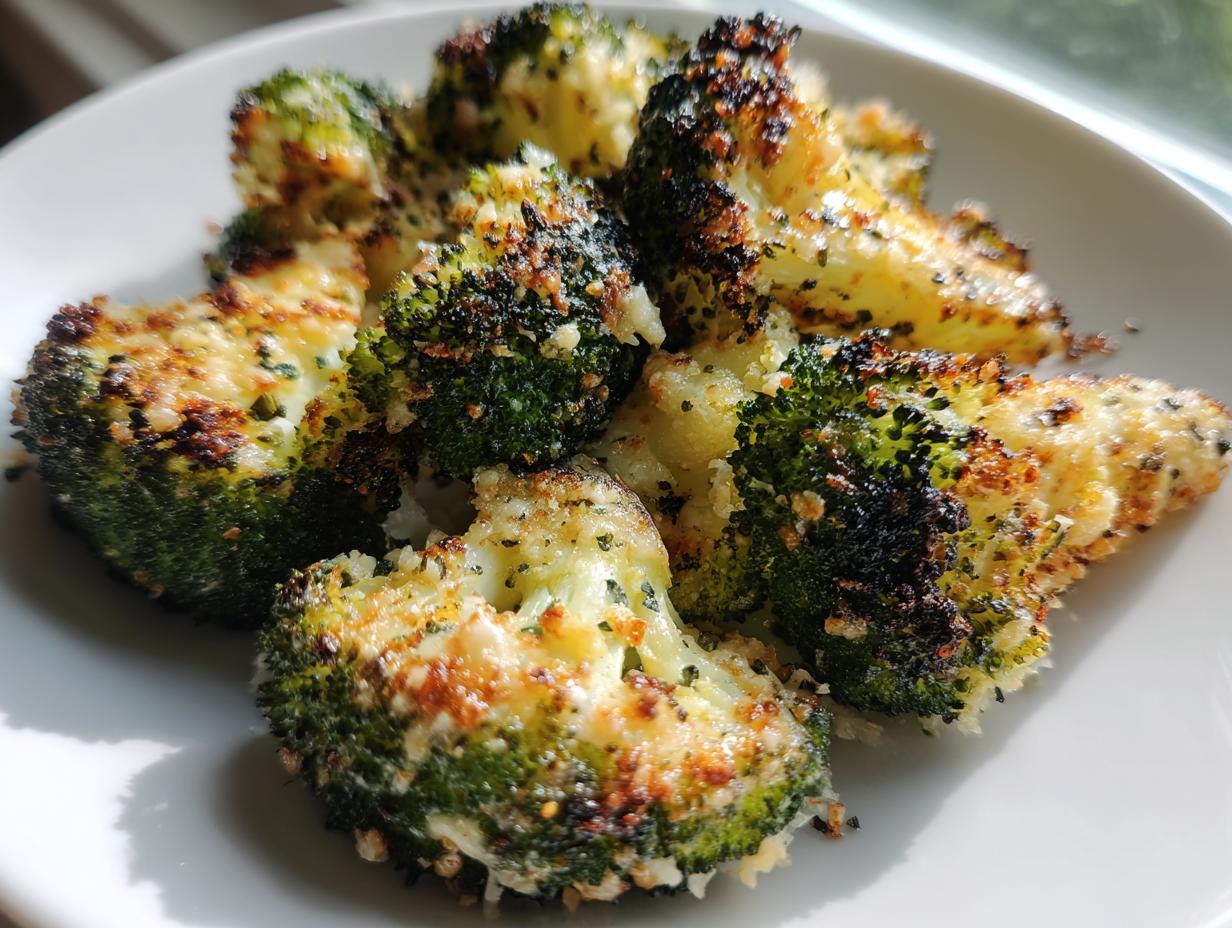
Forget those sad, uniformly soft roasted florets! When you smash them, you create little natural walls that catch the oil and cheese. The edges get fiercely crisp—think vegetable chips almost—while the center stays wonderfully tender. This texture contrast is what makes them addictive. It’s honestly the best way to get truly Crispy Smashed Broccoli without deep-frying them or leaving them in the oven forever.
Quick Prep for Weeknight Broccoli Sides
This whole dish comes together faster than most main courses, clocking in at just 35 minutes total. That’s why I love pushing this one for busy evenings. It fits right into our philosophy of practical techniques—you get a stunning presentation and amazing flavor without spending your entire evening over the stove. These are the perfect Weeknight Broccoli Sides for when you want to feel like you cooked something fancy, but you really didn’t have to!
Ingredients for Your Crispy Smashed Broccoli
Okay, here’s what you need to grab from the fridge and the pantry. I listed everything out precisely because, like in any good recipe, small adjustments here can mess up that glorious crunch later on. Don’t substitute the high-quality stuff for cheap alternatives if you want the best result!
- 2 large heads broccoli, cut into florets (Make sure they are about the same decent size before you start!)
- 3 tablespoons olive oil (Use the good stuff, where you can really taste that fruity flavor.)
- 3 cloves garlic, minced (Seriously, only fresh garlic! Powder just won’t cut it here.)
- 1/2 teaspoon salt
- 1/4 teaspoon black pepper
- 1/2 cup grated Parmesan cheese (Freshly grated is always my preference, if you have the energy.)
- 1 tablespoon fresh lemon juice (This is totally optional, but wow, does it wake up the flavor.)
Ingredient Notes and Substitutions for Smashed Broccoli
I always get questions about Parmesan since it’s a high-heat item. If you are worried about burning the cheese slightly, or if you need to keep this dairy-free for a guest, you can swap that ½ cup of Parmesan right out for nutritional yeast. It gives you that lovely tangy, cheesy note without the milk solids, making it a wonderful option for a Keto Smashed Broccoli variation too!
Also, for the lemon juice—if you use it, only use it right at the very end, after it comes out of the oven. If you add it during roasting, it can sometimes steam the broccoli instead of letting it crisp up, and we absolutely cannot have soggy broccoli on our watch!
How To Make Smashed Broccoli: Step-by-Step Oven Roasted Smashed Broccoli
This is where the magic happens, and honestly, it’s super intuitive! Before we even think about oiling anything, we need to prep the broccoli to take the heat. First things first: preheat your oven to 400 degrees Fahrenheit (that’s 200 Celsius). Line a baking sheet—I always use parchment paper, saves on scrubbing later!
Next, we briefly boil those florets for just 3 or 4 minutes until they’re bright green. They shouldn’t be mushy, just slightly giving way. This step sets up the interior tenderness. Now, this is super important: lay the florets out on a clean towel and pat them until they feel almost dry. Seriously, drier is better for crispiness!
Now for the fun part! Arrange them on your sheet and get ready to smash. We mix up that garlic oil—olive oil, minced garlic, salt, and pepper—and brush it all over. Then, we start the Roasted Smashed Broccoli process with a 15-minute roast. Once that time is up, pull them out, sprinkle that Parmesan cheese all over the top, and pop them back in for another 5 to 10 minutes until those edges are golden and crispy. If you want a creamy side for dipping later, toss this with some of my garlic aioli recipe!
The Critical Step: How to Properly Smash Broccoli Florets
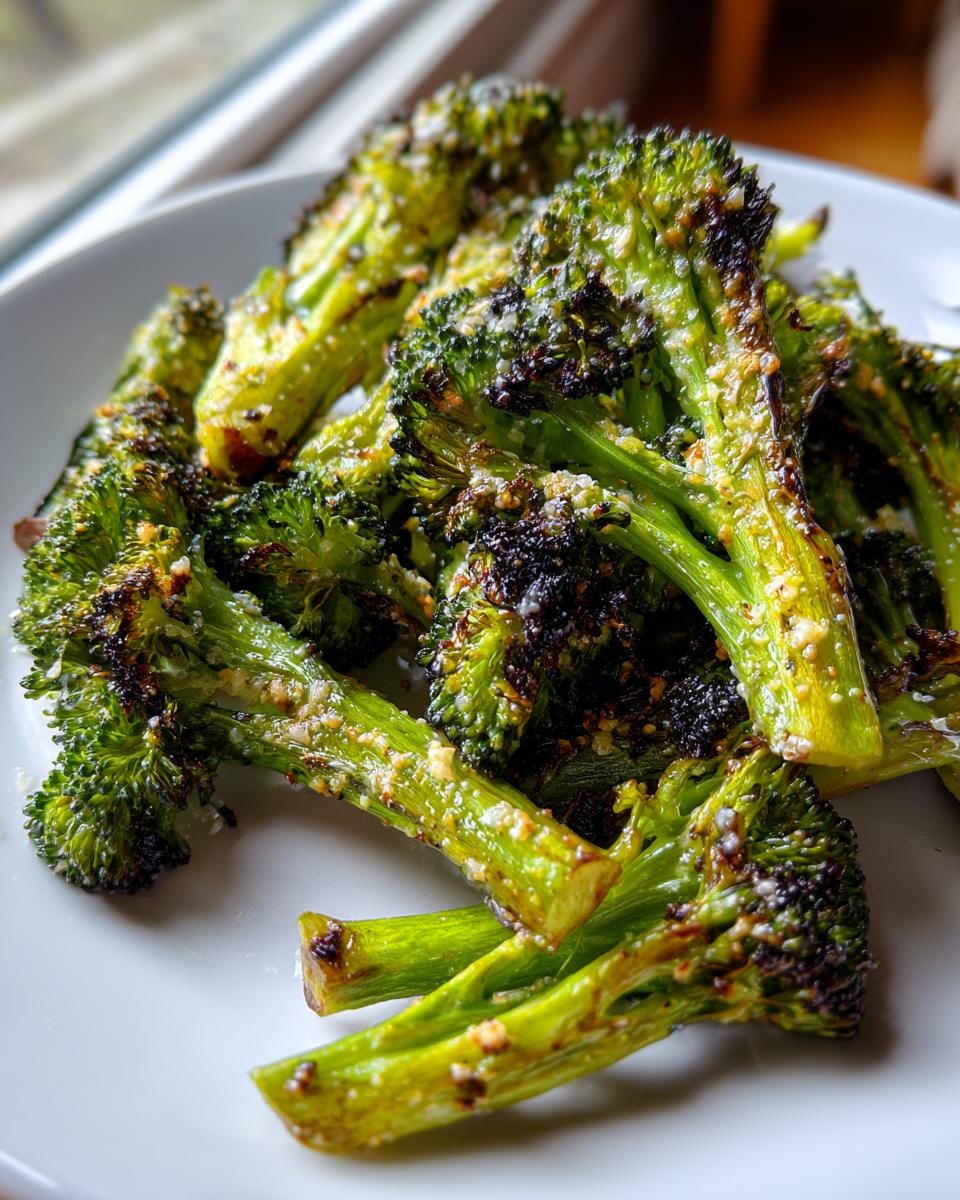
This step is why we call it smashed broccoli and not just flat broccoli! You don’t want to crush them into a paste; we need structure left so they can crisp up beautifully in the oven. Grab the bottom of a sturdy drinking glass, or if you’re feeling energetic, use a meat mallet—that works great too! You want to press firmly enough that the floret flattens out considerably, making good contact with the pan, but not so hard that it completely disintegrates. It should look like a little broccoli pancake, still holding together. If you struggle with this technique, check out how the gang at Evolving Table approaches their smash; their photos really help clarify the pressure needed!
Tips for Success with Your Smashed Broccoli
Look, if you want this to be the absolute best, most perfect, shatteringly crispy side dish you’ve ever made, there is one critical piece of advice I have for you. It’s all about the towel. Don’t rush the drying process after you boil them!
I know, I know, you’re excited and you want to get this Trendy Vegetable Prep into the oven fast. But hear me out: any residual water clinging to those florets will turn straight to steam when it hits the heat, and steam is the enemy of crispiness! Take an extra minute or two. Press down hard with a paper towel or a clean tea towel until the towel feels damp instead of soaked.
If the broccoli is dry, the oil will fry the outside instead of boiling it. That combination of being slightly pre-cooked from the blanch and then dried thoroughly is the secret sauce to getting that perfect texture. Trust me on the drying part; it’s what separates a good side dish from a completely unforgettable one.
Variations for Your Garlic Parmesan Broccoli
While the Garlic Parmesan combination is absolutely stellar—it’s a classic for a reason—I always encourage people to play around once they master the basic smash. This is your canvas, right? Don’t feel locked into just garlic and cheese!
Want a little heat? Toss in a big pinch of red pepper flakes with your garlic oil before that first roast. It gives a gorgeous background warmth that cuts through the richness of that salty Parmesan. If you’re serving this alongside something bright, like my Bruschetta Chicken, try swapping Parmesan for Pecorino Romano. It’s sharper and saltier, which really changes the overall profile. Or, if you’re feeling zesty, use sharp cheddar instead!
Making Keto Smashed Broccoli Variations
A fantastic thing about this preparation is that it’s naturally low-carb, so keeping it Keto Smashed Broccoli friendly is super easy! If you follow that lifestyle, just stick to the oil, salt, pepper, garlic, and cheese. You avoid any starchy additives, and bam—you’ve got a high-fat, low-carb side that’s incredibly satisfying. You skip the lemon juice at the end if you are hyper-focused on measuring carbs precisely, though that teaspoon of juice is probably fine for most folks.
For a totally different take that stays keto-friendly, instead of the Parmesan toss, mix up some smoked paprika, cumin, and a touch of chili powder into that garlic oil before roasting. It turns your side dish into something smoky and almost Southwestern tasting. So many flavors from just one little smash!
If you want to dive into other bright flavors using citrus, check out how the folks at Kalejunkie handle their lemon and Parmesan twist. It’s always fun to see how other home cooks are making this Easy Broccoli Side Dish their own!
Serving Suggestions for this Easy Broccoli Side Dish
This is one of those dishes that behaves perfectly, no matter what you ask of it. I honestly think that’s part of Michael’s philosophy here at the Symphony—find a dish that does double or triple duty! Since we’ve spent all this effort making the edges super crispy, this Easy Broccoli Side Dish deserves to be paired with main courses that let it shine.
First off, it’s amazing alongside creamy, rich mains. If I make something like my Lemon Chicken Orzo, where the main dish is all comforting and soft, the crispy texture of the smashed broccoli provides that necessary contrast. It balances the whole plate out beautifully.
It also works surprisingly well with fish! If you’re making something light and healthy, like an anti-inflammatory salmon dinner, the garlic and lemon notes in the broccoli cut right through the richness of the fish. It feels so elegant, but we know how easy it was to make, right?
And don’t forget appetizers! Because these little smashed florets are slightly flattened, they’re actually perfect for dipping. Set them out on a big platter with a side of ranch or that aioli I mentioned earlier. They disappear fast, especially since they look so much more impressive than just a bowl of steamed green stuff!
Storage and Reheating Instructions for Leftover Smashed Broccoli
Nobody wants sad, soggy broccoli waiting for them the next day, right? That beautiful crispness we worked so hard to achieve needs a little protection if you have leftovers. First rule: you have to let any leftovers cool down completely before you put them away. Don’t try putting warm food into an airtight container; that’s just asking for condensation city!
Once cooled, pop your Smashed Broccoli into a good quality airtight container. I try to avoid plastic bags here because they don’t offer much protection against crushing. You should get about three days out of these before they start to seriously lose their texture, but honestly, they rarely last that long in my house!
Now for the reheating part, which is non-negotiable if you want the best result. Please, please, please don’t use the microwave unless you are serving them to someone you don’t really like! The microwave is basically an enemy to anything crispy; it turns everything rubbery.
The Best Way to Reheat for That Fresh-From-the-Oven Crunch
If you want to save your crispiness, you need dry heat to wake those edges back up. The very best tool for this job is either your oven or, even better, your air fryer if you have one. It’s how we maintain that crucial textural element that makes this recipe special.
For the oven, just spread the cooled, leftover Roasted Smashed Broccoli out in a single layer on your baking sheet—no need to add more oil! Heat things up to about 350 degrees Fahrenheit. It only takes about 5 to 7 minutes for them to get delightfully warm and slightly crisp all over again. You’re essentially giving them a little second bake!
If you are using the air fryer, you’re in luck! It’s even faster. Set your air fryer to 350 degrees and pop the leftovers in for just 3 or 4 minutes. Shake the basket halfway through. These reheating methods show you we’re committed to quality, even the next day. That commitment to great food quality is what building trust is all about here!
Frequently Asked Questions about Smashed Broccoli
I totally get it—when trying something new, you have a million little questions buzzing around! I’ve collected some of the most common ones I get asked about preparing this Quick Vegetable Recipe. If you still have doubts after checking these out, feel free to drop me a line, or check out some great simple snack recipes for more ways to use simple veggies!
Does Smashed Broccoli have to be boiled first?
Yes, most definitely! That initial quick boil, or blanching, is crucial for several reasons. First, it tenderizes the interior of the broccoli so it cooks through evenly in the oven. Second, and this is key for that crispy exterior, it allows us to wash off surface moisture so we can thoroughly dry the florets afterwards. If you skip the boil and drying steps, you end up steaming the broccoli in the oven instead of roasting it, and that defeats the whole purpose of getting that beautiful crunch!
Can I use frozen broccoli for this recipe?
Oh, honey, please don’t try this with frozen broccoli. Frozen vegetables are already loaded up with excess water packed in to keep them from freezer-burning. If you try to thaw and smash them, they’ll turn into a mushy green puddle when they hit the heat. We need fresh, firm florets here to make a proper Crispy Smashed Broccoli! Stick to fresh for this one.
How crispy should the Smashed Broccoli edges get?
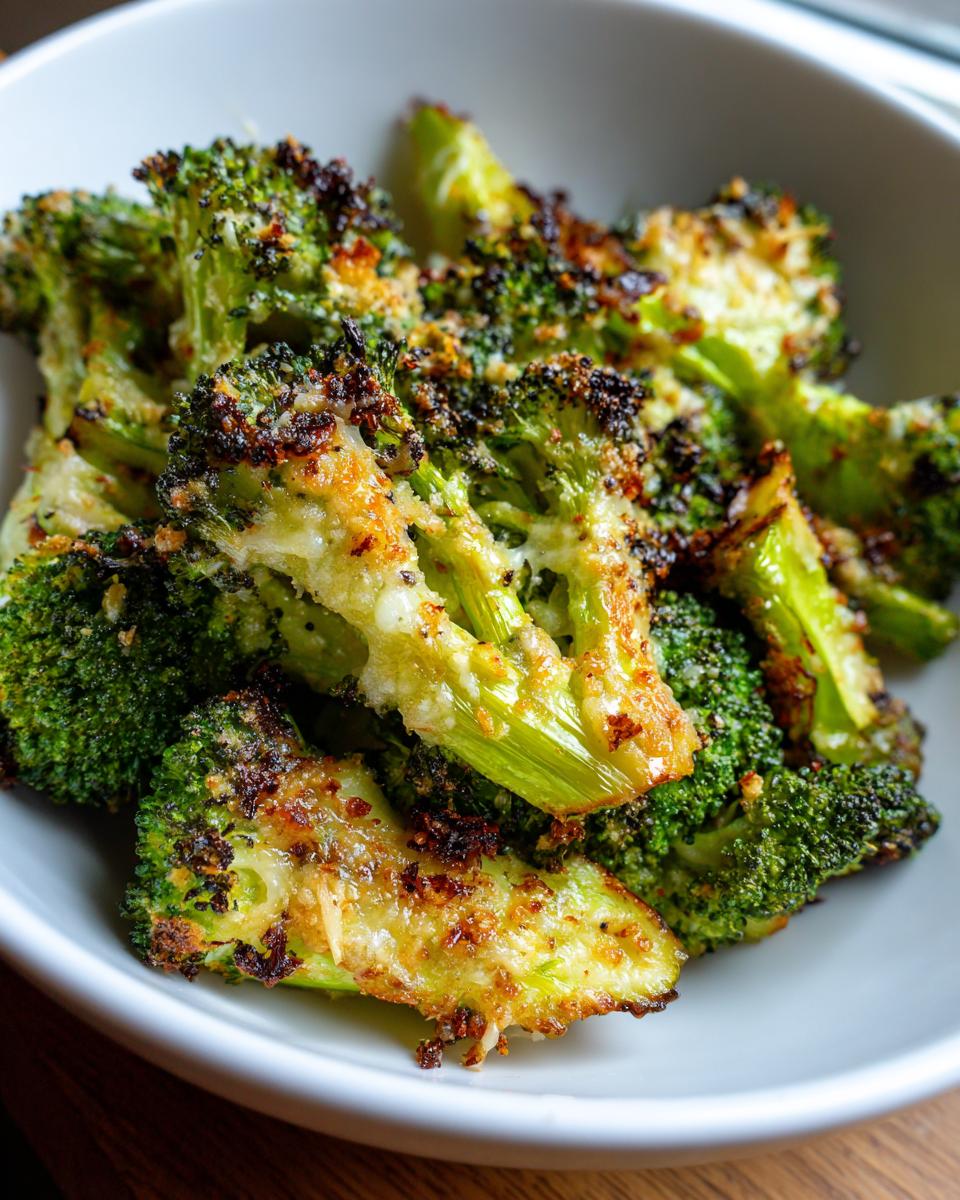
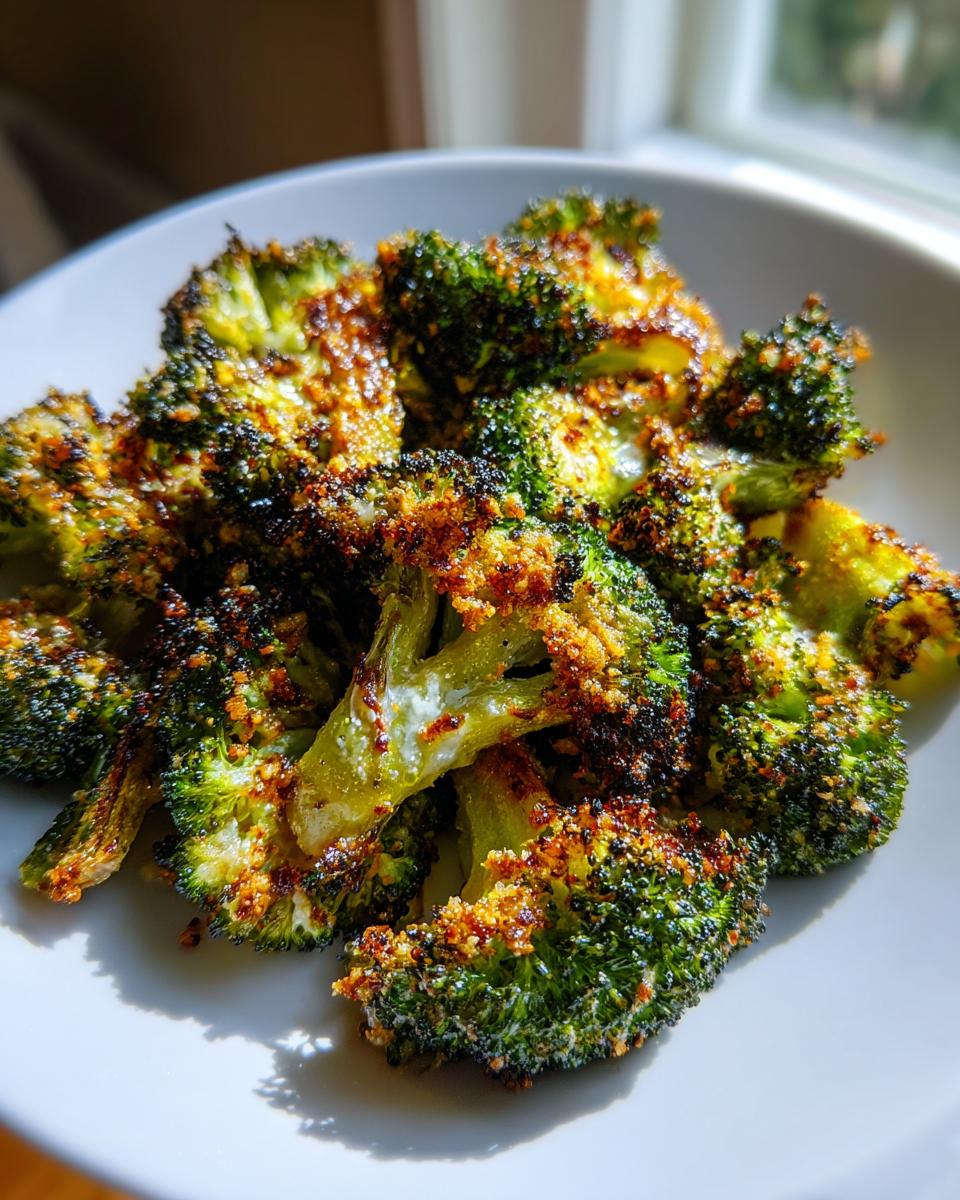
This is subjective, but here’s my sweet spot: you want the very thin edges to be dark golden brown, maybe even a little bit black on the tips, indicating they are perfectly caramelized and crisp when you bite into them. The flatter surfaces should have nice brown spotting and feel firm, not soft. If you’re looking for inspiration on texture, check out the videos on Tasty’s recipe to see that ideal level of crispiness they achieve!
Can I make this ahead of time?
You can certainly do the prep work ahead, which saves time later, but I’d advise against the full smash if you plan to cook it much later than a few hours. You can blanch and dry the broccoli, and even mix your garlic oil, but I wouldn’t smash it until right before you are ready to bake. The longer it sits smashed and oiled, the less structure it holds, and you might start losing some of that crisp potential. For the best results, aim to cook this within an hour or two of smashing them flat.
Is the parmesan cheese necessary for the recipe?
While you certainly *can* skip it if you have an allergy or want to avoid dairy, I would say the Parmesan is what elevates this from a simple roasted vegetable to our featured Garlic Parmesan Broccoli! It melts, browns, and adds a salty, nutty crust that contrasts beautifully with the tender center. If you skip it, make sure you slightly increase the salt in the oil mixture to compensate for that savory punch the cheese usually provides.
Estimated Nutritional Data for Smashed Broccoli
Now, I know some of you are watching macros, and others are just curious about what exactly we’re stuffing ourselves with when we devour this plate of veggie goodness. Because we use simple, whole ingredients here at Delish Symphony, this dish is remarkably clean!
Based on the recipe components for four servings, here are the estimated numbers. Keep in mind, you know how I feel about perfection—these are estimates based on general food values, okay? If you swap out the olive oil for a low-fat spray, your numbers will change! As Michael always says, we aim for accessibility and flavor first.
For one serving of this Flavorful Vegetable Recipe, you can expect:
- Calories: 150
- Fat: 10g
- Protein: 7g
- Carbohydrates: 10g
That’s pretty good for something that tastes like an indulgent snack! You’ve got fiber from the broccoli, healthy fats from the oil, and a nice little protein hit from that Parmesan cheese. It’s a perfect balance when you are looking for a genuinely satisfying side without wrecking your entire day’s intake.
I always stress that these are just guidelines. If you use a mountain of garlic like I sometimes do, your flavors will be enhanced, but the nutrition label might shift slightly! Just enjoy the fact that you are eating something utterly delicious that tastes way—and I mean *way*—more complex than the effort required. That’s the joy of simple home cooking!
Share Your Smashed Broccoli Creations
Alright, now that you’ve smashed, roasted, and hopefully devoured this incredible smashed broccoli, I really want to see what you made! That’s the best part of running this site—seeing all your amazing home-cooked harmonies come to life. Did you go for the full Parmesan crust, or did you try one of the spicy variations we talked about?
When you make this, please take a snap! Snap a picture of those crispy edges and tag us on social media. Showing off your successful, flavorful vegetable recipe helps other cooks feel brave enough to try something new, and that’s what we are all about here at Delish Symphony—finding that joy in simple dishes.
If you leave a star rating on the recipe card below—five stars if you’re feeling generous!—it helps me know exactly which recipes to feature more often. And hey, if something went sideways or you have a brilliant tip I missed, don’t be shy! Drop a comment below, or send me an email via my contact page. I read every single one. Happy cooking, symphony makers!
PrintCrispy Garlic Parmesan Smashed Broccoli

Make flavorful, crispy smashed broccoli roasted with garlic and Parmesan cheese. This easy side dish is perfect for weeknight dinners.
- Prep Time: 10 min
- Cook Time: 25 min
- Total Time: 35 min
- Yield: 4 servings 1x
- Category: Side Dish
- Method: Oven Roasting
- Cuisine: American
- Diet: Vegetarian
Ingredients
- 2 large heads broccoli, cut into florets
- 3 tablespoons olive oil
- 3 cloves garlic, minced
- 1/2 teaspoon salt
- 1/4 teaspoon black pepper
- 1/2 cup grated Parmesan cheese
- 1 tablespoon fresh lemon juice (optional)
Instructions
- Preheat your oven to 400 degrees Fahrenheit (200 Celsius). Line a baking sheet with parchment paper.
- Place the broccoli florets in a large pot of boiling salted water. Cook for 3 to 4 minutes until they are bright green and slightly tender. Drain them well.
- Spread the drained florets on a clean kitchen towel or paper towels and pat them dry.
- Arrange the florets on the prepared baking sheet. Use the bottom of a sturdy glass or a meat mallet to gently smash each floret until it is flattened, but still holds together.
- In a small bowl, whisk together the olive oil, minced garlic, salt, and pepper.
- Brush the garlic oil mixture evenly over the smashed broccoli florets.
- Roast for 15 minutes.
- Remove the pan from the oven. Sprinkle the grated Parmesan cheese evenly over the broccoli.
- Return the pan to the oven and roast for another 5 to 10 minutes, or until the edges are crispy and the cheese is golden brown.
- Remove from the oven. Drizzle with fresh lemon juice, if using, before serving hot.
Notes
- For maximum crispiness, ensure the broccoli is very dry after boiling before you smash and oil it.
- You can substitute the Parmesan cheese with nutritional yeast for a dairy-free version.
- This dish works well as a low-carb snack or appetizer.
Nutrition
- Serving Size: 1 serving
- Calories: 150
- Sugar: 3
- Sodium: 350
- Fat: 10
- Saturated Fat: 4
- Unsaturated Fat: 6
- Trans Fat: 0
- Carbohydrates: 10
- Fiber: 4
- Protein: 7
- Cholesterol: 15