
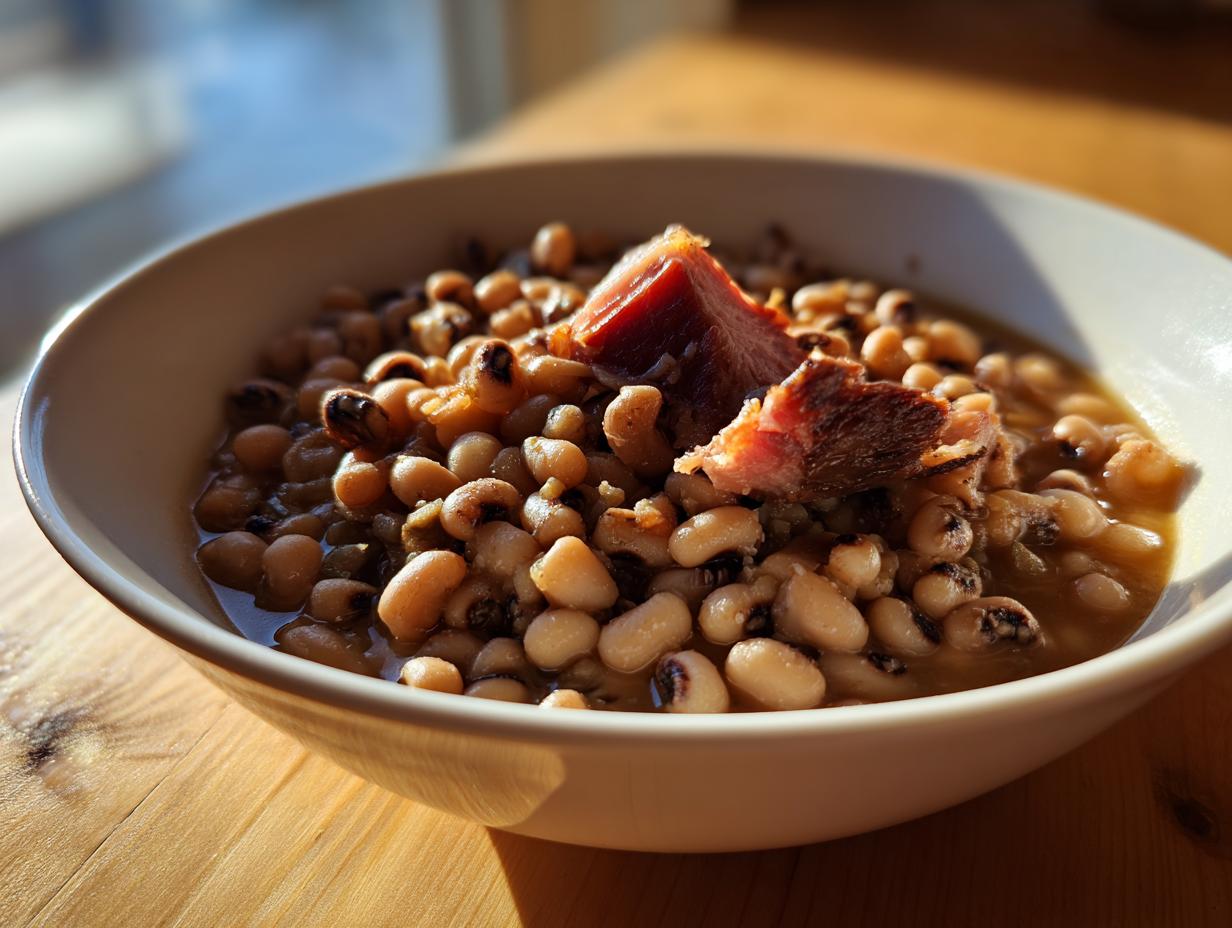
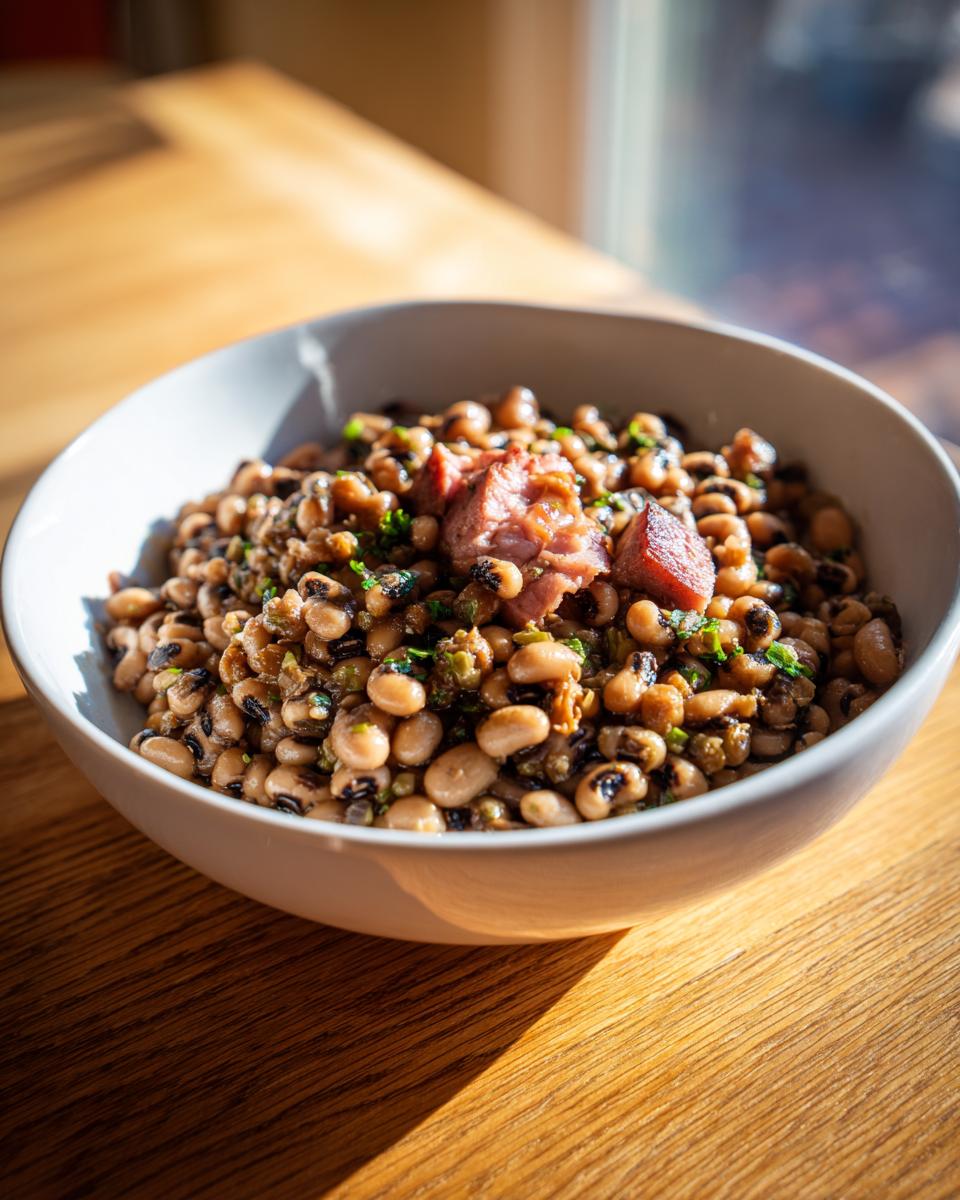
When you think of true comfort food, what comes to mind? Mine is something slow-simmered, deeply flavored, and tied to a little bit of good fortune, which brings me straight to this incredible black eyed peas recipe. We’re diving deep into the traditional Southern style here—the kind that uses smoky meat to build layered flavor. This isn’t just any bean dish; it’s packed with the savory richness you need for a hearty dinner any day, or for that important New Year’s tradition!
Here at Delish Symphony, Mike Carter spends hours perfecting these classic dishes so you don’t have to worry about a thing. He tests every simmer time and seasoning adjustment to make sure this smoky, tender version is totally foolproof for your kitchen. Trust me, once you try these, they’ll become a staple!
- Why This Southern Black Eyed Peas Recipe Is a Must-Make
- Ingredients for the Perfect Black Eyed Peas Recipe
- How to Cook Black Eyed Peas: Step-by-Step Instructions
- Instant Pot Black Eyed Peas Recipe Variation
- Tips for Achieving Creamy Black Eyed Peas
- Serving Suggestions for Your Black Eyed Peas Side Dish
- Storage and Reheating Instructions for Leftover Black Eyed Peas Recipe
- Frequently Asked Questions About This Black Eyed Peas Recipe
- Estimated Nutritional Data for This Black Eyed Peas Recipe
- Share Your Black Eyed Peas Cooking Experience
Why This Southern Black Eyed Peas Recipe Is a Must-Make
Honestly, you can’t beat this flavor profile. We’ve worked hard to nail the authentic taste that makes Southern cooking so famous. It’s rich, it’s satisfying, and it’s so easy, even though it tastes like you slaved over it all day! We know you’ll want to bookmark this Southern Black Eyed Peas Recipe.
- Traditional Southern Flavor Profile: That deep, smoky flavor comes straight from rendering out the fat from bacon or using a smoked ham hock right in the pot. It builds a foundation of savory richness that you just can’t fake with spices alone!
- Perfect for New Year’s Luck: If you want a little prosperity, this is the dish you need on the table come January 1st. It’s tradition, pure and simple, and our version is the absolute best way to honor it.
Ingredients for the Perfect Black Eyed Peas Recipe
Gathering your ingredients is the easiest part of this whole process, I promise! For this classic black eyed peas recipe, we focus on simple pantry staples plus that essential secret weapon: smoky meat. I listed everything out below so you can easily grab it all before you start simmering. Don’t panic about the ham hock; it’s purely there to infuse amazing flavor! We add that little splash of apple cider vinegar right at the end—it doesn’t make the peas taste sour, just brightens everything up beautifully, which is a trick I picked up watching my aunt cook when I was younger.
Here’s what you need to gather for six servings:
- 1 pound dried black eyed peas, rinsed and picked over
- 8 cups water or chicken broth (use broth for extra savory depth!)
- 1 smoked ham hock or 4 ounces smoked bacon, diced
- 1 medium yellow onion, chopped
- 2 celery stalks, chopped
- 2 cloves garlic, minced
- 1 teaspoon dried thyme
- 1 bay leaf
- 1/2 teaspoon salt (we add this last, remember!)
- 1/4 teaspoon black pepper
- 1 tablespoon apple cider vinegar (optional, but highly recommended for that zip!)
Ingredient Notes and Substitutions for Your Black Eyed Peas Recipe
Okay, let’s talk about substitutions, because I know not everyone keeps a ham hock sitting around. If you’re skipping the pork entirely—maybe you want a Vegan Black Eyed Peas Recipe—you absolutely must add smoke back in! My trick is adding about 1 teaspoon of liquid smoke or a generous half-teaspoon of smoked paprika when you add the vegetables. That savory punch is critical.
Also, if you are using strictly water instead of broth, taste the peas before you add salt. Water just doesn’t carry flavor like broth does, so you might need to adjust your final seasoning slightly. And please, make sure you rinse those dried peas well and pick through them to remove any tiny stones or debris. It’s a quick twenty seconds that prevents a nasty surprise later on!
How to Cook Black Eyed Peas: Step-by-Step Instructions
This is where the real magic happens! I know watching dried beans isn’t everyone’s idea of fun, but trust me, following these steps exactly leads to incredibly tender, flavorful black eyed peas. We start slow, building that flavor foundation before letting everything mingle perfectly on the stove.
First thing’s first: get the peas going. Put those rinsed peas into your big pot with 8 cups of water or broth. Bring it to a solid boil—you want a good rumble going on—then immediately drop the heat way down low, cover it, and let them gently simmer for about an hour. This initial cook softens them up nicely before we introduce the savory stuff. Don’t expect them to be done yet; they just need a head start!
Sautéing Aromatics for a Smoky Black Eyed Peas Recipe
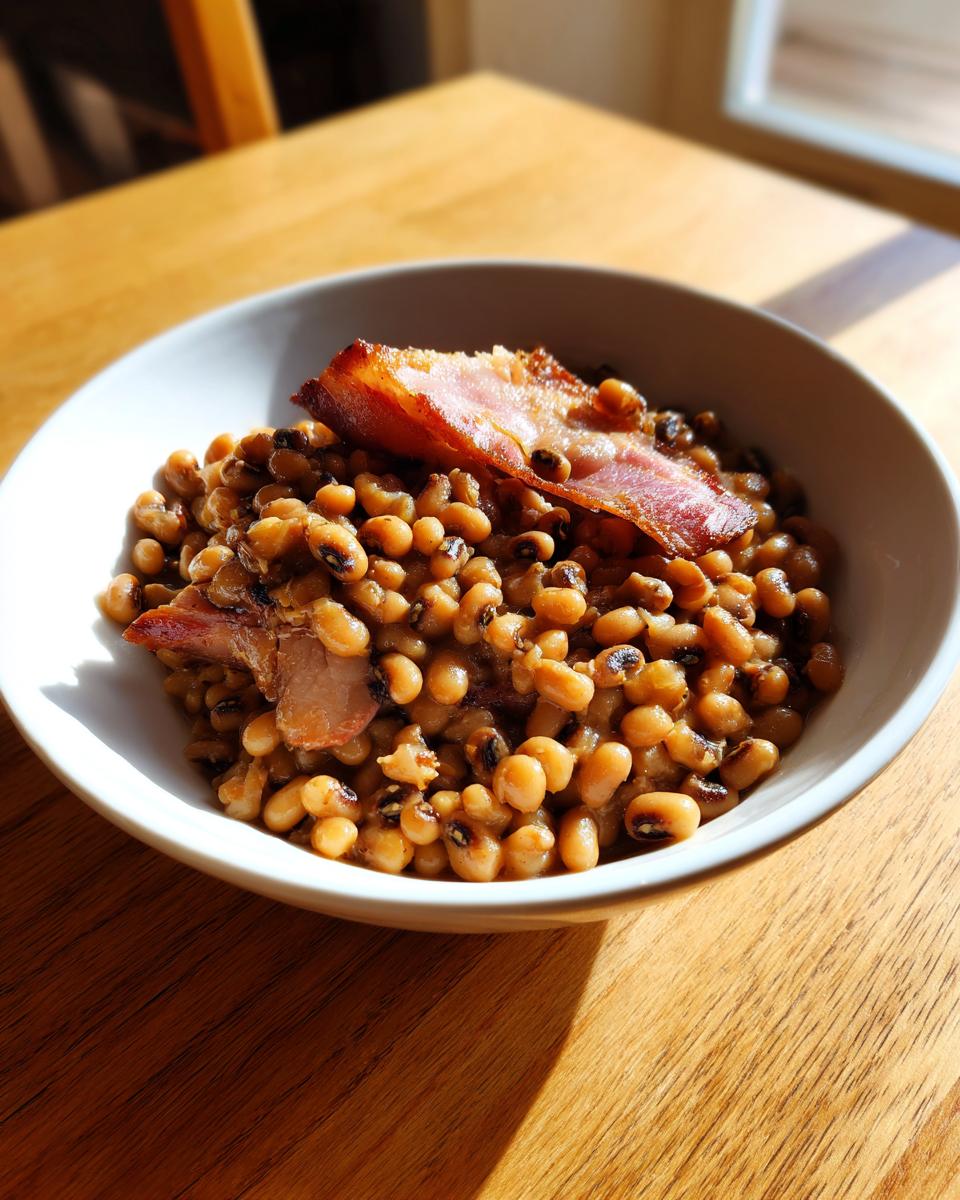
While those peas are starting their journey, turn your attention to developing that smoky base. Grab a separate skillet. Cook your diced bacon or ham hock over medium heat until it actually starts to get crisp. Once it’s browned up, take the meat out but—and this is key—leave about a tablespoon of that glorious rendered fat behind in the skillet. That fat is pure flavor gold!
Toss in your chopped onion and celery into that fat. Cook them down slowly until they look soft and translucent—maybe about five minutes. Then, toss in your minced garlic and cook only until you can really smell it, which is usually just one quick minute. You don’t want that garlic burning, or the whole batch goes bitter, so keep an eye on it!
Simmering and Tenderizing the Dried Black Eyed Peas Recipe
Now, take that sautéed veggie mix, the cooked meat bits, your thyme, and that bay leaf, and dump them right into the main pot with the peas. Give it all a good stir, put the lid back on slightly ajar, and let it go for another 45 minutes up to an hour. You’re checking on the liquid level every so often; if it looks too dry, just splash in some more hot water or broth.
The total cook time is easily two hours, give or take! Once the peas are totally soft—I test this by squishing one between two spoons—pull out that bay leaf and the big ham hock bone.
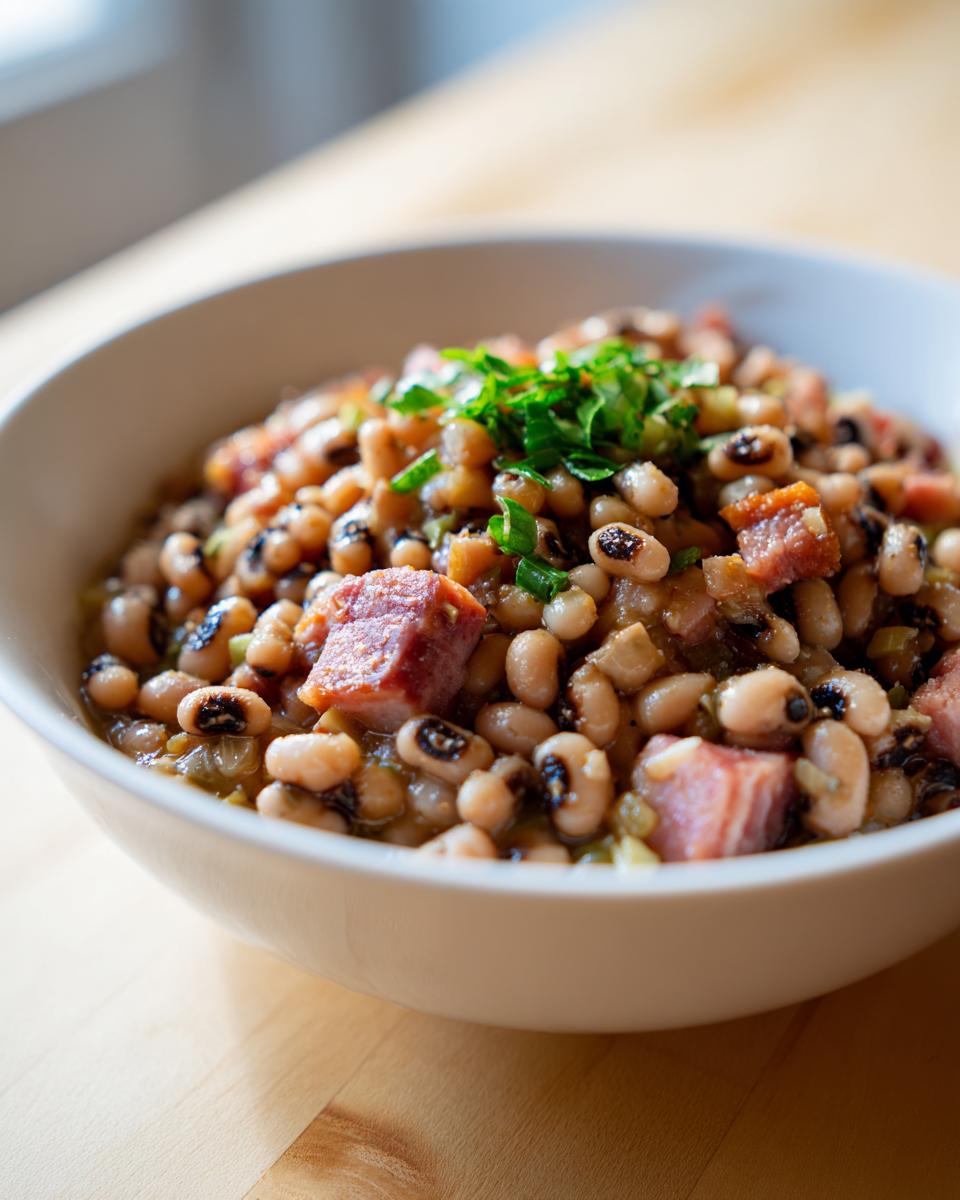
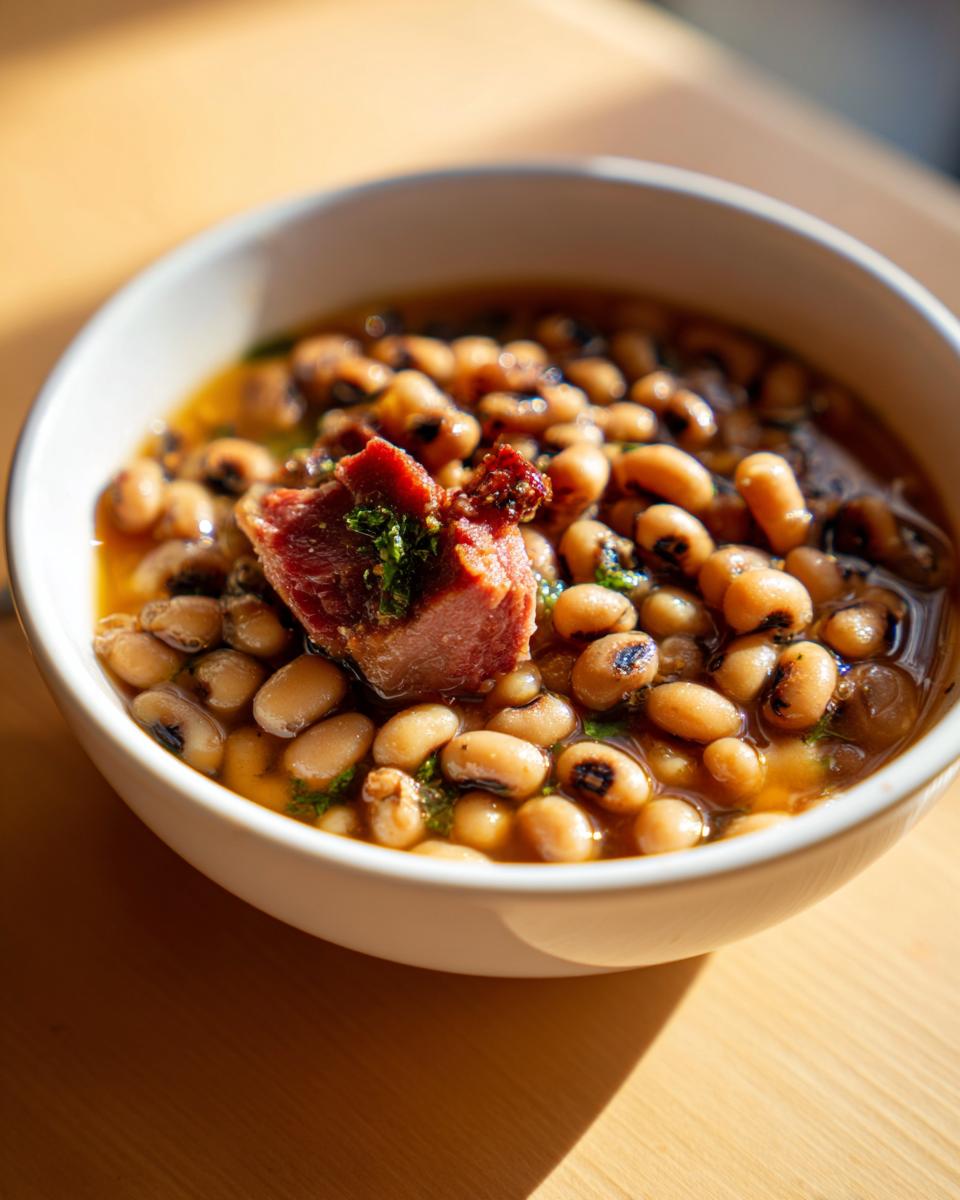
This is the moment for the bright finish! Stir in your salt, pepper, and that optional splash of apple cider vinegar. Let it simmer uncovered for a final 15 minutes so the liquid thickens up just a little bit. If you’re making this classic Southern Black Eyed Peas Recipe, you know it’s ready when it smells smoky, beefy, and utterly comforting!
Instant Pot Black Eyed Peas Recipe Variation
I know, I know! Most of us these days have zero patience to watch beans simmer for two full hours. That’s why I absolutely had to figure out a way to get that same deep, traditional flavor using my Instant Pot. Seriously, if you need this Instant Pot Black Eyed Peas recipe for a weeknight, it’s a total game-changer.
The method is really simple, and honestly, it makes cleanup a breeze. You’re basically throwing everything in but the salt and vinegar. So, you dump in your rinsed peas, your broth (or water), the ham hock or bacon, the onion, celery, thyme, and that bay leaf. Put the lid on tight, set it to High Pressure, and set your timer for exactly 20 minutes. Don’t mess with the time—20 minutes is perfect for that tender texture without turning them to mush!
Now here’s the most important part, the second the timer dings: DO NOT quick release! That shock of pressure ruins the texture on the outside of the peas. You need to let the pressure come down naturally for a full 15 minutes. After that 15 minutes of Natural Pressure Release (NPR), you can carefully quick release any steam left over. Take off the lid, fish out that bone and bay leaf, stir in your salt, pepper, and vinegar, and you’re done! It tastes like it cooked all day, but you saved yourself, what, an hour and a half of hovering? Yes, please!
Tips for Achieving Creamy Black Eyed Peas
If you’re tired of your peas coming out watery or crumbly and you’re really chasing that rich, Creamy Black Eyed Peas texture, I’ve got a couple of secrets that really make a difference. Cooking beans well is all about timing, especially when it comes to thickening up that cooking liquid without resorting to flour!
My biggest tip, the one I always stress when someone asks how to cook black eyed peas perfectly, is to hold back on the salt until the very end of the process. Seriously! If you dump a bunch of salt in when those dried peas first start boiling, they cook tough and never get that soft, creamy interior we’re aiming for. We season them right at the finish line once they are already tender.
Once they are soft—and I mean truly soft, just shy of falling apart—try this little trick: grab a wooden spoon or even the back of a sturdy spatula. Take about a ladleful of the cooked peas and liquid and mash them vigorously right against the side of the pot. You don’t need many, maybe a generous scoop or two. Then stir that mashed mush back into the rest of the pot.
That starchy mash acts like a natural thickener, instantly giving you that luxurious, velvety broth. You let that simmer uncovered for just five minutes, and suddenly, you have the richest, most gorgeous Southern Black Eyed Peas Recipe imaginable. It tastes far more complex than the simple steps let on, I promise you that!
Serving Suggestions for Your Black Eyed Peas Side Dish
Okay, you’ve got this perfect, smoky, tender pot of goodness. Now, what’s going to stand up to this incredible serving of Soul Food Black Eyed Peas Recipe? This isn’t really a dish that stands alone; it needs great companions on the plate to make it a real meal. My go-to pairing, hands down, is something crusty to soak up that flavorful broth.
You simply cannot serve this without warm, slightly sweet cornbread. I’m talking about the crumbly kind, not the cakey kind! You want that bread to act like a sponge, pulling up all those last savory drops from the bowl. If you’re planning a big meal, make sure you have a big batch ready to go. It’s an essential side dish partner.
For a really hearty dinner, serve this over a scoop of perfectly fluffy white rice. It’s funny, because some people eat their peas right out of the pot, but I absolutely love the slightly different texture contrast when the broth soaks into the rice. It transforms the texture completely!
If you are serving this as part of a larger spread—maybe for New Year’s or a Sunday supper—think about greens! Collard greens are traditional, but steamed cabbage or even some sautéed onions go beautifully alongside the rich flavor of the smoky peas. Presentation-wise, just keep it simple: a scoop of peas next to the cornbread, maybe a little squeeze of fresh hot sauce on top if someone likes the heat. That’s Southern elegance right there—delicious simplicity!
Storage and Reheating Instructions for Leftover Black Eyed Peas Recipe
The best part about making a big pot of this black eyed peas recipe is knowing you’ve got amazing comfort food waiting for you the next day! They honestly taste even better the day after, once all those smoky flavors have had time to really settle in and marry up with the spices.
When you’re done eating, don’t just let the pot sit on the counter. You want to pack these leftovers up fast. Make sure you fish out that big ham bone—you probably won’t want to eat that the next day—and definitely take out the bay leaf before you store them.
Here’s my foolproof method for keeping them fresh:
- Put the cooled peas into an airtight container. Glass containers are my favorite because they don’t hold onto smells, but any good sealed plastic container works great too.
- These Southern Black Eyed Peas will keep perfectly in the refrigerator for about four to five days. They firm up a little bit when they chill, but don’t worry about that!
Reheating them is the easiest thing ever! You want to use the stovetop for the very best texture. Dump the cold peas into a saucepan over medium heat. Since they soak up liquid like crazy in the fridge, they’ll probably seem a little too thick when you first put them in. That’s why you need to introduce a splash of liquid—either water or some chicken broth works perfectly. Add just a little bit at a time, maybe a quarter cup, stirring gently until they get back to that lovely, creamy consistency you loved the first night.
If you’re in a huge rush, the microwave works in a pinch. Just make sure you cover the bowl so that steam helps them loosen up and heat evenly. Seriously, leftovers are just as good as the first batch!
Frequently Asked Questions About This Black Eyed Peas Recipe
I totally get it! When you find a great black eyed peas recipe, you immediately start wondering about all the little variations and what-ifs. I’ve cooked this dish more times than I can count, whether for a satisfying dinner or for those good-luck New Year traditions, so I’ve gathered up the questions I hear most often. Here are the quick answers before you dive into making your own batch!
Do I need to soak dried black eyed peas before cooking?
This is the classic debate for any dried bean cook! For this Traditional Black Eyed Peas Recipe, especially if you are using the two-hour slow simmer method, you technically don’t have to soak them overnight. Rinsing them well and picking over the beans is the required minimum.
However, if you are short on time and trying to speed things up (maybe you forgot to start them early!), an overnight soak will definitely cut down on that initial 1-hour simmering time. If you do soak them overnight, dump the soaking water, rinse the beans again, and then cook them in fresh water or broth as written.
Can I make this Black Eyed Peas Recipe without meat?
Oh yes, you absolutely can! We love flavor here, but we love making changes that work for everyone’s kitchen, too. If you want a fantastic Vegan Black Eyed Peas Recipe, the key is replacing the smoky base that ham hock or bacon fat provides. Trust me, just leaving it out leaves a flavor hole!
When you sauté your aromatics (onion and celery), use a nice, neutral oil like canola or olive oil. Then, right when you add the veggies to the main pot, toss in either 1 teaspoon of liquid smoke or about 1/2 teaspoon of smoked paprika. That little bit of smoke brings back the depth and makes it taste just as rich, even as a wonderful Vegetarian Pea Recipe!
What is the best way to make Black Eyed Peas Side Dish spicy?
I always lean towards building spice in early so it infuses the whole pot, rather than just dumping hot sauce on top at the end. If you want a genuinely spicy batch, here’s where you add the heat:
- During the Sauté: Right when you add the garlic, toss in a pinch of cayenne pepper, or maybe a dash of red pepper flakes. Give that just 30 seconds to toast in the fat before you move them to the main pot along with the onions and celery.
- Use Jalapeños: For more texture and heat, dice up half a jalapeño (seeds in for serious heat, seeds out for mild flavor) and sauté it right along with the onions and celery. That way, you get pockets of heat in your Black Eyed Peas Side Dish!
If you’re making this dish for a group where some like it mild and some like it hot, it’s always easier to serve it plain and provide a bottle of your favorite cayenne-based hot sauce right on the table. That way, everyone controls their own fire! I use my notes from my easy breakfast recipes sometimes when thinking about quick flavor jolts like this!
Estimated Nutritional Data for This Black Eyed Peas Recipe
Now, let’s talk about the fuel factor! I always like to include some estimated nutrition because these Comfort Food Bean Recipes are deceptively wholesome. This recipe isn’t just heavy on tradition; it’s actually pretty balanced, packed with protein and fiber thanks to those peas.
Keep in mind, since this involves smoked meat and broth, the sodium content reflects that traditional preparation. Also, remember, these figures are just estimates based on the ingredients listed! If you use lean turkey bacon instead of ham hock, or skip the added salt, your numbers will look a little different. These are based on serving size being about one cup cooked.
Here is a breakdown of what you can generally expect from this hearty dish:
- Serving Size: 1 cup cooked
- Calories: 240
- Fat: 4 grams (with 1 gram Saturated Fat)
- Protein: 15 grams (That’s fantastic for beans!)
- Carbohydrates: 40 grams
- Fiber: 10 grams (Great for keeping you full!)
- Sugar: 1 gram
- Cholesterol: 10 mg
See? Lots of great fiber and protein in this classic black eyed peas recipe! It’s a wonderful foundation for a satisfying meal. If you’re tracking macros, this is a winner. Just remember to account for whatever you serve it with—that cornbread adds a little extra something, which is totally worth it!
Share Your Black Eyed Peas Cooking Experience
Alright, now that you’ve got a big pot of smoky, perfectly tender traditional black eyed peas simmering on your stove, I truly want to hear about it! Cooking is always better when we share the results, right?
Did you make this for New Year’s Day for good luck, or did you just need a big bowl of Southern comfort after a long week? Don’t keep all that deliciousness to yourself!
I’d be thrilled if you rate this black eyed peas recipe right here on the page—five stars if it tastes just like your grandma used to make! If you have any tips or tricks that made it even better for you, drop them in the comments below. Seriously, I read every single one, and your input helps the next reader nail it perfectly.
If you snap a picture of your creamy, smoky peas served up with cornbread, tag us on social media! Seeing your finished dishes truly makes my day and reminds me why Mike and I put all this testing and developing into every recipe. We are all in this symphony together—let me know how yours turned out!
PrintClassic Southern Black Eyed Peas Recipe
Make traditional Southern Black Eyed Peas that are smoky, tender, and packed with flavor. This recipe is perfect for a hearty dinner or for New Year’s tradition.
- Prep Time: 15 min
- Cook Time: 2 hours
- Total Time: 2 hours 15 min
- Yield: 6 servings 1x
- Category: Side Dish
- Method: Stovetop Simmering
- Cuisine: Southern
- Diet: Low Fat
Ingredients
- 1 pound dried black eyed peas, rinsed and picked over
- 8 cups water or chicken broth
- 1 smoked ham hock or 4 ounces smoked bacon, diced
- 1 medium yellow onion, chopped
- 2 celery stalks, chopped
- 2 cloves garlic, minced
- 1 teaspoon dried thyme
- 1 bay leaf
- 1/2 teaspoon salt (adjust to taste)
- 1/4 teaspoon black pepper
- 1 tablespoon apple cider vinegar (optional, for brightness)
Instructions
- Place the rinsed black eyed peas and water or broth in a large pot or Dutch oven. Bring to a boil, then reduce heat, cover, and simmer for 1 hour, or until peas begin to soften.
- In a separate skillet, cook the diced ham hock or bacon over medium heat until crisp. Remove the meat and set aside, leaving about 1 tablespoon of fat in the skillet.
- Add the chopped onion and celery to the skillet and cook until softened, about 5 minutes. Add the minced garlic and cook for 1 minute more until fragrant.
- Add the sautéed vegetables, cooked ham hock/bacon, thyme, and bay leaf to the pot with the peas.
- Continue to simmer, partially covered, for another 45 to 60 minutes, or until the peas are completely tender. Add more water or broth if the mixture becomes too dry.
- Remove the bay leaf and ham hock bone. Stir in the salt, pepper, and apple cider vinegar, if using. Taste and adjust seasonings.
- Simmer uncovered for the last 15 minutes to allow the liquid to reduce slightly and the flavors to meld. Serve hot over rice or with cornbread.
Notes
- For a quicker method, use an Instant Pot: Combine peas, broth, ham hock, onion, celery, thyme, and bay leaf. Cook on High Pressure for 20 minutes, then allow for a Natural Pressure Release for 15 minutes before quick releasing the remaining pressure.
- If you skip the ham hock, add 1 teaspoon of liquid smoke or smoked paprika for a smoky flavor.
- For a vegetarian version, omit the ham hock and use vegetable broth, adding extra smoked paprika for depth.
Nutrition
- Serving Size: 1 cup cooked
- Calories: 240
- Sugar: 1
- Sodium: 350
- Fat: 4
- Saturated Fat: 1
- Unsaturated Fat: 3
- Trans Fat: 0
- Carbohydrates: 40
- Fiber: 10
- Protein: 15
- Cholesterol: 10