
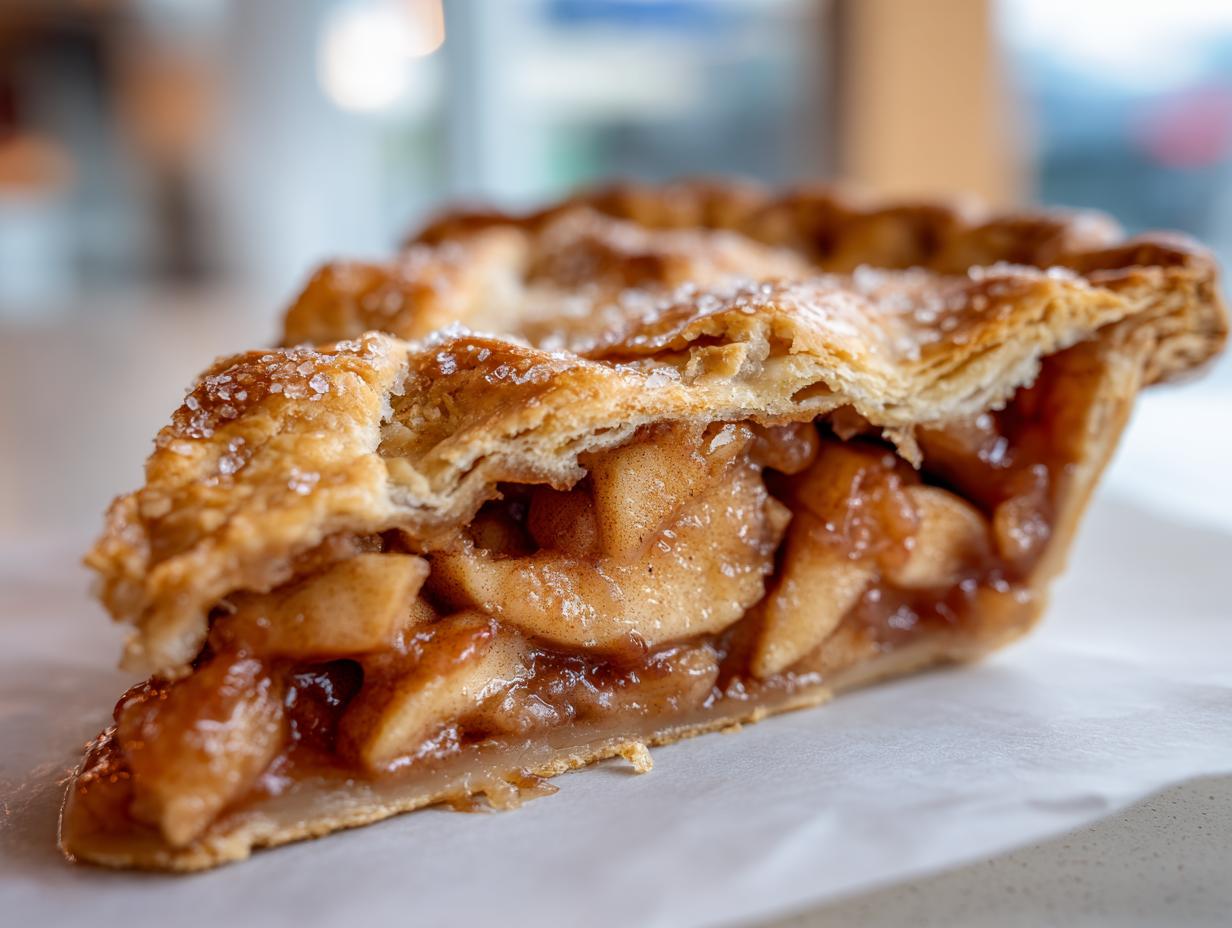
There’s something almost magical about the aroma of a warm, spiced apple pie filling bubbling under a golden-brown crust that just screams ‘home.’ It’s the ultimate comfort food dessert, isn’t it? Well, after years of disappointing, soupy pies that left me with mushy bottoms, I finally nailed it. This recipe for the Best Homemade Apple Pie is the result of trial and error, ensuring you get that beautifully flaky crust and a filling that actually tastes like perfectly tender apples, not applesauce. I’m Michael Carter, and when I left my hectic tech job to focus on simple, flavorful cooking here at Delish Symphony, perfecting this Classic Apple Pie Recipe was non-negotiable. Trust me, this is the one you’ll want to pull out for every holiday gathering—you can explore more of my delicious dessert recipes here!
I focused on technique—specifically cooking the filling slightly beforehand—so you can stop worrying about that soggy bottom crust forever. We’re making something truly special together, something that tastes like it’s been handed down through generations!
- Why This Classic Apple Pie Recipe Delivers Flavorful Harmony
- Ingredients for the Best Homemade Apple Pie
- Easy Apple Pie Instructions: Mastering the Dough
- Assembling the Perfect Apple Pie Filling from Scratch
- Assembling and Baking Your Old Fashioned Apple Pie
- Cooling and Serving the Apple Pie: The Final Step
- Variations on the Classic Apple Pie Recipe
- Frequently Asked Questions About Making Apple Pie
- Storing Your Homemade Baked Dessert for Later Enjoyment
Why This Classic Apple Pie Recipe Delivers Flavorful Harmony
When you’re baking something as iconic as this, you can’t just toss things in and hope for the best! This recipe cuts through all the common frustrations people have with homemade pie, making it both easy and unbelievably delicious. I didn’t want a pie that was complicated, but I definitely refused to settle for anything less than perfect.
If you follow these steps, you get guaranteed results every single time. It’s all about balancing the structure and the sweet spice of the fruit. Ready to see why folks call this the best? You can read a little more about my journey perfecting these recipes over at the About Page!
Achieving the Best Apple Filling Texture
This is the big one, folks. We pre-cook the filling! Seriously, don’t skip it. Cooking the apples down briefly before they even see the dough eliminates all that extra water. That means you get tender, perfectly seasoned fruit that meshes beautifully with the spices, rather than ending up with a soupy mess leaking into your crust. It’s truly the key to achieving the Best Apple Filling Texture possible.
The Secret to a Flaky Pie Crust Tutorial
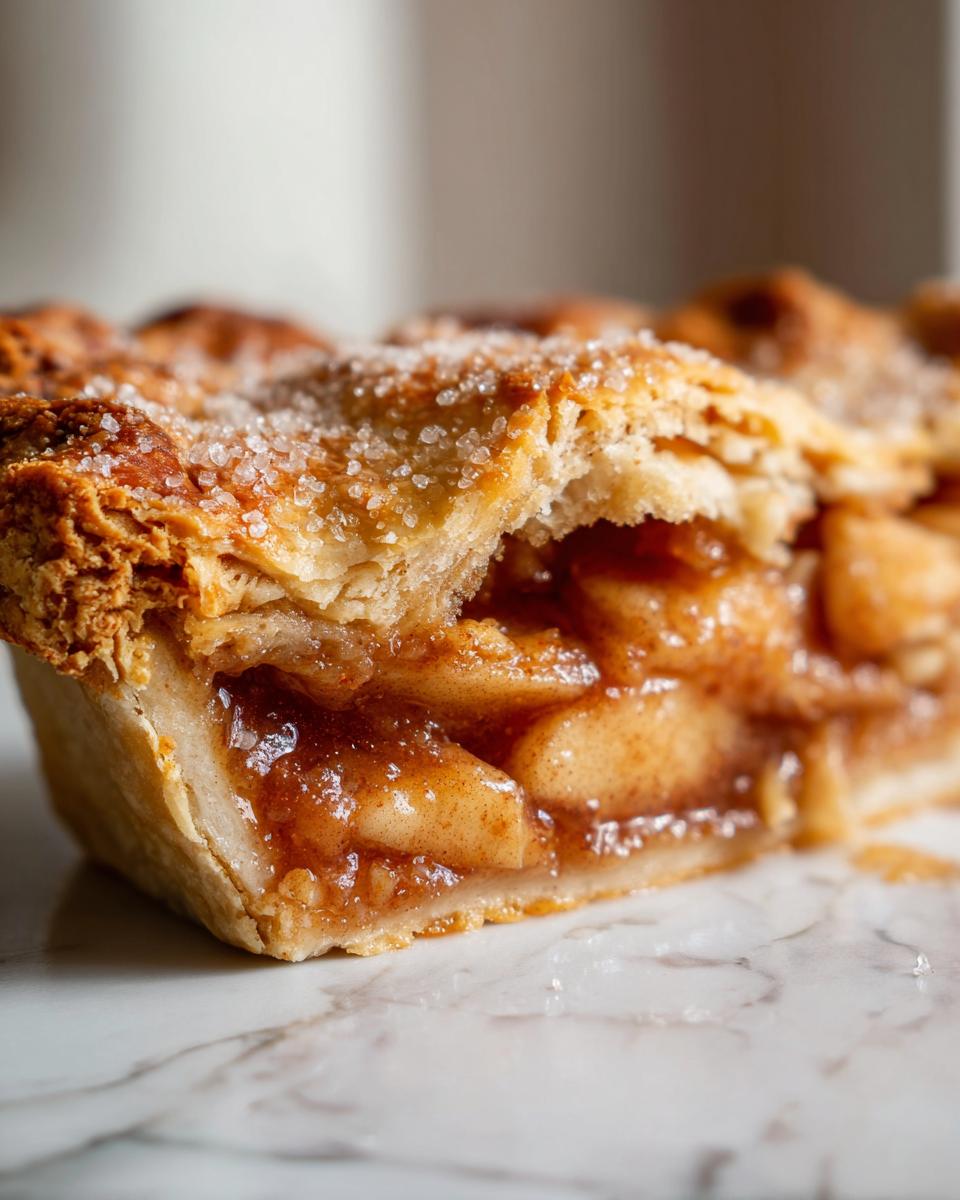
The crust has to sing, and for that, it needs cold ingredients. Butter and water need to be frigid—I mean ice bath cold! When those icy little butter shards hit the hot oven, they send up little bursts of steam, creating those beautiful, airy pockets we associate with a perfectly flaky crust. Following this simple rule is the cornerstone of any good Flaky Pie Crust Tutorial.
Ingredients for the Best Homemade Apple Pie
Okay, let’s talk about what you need. For a truly great pie, especially one destined to be a Family Favorite Pie, the quality and preparation of your ingredients matter way more than you think. I’ve listed everything out here, broken down by what goes into the crust and what makes up that incredible sweet and spiced filling. Precision is important here, especially for the crust!
For the Flaky Double Crust Apple Pie Dough
Remember, the colder everything is, the flakier your crust will be! If your kitchen is super warm, pop your bowl in the freezer for 10 minutes before you start mixing.
- 2 1/2 cups all-purpose flour
- 1 teaspoon salt
- 1 cup (2 sticks) cold unsalted butter, cut into cubes
- 1/2 cup ice water, plus more if needed
For the Spiced Apple Filling from Scratch
I always suggest using a mix of apples—like Granny Smith for tartness and Honeycrisp or Fuji for sweetness and texture—to get the ultimate flavor profile for this Spiced Apple Filling.
- 6 large baking apples (Granny Smith and Honeycrisp mix suggested), peeled, cored, and sliced 1/4-inch thick
- 3/4 cup granulated sugar
- 1/4 cup packed light brown sugar
- 1/4 cup all-purpose flour (this is our crucial thickener!)
- 1 teaspoon ground cinnamon
- 1/4 teaspoon ground nutmeg
- 1/8 teaspoon ground allspice
- 1 tablespoon lemon juice
- 2 tablespoons unsalted butter, cut into small pieces (to dot the top later)
- 1 large egg, beaten with 1 teaspoon water (for the egg wash so it’s shiny)
- 1 tablespoon coarse sugar for sprinkling
Easy Apple Pie Instructions: Mastering the Dough
Before we get to that amazing cooked filing, we have to build our base, and this dough is the key to that dreamy, flaky texture. This is where we channel our inner pastry chef, but honestly, it’s so simple!
First thing: grab your biggest bowl and whisk together your flour and that teaspoon of salt. Now, the fun part—cutting in the butter. You need very cold, cubed butter, remember? I use my pastry blender, working it back and forth until the butter pieces are about the size of small peas. If you don’t have a blender, use your fingers, but work fast so you don’t warm up the fat too much!
Next, add your ice water slowly, one tablespoon at a time. You’re not mixing a cake batter here; you just want the dough to *barely* hold together when you squeeze a handful. Once it looks shaggy, stop messing with it! Divide that dough right in half, wrap those halves up snug in plastic wrap until they are nice, firm disks. We bake these babies cool, so this chilling time of at least one hour isn’t optional—it’s part of our weeknight dinner recipes strategy to ensure fantastic results!
Assembling the Perfect Apple Pie Filling from Scratch
Now that our dough is chilling out and getting cold and happy, we can focus on the star of the show—the apples! This is where we ditch the risk of a runny center. We are actually going to cook this filling slightly before it ever sees the oven.
Grab a large bowl. Toss those beautifully sliced apples—peeled and cored nicely, right?—with both the granulated and brown sugars, the flour that’s going to thicken everything, and all those warm spices: cinnamon, nutmeg, and allspice. Don’t forget that little splash of lemon juice to keep things bright! Remember what I always say about flavor in our kitchen? You need layers! That’s why mixing sweet and tart apples is the secret weapon for the Best Homemade Apple Pie filling.
Next, slide that whole fruity mixture into a large saucepan. Turn the heat to medium and just let it simmer gently, stirring every now and then. You’re looking for the apples to soften just a kiss—maybe 8 to 10 minutes. The biggest visual cue? You’ll see the juices start to bubble up and look noticeably thicker, almost syrupy. Once you see that thickness, take it OFF the heat immediately. Give it about fifteen minutes to cool down before you load it into your pastry shell. Before you transfer it, stir in those final two tablespoons of little butter pieces. This technique ensures that every single bite of your final dessert is tender and perfectly seasoned, giving you that irresistible homemade texture. Find more fruit-focused ideas like my homemade applesauce recipe!
Assembling and Baking Your Old Fashioned Apple Pie
Alright, the dough is chilled and the filling has cooled down just enough—now it’s time to put this masterpiece together! This is where that beautiful Double Crust Apple Pie really comes to life. Preheat your oven to a blazing 425 degrees F first. We need that initial heat blast!
Take one disk of that lovely, cold dough and roll it out nice and even into about a 12-inch circle. Gently ease it into your 9-inch pie dish. You should have about an inch hanging over the edge; trim that overhang slightly. Now, carefully spoon that cooled, spiced apple filling right into the shell. Make sure you get all those gorgeous thick juices in there, too! Dot the top of the apples with those last few little bits of butter—that adds richness we can’t skip.
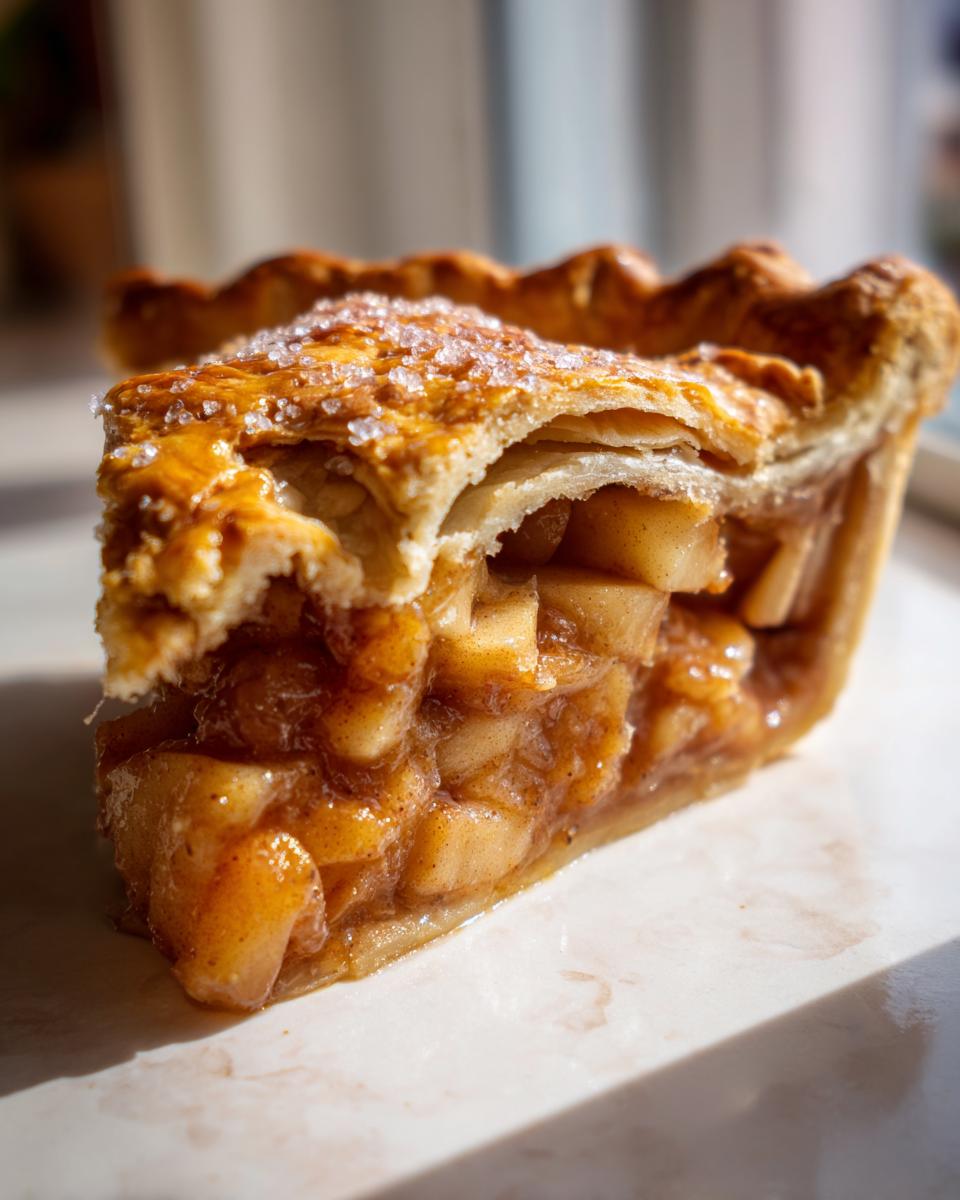
Roll out your second disk for the top crust. Lay it right over the apples. This part takes a little finesse, but you’ve got this! Trim the edges and then press the top and bottom doughs together firmly. Crimp them however you like—a nice tight seal is key to keeping everything contained. Then, crucially, cut several slits right in the top. This is how the steam escapes so your crust doesn’t explode! Before it goes in, brush the whole top with that quick egg wash and sprinkle it generously with coarse sugar for that perfect crunch.
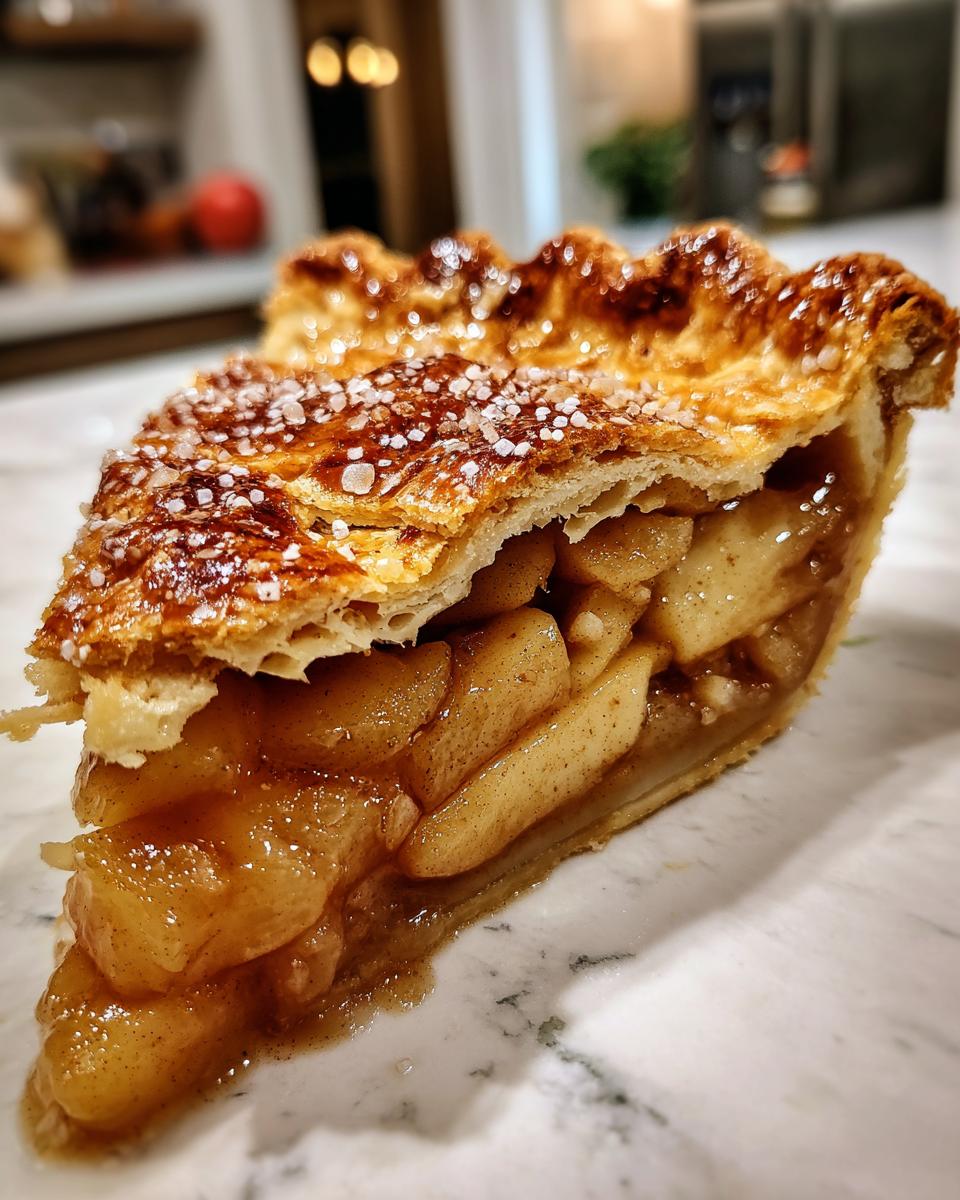
Here’s my best tip for mess-free baking, which I learned the hard way after cleaning butter off my oven floor more times than I care to admit: always place the pie dish on top of a rimmed baking sheet! This catches any drips. Bake it hot at 425 degrees F for exactly 15 minutes. Then, and this is important for an Old Fashioned Apple Pie, reduce the oven temperature down to 375 degrees F. Let it bake for another 40 to 50 minutes until that crust is golden brown and you see the filling bubbling happily in those vents. If the edges start looking too dark too fast, grab a ring of foil like in this guide and shield them. We want golden, not burnt!
Head over to my desserts page after you pull this beauty out. You’ll be making this for every gathering from now on!
Cooling and Serving the Apple Pie: The Final Step
I know, I know. You pull that gorgeous, golden-brown creation out of the oven, and the smell is just torturing you. You want to cut into it right then and there with a fork and dive in. But hold your horses! This last step is arguably the most important for your eating experience. If you cut into this pie too soon, you are going to end up with a puddle of lukewarm liquid where a beautiful slice should have been.
Step seven is all about patience, which is easier said than done when something smells this good! Your filling, which you carefully thickened by pre-cooking, is currently molten lava hot. As it cools down, those starches and thickeners—that flour you added—need time to fully activate and rearrange themselves.
If you slice it early, the thickened liquid just hasn’t had a chance to set up. It flows out everywhere, leaving you with a thin crust bottom and a pile of soft apples on your plate. I always tell folks: you absolutely must let this cool on a wire rack for a minimum of three hours. Seriously, set a timer if you have to!
Three hours might sound like forever, but this resting period is what transforms the interior from a bubbling hot sauce into that perfect, spoonable, yet sliceable filling texture we worked so hard for earlier. Trust me on this one. By the time those three hours are up, slicing is easy, and you’ll have the most beautiful sliceable portions for serving. Those last few hours of waiting make all the difference!
Variations on the Classic Apple Pie Recipe
Now that you’ve mastered the foundational steps for our favorite iteration, maybe you’re thinking about jazzing things up a bit for the next time you bake. That’s the fun of being a home cook, right? We tweak and adapt!
This recipe is wonderfully adaptable. If you’re looking for something a little easier, or perhaps something with extra texture on top, you’ve got options. You might want to check out my classic apple crisp recipe for another way to use seasonal fruit.
For a wonderful twist that skips the top crust entirely, turn this into a Dutch Apple Pie. Just ignore the instruction about the second dough disk! Instead, you’ll make a delicious streusel topping. You just mix 1 cup of flour, 1/2 cup brown sugar, 1/2 cup rolled oats, and 1/2 cup of cold butter until it’s beautifully crumbly. Spread that right over your filling before baking. Alternatively, if you prefer that crumble texture but still want the structure of a full crust, you can simply use the streusel as the top layer instead of the solid second crust. It gives you that wonderful crunch mentioned in some of the online recipes, like this one for Dutch Apple Pie.
Frequently Asked Questions About Making Apple Pie
It wouldn’t be a proper cooking session without a few burning questions, right? When I first started playing around with this Classic Apple Pie Recipe, I had so many doubts myself. Here are the ones I hear most often from friends and family when they try their hand at baking a spectacular From Scratch Pie Baking project!
What are the best apples for apple pie?
This is such a great question because the apple choice totally impacts the final texture! You really want a mix. I rely on Granny Smith because they hold their shape so well and provide that fantastic tartness that keeps the pie from tasting sickly sweet. But you don’t want *only* tart, so I always blend them with something slightly sweeter and softer, like Honeycrisp or Fuji. This combination gives you that perfect structure and depth in your Spiced Apple Filling. It really makes a difference in the overall flavor harmony!
Can I use store-bought crust for this apple pie recipe?
Look, I’m not going to judge if you need a shortcut. If you are in a rush and need a fast Simple Apple Dessert, then yes, store-bought crust will work in a pinch. However, I have to be honest: that amazing flaky texture we talked about? That comes from using ice-cold butter and handling the dough minimally, which you only get when you make it yourself. If you use pre-made, just make sure it thaws in the fridge for a bit before rolling it out so it doesn’t crack!
How do I prevent my apple pie from getting soggy?
This is the eternal battle, but guess what? We’ve already won! The biggest reason for a soggy bottom is excess liquid from the apples leaking out during the long bake time. That’s why my method involves pre-cooking the filling until the juices are thick and syrupy before it even goes into the pastry shell. That small step ensures you have a lovely, firm pie, even the next day. I find that even when I make this for big Thanksgiving Pie Recipes spreads, the bottom crust stays crisp!
Is this recipe good for holiday baking ideas?
Absolutely! This is my number one recipe for holiday baking ideas. Because the filling cooks down a bit first, it holds up perfectly on a buffet table, unlike fully raw fillings that can sometimes weep liquid as they sit out. Make it the day before you serve it, keep it at room temperature (and covered lightly!), and it tastes even better—especially if you let it set properly overnight. If you’re looking for less pie and more quick treats, check out my ideas for simple snack recipes!
Storing Your Homemade Baked Dessert for Later Enjoyment
Okay, the grand feat of baking is complete, and you probably have leftovers—lucky you! The best part about a perfectly set baked dessert like this is that it keeps beautifully, but you need to store it correctly to maintain that fantastic crust texture we worked so hard to achieve.
Since we intentionally cooked our filling down, this fruit dessert is much more stable than one made with completely raw apples. This stability means you have options for keeping it fresh!
Keeping it on the Countertop
If you plan on serving the dessert within two days, the countertop is perfectly fine. Always let the entire thing cool down completely—remember that three-hour cooling rule?—before you even think about covering it. Covering it while warm traps moisture, and that moisture is the sworn enemy of a crisp crust!
Once it’s totally cool, cover the pie loosely with foil or plastic wrap. You don’t want a tight seal right up against the top, as that can make the sugar crust get sticky. Keep it somewhere cool and dry, away from any direct sunlight. It handles room temperature really well, which is great news when you’re hosting a big holiday meal!
When to Move Your Dessert to the Fridge
If you need the dessert to last longer than two days, or if your kitchen is just way too hot and humid, the refrigerator actually works quite well. Remember that the cold might slightly dull the texture of the bottom crust, just a tiny bit. Cover it tightly with plastic wrap once it’s fully cooled—a tighter seal is better here to prevent it from drying out in the fridge.
When you pull it out of the cold, let it sit on the counter for about an hour before slicing. If you want it *really* perfect, you can use the oven trick I describe for reheating (see below).
Reheating Leftovers for That Fresh-Baked Taste
Nothing beats that first bite, but the second-day slice can be just as good if you give it a little life back! Don’t even think about the microwave for reheating slices; it turns pastry sad in under ten seconds. Instead, reheat individual slices on a baking sheet in a moderate oven—say, 350 degrees F—for about 8 to 10 minutes.
This gentle heat warms the spices, softens the fruit just slightly, and most importantly, crisps the buttery crust right back up! It’s like baking it all over again. If you’re looking for other ways to enjoy apples, I have a fantastic easy moist banana bread recipe that freezes even better than this dessert does!
PrintThe Best Homemade Classic Apple Pie from Scratch

This recipe gives you a double crust pie with a flaky, buttery crust and a perfectly spiced filling. We cook the filling slightly before baking to guarantee the best texture, avoiding mushy apples.
- Prep Time: 45 min
- Cook Time: 65 min
- Total Time: 110 min
- Yield: 8 servings 1x
- Category: Dessert
- Method: Baking
- Cuisine: American
- Diet: Vegetarian
Ingredients
- 2 1/2 cups all-purpose flour
- 1 teaspoon salt
- 1 cup (2 sticks) cold unsalted butter, cut into cubes
- 1/2 cup ice water, plus more if needed
- 6 large baking apples (like Granny Smith and Honeycrisp mix), peeled, cored, and sliced 1/4-inch thick
- 3/4 cup granulated sugar
- 1/4 cup packed light brown sugar
- 1/4 cup all-purpose flour
- 1 teaspoon ground cinnamon
- 1/4 teaspoon ground nutmeg
- 1/8 teaspoon ground allspice
- 1 tablespoon lemon juice
- 2 tablespoons unsalted butter, cut into small pieces
- 1 large egg, beaten with 1 teaspoon water (for egg wash)
- 1 tablespoon coarse sugar for sprinkling
Instructions
- Prepare the Pie Crust: In a large bowl, whisk together the 2 1/2 cups flour and 1 teaspoon salt. Cut in the cold butter using a pastry blender or your fingers until the mixture resembles coarse crumbs with some pea-sized pieces of butter remaining. Gradually add the ice water, one tablespoon at a time, mixing until the dough just comes together. Do not overmix. Divide the dough in half, form each half into a disk, wrap in plastic, and chill for at least 1 hour.
- Prepare the Apple Filling: In a large bowl, combine the sliced apples, granulated sugar, brown sugar, 1/4 cup flour, cinnamon, nutmeg, allspice, and lemon juice. Toss gently to coat the apples evenly.
- Cook the Filling: Transfer the apple mixture to a large saucepan. Cook over medium heat, stirring occasionally, for about 8 to 10 minutes, until the apples have softened slightly and the juices have thickened. Remove from heat and let cool for 15 minutes. Stir in the 2 tablespoons of small butter pieces.
- Assemble the Pie: Preheat your oven to 425 degrees F (220 degrees C). On a lightly floured surface, roll out one disk of dough into a 12-inch circle. Carefully place it into a 9-inch pie dish. Trim the edges, leaving a 1-inch overhang. Pour the cooled apple filling into the crust. Dot the top of the filling with any remaining butter pieces.
- Top the Pie: Roll out the second disk of dough for the top crust. Place it over the filling. Trim the edges, crimp the top and bottom crusts together to seal, and cut several slits in the top crust to allow steam to escape.
- Bake: Brush the top crust with the egg wash and sprinkle evenly with coarse sugar. Place the pie on a baking sheet to catch drips. Bake at 425 degrees F (220 degrees C) for 15 minutes. Reduce the oven temperature to 375 degrees F (190 degrees C) and continue baking for another 40 to 50 minutes, or until the crust is golden brown and the filling is bubbling. If the edges brown too quickly, cover them loosely with foil.
- Cool: Let the apple pie cool on a wire rack for at least 3 hours before slicing and serving. This allows the filling to set properly.
Notes
- For the flakiest crust, keep your butter and water as cold as possible throughout the mixing process.
- If you prefer a Dutch Apple Pie, skip the top crust and instead top the filling with a streusel topping made from 1 cup flour, 1/2 cup brown sugar, 1/2 cup rolled oats, and 1/2 cup cold butter mixed until crumbly.
- Use a mix of tart and sweet apples for the best flavor balance in your spiced apple filling.
Nutrition
- Serving Size: 1 slice
- Calories: 450
- Sugar: 35g
- Sodium: 280mg
- Fat: 25g
- Saturated Fat: 15g
- Unsaturated Fat: 10g
- Trans Fat: 0g
- Carbohydrates: 58g
- Fiber: 3g
- Protein: 5g
- Cholesterol: 60mg