
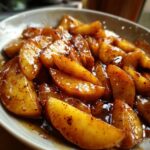
Oh, have you ever taken a bite of pie filling—maybe store-bought or one you tried making yourself—and it was just… *sad*? Soggy apples swimming in a watery sauce that tastes like nothing more than sweetened apple juice? I’ve been there, trust me. When I was working my way out of the daily grind and into the kitchen full-time, bland fillings were my absolute nemesis. That’s why I perfected this recipe. This is my foolproof, stovetop **apple pie filling** that guarantees you get tender, never mushy, apple slices coated in a thick, glorious glaze built on rich brown sugar and warm cinnamon. It sounds simple, but those little touches bring the whole symphony together. You’re going to love how easy this is!
- Why This Easy Apple Pie Filling Recipe is Your New Go-To
- Ingredients for the Best Homemade Apple Pie Filling
- How to Make Stovetop Apple Pie Filling with Brown Sugar
- Tips for the Most Flavorful Cinnamon Apple Pie Filling
- Versatile Uses for Your Homemade Apple Pie Filling
- Storing and Reheating Your Apple Pie Filling
- Frequently Asked Questions About Making Apple Pie Filling
- Estimated Nutritional Data for This Apple Pie Component Recipe
- Share Your Homemade Apple Pie Filling Creations
Why This Easy Apple Pie Filling Recipe is Your New Go-To
Look, we don’t have time for weak recipes, right? This stovetop method is designed specifically to solve the two biggest problems home bakers face: bland taste and a runny mess.
- It’s lightning-fast—ready in about 30 minutes total, which means amazing flavor without waiting hours.
- The flavor profile is deep because we lean heavily on packed brown sugar and fresh cinnamon.
- You control the final texture, ensuring those apples stay firm for perfectly juicy results.
This recipe really lets you build a flavor foundation you can trust. If you want to pop this into a flaky crust or use it over a crisp, jump over to my classic apple crisp recipe for ideas!
Achieving the Perfect Thick Apple Pie Filling Consistency
The old way of just tossing apples and sugar into a crust and hoping for the best usually ends up with too much liquid, right? That’s why we make the glaze first right here on the stove.
By whisking the cornstarch with the sugars and water before we even look at an apple, we create a stable base. This is the secret behind any great Thick apple pie filling tutorial. It coats every slice perfectly, so when you bake it, you get that lovely, thick, glossy sauce instead of a soupy disaster underneath. It’s efficiency in action!
Ingredients for the Best Homemade Apple Pie Filling
When we make this filling, we aren’t messing around with weak flavors. The star here is that packed light brown sugar—it brings that rich, almost caramelized note that white sugar just can’t touch. You need six large apples, and make sure you get them peeled, cored, and sliced exactly to 1/4-inch thickness before you start cooking. That uniformity keeps everything baking evenly!
We rely on a simple mix of cinnamon, nutmeg, and allspice to make this taste like autumn magic. If you want to see how I use apples in other easy recipes, check out my homemade applesauce guide for another pantry staple!
Selecting the Best Apples for Apple Pie Filling
Don’t just grab any apple! For the absolute best **apple pie filling**, I strongly suggest a combo. Use tart apples like Granny Smith for structure, and maybe mix in a few sweeter ones like Honeycrisp. This duo gives you great flavor and keeps those slices firm enough to look beautiful in the final slice. Tough apples are key here, or things turn to mush awfully fast.
How to Make Stovetop Apple Pie Filling with Brown Sugar
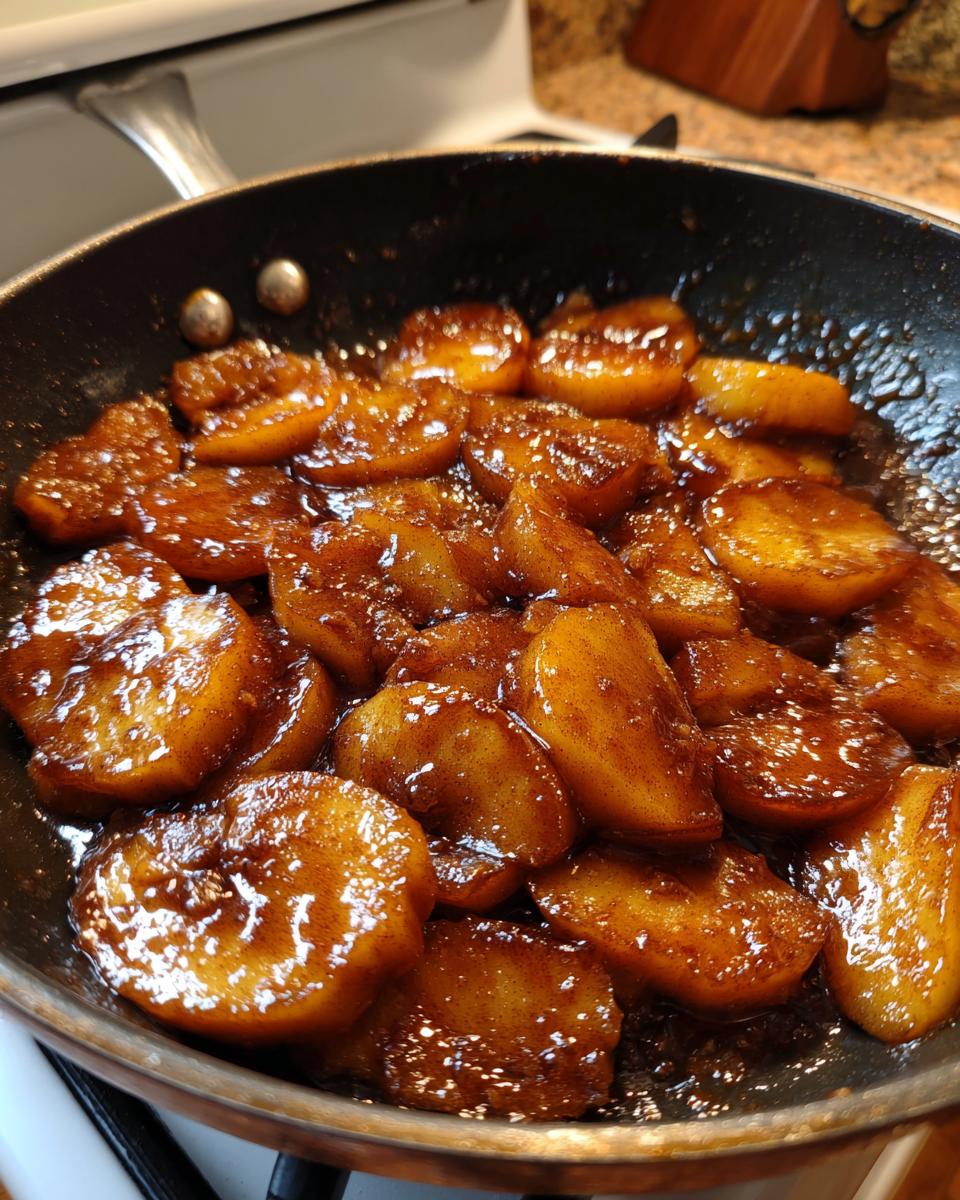
Okay, let’s get down to business. This is where the magic that separates “good” from “the best homemade apple pie filling” happens. Since we’re cooking everything on the burner, we need to build our thick glaze first. Grab that medium saucepan—no heavy bottom required, this isn’t that complicated! Start by whisking those dry things together: both sugars, the cornstarch, and all your spices until you see no white streaks at all. Don’t skip that dry whisking; it saves you a headache later! Then, add your water and whisk until you have zero lumps. This creates the foundation for the glorious sauce you want in your **stovetop apple pie filling**.
Next, we heat it up. Keep stirring constantly over medium until you see it bubble and get clear—it’ll look almost like shiny glass. This usually takes about 5 to 7 minutes. That’s when you know the cornstarch has activated properly. You can check out some of my other quick stovetop work when you look at my easy breakfast recipes!

Cooking the Apples for Ideal Apple Pie Filling
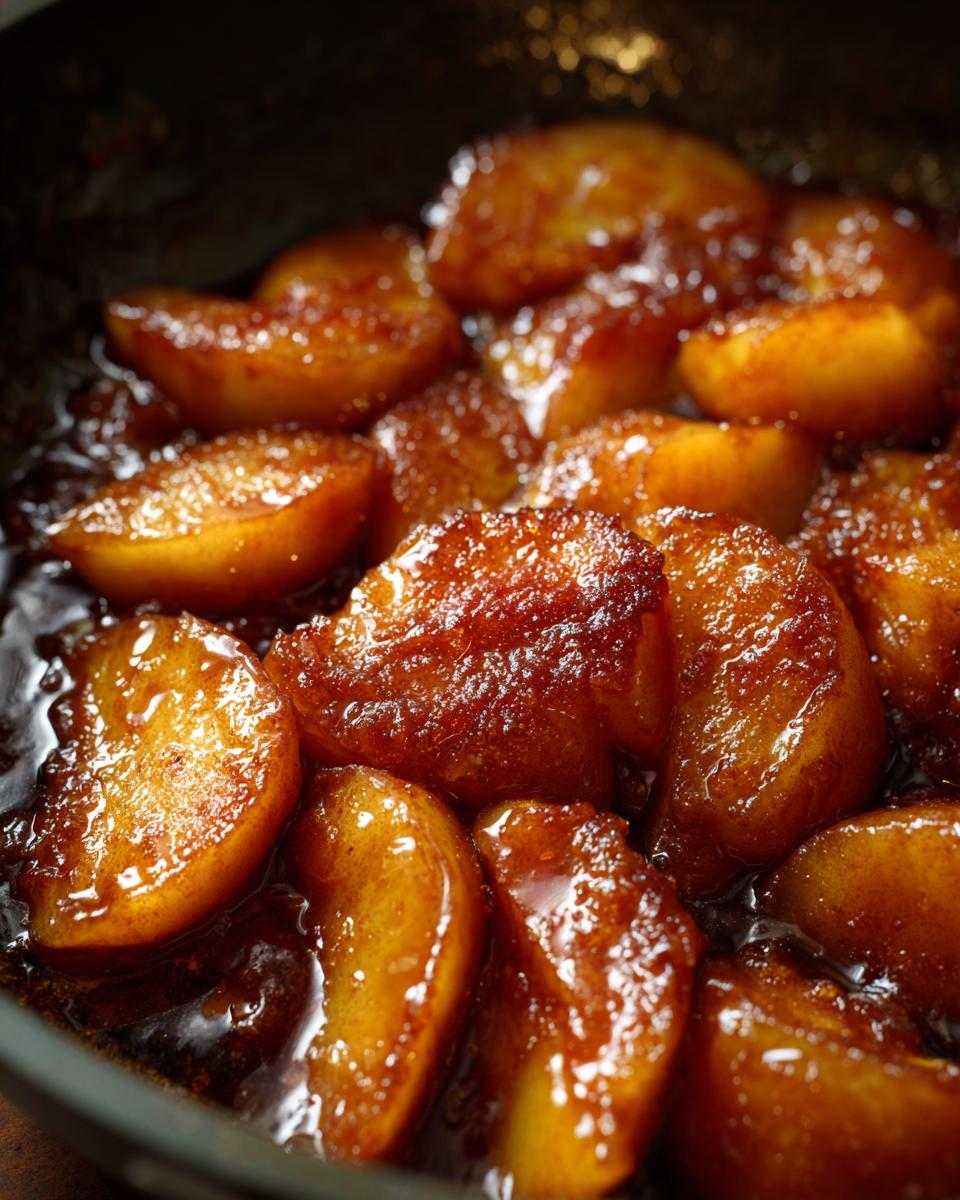
Once that glaze is thick and glossy, turn the heat way down to low. Now, gently fold in all your beautiful 1/4-inch apple slices. We only want them to cook for about 5 to 8 minutes total after they hit the glaze. What you’re looking for is ‘tender,’ not ‘soft.’ If they’re too soft now, they’ll become total mush inside your pie! Keep stirring gently so every part of the apple gets coated in that sweet spiced mix. This short cook time ensures your final **apple pie filling** has great slices, not apple sauce.
Setting the Apple Pie Filling Consistency
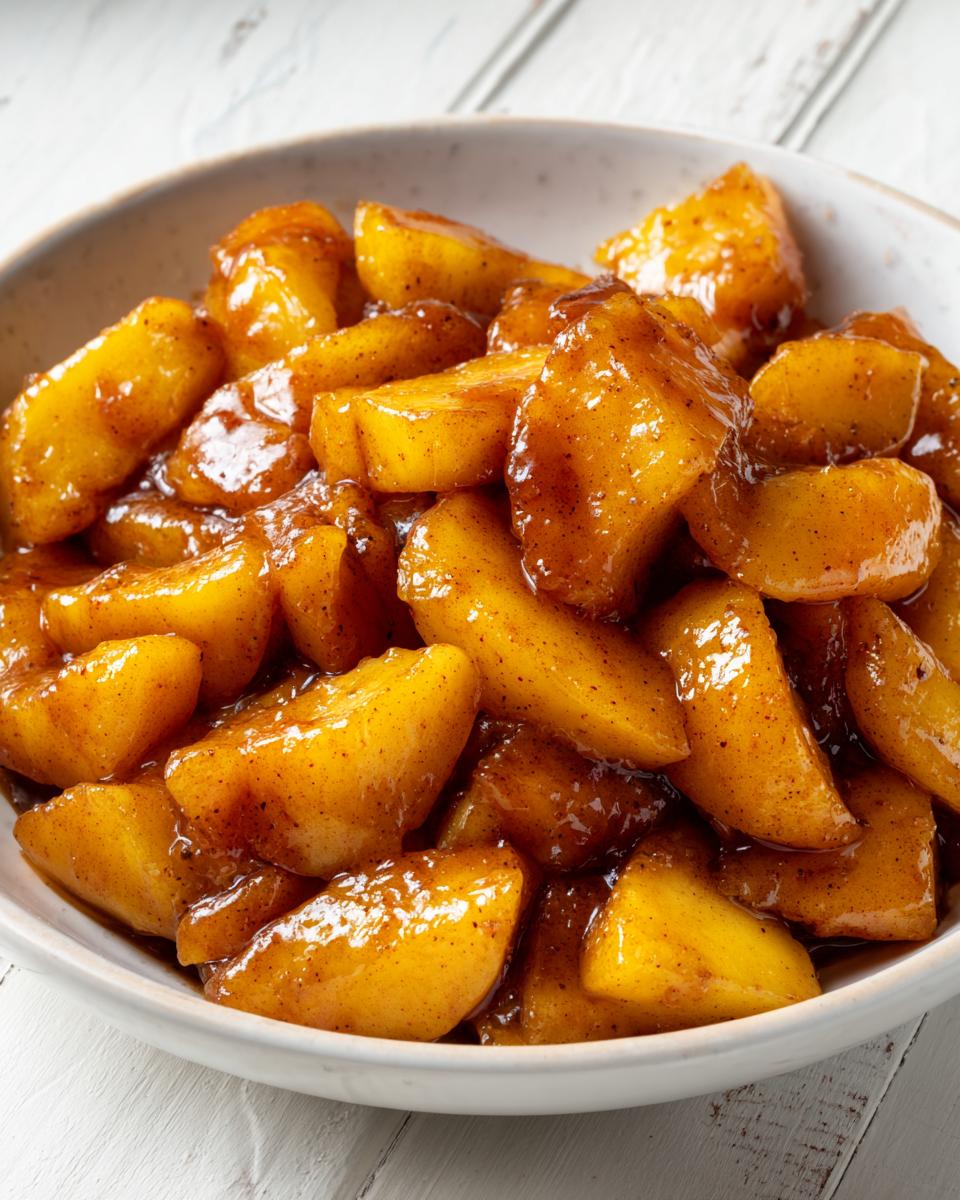
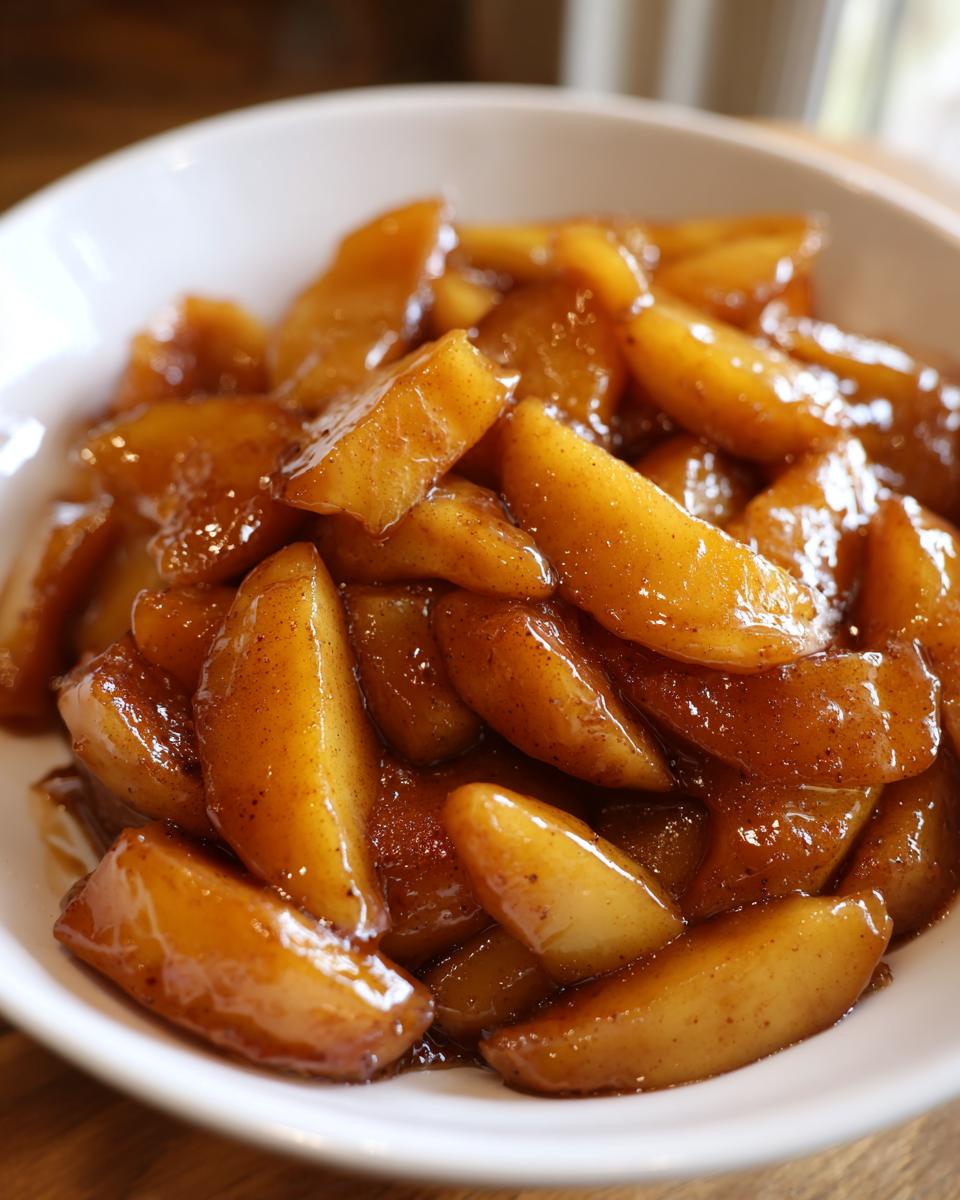
Right at the end, take the pan off the heat completely. This is when we drop in the butter—it makes everything so rich—and the lemon juice, which stops those lovely apples from turning brown. Stir until the butter melts in. But here’s the real secret for texture: you absolutely must let this cool! When you cool the **apple pie filling** down, that glaze thickens up to exactly what a perfect pie requires. Don’t rush the cooling; it dictates the final consistency!
Tips for the Most Flavorful Cinnamon Apple Pie Filling
Every good cook has their little adjustments, and these tips are what elevate this from just a recipe to *my* recipe. If you notice your sauce is behaving more like a thin syrup than the thick glaze we want for our **cinnamon apple pie filling**, don’t panic! You simply need a bit more cornstarch, maybe an extra tablespoon mixed into a slurry before adding it to your sauce. That’s an easy fix!
Remember the apples? Using that tart and sweet mix is non-negotiable if you want that perfect bite. Also, don’t be shy with the spices; they are what make the house smell amazing. I love using slightly stronger nutmeg than the recipe calls for, mixed with that warm cinnamon. It just complements the brown sugar so well. If you’re looking to use this filling alongside other quick meals, maybe check out my weeknight dinner recipes for some fast main courses!
Seriously, for the absolute best result that reminds you of those perfect pies, give this flavor-boosting trick a look over at one of my trusted colleagues who uses brown sugar to amazing effect too.
Versatile Uses for Your Homemade Apple Pie Filling
Okay, so you followed the steps, you have this perfectly thick, gorgeous **apple pie filling**, and now you’re thinking, “Do I really have to bake a whole pie right now?” Absolutely not! That’s the real beauty of making this component from scratch. You get this amazing, sweet spiced apple filling that’s ready to go straight onto anything.
I often make a double batch just so I have grab-and-go toppings ready for the week. Forget those jars of bland fruit! This is restaurant quality!
Here are a few of my favorite ways to enjoy this filling without rolling out any dough:
- Drizzle it warm over pancakes, waffles, or French toast. It’s basically fall brunch in five minutes!
- Spoon it over a scoop of vanilla ice cream. Instant à la mode dessert!
- Use it as the rich base for a quick crisp topped with oats. If you need ideas for that, swing by my easy moist banana bread post for some quick topping inspiration!
- It is fantastic stirred into plain yogurt or cottage cheese for something savory and sweet for lunch.
Seriously, try this as a **sweet spiced apple filling for waffles** next weekend—it changes everything! And if you want another easy, flavor-packed recipe using simple pantry items, check out what my friend over at Blackberry Babe does with a quick stovetop sauce, too.
Storing and Reheating Your Apple Pie Filling
I know you might be making this for a pie next week, so let’s talk storage. Since it’s cooked down with sugar and starch, this **apple pie filling** keeps beautifully in the fridge in an airtight container. I find it stays perfect for about five days. After that, you might start noticing the apples softening too much.
When it comes time to reheat, please use the stovetop if you can! Pop it in a small saucepan over low heat. A quick stir is all it needs. If you’re in a crazy rush, 20 seconds in the microwave works, but stir it halfway through so the bottom doesn’t scorch. Keep it chunky and beautiful!
Need some easy ideas for using up those leftovers? Check out my tips for simple snack recipes.
Frequently Asked Questions About Making Apple Pie Filling
You’ve got questions, and I’ve got clear answers based on making this a million times. Making the **best homemade apple pie filling** is straightforward once you know these little things. Don’t worry if you need to prep ahead or if you’re wondering about apple types—we cover it all here!
Can I use pre-sliced apples for this apple pie filling recipe?
Oh, please don’t, if you can avoid it! Pre-sliced apples from the bag are usually irregular, meaning some pieces cook fast and turn to soup while others are still crunchy. For the perfect texture in your **apple pie filling**, uniform slicing is key. Aim for that consistent 1/4-inch thickness we talked about above. It’s a small step that makes a huge difference in the final result!
What is the best apple to use for a juicy apple filling for pies and tarts?
For that perfect balance of sweet, tart, and truly **juicy apple filling for pies and tarts**, you need apples that hold up to heat. I always mix Granny Smith with something sweeter like Honeycrisp or Fuji. The Granny Smith keeps its shape beautifully, and the sweeter variety brings that nice depth. This mix ensures you get tartness without sacrificing that lovely, tender bite.
Is this apple pie filling with brown sugar suitable for freezing?
Yes, absolutely! This is a great recipe for making a big batch to freeze for later—perfect for **fall dessert recipes** when you’re short on time later. Freeze it flat in Ziploc bags first, then stack the frozen disks to save space. When you thaw it in the fridge overnight, you might notice it looks a tiny bit runnier than when fresh. Just scrape that extra liquid out, or put the filling in a small pot and heat it gently on the stove until it thickens back up. It’s still going to be delicious!
If you’re looking for more ways to use this incredible component, check out my roundup of delicious dessert recipes, or see what other quick **stovetop apple pie filling** ideas my friend at Vintage Kitchen Notes has shared!
Estimated Nutritional Data for This Apple Pie Component Recipe
Because we’re using real ingredients like butter and brown sugar, we always see real numbers! Keep in mind these figures are just estimates based on the recipe provided and the serving size listed. Use this as a helpful guide, not a strict mandate for your home kitchen.
- Serving Size: 1/4 of recipe (about 1 cup)
- Calories: 310
- Sugar: 55g
- Fat: 3g
- Carbohydrates: 72g
- Protein: 0g
This is a sweet treat, for sure. These estimates can shift slightly depending on the exact apples you choose, but they give you a great general idea of what you are enjoying in your bowl or pie!
Share Your Homemade Apple Pie Filling Creations
Now that you’ve got the absolute best **apple pie filling** base ready, I want to see what delicious things you whip up! Did you finally get that perfect, thick glaze? Are you having it over ice cream or tucked into a perfect pie?
Please leave me a rating right here on the page—it truly helps others find this simple, foolproof method. And if you have a second, drop a comment below telling me how you used it! I always love hearing about your culinary wins. Need to get in touch directly? You can reach me easily on my contact page!
PrintEasy Stovetop Homemade Apple Pie Filling with Brown Sugar
Create the best homemade apple pie filling using this simple stovetop method. You get tender, juicy apple slices in a thick, sweet, cinnamon-spiced glaze that is perfect for pies, tarts, or topping pancakes.
- Prep Time: 15 min
- Cook Time: 15 min
- Total Time: 30 min
- Yield: 4 servings 1x
- Category: Dessert Component
- Method: Stovetop
- Cuisine: American
- Diet: Vegetarian
Ingredients
- 6 large apples (like Granny Smith or Honeycrisp), peeled, cored, and sliced 1/4-inch thick
- 3/4 cup packed light brown sugar
- 1/4 cup granulated sugar
- 1/4 cup cornstarch
- 1 teaspoon ground cinnamon
- 1/4 teaspoon ground nutmeg
- 1/8 teaspoon ground allspice
- 1/4 cup water
- 2 tablespoons unsalted butter
- 1 teaspoon lemon juice
Instructions
- Combine the brown sugar, granulated sugar, cornstarch, cinnamon, nutmeg, and allspice in a medium saucepan. Whisk these dry ingredients together until uniform.
- Add the water to the saucepan and whisk until the mixture is smooth and there are no lumps of cornstarch remaining.
- Place the saucepan over medium heat. Stir constantly until the mixture begins to bubble and thicken. This should take about 5 to 7 minutes. The glaze will become clear and glossy.
- Once the glaze is thick, reduce the heat to low. Add the sliced apples to the saucepan. Gently stir to coat all the apple slices evenly with the thickened glaze.
- Continue to cook over low heat for 5 to 8 minutes, stirring occasionally. You want the apples to become tender but still hold their shape; avoid cooking them until they are mushy.
- Remove the pan from the heat. Stir in the butter and lemon juice until the butter is fully melted and incorporated.
- Let the apple pie filling cool completely before using it in a pie crust or serving. Cooling allows the glaze to set to the proper thick consistency.
Notes
- For the best texture, use a mix of tart and sweet apples. Do not overcook the apples; they should remain slightly firm.
- If you prefer a slightly thicker filling, use 5 tablespoons of cornstarch instead of 4.
- This filling works well as a topping for waffles, pancakes, or vanilla ice cream.
- This recipe makes enough filling for one standard 9-inch pie.
Nutrition
- Serving Size: 1/4 of recipe
- Calories: 310
- Sugar: 55
- Sodium: 5
- Fat: 3
- Saturated Fat: 2
- Unsaturated Fat: 1
- Trans Fat: 0
- Carbohydrates: 72
- Fiber: 4
- Protein: 0
- Cholesterol: 6