
Oh, the frustration! You stand over the simmering water, trying to create those majestic, Instagram-worthy poached eggs, and what do you get? Wispy, slimy egg threads floating sadly around a cooked-through yolk. I’ve been there a hundred times! That’s why I spent way too many mornings testing techniques until I found the sweet spot. Forget the fancy gadgets; this method is pure, easy technique that guarantees you get exactly what you want: perfectly formed, firm whites hugging a beautifully runny yolk every single time. This is the foolproof way to conquer the poaching pot, making cleanup nearly nonexistent. If you’re looking for more simple morning solutions, check out my favorite easy breakfast recipes!
- Why This is the Best Way to Poach Eggs: Achieving Perfect Poached Eggs
- Ingredients for Making Poached Eggs
- Step-by-Step Instructions for Foolproof Poached Eggs
- Kitchen Hacks for Making Poached Eggs Easier
- Alternative Methods: Oven Poached Eggs and Microwave Poached Eggs
- Serving Suggestions for Your Poached Eggs for Breakfast
- Storage and Reheating Instructions for Poached Eggs
- Frequently Asked Questions About Poached Eggs
- Estimated Nutritional Data for Poached Eggs
- Share Your Poached Eggs Success
Why This is the Best Way to Poach Eggs: Achieving Perfect Poached Eggs
Look, I’ve seen all the complicated methods out there—the plastic wrap cups, the tiny measuring cups—but honestly, the vortex method we’re using is the simplest way to get that incredible result. It’s just science working for you! The magic behind successfully making poached eggs comes down to two main factors: the quality of the egg and how hot the water actually is. If you get these two elements right, your whites will wrap tightly around that beautiful golden yolk every single time. Skip this preparation, and you’re back to the white-stringy mess. If you’re looking to elevate other parts of your day, check out my quick weeknight dinner recipes once breakfast is done!
We aren’t cheating here; we’re just optimizing the process. I trust this technique because it consistently beats the other chaotic methods I’ve tested when I looked into how different poaching methods stack up.
The Importance of Fresh Eggs for Poached Eggs
This is non-negotiable, folks. If you’re using eggs that have been sitting in the fridge for a few weeks, you’re setting yourself up for failure. Think about it: an older egg has a thinner white, or albumen. When that thin white hits the hot water, it spreads out immediately, giving you feathering. Super fresh eggs, the ones with that tight, almost jelly-like center, hold their shape wonderfully. When I buy eggs, I always try to find the ones with the strongest shell because that usually means the structure inside is still solid.
Vinegar and Water Temperature for Perfect Poached Eggs
The acid in the vinegar—white vinegar is best because it’s clear—acts like a quick-setting glue for the egg white proteins. It helps them coagulate super fast when they hit the heat, meaning those beautiful firm white poached eggs you want form almost instantly. But you have to watch that heat! If your water is roaring with big, aggressive bubbles, it will tear your delicate egg apart. I look for what I call “shimmering water”—tiny bubbles gently rising consistently from the bottom, barely disturbing the surface. It’s a low, respectful simmer, not a fight!
Ingredients for Making Poached Eggs
Alright, keeping with our philosophy here at Delish Symphony—simple ingredients for a massive flavor payoff. You don’t need anything fancy or hard to find for this method to work like a charm. I’ve listed exactly what you need below for three servings, but honestly, it scales up perfectly if you’re cooking for a crowd.
- 3 large, very fresh eggs (I stressed fresh above for a reason!)
- 4 cups water (Just regular tap water is fine!)
- 1 teaspoon white vinegar (Don’t skip this, it’s our secret helper!)
- Pinch of salt (Just for seasoning the water slightly)
That’s it! See? No specialized tools or weird oils involved. Keep these essentials handy, and you’re already halfway to mastering this technique. Next, we’ll put this short list to work.
Step-by-Step Instructions for Foolproof Poached Eggs
Now for the fun part! This is where we put your patient simmering and your fresh eggs to work. Trust me when I say that watching this process click into place for the first time is incredibly satisfying. We are aiming for that perfect three-to-four-minute cook time to guarantee those beautiful runny yolk poached eggs you’re craving. Remember, efficiency is key in my kitchen, so let’s make this process smoothly repeatable, maybe even for your next great snack!
Prepping the Water and Creating the Swirl for Poached Eggs
First, get that water to that gentle simmer we talked about. You need a medium saucepan—not too deep, not too wide. Once the water is just bubbling softly, grab a spoon. This is crucial: stir the water with purpose until you create a nice, slow whirlpool right in the middle. You don’t want it spinning like a blender; think of it as a gentle, continuous stir. Why make the vortex for your poached eggs? It’s simple physics! That swirling motion catches the wispy whites as soon as they hit the water and pulls them right into the center, wrapping them tightly around the yolk. Before sliding the egg in, crack it gently into a little ramekin first. Never drop an egg straight from the shell into the swirling water, or you’ll break the yolk immediately!

Cooking Times for Perfect Poached Eggs
Okay, egg safely nestled in the vortex. Now we watch the clock! For that ideal, golden, liquid center—the hallmark of perfect poached eggs—set your timer for exactly three minutes. If you like them a little set but still flowy, four minutes is your sweet spot. Five minutes starts pushing you into medium territory, so only go there if you aren’t a fan of the super-runny style. When that timer is up, turn off the heat. I use a trusty slotted spoon to scoop the egg out gently. Don’t rush this part! Let it sit over the pot for just a second to drip. If you’re looking for some extra inspiration on egg hacks, I saw a neat trick floating around online that might help with shaping, so check out this easy egg poaching method if you struggle with your whites!
Kitchen Hacks for Making Poached Eggs Easier
Even the best technique sometimes needs a nudge when you’re rushing out the door. I’ve picked up a couple of little kitchen shortcuts over the years that really help when you’re trying to master how to poach eggs without any mess. My absolute favorite involves a fine-mesh sieve. Seriously, put the egg into that sieve over a small bowl first. You’ll notice the thin, watery part of the egg white just drains right out! Once that drippy stuff is gone, you’re left with just the thick white and the yolk, which firms up beautifully in the water. It virtually eliminates those sad, stringy bits.
Also, if you’re hosting brunch, don’t feel like you have to do everything one egg at a time. I often poach my eggs, then immediately plunge them into an ice bath to stop the cooking. They keep perfectly well submerged in that cold water for a day or so. When you’re ready to serve your poached eggs, just drop them into a pot of hot (not boiling!) water for about 30 seconds to warm them through. They come out tasting almost freshly made. If you’re looking for a creamy dressing to put on top besides the classic Hollandaise, you should definitely try my garlic aioli recipe!
Speaking of hacks, I saw one recently that focused just on getting the shape right using a quick method, which you might find helpful if the swirling technique is giving you trouble. You can read more about that easy poaching hack here—it’s another great tool for the home cook’s arsenal.
Alternative Methods: Oven Poached Eggs and Microwave Poached Eggs
So, what if your pan is too small, or maybe you just don’t trust yourself near a swirling vortex of boiling water? Don’t panic! While I absolutely stand by the simmering stovetop method—it gives you the most beautifully delicate result—there are a couple of other ways to get a cooked white and a warm, liquid center. These are great kitchen options when you’re feeling cautious or need to cook a big batch all at once without juggling pans.
We’re talking about oven poached eggs and giving the microwave a try. Remember, these methods can sometimes be a little less precise than the stovetop, but they are definitely worthy of a spot in your rotation, especially for busy mornings or when you are making something like Eggs Florentine for a crowd.
I know folks who swear by the oven method, especially since you can just stick a bunch of ramekins in there and walk away guilt-free. If you want to see a well-tested approach for baking them, check out the details on making oven-poached eggs.
Then there’s the speed demon: the microwave. If you need one single egg *right now*, the microwave is your friend. You simply crack an egg into a mug with a little water, zap it for about a minute, and boom, you’re done. It’s undeniably fast, though getting that perfectly contained white usually takes a bit of trial and error depending on your microwave’s power. Fast, yes, but I still find the stovetop gives you that superior texture every time for brunch!
If you want to explore that super-quick option further, there’s a great guide on how to handle a microwave poached egg that walks you through the timing; just know that technique requires a careful eye!
Serving Suggestions for Your Poached Eggs for Breakfast
Congratulations! You’ve mastered the technique, and now you have these gorgeous, delicate orbs ready to go. Don’t let them get lonely just sitting on a plain slice of bread! That perfect runny yolk is what makes the entire effort worth it, and we want to celebrate that richness. These poached eggs are so versatile; they aren’t just for breakfast, though they certainly shine brightest in the morning. Think of them as the ultimate creamy finishing touch for almost any savory dish you can imagine.
If you’re looking to turn this into a full-on brunch spread, you absolutely have to try them on a classic Eggs Benedict—I have a great streamlined recipe for that over on RecipeTin Eats that pairs perfectly with these eggs. Or, for a healthier vibe, they are amazing atop a grain bowl or even sprinkled over roasted asparagus.
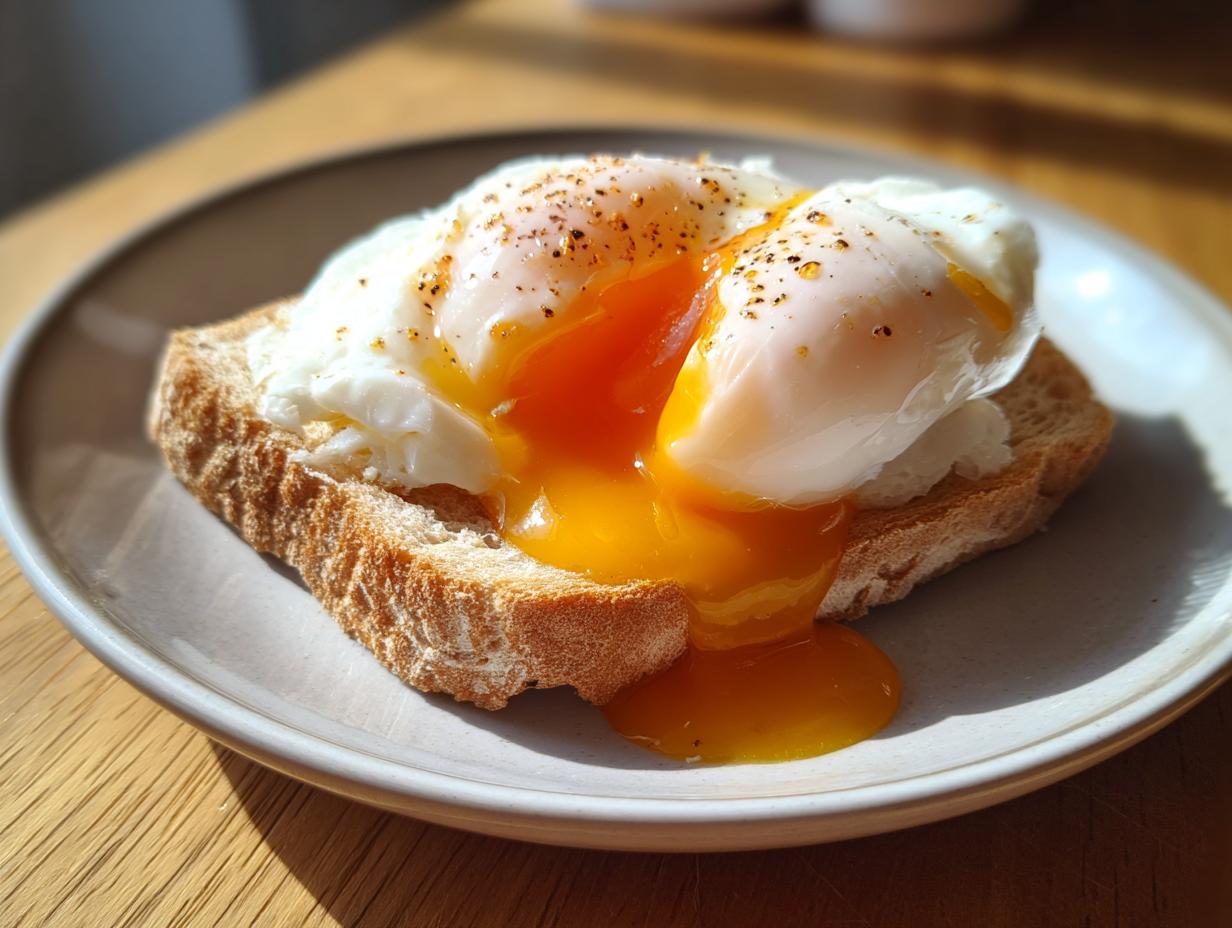
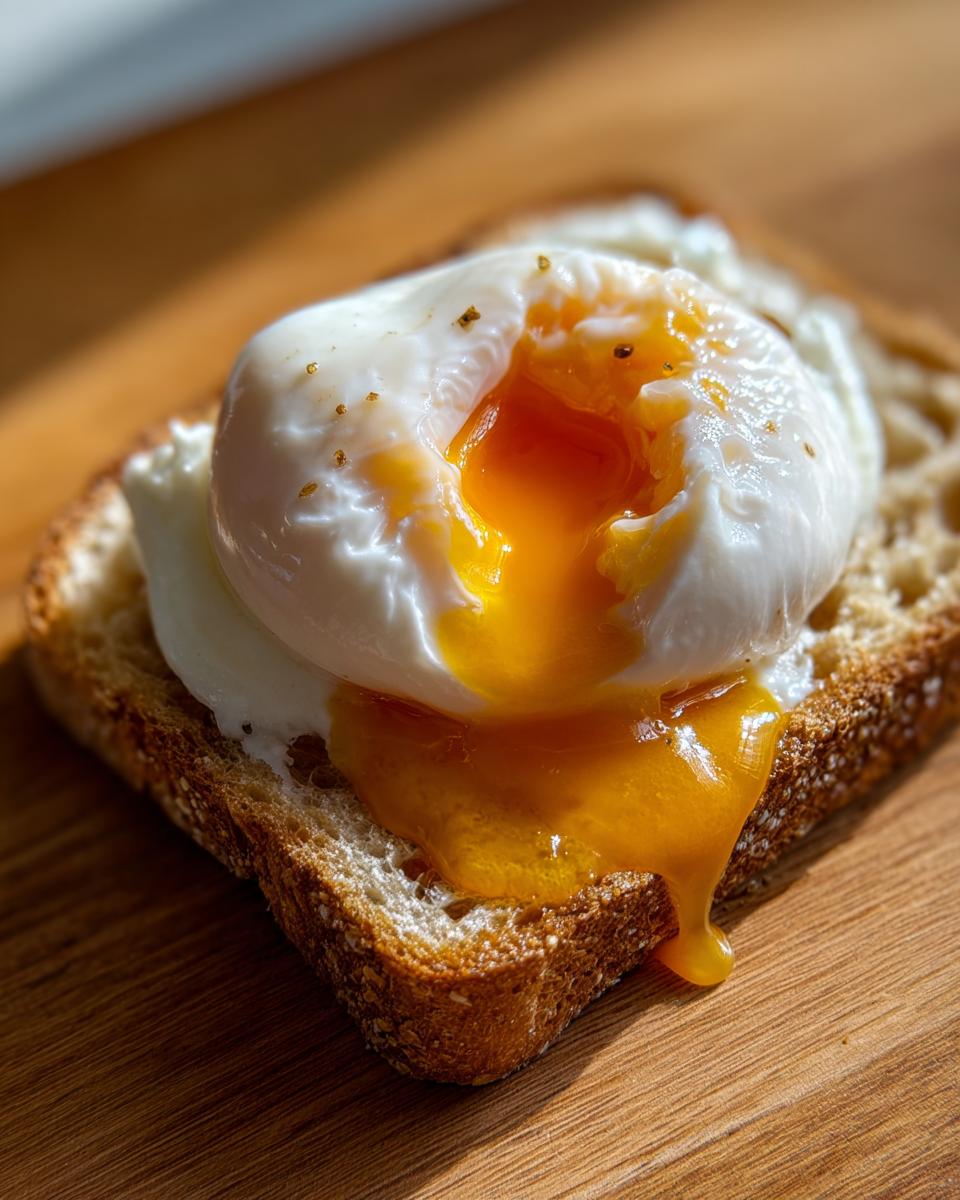
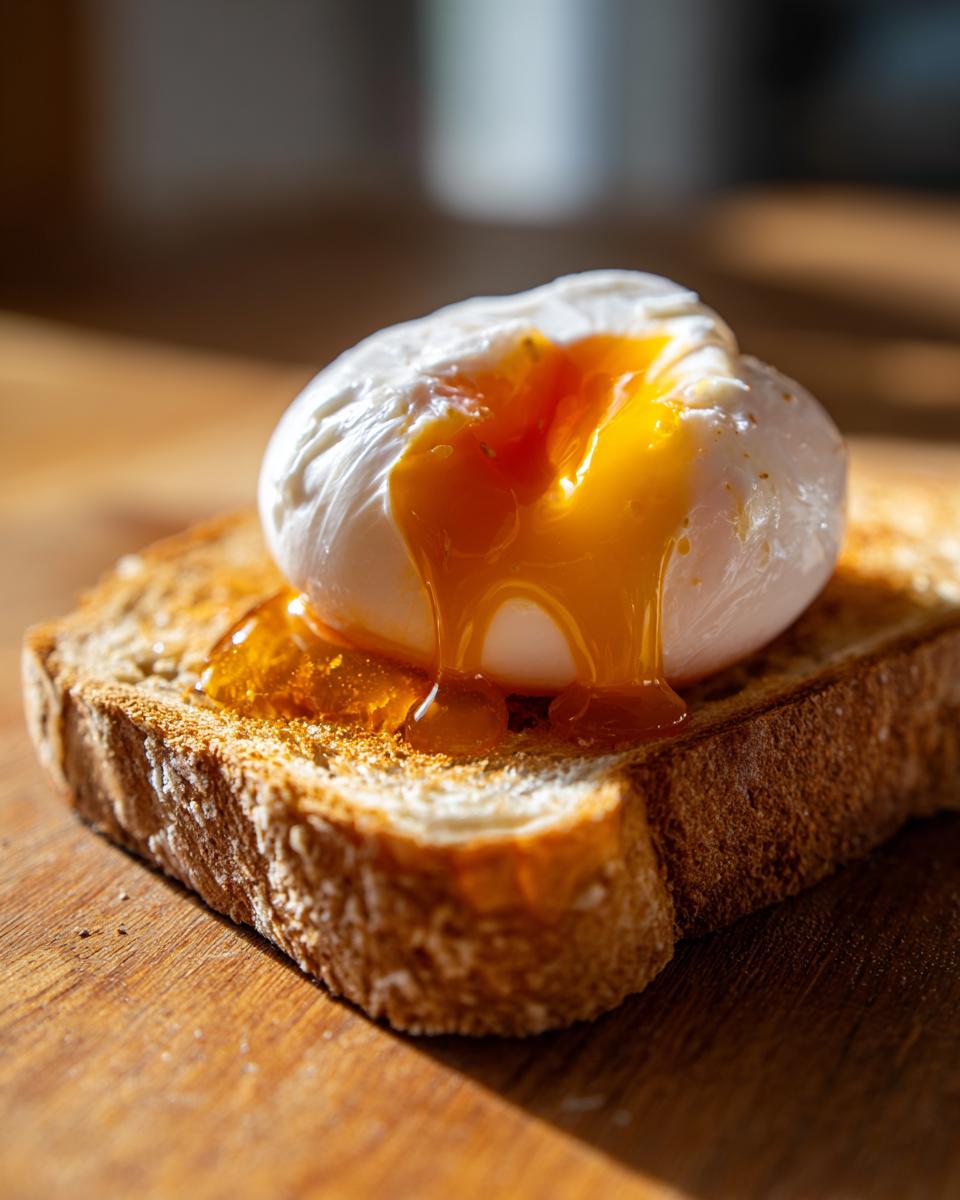
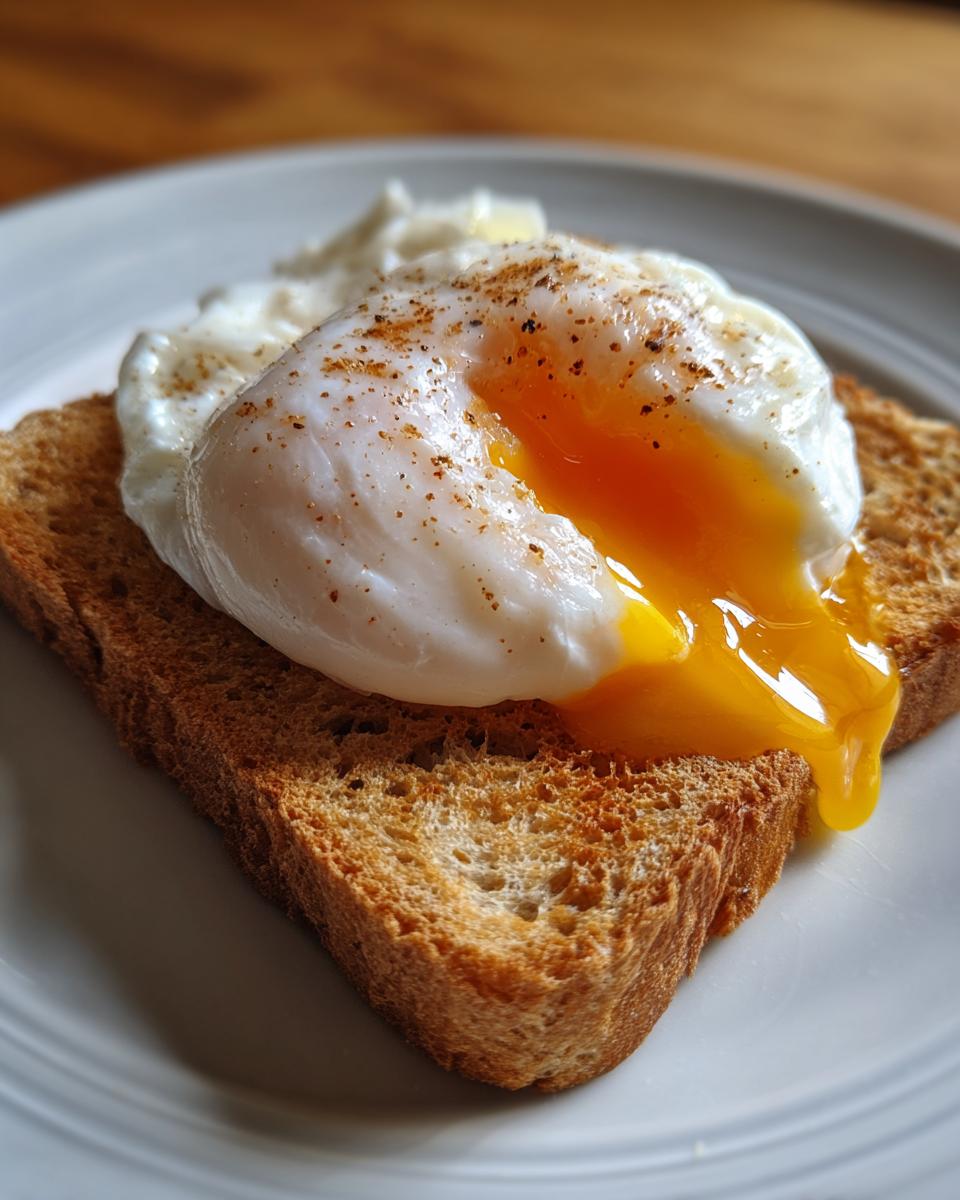
Classic Pairing: Poached Eggs on Toast
Sometimes, the simplest preparation is the best review of your technique. For a killer plate of poached eggs on toast, don’t just grab any old slice of bread. I prefer a thick-cut sourdough or a hearty whole-grain loaf, toasted until it’s sturdy enough to handle the yolk without immediately dissolving. Butter it generously while it’s hot. Then, gently place your egg on top, pierce that yolk, and let that beautiful liquid gold run down into the buttered nooks and crannies. A heavy crack of black pepper and maybe a tiny sprinkle of fresh chives or parsley truly makes this simple dish feel gourmet. If you need more hearty breakfast ideas that use eggs, check out my recipe for sausage, potato, and egg breakfast burritos!
Storage and Reheating Instructions for Poached Eggs
What if you made too many? That’s totally fine—cook’s privilege! If you need to store your perfect poached eggs, the best way is right after you lift them out of the hot water. Don’t let them sit at room temperature. Immediately slip them into a bowl of ice water. This stops the cooking process right where it is. They’ll keep happily in the sealed container in the fridge for about a day. When you’re ready to eat them later, don’t just throw them in the microwave, trust me! Gently warm them for about 30 seconds in hot (but not boiling!) water. This brings them back to serving temperature without rubberizing that yolk on you.
Frequently Asked Questions About Poached Eggs
When you’re trying to nail down a new cooking technique, there are always a few little questions that pop up right at the end. I get it! I’ve rounded up the ones I hear most often about getting those delicate, beautiful firm white poached eggs just right. If one of these sounds like your burning question, hopefully, my answer helps you feel more confident in the kitchen!
Can I make poached eggs ahead of time?
Yes, and I highly recommend it if you’re having a brunch crowd! You can certainly make them ahead. The trick, which I mentioned briefly earlier, is to cook them slightly less than you think you need—maybe three minutes instead of four. Then, pull them instantly and plunge them into an ice bath to stop the cooking completely. They hold up great in the fridge submerged in cold water for about 24 hours. To reheat them, just drop them back into hot water for about 30 seconds until they are warmed through. It’s a fantastic time-saver!
What if my egg whites separate in the water?
Ugh, this is the worst! If you see those sad little strands floating away, it’s almost always because the egg wasn’t fresh enough, or your water was too aggressively boiling. If you’ve used the freshest eggs you can find and you’re still getting separation, try the sieve trick! Seriously, crack the egg into a fine-mesh sieve over a bowl first. That sieve catches all the super-runny, watery albumen before you ever introduce it to your simmering liquid. That simple step really helps you achieve that tight shape during the poaching process.
Is vinegar necessary when making poached eggs?
I know some purists will say no, but in my book? Yes, it’s necessary, especially if you want an easy egg poaching method that gives you consistent results. You only need a teaspoon in a few cups of water, so don’t worry; you absolutely won’t taste it at all! The vinegar is acidic, and acid helps the proteins in the egg white tighten up and set much faster when they hit the heat. This instant setting is what traps that yolk perfectly inside without letting the white sprawl everywhere. It’s a total game-changer for texture!
If you’ve found success with these simple steps, you should take a look at my recipe for cottage cheese and spinach egg cups—it’s another healthy, simple egg dish you can mix up easily!
Estimated Nutritional Data for Poached Eggs
Now, I always like to include a quick snapshot of what’s in what you’re eating, just so you know where you stand. Since we are focusing on simple, whole ingredients here—just egg, water, vinegar—this is a wonderfully healthy addition to any meal, whether it’s a quick breakfast or part of a bigger plate.
Keep in mind that these numbers are all based on one standard large egg cooked this way, according to typical averages. Nothing here is fancy, so the nutrition is pretty straightforward!
- Serving Size (1 egg): approx. 70 Calories
- Protein: 6 grams
- Fat: 5 grams (with 1.5g being Saturated Fat)
- Carbohydrates: 1 gram
- Sugar: 1 gram
- Cholesterol: 186 mg
- Sodium: 70 mg (This can vary slightly based on how much salt you add to the water!)
This is a fantastic source of high-quality protein with minimal impact on your daily sugar or carb count. That’s why I love using these for quick, healthy meals throughout the week. It just proves that finding that best way to poach eggs doesn’t mean you have to compromise on health!
Share Your Poached Eggs Success
So, there you have it! We’ve gone from watery messes to creating those stunning, firm-white, runny-yolk beauties. I truly hope this method simplifies your morning routine and brings that little bit of simple symphony into your kitchen. I really want to know how it went for you!
Did you find this the easiest way to master poached eggs?
Please take a second and drop a star rating for the recipe down below. Even one star helps me know where I need to adjust my notes or maybe try a new hack! If you have a killer photo of your perfect poached eggs—maybe crowning a plate of Eggs Benedict or sitting happily on toast—I would absolutely love to see it. Tag me or shoot me a note through my contact page. Hearing from you reminds me why I love cooking at home and sharing these practical techniques. Happy cooking, and enjoy that creamy yolk!
PrintFoolproof Poached Eggs: The Best Way to Get Firm Whites and Runny Yolks

Learn the simple technique for making perfect poached eggs every time. This guide focuses on achieving firm whites and beautifully runny yolks using an easy, reliable method ideal for breakfast or brunch.
- Prep Time: 5 min
- Cook Time: 12 min
- Total Time: 17 min
- Yield: 3 servings 1x
- Category: Breakfast
- Method: Stovetop Simmering
- Cuisine: American
- Diet: Vegetarian
Ingredients
- 3 large, very fresh eggs
- 4 cups water
- 1 teaspoon white vinegar
- Pinch of salt
Instructions
- Fill a medium saucepan with 4 cups of water and add the vinegar and salt. Bring the water to a gentle simmer over medium heat; you want small, steady bubbles, not a rolling boil.
- While the water heats, crack one egg into a small bowl or ramekin. Do not crack the egg directly into the water yet.
- Use a spoon to gently stir the simmering water in one direction to create a slow vortex or whirlpool in the center of the pan.
- Carefully slide the egg from the ramekin into the center of the swirling water. The swirling motion helps gather the white around the yolk.
- Cook the egg for 3 to 4 minutes for a soft, runny yolk. Adjust time based on your preferred doneness; 5 minutes yields a firmer yolk.
- Use a slotted spoon to gently lift the poached egg out of the water. Let excess water drip off.
- Repeat the process with the remaining eggs, making sure the water returns to a gentle simmer between each batch.
- Serve immediately on toast, avocado, or as part of Eggs Benedict.
Notes
- Use the freshest eggs possible; older eggs have thinner whites that spread out in the water.
- Using vinegar helps the egg whites coagulate faster and hold their shape.
- If you are making many eggs, consider poaching them in batches or using a dedicated egg poacher insert for consistent results.
- For a hack, crack the egg into a fine-mesh sieve first to drain off the thin, watery part of the white before sliding it into the water.
Nutrition
- Serving Size: 1 egg
- Calories: 70
- Sugar: 1
- Sodium: 70
- Fat: 5
- Saturated Fat: 1.5
- Unsaturated Fat: 3.5
- Trans Fat: 0
- Carbohydrates: 1
- Fiber: 0
- Protein: 6
- Cholesterol: 186