
When that first crisp autumn evening hits, doesn’t your brain just immediately scream for something warm, spiced, and wonderfully straightforward? I get it—that’s peak comfort food season. Forget complicated pastry crusts; when I need that real, homey hug in a bowl, nothing beats a truly rock-solid apple crisp recipe. This isn’t some fancy, fussy dessert. This is the ultimate, easy, and classic treat, seriously foolproof even after I’ve powered through my busiest week in the IT world. I’ve tested the ratios countless times to make sure that buttery oat topping crisps up perfectly over those tender, cinnamon-spiced apples every single time. Trust me; this is the recipe you’ll want bookmarked for every fall baking session from now until spring.

- Why This is the Best Apple Crisp Recipe for Cozy Evenings
- Gathering Ingredients for Your Apple Crisp Recipe
- Simple Steps for the Perfect Oat Crumble Topping Recipe
- Assembling and Baking the Warm Apple Dessert
- Tips for Success with Your Apple Crisp Recipe
- Serving Suggestions: Apple Crisp with Ice Cream
- Storage and Reheating Instructions for This Apple Crisp Recipe
- Frequently Asked Questions About Making Apple Crisp
- Share Your Apple Crisp Experience
Why This is the Best Apple Crisp Recipe for Cozy Evenings
I’m telling you, this is truly the best apple crisp recipe you’ll ever try, and it’s all about the balance. So many recipes skimp on the topping, or they use apples that turn into mush, but not here. I worked on perfecting the ratio of fruit to crumble for ages. My favorite thing is getting that audible crunch when you press your spoon through the top layer. That golden, buttery oat topping needs to be thick enough to stand up to the juicy, steaming apples underneath. It transitions perfectly from bake to plate. I find that for sharing, this ratio is unmatched, and if you want to check out another fantastic classic crisp recipe sometime, I have one saved.
This is pure, unadulterated comfort food dessert. It’s fast—we’re talking less than 15 minutes of prep time—so it fits right into a busy weeknight after I’ve finally closed my laptop from work. You definitely want this cozy recipe for those chilly nights, and hey, if you’re looking for something that’s quick in the morning too, check out my easy breakfast recipes later!
Key Attributes of Our Classic Crisp Recipe
- It’s always served wonderfully warm—never lukewarm!
- The topping is guaranteed buttery and crunchy.
- Super simple ingredients; definitely an easy homemade apple crisp.
- That signature cinnamon and nutmeg highlight that classic flavor profile.
Gathering Ingredients for Your Apple Crisp Recipe
Okay, let’s talk what you need. Because this is an old fashioned apple crisp that focuses on texture, ingredient prep matters. For the apples, you need about six big ones—I always grab Granny Smith or Honeycrisp because they hold their shape and give you that little bit of tartness to cut through the sugar. You’ll slice those up, toss them with cinnamon, nutmeg, a little sugar, and lemon juice to stop them from browning too much.
Now for the topping, this is where you need to pay attention: the butter must be cold and cut into small cubes. Don’t try to soften it up at all! Cold butter creates those perfect little pockets of steam while baking, which gives you that amazing crunch we are aiming for. If you like making your own crunchy goodies in general, you should totally check out my homemade granola recipe sometime. For now, just make sure those cubes are ready to go!
Simple Steps for the Perfect Oat Crumble Topping Recipe
Before we even think about layering the apples, we have to guarantee that incredible topping is ready to go. This is the soul of our apple crisp recipe, honestly! In a bowl, just whisk together the dry stuff: the flour, those rolled oats, brown sugar, cinnamon, and salt. Get it nicely combined so everything is evenly distributed.
Then comes the crucial part: cutting in that cold, cubed butter we talked about. You have two main options here. You can use a pastry blender if you have one—that tool is fantastic for getting those pea-sized crumbles quickly—or, my old-school method, is just digging in with my fingertips. You have to work fast so the butter doesn’t warm up too much from your hands. We are looking for a texture that looks like coarse sand mixed with some slightly larger, buttery pebbles. That’s the secret to the buttery oat topping!
Warning: Stop mixing the second you hit that texture! If you overmix, you’ll melt the butter into the flour, and instead of a crunchy topping, you’ll get a solid, dense sheet of goo when it bakes. No one wants that! Resist the urge to keep stirring. If you’re interested in mastering other crumbly toppings, you might enjoy looking at my sweet potato casserole pecan streusel notes, because the technique for the topping is nearly identical.
Assembling and Baking the Warm Apple Dessert
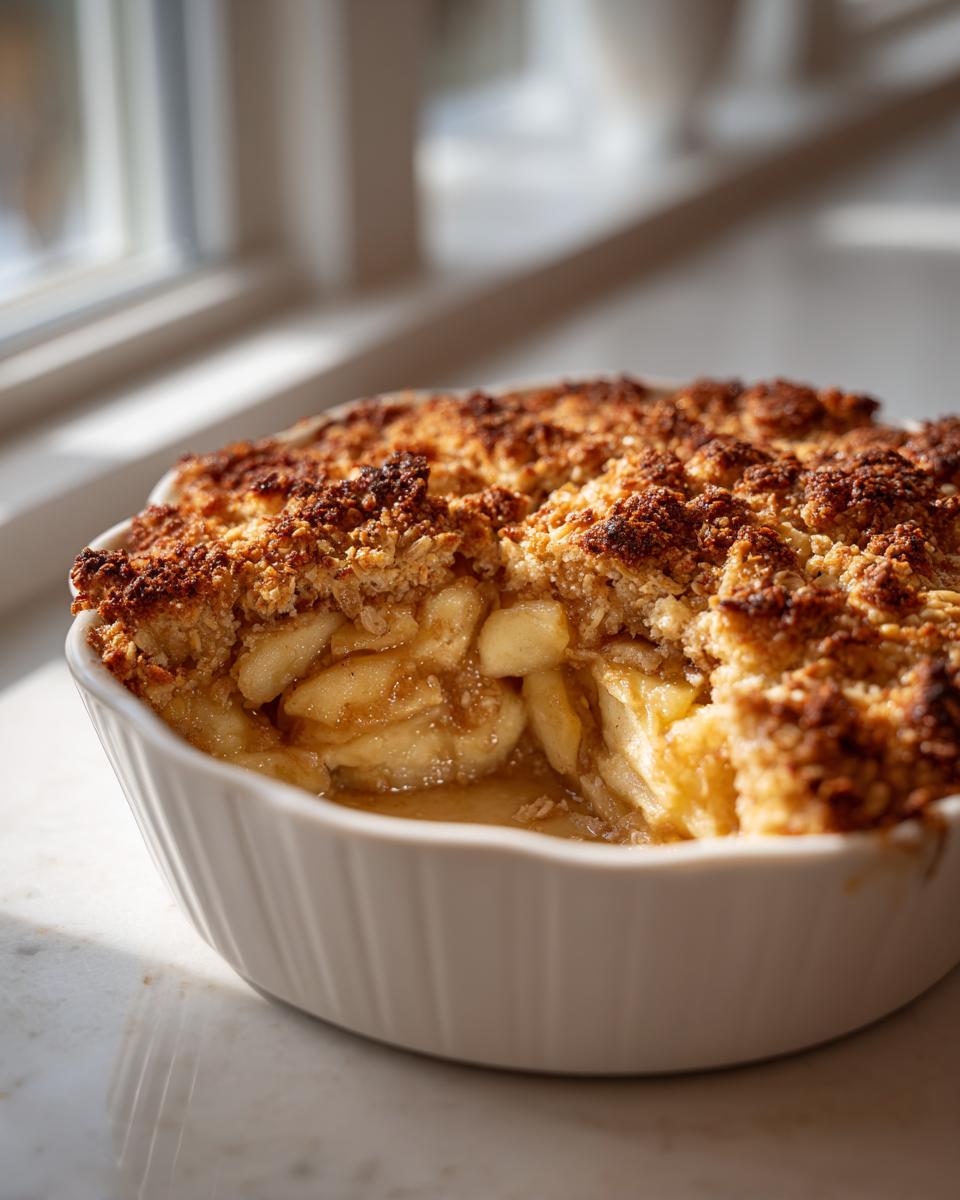
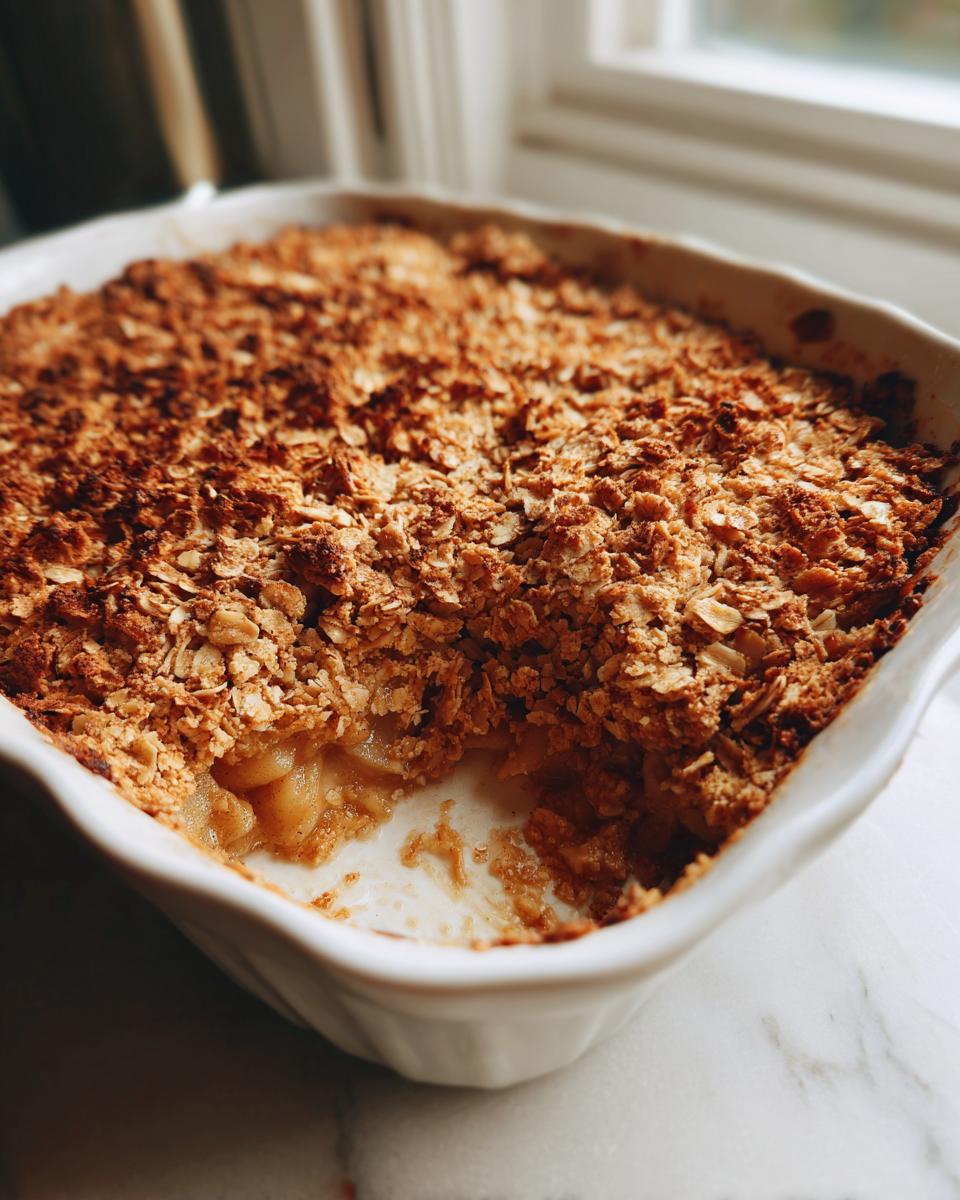
Alright, now that we have our tender, spiced apples waiting in the greased dish, and our perfectly coarse buttery oat topping ready to go, it’s time for assembly! Keep things simple—just gently spread that apple mixture out into an even layer. Don’t pack it down, let those apples breathe in there.
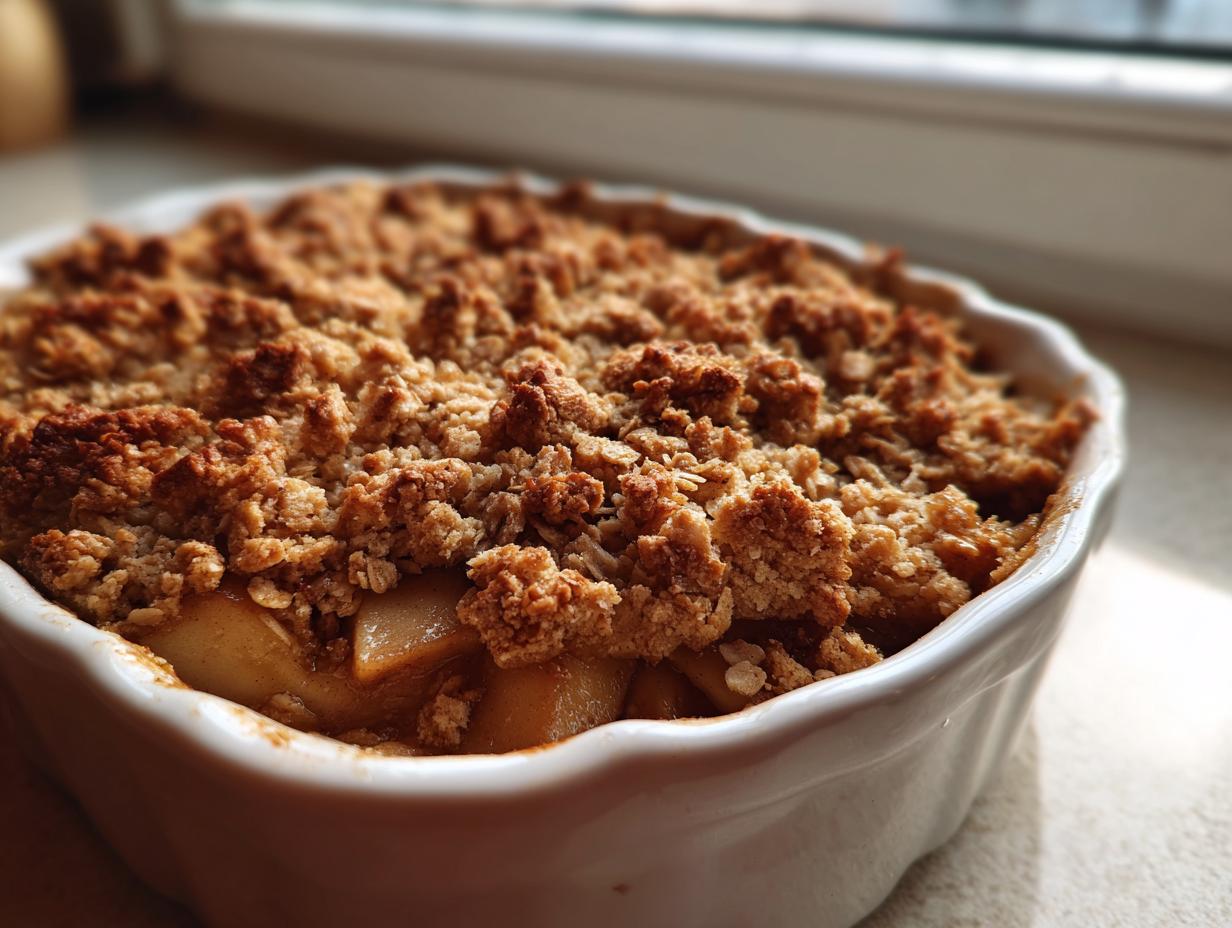
Next up, generously sprinkle that entire topping evenly over the fruit. I like to make sure the whole surface is covered; that’s how you get those glorious, golden-brown spots in every single bite of this warm apple dessert. Pop the whole dish into your preheated oven at 375°F (190°C).
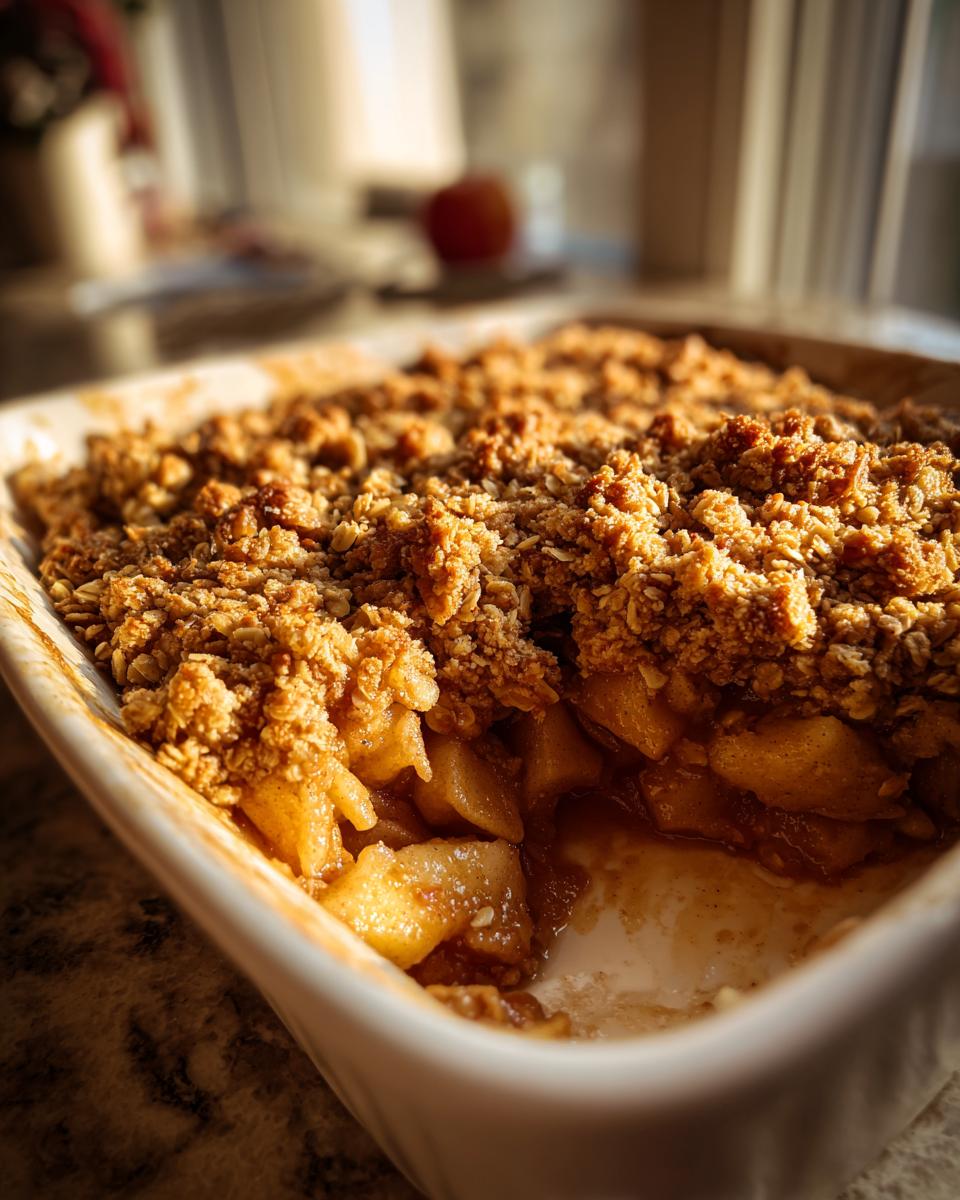
You’re looking at 40 to 50 minutes of baking time. Keep an eye on it, though! The filling should be bubbling like crazy around the edges, and the topping should look deep golden. Since ovens vary wildly—and I’ve ruined many a topping over the years by having mine run too hot—here’s a pro tip I learned the hard way: If you see the topping getting dark brown before the apples are fully tender inside (usually around the 30-minute mark), just loosely tent some aluminum foil over the dish for the remaining bake time. This protects the crunch while letting the fruit soften up beautifully. When it comes out, let it rest for about 15 minutes before you serve it! Perfect timing, right?
If you’ve enjoyed this simple technique for layering, you might want to look at how I apply similar assembly logic to my apple pie dump cake when I need something even faster!
Tips for Success with Your Apple Crisp Recipe
You’ve got the technique down, but just a couple more nudges will turn this good apple crisp recipe into a legendary one. Remember, this is based on that old fashioned apple crisp my family always made—we relied on simple ingredients performing perfectly.
First up: the apples. I mentioned Granny Smith for tartness, but that’s non-negotiable for me. If you use only sweet apples, the whole dessert tastes flat and cloying. You need that bite! Slicing them about a quarter-inch thick is key too; too thin and they vanish, too thick and they might still be hard when the topping looks done.
My last big tip, and this is maybe the hardest part, is letting it rest. Seriously, after pulling this beautiful warm apple dessert out of the oven, you have to walk away for at least 15 minutes. If you dig right in, the filling will just run everywhere, turning your lovely crisp into apple soup. Those 15 minutes let the filling set up and the juices thicken. It’s still piping hot, I promise! Once you master this small waiting game, you’ll appreciate the texture so much more. If you’re interested in what I use for other apple creations, my homemade applesauce recipe focuses on getting that perfect balance too!
Serving Suggestions: Apple Crisp with Ice Cream
Okay, you’ve successfully managed the bake, the glorious scent is filling your kitchen, and now comes the best part—how you decide to serve this magnificent creation. Look, I’m passionate about a lot of desserts, but when it comes to this crisp, there is only one true way to eat it, and that involves vanilla ice cream. You absolutely have to try this apple crisp with ice cream!
The whole point of baking this is the temperature contrast, right? You pull that crisp out, let it rest just a minute so it doesn’t completely spill out onto the plate, and then you drop a big, frosty scoop right on top. That juxtaposition—the warm, spicy apple filling and the crunchy, hot topping meeting that cold, sweet cream—is pure magic. It’s the ultimate sensory experience, and honestly, it’s what makes this dessert truly special.
Now, I’m pretty rigid about the ice cream, but I have learned over the years that not everyone agrees with me! If ice cream isn’t your thing, a dollop of lightly sweetened whipped cream works fine; it keeps the dessert feeling light. For a real old-school, slightly quirky touch that some folks swear by, try serving a slice with a thin shaving of sharp cheddar cheese on top. It sounds wild, but the saltiness cuts the sweetness perfectly. If you’re looking for something equally comforting but maybe less warm, I have a fantastic easy moist banana bread recipe you might enjoy later this week!
Storage and Reheating Instructions for This Apple Crisp Recipe
Now, the good news about this incredible apple crisp recipe is that it almost always results in leftovers, even when you think you’re only making it for two! And trust me, eating this the next day is almost as exciting as eating it fresh out of the oven, provided you know how to store it correctly.
If you have some left, just let it cool completely first. Don’t put a warm dish of baked goods into the fridge; that just creates condensation and makes everything soggy. Once cool, cover the baking dish tightly with plastic wrap or transfer the leftovers into an airtight container. It’s perfectly fine to keep it on the counter at room temperature for about a day if your kitchen isn’t too warm, but for longer storage—say, up to four days—the fridge is the safest bet.
Reheating is what brings back that perfect texture, so don’t just try to microwave the whole thing if you can avoid it! Microwaving is fast, sure, but it really steams the topping, killing that beautiful crunch we worked so hard to achieve. If you need a quick bite, a small portion in the microwave for about 30 seconds will do the trick, but you sacrifice crispness.
My absolute favorite way to reheat this comfort food dessert—and keep that topping crisp—is back in the oven. Take out what you want to serve, place it on a small baking sheet if you dumped it out of the dish, and warm it at 350°F (175°C) for about 10 minutes. That low, slow heat warms the apples through and dries the topping out again perfectly. Then, just hit it with a fresh scoop of vanilla ice cream, and you’re back in business!
Frequently Asked Questions About Making Apple Crisp
I know you—we home cooks—always have a few last-minute things we need to iron out before popping something in the oven, especially when we’re chasing that perfect texture. Don’t worry! I’ve pulled together some of the most common questions I get about this apple crisp recipe so you can bake with total confidence. Knowing a few tricks really helps when you are aiming for that ideal sweet and crunchy apple treat.
Can I make the buttery oat topping ahead of time?
You absolutely can mix up the whole buttery oat topping recipe and store it! This is a huge time-saver when you’re planning a big meal. Just follow the steps to cut in the butter, then put the crumb mixture into a sealed container and pop it in the fridge for up to three days. Honestly, it might even get a tiny bit better structured sitting in the cold. When you’re ready to bake, just sprinkle it right over your prepared apples—no need to let it warm up first. Just remember that if the topping is super cold going into a hot oven, you might need to add 5 or so minutes to the total bake time to make sure the apples underneath are totally bubbly.
What are the best apples for an easy homemade apple crisp?
This is key to stopping your dessert from turning into applesauce! For the best apple crisp recipe, you have to pick apples that are firm and slightly tart. I swear by Granny Smith apples because they keep their shape reliably. Honeycrisp is a close second, and if you’re feeling adventurous, mixing half and half works wonderfully for flavor complexity. Avoid softer apples like Red Delicious, because they just break down too much under heat. We need structure for this classic crisp recipe, remember? Using a tart apple means you won’t have to rely only on sugar to get that great flavor balance for your cinnamon apple dessert.
If you like planning ahead and want to see how I structure my week around getting great meals on the table without stress, take a peek at my notes on weeknight dinner recipes. Happy baking!
Share Your Apple Crisp Experience
Alright, that’s it—the ultimate, easy, foolproof guide to making the most comforting cinnamon apple dessert you’ll ever need. I truly hope this apple crisp recipe fills your house with that amazing, warm scent like it always does mine. I pour my heart into making sure these recipes are practical for the everyday home cook, and this crisp is proof that you don’t need elaborate pastry skills to achieve dessert perfection.
Now that you’ve pulled that golden beauty out of the oven—and you remembered to let it rest!—I absolutely want to hear about it. Did you serve it with plenty of vanilla ice cream, or did you go bold and try that sharp cheddar trick I mentioned?
Please, take a moment to rate this recipe near the top of the page; your feedback really helps other home cooks know they can trust this process. And if you snapped a photo of your perfectly crunchy topping and bubbling spiced apples, tag me! I love seeing your creations. If you’re already planning your next bake after this cozy success, I have loads of other great ideas in my collection of delicious dessert recipes. Let’s keep this symphony of flavor going!
PrintClassic & Ultimate Warm Apple Crisp Recipe with Buttery Oat Crumble

Find the best apple crisp recipe featuring tender, cinnamon-spiced apples beneath a thick, buttery oat crumble topping. This easy homemade dessert is perfect for fall baking and tastes wonderful served warm with vanilla ice cream.
- Prep Time: 15 min
- Cook Time: 45 min
- Total Time: 60 min
- Yield: 6 servings 1x
- Category: Dessert
- Method: Baking
- Cuisine: American
- Diet: Vegetarian
Ingredients
- 6 large Granny Smith or Honeycrisp apples, peeled, cored, and sliced (about 6 cups)
- 1/4 cup granulated sugar
- 1 tablespoon all-purpose flour
- 1 teaspoon ground cinnamon
- 1/4 teaspoon ground nutmeg
- 1 tablespoon lemon juice
- 1 tablespoon water
- For the Topping:
- 1 cup all-purpose flour
- 1 cup old-fashioned rolled oats
- 3/4 cup packed light brown sugar
- 1/2 teaspoon ground cinnamon
- 1/4 teaspoon salt
- 1/2 cup (1 stick) cold unsalted butter, cut into small cubes
Instructions
- Preheat your oven to 375°F (190°C). Lightly grease an 8×8 inch baking dish or a 9-inch pie plate.
- In a large bowl, combine the sliced apples, granulated sugar, 1 tablespoon flour, 1 teaspoon cinnamon, nutmeg, lemon juice, and water. Toss gently until the apples are evenly coated.
- Spread the apple mixture evenly into your prepared baking dish.
- Prepare the buttery oat topping: In a separate medium bowl, whisk together the 1 cup flour, rolled oats, brown sugar, 1/2 teaspoon cinnamon, and salt.
- Cut in the cold butter cubes using a pastry blender or your fingertips until the mixture resembles coarse crumbs with some pea-sized pieces remaining. Do not overmix.
- Sprinkle the oat crumble topping evenly over the apple mixture, covering the fruit completely.
- Bake for 40 to 50 minutes, or until the topping is golden brown and crisp, and the apple filling is bubbling thickly around the edges.
- Remove from the oven and let the apple crisp cool on a wire rack for at least 15 minutes before serving warm.
- Serve this comfort food dessert warm, ideally with a scoop of vanilla ice cream.
Notes
- For the best texture contrast, use firm, slightly tart apples like Granny Smith.
- If your topping starts browning too quickly during baking, loosely cover the dish with aluminum foil for the last 10 minutes.
- This recipe makes a fantastic warm apple dessert that reheats well the next day.
Nutrition
- Serving Size: 1 serving
- Calories: 380
- Sugar: 35g
- Sodium: 150mg
- Fat: 18g
- Saturated Fat: 11g
- Unsaturated Fat: 7g
- Trans Fat: 0.5g
- Carbohydrates: 55g
- Fiber: 5g
- Protein: 5g
- Cholesterol: 45mg