
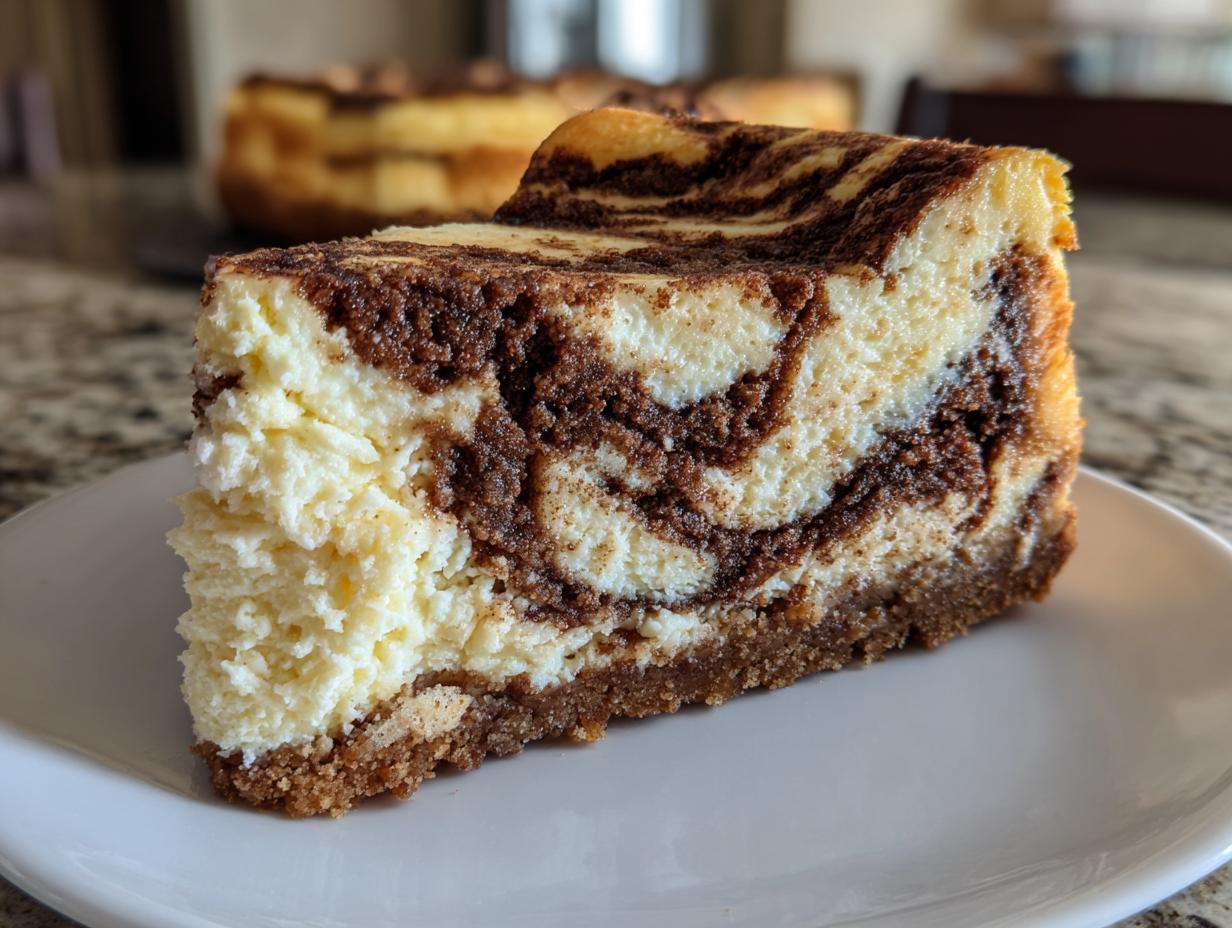
Sometimes, the best things in life happen when two incredible ideas decide to merge. We’re talking about the ultimate dessert mashup, and believe me when I say this snickerdoodle cheesecake recipe is the harmony I’ve been searching for. Forget stiff, overly sweet desserts; we are bringing the comforting chew of a snickerdoodle cookie into the velvety world of cheesecake. Here at Delish Symphony, everything I create, including this rich, spiced treat, is rigorously tested in my own kitchen to ensure it’s absolutely foolproof, even for your busiest weeknights or biggest holiday parties. If you loved my cinnamon sugar cream cheese rolls, you absolutely have to try this fusion! Get ready for pure indulgence, and don’t forget to check out other amazing takes on this classic, like the one over at Made by 2 Sisters.
- Why This Snickerdoodle Cheesecake Recipe is a Must-Make
- Gathering Ingredients for Your Snickerdoodle Cheesecake
- Step-by-Step Instructions for Perfect Snickerdoodle Cheesecake
- Tips for the Best Creamy Cheesecake Dessert
- Serving Suggestions for Your Cinnamon Sugar Cheesecake
- Storage and Making Ahead for Gatherings
- Frequently Asked Questions About Snickerdoodle Cheesecake
- Estimated Nutritional Data for This Indulgent Dessert Mashup
- Share Your Snickerdoodle Cheesecake Creations
Why This Snickerdoodle Cheesecake Recipe is a Must-Make
Honestly, this recipe isn’t just another dessert; it’s an event! If you are looking for the Best Cheesecake Recipes out there that bake up perfectly every single time—that’s what I aim for here. You get that irresistible warm spice from the snickerdoodle cookie flavor meeting true creamy luxury.
Here is why I think this is going straight into your favorites folder:
- It’s the definition of Indulgent Dessert Mashup—cookie meets creamy perfection.
- That deep, cozy cinnamon flavor makes it perfect material for your Thanksgiving Dessert Menu or as one of your favorite Christmas Cheesecake Treats.
- It brings that homemade cinnamon goodness without being overly fussy. You’ll find this is one of the most Easy Cheesecake Baking triumphs you’ll ever experience.
Achieving Velvety Spiced Cheesecake Texture
The texture here is everything—we want it to melt, not crack! The secret to this Velvety Spiced Cheesecake is twofold: first, always whip your cream cheese and eggs when they are fully room temperature. Second, and this is non-negotiable, using a water bath keeps the environment around the cheesecake moist and steamy. That gentle heat cooks it evenly so you get that pure, smooth texture every time. If you love cinnamon roll vibes, you’ll enjoy how this builds flavor, almost like my cinnamon roll casserole does!
Check out this fantastic inspiration for making your holiday desserts shine over at Slimming Violet!
Gathering Ingredients for Your Snickerdoodle Cheesecake
Before we dive into the magic of baking this fantastic snickerdoodle cheesecake, we need to talk about getting our elements together. Just like any great symphony, every ingredient plays a crucial role here. I cannot stress this enough: for the filling to be truly creamy and avoid that awful lumpy texture, your cream cheese *must* be softened—set it out about an hour before you plan to start mixing. Same goes for those four large eggs!
We’re listing everything out here so you can easily check your pantry. Since my goal is always to give you an easy recipe, I built this using standard grocery store finds. If you’re looking for other easy pantry staples, my guide to easy moist banana bread has some great tips on prepping ingredients!
Ingredients for the Cinnamon Graham Cracker Crust
This crust is what gives us that initial, comforting base flavor. Mix these up right away:
- 1 1/2 cups graham cracker crumbs
- 1/4 cup granulated sugar
- 1 teaspoon ground cinnamon (for crust)
- 6 tablespoons unsalted butter, melted
Ingredients for the Creamy Cheesecake Filling
This is the star of the show, folks! Remember, room temperature is your friend here for that luxurious, smooth finish:
- 3 (8 ounce) packages cream cheese, softened
- 1 1/2 cups granulated sugar (for filling)
- 1/4 cup all-purpose flour
- 1 teaspoon vanilla extract
- 1/2 teaspoon ground cinnamon (for filling)
- 4 large eggs
- 1/2 cup sour cream
Ingredients for the Cinnamon Sugar Swirl and Topping
These little bits of spice are absolutely vital for that signature snickerdoodle kick we are aiming for. Don’t skip these, or it won’t taste quite right!
- 1/4 cup granulated sugar (for topping)
- 1 teaspoon ground cinnamon (for topping)
Step-by-Step Instructions for Perfect Snickerdoodle Cheesecake
Now we get to the fun part—baking! Following these steps precisely ensures you get that wonderful, creamy classic texture we’re aiming for in this snickerdoodle cheesecake. Remember, even though it has a swirl, this isn’t a hard recipe; it just requires a bit of timing and patience, especially during cooling. If you’ve made my easy pumpkin bars, you already know how important that gentle baking is!
Preparing the Crust and Initial Bake
First things first, let’s get that buttery anchor set. You need to preheat your oven to 350 degrees F right away. Before anything else, take your 9-inch springform pan and wrap the outside bottom tightly with heavy-duty aluminum foil. You want this watertight because we are introducing it to water later on!
For the crust, mix your graham cracker crumbs, the quarter cup of sugar, and that first teaspoon of cinnamon together. Drizzle in the 6 tablespoons of melted butter and mix until it looks like wet sand—evenly moistened is the goal. Press this mixture firmly into the bottom of your prepared pan. Don’t be shy; press it down well! Then pop it into the oven for 10 minutes. Once that time is up, pull it out and let it cool just a little bit—we still need that oven running, but we’re dropping the heat to 325 degrees F for the filling.
Mixing the Velvety Snickerdoodle Cheesecake Filling
This is where you need to be gentle! Grab your big bowl, and beat that beautifully softened cream cheese until it’s smooth as silk—no lumps allowed. Now, slowly start adding the 1 1/2 cups of sugar, the flour, vanilla extract, and the second dose of cinnamon (the half teaspoon meant for the filling). Mix this until it’s *just* combined. Seriously, stop mixing when you see everything come together. The biggest mistake people make is over-beating the base!
Now, introduce the eggs, but do it one at a time. Mix only until the yellow disappears after each egg goes in. We are trying to incorporate air gently, not whip it into meringue! Finally, fold in the sour cream just until you see uniform color. That yields that fantastic creamy texture.
Assembling and Creating the Cinnamon Swirl Cheesecake
Time for layering! Pour half of your glorious cheesecake batter directly over that slightly cooled crust. Now, take that final cinnamon-sugar mix you set aside—that’s for the swirl—and sprinkle about half of it evenly over the batter layer. Pour the remaining cheesecake batter on top.
Sprinkle the rest of that lovely cinnamon-sugar topping right on the surface. Take a knife or maybe a wooden skewer and gently run it through the batter a couple of times. You don’t want to mix it completely! We only want soft ribbons of spice running through the Cinnamon Swirl Cheesecake, not mud. Swirl gently, my friends!
Baking the Snickerdoodle Cheesecake in a Water Bath
Because we want this to be the best, we’re going to give it a proper, gentle bake in a water bath—sometimes called a *bain-marie*. Set your foil-wrapped springform pan inside a larger roasting pan. Carefully pour hot water into the roasting pan until the water comes about halfway up the sides of the springform pan. This steam keeps everything moist and prevents those terrible cracks.
Bake this carefully assembled setup for 60 to 75 minutes at 325 degrees F. How do you know it’s done? The edges should look set, but if you gently nudge the pan, the very, very center should still have a slight, soft jiggle. It shouldn’t look like liquid, but it shouldn’t be totally firm either. Trust your gut, but check that time range first! For a great reference on easy layered desserts, check out the recipe from Quick and Sweet Recipes.
Cooling and Chilling for the Best Snickerdoodle Cheesecake
This last phase is probably the hardest: waiting! You cannot take this beauty straight out of the oven and put it on the cooling rack; it will shock and crack, guaranteed. Once the baking time is up, simply turn the oven off, crack the door open just a touch (maybe prop it with a wooden spoon), and let the cheesecake sit in that warm, steamy environment for a full hour. It’s a slow descent back to room temperature, which is key for that smooth finish in your homemade snickerdoodle cheesecake.
After that hour, remove it from the water bath and let it cool completely on a wire rack. Only once it’s totally cool should you wrap it loosely and put it in the fridge. You absolutely must chill it for a minimum of 6 hours—overnight is always better. This lets the flavors truly marry and firms up that creamy interior perfectly. When you’re ready to serve this spectacular cheesecake with cookie crust, run a thin knife around the edge before releasing the springform side.
Tips for the Best Creamy Cheesecake Dessert
Alright, we’ve baked this beautiful, spiced creation, but sometimes that final presentation hinges on a few little secrets! As a home cook who has definitely watched a baked cheesecake crack in despair, I learned a few tricks that I always keep in my back pocket. Keeping that texture perfect—that melt-in-your-mouth feeling—is what separates a good cheesecake from an amazing one. While I’m not using our exact primary keyword here, these tips ensure you nail that creamy cheesecake dessert quality every time.
If you’re looking for ways to bring some zing to the side, a nice sharp dip like my garlic aioli (yes, savory dips sometimes inspire my sweet thoughts!) can really cut the richness, but for this dessert, simplicity shines.
Ingredient Temperature Matters for Snickerdoodle Cheesecake
This isn’t just a suggestion; it’s a foundational rule for smooth cheesecake batter, trust me. If your cream cheese is even slightly cool, as soon as it hits the sugar and the mixer starts, you are going to end up with tiny, hard clumps that simply won’t blend in, no matter how long you beat it! That means a lumpy filling, and we want this whole thing to be luxurious.
The same goes for those four large eggs. They need to be relaxed, too! Cold eggs can cause the smooth fat in the cream cheese mixture to seize up, which again, ruins that beautiful, velvety texture we worked so hard on. Set them out early—it’s the easiest no-bake step you can take for a baked dessert!
Why Skipping the Water Bath Risks Your Cheesecake
I know the water bath—the foil wrapping and the careful water placement—feels like extra fuss, especially when you’re pressed for time. But that environment is acting like a constant, warm sauna around your cheesecake. The steam keeps the air inside the oven from getting too dry and hot.
When the sides cook much faster than the center, the edges shrink faster than the middle can keep up, and *bam*, you have a crack! The water bath ensures the heat transfers gently and evenly across the entire cheesecake surface, promoting that smooth, crack-free top that looks just stunning before you add the cinnamon sugar. If you want to see how others tackle their beautiful bakes, check out the inspiration waiting at Just Worthi.
Serving Suggestions for Your Cinnamon Sugar Cheesecake
Once your incredible snickerdoodle cheesecake has chilled overnight—and trust me, that wait is worth it—it’s time to dress this masterpiece up for company! The beauty of this Cinnamon Sugar Cheesecake is that it honestly doesn’t need much. It already has the crust, the filling, and that beautiful swirl built right in. But presentation matters, right? We want every guest to see how delicious this homemade treat is.
When I prepare this for a big crowd, especially when I include it on my Thanksgiving Dessert Menu, I try to lean into simple, warm accompaniments that play up that cinnamon flavor.
Here are a few ways I like to serve it up:
- Simple Dusting: Often, I skip the heavy topping from the instructions and just use a light dusting of powdered sugar over the top just before serving. It makes the cinnamon swirl pop visually!
- Whipped Cream Dreams: A generous dollop of freshly whipped cream is unbeatable. If you want to get fancy (and you totally should!), flavor that whipped cream with just a tiny splash of bourbon or a drop of vanilla extract—pure heaven against the spiced cheesecake.
- Warm Sauce Pairing: While I usually pair my classic apple crisp with caramel, a very light drizzle of a thin salted caramel or a quick maple glaze can be stunning across a slice. Be super light-handed; we don’t want to overpower that signature snickerdoodle spice!
Remember, serve this beautiful dessert straight from the fridge. Chilled cheesecake has that perfect firm-yet-creamy mouthfeel that really makes this spiced confection sing!
Storage and Making Ahead for Gatherings
One of the absolute best things about making a true baked cheesecake, especially one as crowd-pleasing as this snickerdoodle cheesecake, is that it is practically engineered for advance prep! If you’re Baking for Gatherings, knowing you can cross a major dessert off your list days ahead of time is a huge stress reliever, right? I treat leftovers with reverence, too; this thing tastes even better the next day!
For storage, keep the cheesecake contained properly. Once it has fully chilled (remember that minimum of 6 hours, but preferably overnight!), you need to cover it well. Since it’s a moist environment, you don’t want it absorbing any fridge funk. Just wrap the entire springform pan—or transfer the slice to an airtight container—and keep it chilled. It stays absolutely divine for about four to five days in the refrigerator, honestly maybe even longer, though mine never makes it that far!
Making it ahead is where this recipe truly shines for holiday season ease:
- Two Days Out: Bake your cheesecake completely, chill it thoroughly overnight, and then store it, still secured in the springform pan, in the fridge. This guarantees that ultimate firmness everyone looks for in a great slice.
- One Day Out: Release the springform ring, cover the top loosely with plastic wrap (don’t let it touch the surface if you can help it!), and return it to the fridge. Take it out about 30 or 45 minutes before you plan to serve it so it loses that rigid chill and achieves maximum creaminess before slicing.

If you are looking for other pantry staples that are great for prepping ahead, you should peek at my tips for making homemade granola. A quick grab-and-go item is always handy!
For anyone needing more cozy holiday inspiration, make sure you check out the amazing recipe from Yumnoode—they always have great seasonal ideas!
Frequently Asked Questions About Snickerdoodle Cheesecake
When I finish testing a recipe, I always have a stack of notes about things readers might wonder about, especially when we’re combining two beloved desserts. Everyone wants their snickerdoodle cheesecake to turn out perfectly smooth! Since this dessert seems popular for everything from cozy nights in to big parties, I gathered the most common questions I get about achieving that ideal fall flavor profile.
If you’re looking for insights on mastering tall, beautiful baked goods, I actually delve into some oven dynamics in my guide on coffee cake muffins that might give you some extra context on heat!
Can I use actual snickerdoodle cookies for the crust in this snickerdoodle cheesecake recipe?
Oh, that’s a fun thought, trying to double down on the cookie flavor! Yes, you totally can switch out the graham crackers for snickerdoodle cookies if you prefer that flavor right from the base. However, you need to be careful because store-bought cookies usually have more fat already built into them than plain graham crackers.
What I suggest is crushing about 2 cups of snickerdoodles and using slightly less melted butter—maybe start with 4 tablespoons instead of 6. Taste the crumbs before you add them to the pan; if they seem moist enough to hold together, stop there! It’s a delicious variation for an extra-spiced base in your Cinnamon Sugar Cheesecake.
What is the best way to get a crack-free creamy cheesecake dessert?
I get this question constantly, and it all comes down to managing the heat and environment. To guarantee that smooth surface on your creamy cheesecake dessert, you need the two-step cooling process we detailed, combined with the protective steam of the water bath.
The water bath (bain-marie) uses gentle, moist heat to cook the center evenly with the edges, preventing shrinkage and surface tension cracks. After baking, the slow cool down inside the turned-off oven lets those internal temperatures normalize slowly. If you skip either that water bath or the hour of slow cooling, you’re basically asking for a crack to appear. Patience during the cooling stage is the secret to a flawless presentation!
Can I adapt this recipe to be a no-bake snickerdoodle cheesecake?
That’s a great question if you’re looking for speed, but this specific recipe relies heavily on the eggs and flour structure to achieve that dense, chewy texture that honors the snickerdoodle tradition. A no-bake version would require a totally different binder, usually gelatin or more stabilizers, and it would definitely result in a lighter, fluffier filling, quite different from this rich, baked version.
If you must go the no-bake route, crush your cookies, mix them with butter, and press that crust. For the filling, you’d use cream cheese whipped heavily with powdered sugar and stabilized with whipped heavy cream. It’s tasty, but just know you’re moving away from that authentic, dense cheesecake experience this recipe provides.
Is this cheesecake good for making ahead for a large gathering?
Absolutely! This is one of the major selling points! This dessert shines when made ahead. As I mentioned in the storage section, you can fully bake and chill this entire Christmas Cheesecake Treat the day before your party. The chilling process actually makes the flavors deepen beautifully, enhancing that cinnamon flavor profile.
Just be sure to keep it covered tightly in the fridge. When you are ready to serve it as part of your main Thanksgiving Dessert Menu, take it out about 30 minutes prior to slicing so it softens just enough. It’s the perfect make-ahead dessert to reduce stress on the day of!
Estimated Nutritional Data for This Indulgent Dessert Mashup
Look, I won’t pretend that whipping up such a magnificent, creamy creation is going to knock your socks off in the lean department, right? It’s a true dessert mashup, and it’s rich, but that’s why we love it! When you dedicate yourself to creating something this spectacular, you have to know what you’re working with. I’ve compiled the estimated nutrition facts for a standard slice of this beautiful cheesecake based on the recipe proportions, but remember, this is just a guide.
Your final count can shift based on your brands of cream cheese or how generous you are with that final dollop of cream on the plate. If you’re looking for some other ways to balance out your sweet treats with proteins, you might want to check out my guidelines on making high-protein waffles—it’s all about balance in the kitchen!
Here is the breakdown for one slice, based on yielding about 12 servings:
- Calories: 450
- Fat: 28g (17g Saturated, 11g Unsaturated, 0.5g Trans)
- Carbohydrates: 42g
- Protein: 7g
- Sugar: 35g
- Sodium: 280mg
- Cholesterol: 95mg
I always tell folks that these numbers are estimates, and they’re here mostly for context. The real measurement here is the delight on your guests’ faces when they take that first bite of that spiced, velvety cinnamon goodness. Don’t worry about the numbers too much; just enjoy the harmony of the flavors we created!
Share Your Snickerdoodle Cheesecake Creations
Now that you’ve got the recipe and hopefully a beautiful, crack-free snickerdoodle cheesecake chilling in your fridge, the symphony isn’t over! This is where the true joy of home cooking comes into play—it’s not just about following my steps; it’s about making the recipe your own and joining our community here at Delish Symphony.
I put my heart and soul into creating these recipes so they are easy and reliable, and seeing your results is the best reward. Did you make it for Thanksgiving? Did you swirl the topping just right? Did you try serving it with a tiny bit of bourbon-flavored whipped cream?
I genuinely want to hear about it! Please take a moment to leave a rating—if this recipe brought harmony to your dessert table, click those five stars at the top of the page. It helps other home cooks find reliable recipes like this one.
If you ran into any tricky spots, or perhaps perfected one of my tips into something even better, drop a question or a comment down below. I personally read every single one, and I’m always here to help troubleshoot or just chat about great Fall Desserts Cinnamon flavors. You can also always reach out through my contact page if you prefer sending a private message!
Let’s keep making wonderful things together!
PrintCreamy Snickerdoodle Cheesecake with Cinnamon Swirl
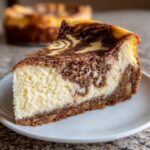
Create this rich and creamy Snickerdoodle Cheesecake, blending the warm spice of snickerdoodle cookies with a smooth cheesecake filling. It features a buttery cinnamon graham cracker crust and a sweet cinnamon sugar swirl, making it a perfect indulgent dessert for holidays or gatherings.
- Prep Time: 25 min
- Cook Time: 75 min
- Total Time: 100 min
- Yield: 12 servings 1x
- Category: Dessert
- Method: Baking
- Cuisine: American
- Diet: Vegetarian
Ingredients
- 1 1/2 cups graham cracker crumbs
- 1/4 cup granulated sugar
- 1 teaspoon ground cinnamon (for crust)
- 6 tablespoons unsalted butter, melted
- 3 (8 ounce) packages cream cheese, softened
- 1 1/2 cups granulated sugar (for filling)
- 1/4 cup all-purpose flour
- 1 teaspoon vanilla extract
- 1/2 teaspoon ground cinnamon (for filling)
- 4 large eggs
- 1/2 cup sour cream
- 1/4 cup granulated sugar (for topping)
- 1 teaspoon ground cinnamon (for topping)
Instructions
- Preheat your oven to 350 degrees F. Wrap the bottom of a 9-inch springform pan tightly with heavy-duty aluminum foil.
- Prepare the crust: In a medium bowl, combine the graham cracker crumbs, 1/4 cup sugar, and 1 teaspoon cinnamon. Pour in the melted butter and mix until the crumbs are evenly moistened. Press the mixture firmly into the bottom of the prepared springform pan. Bake for 10 minutes. Remove from the oven and let cool slightly.
- Reduce the oven temperature to 325 degrees F.
- Prepare the filling: In a large bowl, beat the softened cream cheese with an electric mixer until smooth. Gradually beat in the 1 1/2 cups sugar, flour, vanilla extract, and 1/2 teaspoon cinnamon until just combined. Do not overmix.
- Beat in the eggs one at a time, mixing only until each egg is incorporated. Gently mix in the sour cream.
- Pour half of the cheesecake batter over the cooled crust.
- Prepare the swirl topping: In a small bowl, mix the remaining 1/4 cup sugar and 1 teaspoon cinnamon until combined. Sprinkle half of this cinnamon-sugar mixture evenly over the batter layer.
- Pour the remaining cheesecake batter over the first layer. Sprinkle the rest of the cinnamon-sugar mixture on top. Use a knife or skewer to gently swirl the topping into the batter.
- Bake the cheesecake in a water bath: Place the foil-wrapped springform pan into a larger roasting pan. Carefully pour hot water into the roasting pan until the water reaches about halfway up the sides of the springform pan.
- Bake for 60 to 75 minutes, or until the edges are set but the center still jiggles slightly.
- Turn off the oven, crack the oven door open slightly, and allow the cheesecake to cool inside the oven for 1 hour. This prevents cracking.
- Remove the cheesecake from the water bath and let it cool completely on a wire rack.
- Once cool, cover the pan loosely and refrigerate for at least 6 hours, or preferably overnight, before serving. Run a thin knife around the edge before releasing the springform side.
Notes
- For the creamiest texture, make sure your cream cheese and eggs are at room temperature before starting the filling.
- If you skip the water bath, watch the baking time closely, as the cheesecake may cook faster and risk cracking.
- This dessert is excellent served chilled, perhaps with a dollop of whipped cream.
Nutrition
- Serving Size: 1 slice
- Calories: 450
- Sugar: 35g
- Sodium: 280mg
- Fat: 28g
- Saturated Fat: 17g
- Unsaturated Fat: 11g
- Trans Fat: 0.5g
- Carbohydrates: 42g
- Fiber: 1g
- Protein: 7g
- Cholesterol: 95mg