
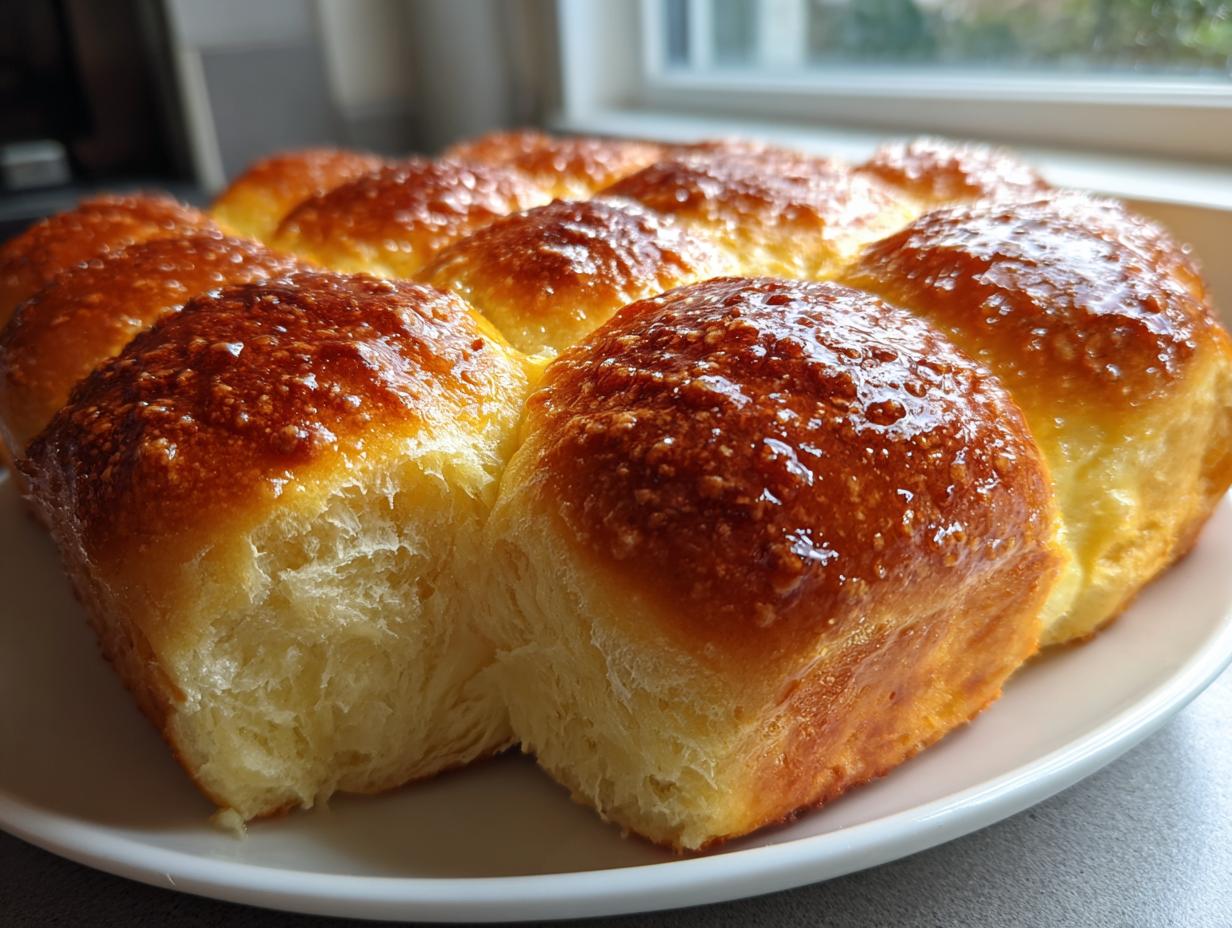
If there’s one thing that instantly makes any meal feel special, it’s the smell of fresh bread baking, right? That soft, yeasty aroma fills the whole house, and honestly, it’s the definition of comfort. We’re diving into what I think is truly the best comfort food baking you can tackle: my recipe for Super Soft and Fluffy Homemade Dinner Rolls. Forget anything you’ve bought in a plastic bag; these are incredibly soft, deeply buttery, and simple to make from scratch, making them perfect for last-minute weeknights or even the big holiday table. When I first developed this recipe, I needed something reliable that fit my busy schedule—that’s the heart of Delish Symphony—and these rolls never fail to deliver that fluffy, golden perfection.
- Why These Are the Best Dinner Rolls Ever
- Ingredients for Super Soft and Fluffy Dinner Rolls
- Step-by-Step Instructions for Making Homemade Dinner Rolls
- Making Copycat Texas Roadhouse Rolls Variations
- Tips for Success When Making Homemade Dinner Rolls
- Storage and Reheating Your Buttery Dinner Bread
- Serving Suggestions for These Simple Dinner Rolls
- Frequently Asked Questions About Dinner Rolls
- Estimated Nutritional Data for Dinner Rolls
- Share Your Baking Success with These Dinner Rolls
Why These Are the Best Dinner Rolls Ever
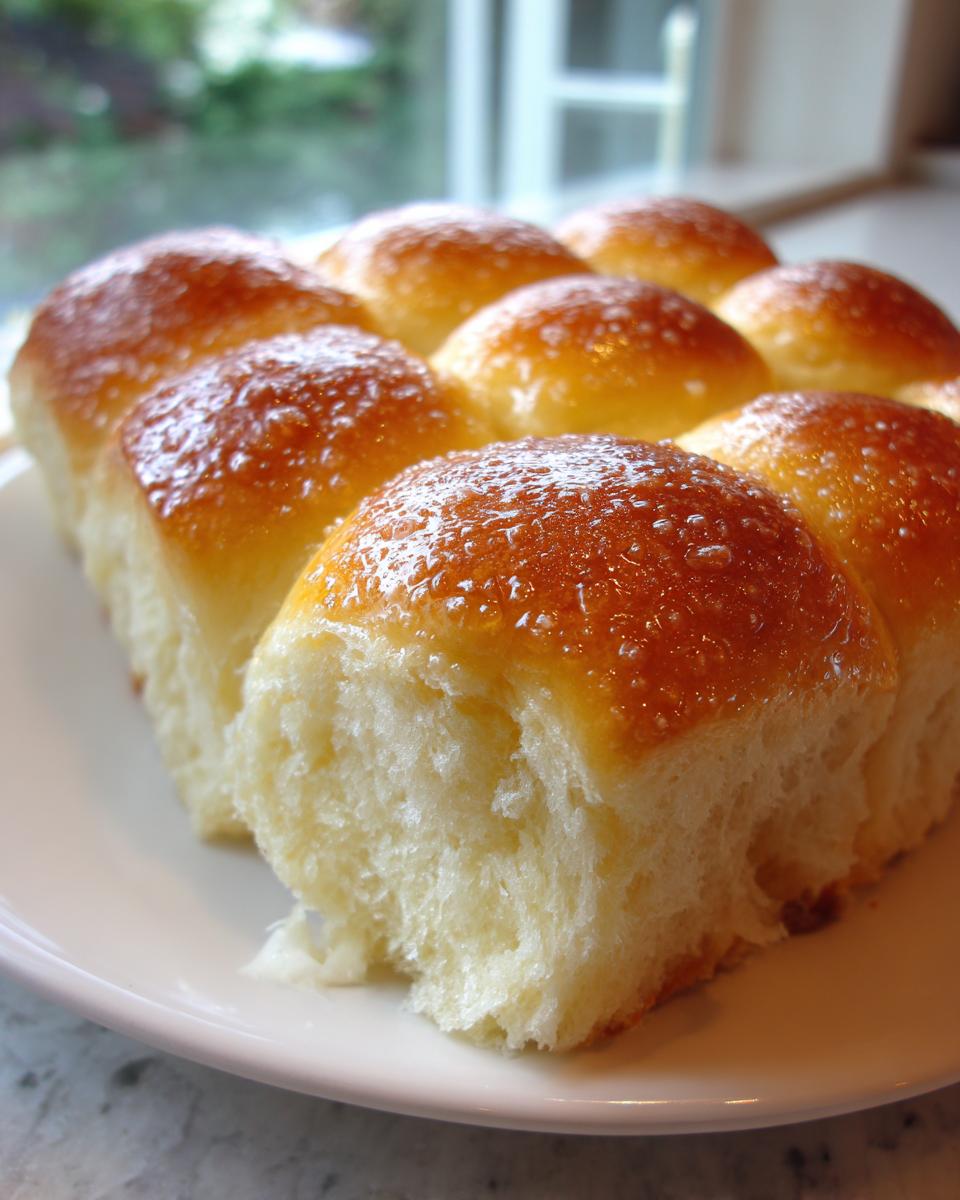
Look, I’ve tried making my own bread on busy weeknights, and sometimes it just doesn’t work out. But these soft homemade rolls break that cycle. They are hands-down the best comfort food baking I put on my table. You know that texture you’re chasing? The one where the roll is so light it practically floats, yet still holds that satisfying chew? That’s exactly what happens here.
The secret is that final brush of melted butter right out of the oven—it locks in the steam and makes them unbelievably tender. They are miles better than anything pre-made. If you’ve ever felt intimidated by yeast, trust me, this simple yeast bread recipe is your gateway. They are rich, buttery, and so straightforward, you’ll wonder why you ever opened a store-bought package.
Ingredients for Super Soft and Fluffy Dinner Rolls
Gathering your ingredients is the first act of composing this delicious symphony! For these wonderfully soft homemade rolls, keep everything measured and ready before you even think about turning on the mixer. We’re using simple components to make truly great buttery dinner bread here.
You’ll need one cup of warm water, making absolute sure the temperature is between 105 and 115 degrees Fahrenheit—this is critical for waking up that yeast. We’ll use two and a quarter teaspoons of active dry yeast, a quarter cup of plain granulated sugar, and a half cup of whole milk that’s also been warmed gently. For richness, melt a quarter cup of unsalted butter, and you’ll need one large egg, which should be lightly beaten before you add it in. Then, grab between three and a half to four cups of all-purpose flour, mixed together with one teaspoon of salt. Finally, keep another four tablespoons of unsalted butter melted separately; this is for the amazing brush finish at the very end.
Ingredient Notes and Substitutions for Your Dinner Rolls
So, about that water temperature for the yeast—if it’s too cold, the yeast sleeps, and you get flat, sad rolls. Too hot, and you kill it dead! 105 to 115°F is the sweet spot for that great fluffy yeast rolls recipe success. You should feel slightly warm, not hot, to the touch.
When handling the flour, this is important for any beginner bread recipe: don’t just dip your measuring cup straight into the bag! You need to fluff it up, spoon it gently into the cup, and then level it off. Scooping straight down packs it too tightly, and you’ll end up with dense bread instead of your intended fluffy golden rolls.
If you prefer things a little sweeter—maybe you are making sweet honey rolls instead of plain ones—this is the spot to adjust! Go ahead and swap out the granulated sugar for about a quarter cup of honey in the wet mixture. It deepens the flavor subtly and keeps them incredibly tender.
Step-by-Step Instructions for Making Homemade Dinner Rolls
Okay, let’s get our hands messy! This is where things start to smell like victory. We need to move methodically here if we want those perfect, soft homemade rolls, but don’t stress; it’s mostly waiting time after the initial mix. If you’ve mastered the ingredients, now you get to see how we turn them into the best dinner rolls ever!
Activating Yeast and Mixing the Dough for Fluffy Yeast Rolls Recipe
First, take that warm water—remember, just warm, not hot!—and sprinkle your yeast over the top. Add a pinch of that sugar we measured out too. Give it a gentle swirl and now, the patience part: you wait about five minutes. When it gets foamy and bubbly on top, that means your yeast is alive and happy; that foamy look is your green light for making fluffy yeast rolls recipe perfection.
Once it’s foamy, stir in the warmed milk, the quarter cup of melted butter, and your beaten egg. Don’t overthink this part; just mix it gently until it’s combined well.
Kneading and First Rise for Perfect Dinner Rolls
Now, gradually start adding your flour and salt mixture. Once it all comes together into a shaggy mass, turn it right out onto a lightly floured counter. This is where the real work happens for that great texture: knead it for a solid 5 to 7 minutes. You want the dough to become beautifully smooth and elastic, pulling away from your hands without sticking too much. If it stays sloppy, add a tiny bit more flour, but stop as soon as it feels workable.
Toss that smooth dough into an oiled bowl, cover it up tight, and put it somewhere warm. It needs this first rest to really build structure in this simple yeast bread—so let it hang out for a solid hour, maybe an hour and a half, until it’s seriously doubled in size. Don’t rush this step; timing makes all the difference!
Shaping and Second Proofing for Fluffy Golden Rolls
Once it’s puffy, punch it down gently—that’s called releasing the gases, but I just like saying “punch down.” I use a kitchen scale sometimes to make sure I get 12 pieces that are exactly the same weight, but estimating works fine too! Roll each piece quickly into a nice tight ball. Place them evenly in your greased 9×13 pan, leaving about an inch between them so they grow into each other.
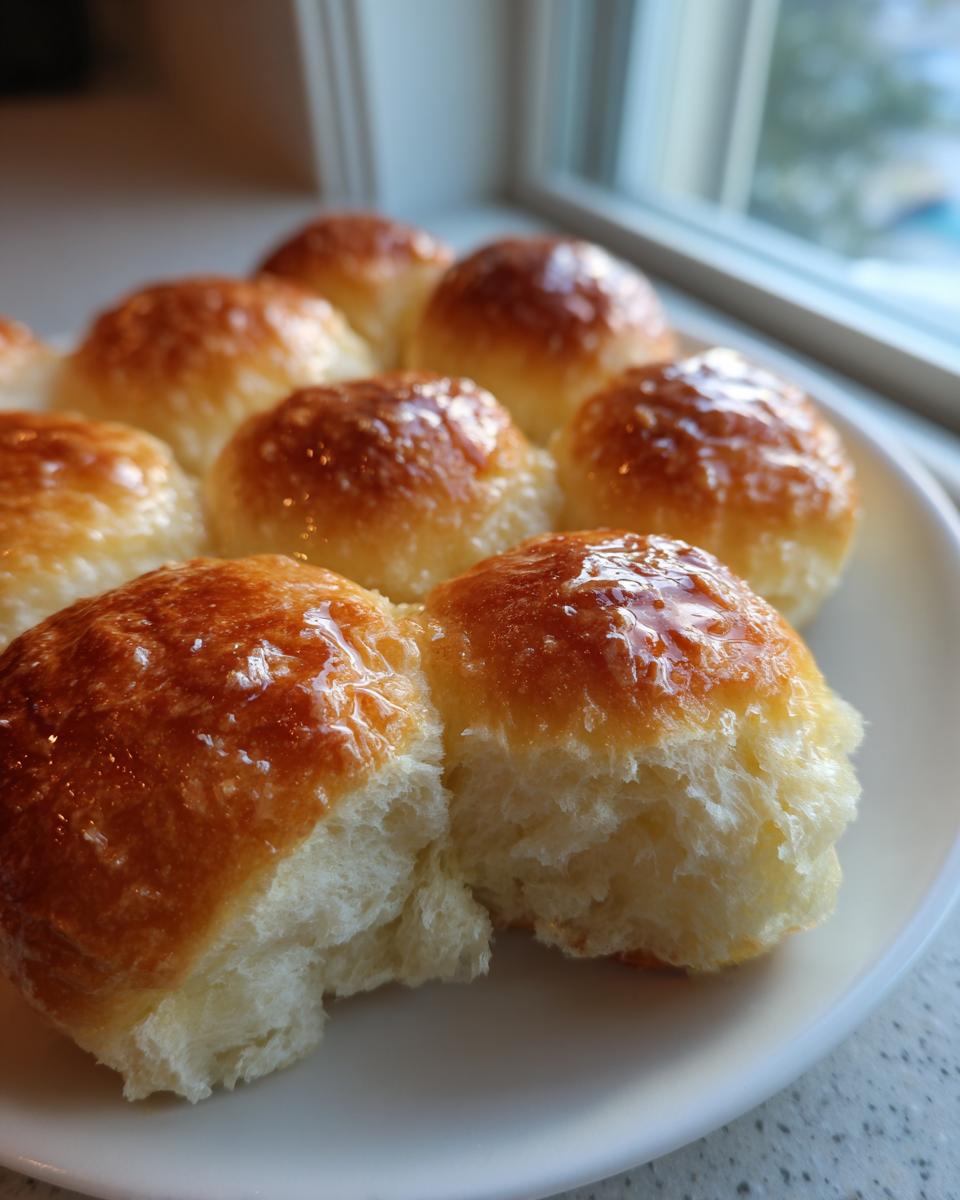
Cover the pan again loosely and let them have their second puff, usually 30 to 45 minutes. You’ll know they are ready for the oven when they look big, puffy, and touch just slightly at the edges—these are your future fluffy golden rolls!
Baking and the Essential Butter Brush Finish
Fire up that oven to 375°F (190°C). Pop the pan in and set your timer for about 15 to 18 minutes. You are looking for that gorgeous golden-brown color on top; they should sound slightly hollow if you tap the bottom, but don’t let them get too dark!
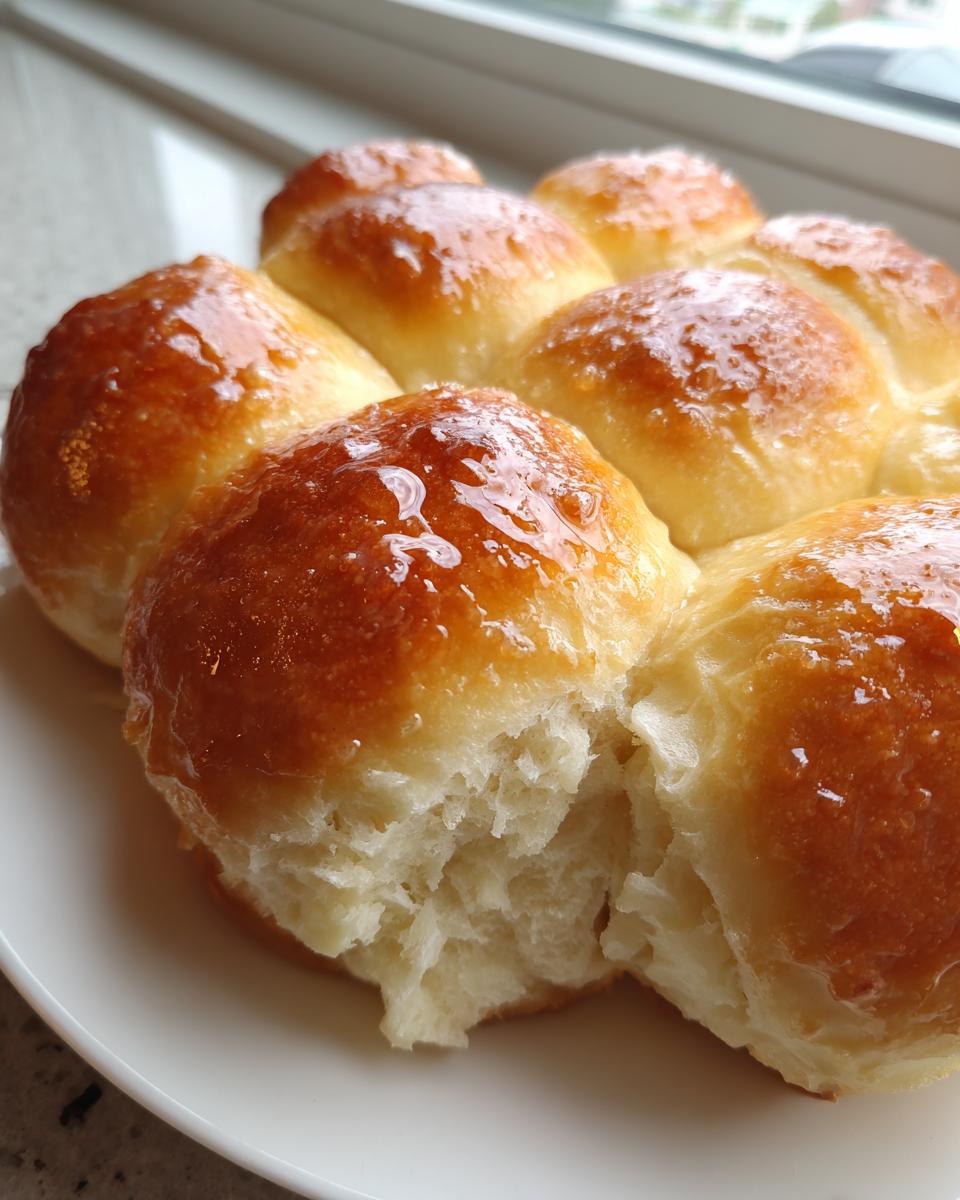
Here’s the absolute non-negotiable last step for amazing buttery dinner bread: as soon as they come out of the oven, grab those final four tablespoons of melted butter and brush them all over the hot tops, generously! That melted butter kisses the crust, keeps them soft inside, and guarantees that rich flavor. Serve these warm bread side dish beauties right away!
Making Copycat Texas Roadhouse Rolls Variations
Now, I know some of you are scrolling down specifically thinking, “Mike, these sound great, but what I really want are those irresistible, slightly sweet rolls they serve at the steakhouse.” You’re not alone! Everyone asks me about the copycat texas roadhouse rolls, and the good news is, this fantastic dough forms the perfect base for those famous rolls.
The Texas Roadhouse style is generally a little sweeter and often has that subtle hint of garlic when they come out of the oven. It’s easy to tweak our basic recipe for these amazing **dinner rolls**!
For the sweetness factor, you can easily boost the sugar in the initial recipe up to a half cup instead of a quarter cup. That gives you that slightly sweeter, recognizable dough characteristic. Don’t worry, this dough handles the extra sugar beautifully because we have plenty of structure from the milk and egg.
For the butter brush finish, that’s where the real magic happens to get that savory-sweet coating. Instead of just plain melted butter, try this: melt your finishing butter—those last four tablespoons—and whisk in about half a teaspoon of garlic powder and maybe just a tiny pinch of honey if you didn’t increase the sugar earlier. It sounds small, but brushing this garlicky, buttery goodness over the piping hot rolls after they bake completely transforms them. They come out looking just like those famous, slightly golden rolls you love to use for dipping into creamy sauces or enjoying alongside something spicy like my garlic chicken and rice recipes.
It uses the same simple yeast bread process, but those minor changes take our already great rolls and turn them into amazing copycats. Try it out next time you need a serious comfort food baking fix!
Tips for Success When Making Homemade Dinner Rolls
Even with a solid recipe, making homemade yeast bread can sometimes throw you a curveball. The difference between good dinner rolls and those that are just okay really lies in a few small but mighty details. You want them fluffy, you want them soft, and you definitely don’t want them stuck in the pan!
Here are the crucial things I learned over years of testing, especially back when I was trying to juggle deadlines and get a decent side dish ready for supper. Follow these, and you’ll nail that soft homemade rolls texture every time.
- Temperature Control is Your Best Friend: I mentioned water temperature earlier, but let me hammer this home. Yeast is sensitive! If your dough isn’t rising well, 99% of the time it’s because your warm liquid was either too cold or too hot. Invest in a cheap candy or instant-read thermometer just for your liquids. Getting that 110°F spot-on really ensures a fantastic rise for your fluffy yeast rolls recipe.
- Don’t Add Too Much Flour: This is the common trap everyone falls into, especially beginners. You knead, and the dough sticks a little, so you toss on more flour. Stop! You need the dough to be sticky when you start kneading. It should feel tacky, but not gluey. Adding too much flour kills the lightness and leads to dry, dense bread instead of fluffy golden rolls. Keep your floured surface minimal.
- The Warm Rise Spot: You need a consistently warm area for rising, and sometimes my kitchen just isn’t warm enough in the winter. If you under-rise the dough, you won’t get that pillowy texture. My solution? I turn my oven completely off, toss the bowl inside with the door closed for about five minutes to warm up the air, then turn the oven off again before putting the dough in to rise. That cozy environment is magic for making homemade rolls that double in size.
I remember one terrible Thanksgiving when everything felt wrong. My first batch of dough barely rose an inch during the first proof. I panicked! I thought I had killed the yeast, so I threw it out and started over, rushing the second rise because I was already late. The resulting rolls were hard little baseballs. Oops! I realized later the error wasn’t the yeast; it was the drafty spot I placed the bowl. It was barely 65 degrees on the counter! Now, I’m religious about using the slightly warmed, off oven trick. That one adjustment instantly turned my bread baking around. If you want incredible, buttery dinner bread, respect the rise time and the temperature!
Storage and Reheating Your Buttery Dinner Bread
Now, that’s my biggest challenge—trying not to eat the entire batch of these buttery dinner bread rolls the moment they come out of the oven! But if you are disciplined enough to save some for the leftovers (or if, like me, you need to prep ahead for a big holiday), you need to treat them kindly so they stay soft.
The best way to store your leftover homemade dinner rolls is totally low-tech: grab an airtight container or a large zip-top bag. Make sure the rolls are completely cooled down first, otherwise, the steam will just make them soggy when you seal them in. If you keep them sealed up, they should stay wonderfully soft on the counter for about two or three days. They are fantastic the next morning toasted for breakfast, too!
If you have a huge yield from this recipe and know you won’t get to them all, I highly recommend freezing them. Just let them cool completely, wrap them tightly first in plastic wrap—really hug them tight—and then place them into a sturdy freezer bag. Our recipe notes say they hold up great for up to three months, and honestly, I believe it. They are a lifesaver when you need a quick side dish!
Reheating is key to bringing back that just-baked flavor. You want that warm bread side dish texture, right? The oven is always the winner here. For a few rolls, just lay them on a baking sheet and heat them at 350°F (175°C) for about 5 to 8 minutes until they are warmed through. If you’re reheating a whole pan, give them closer to 10 or 12 minutes. If you want to get fancy, you can follow my classic apple crisp recipe tip: just add a tiny splash of water to the pan before covering it lightly with foil. That steam helps them plump right back up and makes them taste almost fresh-from-the-oven soft!
Serving Suggestions for These Simple Dinner Rolls
The real joy of having truly wonderful **dinner rolls** on hand is figuring out what amazing things you can pair them with! Since these rolls are so soft and buttery, they easily elevate even your most standard weeknight meal into something special. You don’t always need a huge holiday spread to justify baking bread; sometimes, you just need that comforting quality that only fresh dough brings.
When I’m looking for a quick dinner side dish that feels substantial, I immediately think about what needs soaking up delicious broth or sauce. These rolls are practically begging to be dunked! They make the absolute best accompaniment for nearly any soup or stew. If you’re making something hearty like an Italian Wedding Soup or even just a simple lentil soup, having a few of these warm rolls nearby lets you scoop up every last flavorful drop. They truly shine alongside things meant for dipping, like a creamy chowder or my own Irish potato leek soup recipe.
Of course, they are the undisputed champions of the holiday table. Forget those dry, disappointing rolls from the grocery store; when you serve these fluffy golden rolls next to a big roast turkey or a glazed ham, everyone notices! The richness of the butter contrasts beautifully with savory roasted meats. They are also perfect for soaking up gravy—if you’ve never used homemade bread to mop up turkey gravy, you are missing out!
But don’t limit yourself to dinner! Because this is a beginner bread recipe that makes such a reliable yield, I often make a batch just to have on hand as a snack. A quick slice, a smear of apple butter or jam, and suddenly you have an elevated afternoon treat. Honestly, whether it’s for a main course, a quick **warm bread side dish**, or just because you need something comforting, these simple dinner rolls are your reliable all-star.
Frequently Asked Questions About Dinner Rolls
I always get questions after I share this recipe because watching the dough slowly double in size makes people wonder about cutting corners. We’re aiming for the best comfort food baking here, and sometimes that means respecting the process! I’ve pulled the most common things folks ask me about when they’re making their **dinner rolls** for the first time.
Can I make these dinner rolls faster than the stated time?
Oh, I totally get the desire for speed, especially when you need a quick dinner side dish! You see those headlines promising 30-minute rolls, but here’s the truth from my kitchen: that time usually only accounts for hands-on time. For these wonderfully fluffy yeast rolls recipe styles, you absolutely need the rising time. Yeast needs time to eat the sugars and produce the CO2 that makes them airy and light. If you cut the rise short, you end up with dense little pucks, not soft homemade rolls, no matter how great your ingredients are. Squeeze the timeline slightly if your kitchen is warm, but never skip the full proof!
What is the best flour to use for soft homemade rolls?
For this specific recipe, aiming for that super soft texture, All-Purpose flour is actually my go-to flour. It has the right balance of protein to give you structure without being tough. We rely on the melted butter and milk for richness, not a high-protein flour for chew. The goal here is that pillowy texture reminiscent of fluffy golden rolls.
Now, if you wanted a chewier roll, maybe if you were making a heartier holiday bread recipe, high-protein bread flour is great. But for truly tender, melt-in-your-mouth dinner rolls, stick with AP. It’s the secret weapon for simple yeast bread!
Can I use instant yeast instead of active dry yeast for these dinner rolls?
Yes, absolutely, and this is a great tip for anyone who loves an easy scratch rolls recipe! Instant yeast is designed to be mixed right in with the dry ingredients. If you use instant yeast, you can skip the whole step where we bloom the yeast in the warm water and wait for the foam! Just whisk the instant yeast right in with your flour and salt mixture in Step 3.
You’ll still follow the rest of the recipe, but you save about five minutes of waiting time right at the start. It speeds things up just enough to make this a fantastic beginner bread recipe without sacrificing the final texture of those fluffy rolls for soup.
Estimated Nutritional Data for Dinner Rolls
Cooking at home is my favorite thing, but sometimes we want to know what we’re working with, right? Whether you’re counting macros or just curious about how rich these buttery dinner rolls truly are, I’ve compiled the estimated nutrition information for one single roll from this recipe. Remember, because we are making a homemade bread recipe from scratch, these numbers are based on the specific ingredient quantities listed above.
When you’re planning a big meal, details matter, and I want you to have the full picture of your delicious side dish! This is the symphony of balance in action—delicious flavor achieved with reasonable nutritional components.
- Calories: Approximately 210 per roll
- Fat: Around 7 grams (including 4g of saturated fat from that glorious butter!)
- Carbohydrates: About 33 grams
- Protein: Roughly 5 grams
- Sugar: Just 5 grams
Now, I have to give you the standard but important disclaimer here: these are estimates. If you decide to double the melted butter brushed on top—and I wouldn’t blame you if you did—those numbers will shift! Also, the type of flour you use or if you add extra ingredients like honey for sweet honey rolls will affect the final count. This data gives you a fantastic baseline for these simple dinner rolls, showing you they are a comforting, yet relatively balanced, part of your meal planning.
Share Your Baking Success with These Dinner Rolls
Well, we’ve done it! We’ve moved past the confusing world of store-bought yeast and created true, amazing, buttery dinner bread right here in our own kitchens. That is the harmony I love to create here at Delish Symphony. Now that you have these Super Soft and Fluffy Homemade Dinner Rolls cooling on the rack, I truly want to hear about your experience!
Did they come out as soft and airy as you hoped? Were they pillowy enough for your family dinner? Tell me the truth: did you brush on a little *extra* butter at the end? (No judgment here, I promise!) This whole process is about building confidence in making your own delicious food, and seeing your success helps me know these recipes are working for busy folks like us.
If you followed along and ended up with 12 perfectly fluffy rolls ready for dipping into soup or serving alongside your favorite main, please press that 5-star rating button right below the recipe card. Seriously, it helps other home cooks find this recipe and realize that simple yeast bread doesn’t have to be scary!
Drop a comment below using the form. Tell me what you served these incredible **dinner rolls** with, or if you tried the Texas Roadhouse tweak above. I genuinely look forward to reading every single comment and helping troubleshoot if anything didn’t go quite as planned on your first attempt. You can always learn more about my philosophy on practical, flavorful cooking right here. Happy baking, friends!
PrintSuper Soft and Fluffy Homemade Dinner Rolls
Create incredibly soft, buttery dinner rolls from scratch. This easy yeast bread recipe yields fluffy golden rolls perfect for any family meal or holiday gathering, tasting much better than store-bought options.
- Prep Time: 20 min
- Cook Time: 18 min
- Total Time: 2 hours 18 min
- Yield: 12 rolls 1x
- Category: Dinner
- Method: Baking
- Cuisine: American
- Diet: Vegetarian
Ingredients
- 1 cup warm water (105-115°F)
- 2 1/4 teaspoons active dry yeast
- 1/4 cup granulated sugar
- 1/2 cup whole milk, warmed
- 1/4 cup unsalted butter, melted
- 1 large egg, lightly beaten
- 3 1/2 to 4 cups all-purpose flour
- 1 teaspoon salt
- 4 tablespoons unsalted butter, melted (for brushing)
Instructions
- Combine the warm water and yeast in a large bowl. Let it sit for 5 minutes until foamy. This activates the yeast.
- Stir the sugar, warm milk, 1/4 cup melted butter, and beaten egg into the yeast mixture.
- In a separate bowl, whisk together 3 1/2 cups of the flour and the salt.
- Gradually add the dry ingredients to the wet ingredients, mixing until a shaggy dough forms.
- Turn the dough out onto a lightly floured surface. Knead for 5 to 7 minutes, adding more flour only if the dough is too sticky to handle. The dough should be smooth and elastic.
- Place the dough in a lightly oiled bowl, turning to coat. Cover the bowl with plastic wrap or a clean towel and let it rise in a warm place for 1 to 1.5 hours, or until doubled in size.
- Gently punch down the risen dough. Divide the dough into 12 equal pieces. Roll each piece into a smooth ball.
- Arrange the dough balls in a greased 9×13 inch baking pan, leaving about 1 inch between them.
- Cover the pan loosely and let the rolls rise again for 30 to 45 minutes, or until puffy.
- Preheat your oven to 375°F (190°C).
- Bake the rolls for 15 to 18 minutes, or until they are golden brown on top.
- Immediately brush the tops of the hot rolls generously with the remaining 4 tablespoons of melted butter.
- Serve the warm bread side dish immediately for the best flavor.
Notes
- For a quick dinner side dish, you can reduce the second rise time slightly if your kitchen is warm, but do not skip the rising steps for fluffy rolls.
- If you want sweet honey rolls, add 2 tablespoons of honey to the wet ingredients along with the sugar.
- These rolls freeze well after baking. Cool completely, place in an airtight container, and freeze for up to 3 months. Reheat in a 350°F oven until warmed through.
Nutrition
- Serving Size: 1 roll
- Calories: 210
- Sugar: 5
- Sodium: 280
- Fat: 7
- Saturated Fat: 4
- Unsaturated Fat: 3
- Trans Fat: 0
- Carbohydrates: 33
- Fiber: 1
- Protein: 5
- Cholesterol: 25